In the practice of motorists, there are situations when you need to go somewhere, but the engine cannot be started because the starter is not working.
The reasons why the starter does not operate after turning on the ignition switch can be divided into two categories. Violation of the electrical wiring circuit and direct breakdown of the starter itself.
Before starting the test, you can check the starter by shorting the starter terminal with the positive voltage supply terminal (the presence of “+” can be determined using a tester or test light). Short circuit the circuit using a screwdriver, pry bar, etc. If the starter cranks normally, then there is a problem in the electrical circuit; if there is no result, the problem is with the starter itself.
Important! Before starting the test, make sure that the car is in neutral gear, the handbrake is on, and it is advisable to place wheel chocks under the wheels.
Malfunctions of the electrical circuit, starter power supply:
- The tips of the wires suitable for the battery terminals are loose or oxidized. In this case, the tips are removed from the battery and cleaned using a metal brush and sandpaper. After this, they are put in place and tightly tightened using clamping bolts.
- The battery is low or defective. Using a load plug, check the battery charge level. If necessary, recharge using a charger. Replace the faulty battery. It is also worth checking the density of the electrolyte, since with a low density of the solution (especially in the cold season), the battery quickly discharges.
- The nut at the voltage supply terminal to the starter is not tightened. This problem arises from the effect of vibration on the car, its solution is to tighten all the nuts using wrenches.
- The contact group of the ignition switch has failed. Using the electrical diagram, determine the contact to which voltage is supplied. Clean the terminal and tighten the fastening bolt. If it didn’t work, then connect this connector directly, with a separate wire, to the battery. If the starter spins, it means the contact group has failed. It is better to replace the ignition switch.
- The contact protection relay is faulty (additional starter relay). The supply of electricity to the traction relay occurs from the supply of voltage from the ignition switch through the starter relay. To check this relay, you can bridge the wires suitable for the starter relay (thickest in diameter). The starter is working, so remove and clean the contacts. If this does not happen, replace the relay.
- The starter “ground” is broken or poorly secured. Correct the violation of the electrical circuit, the engine with the “ground” of the car body. By securing or tightly tightening the bolt securing the ground wire.
- The fuse has blown. Check fuses and replace if necessary.
We recommend:
Replacing the fuel pump for a VAZ 2114 - step-by-step instructions
If the above check does not produce results, the starter must be removed from the car for further diagnostics. To do this, first of all, you should find out the principle of operation and what parts this part of the car consists of.
Starter bushings
At the front and rear of the starter are bushings or bearings on which the shaft rotates. If they wear out, the symptoms may be different - the relay may click, but not turn the starter, because the shaft has lost alignment and the primary winding closes with the secondary.
In this case, there is a danger of burning the windings, and this can lead to melting of the wires, a short circuit in the electrical system and, in the worst case, a fire. The bushings and bearings of the starter wear out over time, which can lead to a fire. If the relay clicks and the starter does not spin , under no circumstances should the starter be kept on for a long time. After several attempts, the shaft may fall into place and start the engine, but at the first appearance of symptoms, it is imperative to disassemble the starter and replace the bushings. In this case, there is no point in delaying for obvious reasons.
About spark plug gap
Over time, the gap between the electrodes increases. The normal parameter is from 0.7 mm to one millimeter. You can check this gap using a special feeler gauge.
The same is used for setting valve clearances on carburetor engines. So, if a parameter does not meet the norm, it should be adjusted. To do this, you should use a negative screwdriver. To reduce the gap, press the end of the plug onto the top electrode of the spark plug. With your other hand, hold the part itself. If you “overdid it”, it doesn’t matter – everything can be returned back. To do this, bend the electrode with the edge of a screwdriver (it bends quite easily) and check the distance again. It is worth noting that with a correctly set gap, you can not only ensure trouble-free engine starting, but also reduce fuel consumption by 5 percent. Also the car will run smoothly. After all, the mixture is ignited exactly at the moment when it is necessary. And the last thing is the resource of the candles themselves. If the gap is higher or lower than normal, the risk of breaking through the insulator increases significantly. As for the replacement schedule, it is about 40 thousand kilometers. It is recommended to replace the high-voltage wires along with the spark plugs.
Do-it-yourself bottom nine repair, video version
The armature of the traction relay should move freely in the housing, without jamming. At the same time as checking the winding resistance, check whether the contact plate closes the contact bolts of the traction relay. If the ohmmeter shows “?”, then either there is a break in the winding or the plate does not close the contact bolts.
In both cases, the traction relay must be replaced. 1 - contact plate, 2 - rectangular heads of slip rings. Inspect the contact bolts. Clean the burnt bolt heads with fine sandpaper.
If the heads are severely burned out, you can rotate the bolts 180° so that they are pressed against the contact plate with the unburnt side. If the surface of the contact plate is heavily worn, then it can be turned with the other side towards the contact bolts. If the faults of the VAZ 2109 retractor cannot be eliminated, it should be replaced with a new one.
Direct repair
You should not think that before removing the starter, you need to lift the VAZ 2109 car into the inspection hole. We begin to repair the starter after it has been completely removed. So, let’s begin:
we check the relay by applying a voltage of 12 V to the terminal, do not forget that the negative should be short-circuited to the body; at the same time as this procedure we attach the ohmmeter to the contact bolts (if the relay is working normally, the coupling should move into the hole when current is received, and the bolts should be closed - if this does not happen, then the relay should be replaced).
checking the starter relay VAZ 2109
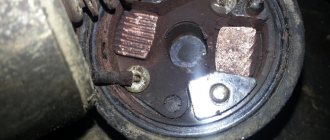
we check the brushes; the starter cover is removed, after which the screw securing the fastening of all wires is unscrewed; the spring is removed; the brush is removed (as a rule, its minimum height should be 12 mm - otherwise, this means its erasure and mandatory replacement).
We continue to work with the VAZ 2109. The starter, the repair of which is carried out by hand, must be carefully inspected. At this stage, you can even arm yourself with a magnifying glass in order to see everything better. Let’s move on to the next step:
we check the winding of the starter itself (as mentioned above, this device is not particularly different from other VAZ 2109 models, and repairing the starter yourself must be carried out skillfully and know all the basics of the circuit); take an ohmmeter and check for a short circuit between the turns and on the housing; inspect the collector and other windings (to do this, you need to carefully remove the ring so that it does not fly off, and pull it out); remove the washer from the axis; disconnect the tubes that serve to insulate the coupling bolts and pull them out; carefully inspect the collector and winding (they should not there is carbon deposits or surf); use sandpaper to wipe off minor changes on the surface.
Repairing the starter on a VAZ 2109 with your own hands also involves a thorough check of the armature winding. As you know, the starter armature consists of a core and a shaft. Between them there is a winding that should be checked. The easiest way is to check it for interturn short circuit on a special stand. To do this:
take a 220 W test lamp; check the insulation for rupture, determine the runout of the shaft (which should be 0.08 mm, the insulation resistance should be at least 10 kOhm; connect the armature collector with one wire with a current of 220 V; connect the second wire through a 220 W lamp 100 W with power housing (if the lamp lights up, then there is a breakdown in the armature and it needs to be replaced.
On a VAZ 21099 car, repairing a starter where the armature is in order also involves inspecting and checking the manifold. Some important tips:
if burning of the plates in two places is detected on the commutator, then the coil is broken; if the plates are blue, then a turn short circuit has occurred (this is rare, but it does occur): an interturn short circuit is found on visible sections of the armature or busbar wire (usually the turns are crumpled or bent); You can eliminate the short circuit and correct bruised tires by checking for the presence of foreign bodies; if the short circuit is not found, all that remains is to rewind the anchor.
On a VAZ 21093 car, repairing a starter, as well as on a VAZ 21099 and 2109, after checking the windings, involves inspecting the couplings and gears. To do this, we carry out the following type of operations:
Solenoid relay
We are slowly getting to the starter. All domestic VAZ cars have the same type of starters, it’s just that on VAZ 2101-2106 they are connected according to the same circuit, and on more modern ones - Priora, Kalina, VAZ 2110, VAZ 2114, VAZ 2115, the starter is connected a little differently, but the solenoid relay is designed everyone has the same. The signs of its breakdown are simple:
the starter hums and spins idle, but does not crank the engine; the starter is silent at all; the solenoid relay is activated, but the engine does not crank; the Bendix does not engage with the flywheel, it crunches and does not crank the engine.
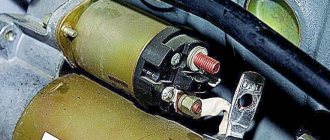
Checking the retractor itself is also easy. You need to apply voltage directly from the battery to the control terminal of the relay (the thinnest wire is there, it’s easy to distinguish), and if the motor cranks normally, then the problem is in the relay itself. Most likely, the nickels of contacts were burnt.
To fix this, you need to remove the relay, clean the nickels, and everything should fall into place. But you need to take into account that such a relay will not last long, since at the factory a layer was applied to the contact pads that resisted electrical erosion.
Since there is now no layer, it is not known when the contacts will burn out next time. All generations of VAZ have the same type of starters. With Bendix the situation is more complicated, but it is quite easy to find out. You just need to short-circuit the two power terminals on the relay.
Thus, we will allow current to bypass the relay and see if the starter turns. If the starter hums and spins well, then the bendix does not engage the flywheel when starting the engine.
DESIGN FEATURES AND OPERATING PRINCIPLE
The starter on the VAZ 2114 (5712.3708) has an operation cycle, which can be divided into four main stages:
- After turning the ignition key, the fourteenth battery in the contact chain begins to supply power to the starter and traction relay;
- The Bendix gear drive (overrunning clutch) is connected to the flywheel;
- At the moment the gear drive is connected, power begins to be supplied to the electric motor of the unit;
- The electric motor begins to spin the drive, the revolutions of which are transmitted to the crankshaft of the car, as a result of which the engine starts. When the engine speed begins to exceed the starter speed, the drive and the crankshaft are disconnected.
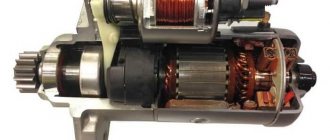
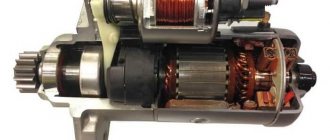
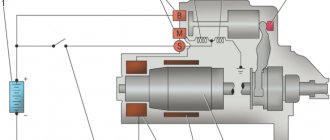
Now let's look at the design features of the fourteenth starter. In the diagram below you can see the main elements of the device.
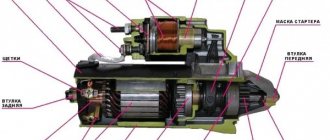
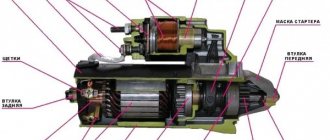
Starter device
- Housing - is made in the form of a cast steel cylinder at the ends, closed with lids, inside which the cores and the exciting winding (stator) are located;
- Solenoid relay - consists of a movable jumper and power contacts. The purpose of the solenoid relay is to close the contacts when the ignition is turned on, as a result of which power begins to be supplied to the electric motor. Upon completion of the operating cycle, the solenoid relay disconnects the power and the device turns off;
- Bendix of the VAZ 2114 starter (aka overrunning clutch) - at the beginning of the operation of the device, the bendix is connected to the crankshaft and transmits the electric drive speed to it through the engagement gear; at the end of the cycle it is disconnected. The serviceability of the entire device depends on the normal functioning of the bendix, since if disconnection does not occur at the moment when the engine speed exceeds the speed of the electric drive, the unit will be damaged;
- Anchor - is a cast axle made of alloy steel, onto which collector plates and a core are pressed;
- Brushes and brush holders are structural elements that are necessary to supply power to the armature. Properly functioning brushes increase the power of the device's electric drive;
- The starter bushing - there are three in total: the rear and front - are pressed into the body, the third is located at the junction of the armature and the bendix. The bushings are responsible for fixing the drive shaft.
VAZ 2109 starter malfunctions, which are most common
We repair the starter in Samara 2
Considering that the overall design of the starter has not undergone any changes at all, the developers still tried to make certain adjustments and modernized some parts. The main difference is the shaft sleeve, which now does not belong to the starter, but is installed in the clutch system housing. This detail is often forgotten during diagnostics and repairs.
When repairing the 2109 starter, inexperienced drivers are perplexed to discover signs of breakdown when everything that can be replaced in the starter itself has been replaced. Replacing the VAZ 2109 starter bushing also has its own characteristics. It's not that easy to remove if you don't know how to do it correctly. This is very easy to do if you screw in a tap of suitable diameter. By cutting a thread inside the worn bushing, he will carefully remove it from the socket. Otherwise, the faults of the VAZ 21099 starter (and all other modifications of the 9), which are most often encountered, can be as follows:
the starter shaft does not rotate or rotates very slowly; the shaft rotates, but the gear does not get good engagement with the flywheel crown; the solenoid relay operates repeatedly in vain, but does not keep the gear in engagement; the starter makes an unusual noise when operating.
You can read about how to check the VAZ 2109 starter in specialized literature, but if you have a problem starting the engine, you should immediately begin repairs.
Cases in which the problem can be solved on site
If the starter does not turn, there are several ways to start the car:
- close the starter contacts with a screwdriver;
- Connect the starter directly to the battery.
In an automobile system, the starter
a separate role stands out - to spin the crankshaft to create the required torque and compression ratio for the fuel-air mixture. Naturally, the starter functions in conjunction with other components and electrical systems. Therefore, damage of various properties may occur:
- lack of voltage in the on-board network;
- discharge;
- battery;
- damage to wires;
- problem in the ignition switch;
- mismatch of oil viscosity in the crankcase;
- weakening of contacts.
If the starter does not work, then in most cases the traction relay fails, the coil winding burns out, the bendix slips, or the screw thread drive runs slowly.
Some damage to the starter allows it to operate normally when the engine is running. But he fails to spin the heavy flywheel the first time. In any case, after a successful start, it is necessary to urgently take the starter for professional diagnostics in order to identify the true cause of the malfunction.
Thus, a malfunction of the starter can be caused by:
- faulty start relay;
- wear and tear
- Bendix;
- problems with the solenoid relay;
- combustion of the internal elements of the unit.
Device and connection diagram of the VAZ 2114 starter
VAZ 2114 starter connection diagram
A car starter is a DC electric motor and has a rather complex design. During the operation of this unit, various problems may arise, and in order to figure out, for example, why the starter on a VAZ 2114 does not turn, you need to have a good understanding of how it works and how the VAZ 2114 starter switching circuit is designed.
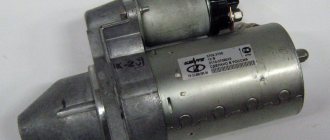
The machine is equipped with an electric starter model 5712.3708. The main parts of this device are:
- the moving part is an armature rotating on a shaft inside a stationary stator on which four magnets are fixed, which are the poles of the stator;
- a traction or retractor relay, which, when the ignition key is turned, sends a signal to unwind the armature;
- Bendix, also known as an overrunning clutch, which is designed to engage the engine flywheel;
- the housing in which all the working elements of the electric starter are located, it is closed with two covers. A solenoid relay is attached to the motor housing.
Fuel system problems
Among the elements of the fuel system, the following factors influence engine starting:
- presence of gasoline in the tank;
- the integrity of the fuel lines under the “belly” of the car;
- cleanliness of the filters: coarse cleaning (located in the tank) and fine cleaning (located under the car, to the right of the spare wheel compartment).
Also included in this category are electrical components that are directly related to the fuel supply. This is an electric fuel pump and a fuel pump relay.
Before checking other methods, you must be completely sure that the VAZ 2114 with an injector is filled. “Yes, there are still five liters there” according to the indicator on the tidy or “I filled it up yesterday, I couldn’t spend that much” are not suitable. The gauge may be lying, and there may be leaks in the tank or fuel lines. Carefully check the car for fuel leaks; just in case, fill in 5-7 liters of gasoline from a canister.
The mesh in the tank rarely gets clogged, leave this option for last, but it’s worth trying to change the fine filter if electrical problems are ruled out.
The operation of the fuel pump is checked by ear (after turning the key, its operation should be heard; if not, the pump has “died”, or the pump relay, or a wiring break). According to the manual, you need to connect a pressure gauge to the fuel system. If the pressure does not stay within 2-2.5 atm, the VAZ 2114 will not catch due to insufficient fuel pressure.
Replacing starter bushings for VAZ 2109
On a VAZ 2109 car, the starter device is not the same as on classic VAZ models and one of the starter bushings is located in the gearbox housing, and the second is in the rear cover of the starter; to replace the front starter bushing, the starter must be removed (see information on how to remove a VAZ 2109 starter above). Bushing starter located in the VAZ 2109 gearbox housing replacement. Inspect the bushing pressed into the gearbox housing. If the bushing is worn or has burrs, holes, etc., replace the bushing. Replacing the VAZ 2109 starter bushing in the cover. Inspect the manifold side starter cover and intermediate support.
Was the material useful?
VAZ 2109 starter device malfunctions, connection diagram, do-it-yourself repair
Hello, dear car enthusiasts! The VAZ 2109 car became the founder of a whole series of very successful and popular models.
The launch of the production of the first front-wheel drive VAZ modifications created a real sensation. The design, layout of the power unit, control style, interior design - everything was new and attractive. Driving also gave a completely different feeling.
The car was more maneuverable, throttle response with soft, informative controls. The promising beginning was replaced by the realities of the peculiarities of domestic production - breakdowns were borrowed from the previous Zhiguli. This is especially true for the starting system. It’s not surprising, because both the principle of operation and the design of the starter have not changed at all. Repairing the VAZ 2109 starter for an experienced car enthusiast who has already become familiar with this unit in old “classic” models is not at all difficult. As in most cars, the device VAZ 2109 starter is quite familiar:
four-pole DC electric motor with electromagnetic activation; freewheel complete with gear;
The starter does not turn over when hot
A common problem is that the starter turns the engine poorly and with difficulty when it’s hot, or doesn’t turn it at all when the battery is charged, whereas on a cold engine it starts without problems. Here only healthy logic or an experienced car mechanic can come to the rescue.
A car mechanic may not always be nearby, especially at night in the field, so we will rely only on ourselves. If the electrical equipment is in order, the ignition is adjusted and the spark plugs are dry, the problem is in the starter. The engine heats up during operation, and this is quite natural.
Together with the engine, the starter also heats up, in which there are a lot of mechanical interfaces that expand when heated. First of all, it could be the starter bushings, which are incorrectly sized.
They heat up, jamming the shaft and preventing the starter from rotating at full force. There is also a high probability that the power contact from the battery to the starter has been lost.
Check all the terminals and contacts, in 80% of cases this is the problem, but if the starter was recently repaired, then the bushings are to blame. Each specific case of difficulty starting a car is individual. We have compiled a collection of only the most common causes of such failure.
But the main thing is not to lose composure and use the deductive method. Then no breakdown can ruin your day. Even if the car doesn't start.
Other reasons for the inability to start the engine
Figuring out why the engine stalls is not difficult. In addition to typical problems, the following types of problems may be present:
- timing belt is broken;
- the engine “knocked”;
- the shaft is jammed.
A fairly common problem, especially on 16-valve engines, is a broken timing belt. In this case, the valves on the VAZ 2115 bend. Such breakdowns not only lead to the inability to start the engine. But they require a complete engine overhaul. The situation is similar if the engine knocks. If you can’t start the car even when it’s hot, you should check the air supply channel. Moreover, starting is not always possible the first time.
There are many nuances associated with setting the ignition and ensuring normal engine operation. You will need to carefully understand all the subtleties and nuances. Many problems associated with the inability to start the VAZ 2115 engine are associated with typical malfunctions and repairs take a minimum of time.
Malfunctions and their symptoms
Troubleshooting
But it is not at all necessary to disassemble the assembly in order to recognize the signs of a faulty solenoid relay. They look like this:
- The engine runs, but the starter still turns. At the same time, the sound is too loud and uncharacteristic;
- When the ignition is turned on, the starter does not spin, although the relay makes a characteristic click;
- The ignition is turned on, but the starter is idling and the engine does not respond.
All this suggests that there is a high probability of your transmission on the VAZ 2114 breaking. Therefore, it must be removed and a new element installed in place of the damaged one.
The starter works, the engine turns, but the car does not start
In this case, first of all you need to check whether there is a spark. You can do this as follows:
- all power wires with candlesticks must be disconnected;
- then one of the candles is unscrewed;
- neatly connects to the armored wire;
- Next, you need to place the spark plug housing on the cylinder block.
You should try to “turn” the starter - if after this a bright blue spark jumps between the central and side electrodes, then there are no problems. If there is no spark or is red, then the spark plug will need to be replaced. Even if out of 4 only one spark plug does not work well, the car will no longer start the first time.
https://www.youtube.com/watch?v=upload
So, the starter spins, the engine spins, the pistons move, but the engine still won’t start. Here the problem is most likely in the fuel-air mixture, perhaps the marks have come off, etc.
DPKV - if it malfunctions, it is very difficult to start the engine, and the running engine runs unevenly, intermittently, and the power drops noticeably.
Next you should pay attention to the labels:
- Mark on the timing camshaft gear (photo).
- Markings on the flywheel under the thermostat (photo).
If the marks do not match, most likely the belt has simply slipped by one tooth, the camshaft gear itself may be worn out, it needs to be adjusted and installed correctly!
Next we will talk about the air-fuel mixture.
I warn you in advance that the easiest way is to do computer diagnostics of the engine or look at the errors on the on-board computer.
Air supply
As a rule, a malfunction in the air supply should not affect the problem of starting the engine. For better or worse, the engine should still run. However, we will not go through the air system sideways.
The following sensors are responsible for air metering and supply:
- Mass air flow sensor is the most expensive sensor; if it fails, then the car simply begins to consume liters of gasoline, then this sensor can simply die “to zero”, but it indirectly affects the starting of the car. That is, no matter how it fails, the car should start.
- IAC - should not affect the problem of starting the engine. If it malfunctions, problems arise at idle.
Here may be the real reasons for our problem:
- First of all, we look at the candles. We turn the candles out (How to remove the candles?) and look at their condition:
A normal spark plug should have a slightly brick color; if the spark plug is wet, the spark plugs are flooded; you need to clean and bleed the cylinders by cranking the engine at idle with the starter with the spark plugs turned out. If one cylinder is flooded - the problem is local (High-voltage wires, faulty spark plug, injector), all cylinders are flooded - a general problem (ignition coil, brains, oxygen sensor, fuel pressure in the rail)
- Next, check for the presence of a spark. To check the spark, see the following article: How to check the spark?
- If there is no spark on one cylinder, there is a faulty spark plug or high-voltage wire.
- If there is no spark on two adjacent cylinders (1-4 or 2-3), then the problem is in the ignition coil or in the ECU.
- If there is no spark anywhere, then the problem may lie in the ignition coil or in the ECU, in mismatched timing marks, or in a non-working DPKV.
- If there are no problems with the presence of a spark, then the problem lies in the fuel supply.
Fuel supply
Two points are very important in fuel supply:
- normal fuel pressure;
- working injectors.
If, when you turn the key into the ignition, you do not hear the fuel pump pumping, then therein lies the problem. If the pump pumps, then first of all we measure the pressure in the fuel rail: How to measure the pressure? and draw appropriate conclusions.
High fuel rail pressure coupled with a malfunctioning fuel pressure regulator can flood your engine in an instant.
Signs and causes of malfunction
Like any other part that is in constant use, over time the starter wears out and fails. Let's look at the main signs that can help identify a device malfunction:
- When the ignition is turned on, the engine does not start or clicks are heard, but the engine does not turn over;
- After turning on the engine, the starter continues to spin (the bendix and flywheel are not disconnected);
- Smoke begins to come out from under the hood with the smell of burnt windings;
- When the ignition is turned on, the starter begins to buzz, and the engine starts only after repeated attempts.
To determine the reason why the unit failed, it is necessary to remove the VAZ 2114 starter.
Let us highlight the main reasons for starter failure:
- It doesn’t turn: the winding is shorted or the armature on the solenoid relay is stuck, the contacts of the positive terminal on the battery may have oxidized;
- It turns, but the armature or stator winding is broken or shorted, the brushes are worn out;
- It turns, but does not transmit speed to the crankshaft: idling - typical signs of a Bendix malfunction;
- Does not turn off after turning on the engine: the traction relay is stuck or the spring on the freewheel is broken.
Failures in the fuel system
It’s worth noting right away that there is no point in considering major engine breakdowns, since the average driver will neither be able to diagnose nor repair them, so you should pay attention not to those faults that can be eliminated with your own hands or in a short time. For example, if a VAZ-2114 does not start, it is worth checking its fuel system, and first of all, you need to take care of the following aspects:
For example, if a VAZ-2114 does not start, it is worth checking its fuel system, and first of all, you need to take care of the following aspects:
- presence of fuel in the gas tank (the sensor may be wrong);
- the integrity of the gas pipelines running along the bottom of the car from the tank to the engine;
- serviceability of the coarse filter in the fuel tank;
- the serviceability of the fine filter in the tank below, near the spare wheel.
Disassembling the VAZ 2109 starter and troubleshooting
Before any repair of the starting system, it is necessary to check the condition of the battery, as well as the quality of the contacts on the circuit: battery - ignition switch - starter relay - traction relay. Very often the reason for poor starting lies in this part and the starter turns out to have nothing to do with it. Before disassembling, the VAZ 2109 starter connection diagram should be studied and memorized in detail.
This is important for successful installation after repair. The starter is quite easy to remove. To do this you need to: disconnect the battery terminals, remove the engine crankcase protection, unscrew and disconnect the electrical wiring terminals
After the three nuts securing it to the crankcase are unscrewed, the starter is in our hands
When disassembling the starter, it is necessary to pay special attention to the following parts: the motor armature, the condition of the windings, the condition of the brush assembly, wear of gears, bushings, cleanliness of the traction relay contacts. Any of the parts must be cleaned and inspected, and the electrical parts must be checked with special instruments
For this, the electrical circuit of the VAZ 2109 starter is useful. Anything that is burnt, heavily soiled, worn out or broken must be replaced with new spare parts and do not try to save on repairs.
disconnect the electrical wiring terminals; unscrew the nuts securing the starter to the crankcase (there are three of them).
Attention: During the dismantling process, it is necessary to pay special attention to such parts of the starter as the armature, the condition of the winding, gear defects, cleanliness of contacts and much more.
How can I close the starter directly?
You can close the starter directly by connecting to the battery or through contacts. Both options work if the device’s anchor is not damaged.
Closing the terminals with a screwdriver, pry bar or wrench
If the traction relay is faulty, the direct closure method is used with any metal rod of the required length. This could be a screwdriver, wrench or pry bar. Problems with the retractor are indicated by a characteristic clicking sound when turning the key in the ignition switch. The starter at this moment is unable to crank the crankshaft, since the Bendix teeth do not cling to the flywheel crown
. By closing the starter's power terminals, it will be possible to send current directly to the electrical windings. A wrench or screwdriver will take over the functions of the traction relay.
Before doing this, be sure to put the car on the handbrake and in neutral to avoid accidents. The tool itself should have an insulated handle and a fairly thick shaft. Therefore, it is recommended to use one of the items described above. The pry bar or key can be wrapped with electrical tape at the gripping point.
Closing contacts B and S, M and B is strictly prohibited! Explanation: B – Bold or thick wire – constant voltage contact. On many starters it is closed with a protective rubber cap and marked “+12”. M – Motor or electric motor. S – Start, the contact is made in the form of a threaded outlet, petal or plug, often closed with a plastic tip, so it must be removed before forced closure. 8 – negative contact, connected to the body.
On some car models (VAZ 2109, 2110, 2114), in order to bridge the starter with a screwdriver, you need to dismantle the air filter and disconnect the chip placed on the contact group. After starting the engine, everything comes back together.
Possible consequences
The disadvantage of this method of resuscitating the starter is the risk of burning the car's ignition coil. For this reason, it is not recommended to repeat the procedure - once is enough. If you can’t start the engine, then you need to look for the problem elsewhere.
Another unpleasant moment: at the points where the screwdriver connects to the contacts, regardless of the amperage of the car, a current of 40-50 A is generated. Because of this, the tool rod can become stuck and give a strong kickback to the hand. Solution: without panic, remove the negative terminal with an open-end wrench.
Connecting directly to the battery
A piece of copper cable, alligator clips and a flat plug is all that is needed to directly connect the starter to the battery. These three components are used to assemble a carrier that will make it possible to start the engine. You need to integrate the homemade device with the power cable going to the starter. It has a connector where you need to insert the wire.
Further actions:
- put the car in neutral;
- turn on the ignition;
- connect the crocodile clip to the positive terminal of the battery.
Homemade carrier with a crocodile
If there are no other faults, the starter should work. After starting the power unit, you need to quickly disconnect the terminal from the battery. Pull the manufactured wire out of the connection and replace the removed plug. Everything is done simply, but caution is recommended. Otherwise, you may get burned or short circuit something.
Immobilizer and alarm
Car alarms can also negatively affect the operation of the starter. Sometimes security systems can also present some surprises. Finding out the cause is quite simple, but fixing it is difficult.
The fact is that in the alarm systems with auto start and in the standard immobilizers of some cars, inconsistencies may arise that appear over time. This problem was relevant for the 2007-2008 Ford Focus 2.
Without any reason, one fine morning the starter completely refused to work. Although everything indicated that the electrical equipment was normal, all contacts were reliable, the starter did not want to turn the engine at all.
On Ford and some other cars, this was solved by replacing the standard immobilizer, and the officials did this under warranty. It was easy to find out the reason - bypassing all systems, the power from the battery to the starter was simply turned on through a button, and then it worked as if nothing had happened. The cases are not widespread, but they were, so this option also cannot be discounted.
Replacement of components and other repair features
Identifying the fault is very important, but now you need to take care of high-quality repair of the VAZ 2114 starter. Of course, you can go to a company service center, where specialists will diagnose and fix all the problems, but this will cost a pretty penny. However, the peculiarity of the domestic automobile industry is that in most cases it is possible to carry out such work independently.
For all the failed elements - gears, bearings, cracked cover, gearbox, bendix, brushes and commutator - the best cure is replacement. If the mechanism does not turn due to insufficient battery charge, then you should restore it or replace the battery with a new one. The VAZ 2114 starter sometimes does not work due to a short circuit in the winding of the traction relay or armature. In this case, again the failed mechanisms only need to be replaced.
Starter windings
A starter is an ordinary power electric motor with all its characteristic diseases, and winding wear is one of them. If the starter windings just begin to smell when starting the engine, this is a sure sign that they will soon fail.
If we disassemble a starter with burnt windings, we will see that the protective varnish on them has faded and they have darkened. As a rule, this happens when the driver overdoes it with starting the starter. If there is a smell at the starter windings, they will soon fail. The starter cannot spin for a long time, the maximum duration of its operation is a few seconds, and inexperienced motorists can turn the starter on an engine that does not want to start for various reasons, for several minutes until the battery is completely discharged or the starter windings overheat.
In this case, most often you have to say goodbye to the starter, since rewinding the windings is quite a troublesome and expensive task. It's often easier to replace the starter than to rewind the windings, so don't try to get the most out of the starter. Take care of him.
