How to remove rear parcel shelf 2115 | video
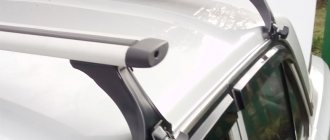
Collection VAZ 2115 Fifteen. Raise the rear parcel shelf and rotate it to its natural position. Straighten your seat belts. Put the shelf back in place. Fasten evenly and push tabs behind. Checking seat belts. Pull them all the way out to make sure the belt is not obstructing or working. If it does not stretch, you need to look under the shelf and straighten the belt. There should be no space between the shelf and the glass. If there is a gap, it means that the regiment has not sat down and needs repairs. Choose your hats. Find the hole. First, push the bottom of the piston all the way down. Then we screw the top on. There is a little trick here, it will be needed if we take the caps apart again in the future. The upper piston cover returns independently through the screwdriver socket. Next time it will be convenient to take it apart. We install the pistons ourselves without a screwdriver. For those who broke the piston during disassembly. Let's bring the interior to an end. Buy the pistons later and slowly assemble them later. We assemble all the instruments from the barrel. Raise the seat back and fasten the belt in front of it. We placed our backs in an upright position. We lock the back on each side until it clicks. We check whether the back is fixed by pulling it slightly around the corner. We pull on the back of the seat so that it eventually rises up. We lower the seats, take out the carabiners and the middle seat belt. Finally, lower the seat. We press on him to finally take his place. Pull the head restraints into place. We carry everything from the front seats to the trunk. ALL. Well done!
Preparatory part. First we will carry out preparatory work. Namely, we will make room for work. We all carry something in our trunk. We are preparing a VAZ 2115 car for disassembling torsion bars. Things in the trunk We are preparing a VAZ 2115 car for disassembling the torsion beams of the trunk. We take things out of the chest. We carry all our luggage in the front seats. Fold down the floor and the seats themselves. We are preparing a VAZ 2115 car for dismantling the torsion beams of the trunk. We put things on the front seats. Prepare your VAZ 2115 car for disassembly. torsion bar We place things on the front seats and on the floor. Now we remove all the things from the back seat and from the shelf. We are preparing a VAZ 2115 car for dismantling the torsion beams of the trunk. We remove all things from the back seat and from the shelf. Prepare your VAZ 2115 for removing the torsion bar torsion beams. We took things from the back seat and shelf. After that we folded down the rear seats. To do this, remove the head restraints. Removing the trunk from torsion of a VAZ 2115. Removing head restraints in the rear seat. We also remove them in the front seats. Removing the trunk from torsion of a VAZ 2115. Remove the head restraints on the front seat. Open both rear doors. We are preparing a VAZ 2115 car for disassembling the torsion . Open both rear doors. Now we lift the cushion on which the passengers are sitting. How to do it. There is a small loop between the bottom and top of the seat. This is only between the carabiners. We are preparing a VAZ 2115 car for disassembling the torsion . Raising the rear seat cushion Lift the seat and raise the cushion. We are preparing a VAZ 2115 car for dismantling the torsion beams of the trunk. Rear seat cushion hinge position Place it upright. We are preparing a VAZ 2115 car for dismantling the torsion beams of the trunk. Raise the rear seat cushion to an upright position. If you don't have a loop, it has failed. How to do this at the end of the book. Lower the seat back. In the upper part of the back there is a little between the back and the shelf, in the middle. lever arm. We are preparing a VAZ 2115 car for dismantling the torsion beams of the trunk. Rear seat back lever. Pull it and release the backrest. We are preparing a VAZ 2115 car for disassembling the torsion . View of the rear seatback lever on the back. We remove the seat belts so as not to interfere with the process. We are preparing a VAZ 2115 car for dismantling the torsion beams of the trunk. Seat belts in the rear seat. Preparing a VAZ 2115 car for disassembling the torsion beams of the trunk.
You may also like
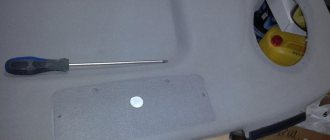
Remove the side seat belts. Lower. We are preparing a VAZ 2115 car for dismantling the torsion beams of the trunk. Lower the back of the rear seat. We have such a tunnel. We are preparing a VAZ 2115 car for dismantling the torsion beams of the trunk. Got a free tunnel. Now you need to remove the shelf, since there are torsion bars under it. We are preparing a VAZ 2115 car for dismantling the torsion beams of the trunk. Torsion bars are located under the shelf. To do this, remove the two covers. Pistons at the window. We are preparing a VAZ 2115 car for disassembling the torsion . Location of the piston on the rear shelf How to remove the pistons. We are preparing a VAZ 2115 car for dismantling the torsion beams of the trunk. Close-up of the shelf piston. Turn the top head, there is a place for a screwdriver. Screwdriver slot on piston cover. We are preparing a VAZ 2115 car for dismantling the torsion beams of the trunk. If you don't see the screwdriver slot, you just need to turn the piston slightly on its axis. Do not try to pull both parts of the piston at the same time! This won't work because the top is blocking the bottom from pulling out. Just one after another. If you have broken the upper piston cover then. The lower part of the rear shelf piston We are preparing a VAZ 2115 car for dismantling the trunk torsion bar. Now let's pull out the bottom. All piston parts have been removed from the shelf. We are preparing a VAZ 2115 car for dismantling the torsion beams of the trunk. This is what both parts of the piston look like. Disassembled view of the piston shelf. We are preparing a VAZ 2115 car for dismantling the torsion beams of the trunk. And this is a piston assembly. The principle of its operation can be seen in the photo: the upper part blocks the removal of the lower part. Piston assembly. We are preparing a VAZ 2115 car for dismantling the torsion beams of the trunk. We remove it from the other side in the same way. To remove the shelf, press it with your hand at the bottom of the rear window. We help her get off the hook. Remove the shelf from the seat. We are preparing a VAZ 2115 car for dismantling the torsion beams of the trunk. They removed the shelf from its place. We are preparing a VAZ 2115 car for dismantling the trunk rotation after removing the shelf. It is necessary to move it as far into the cabin as possible. To do this, loosen the seat belts. Weak seat belts. We are preparing a VAZ 2115 car for dismantling the torsion beams of the trunk. We lower the shelf. Lower the shelf. We are preparing a VAZ 2115 car for dismantling the torsion beams of the trunk. Now we remove the seat belts completely from the reels. Pull the seat belts completely off the reels. We are preparing a VAZ 2115 car for dismantling the torsion beams of the trunk. Turn the shelf upside down. Rotate the belt into the groove and secure it to prevent the belt from being pulled into the reel. Secure the belt from self-tightening to the reel. We are preparing a VAZ 2115 car for dismantling the torsion beams of the trunk. We put the shelf as in the photo. Place the shelf upside down. We are preparing a VAZ 2115 car for disassembling the torsion bar. Inverted shelf. We are preparing a VAZ 2115 car for dismantling the torsion bar trunk. So, we have opened access to the torsion bar and freed up the working space for ourselves. Open access to torsion ends. We are preparing a VAZ 2115 car for dismantling the torsion beams of the trunk. Here the numbers indicate one and other torsion bars. One and the other torsion line. We are preparing a VAZ 2115 car for dismantling torsion beams. Photos of torsion beams from all sides. Left. Right. Bottom view from the trunk. The end of the torsion bar is in the trunk lock. Torsion bars are under torsional stress. To make removing the torsion bars easier, the trunk lid must be secured in a vertical position. At the highest point. To do this, we use bars 102-103 cm long. We place one end of the bar in the corner of the trunk. Let's start another trunk lid. To avoid scratching the paint on the trunk lid, you can place a piece of cloth under the grille. The trunk is all fixed. All preparatory work has been completed! Let's move on to the main process of disassembling torsion bars. Request satisfaction rate: 23.93%. I didn't realize at the time that plywood shelves could improve both the sound of the rear speakers and the low-frequency level of what people simply call bass.
Why would you need to replace an acoustic shelf?
If the sound quality of the speakers initially satisfied you, then the need to make an acoustic shelf with your own hands may arise for the following reasons:
- damage to the stock part;
- decision to increase the number of speakers;
- to improve sound quality;
- wear of a previously installed element.
Drivers often encounter breakage of shelf fasteners, which occurs while driving on a rough road. Most often, this malfunction is encountered by drivers who do not slow down in front of potholes or on rural rough roads.
However, the vast majority of VAZ-2115 owners replace the acoustic shelf in order to improve the sound quality of music inside the car.
In this case, the shelf should be made of plywood with your own hands or to order. This material will help make the speakers sound clearer.
VAZ 2115 rear parcel shelf rattles, problem solution
Show Control Panel
- Published: January 21, 2019
- In this video I’ll tell you how you can get rid of the always rattling shelf on 2115, without changing the shelf to a wooden or acoustic one. We will need 2 scraps from door seals (we used 3-chamber ones from a VAZ 2109), which we will install along the edges of the shelf. Next, we seat and tighten 2 bolts on both sides and the problem is solved! Music: Jane_Fonda VK - id532600955 public178623127 Previous videos: www.youtube.com/watch?v=Ec9Lj. www.youtube.com/watch?v=wt9oV. Radio repair: www.youtube.com/watch?v=woTHF. Registration Teaser bz - teaserbz.info/u/Shekolyan Teaser bz - browser extension for making money Best stores with cashback: ali.pub/36pcjk Double cashback AliExpress: ali.pub/36pbnh
Preparing to make a shelf
First of all, you will need to prepare the materials and tools that will be required to complete the work. Purchase in advance:
- plywood sheet;
- carpet for cladding;
- radio fabric;
- PVA glue;
- fabric glue;
- a box of self-tapping screws.
The tools that will be useful to you are a jigsaw, a drill or screwdriver, and a grinder. Please note that the plywood must be at least a centimeter thick, otherwise the shelf will be no more effective than the standard one.
Many people are interested in how to take the dimensions of a shelf correctly, so as not to make mistakes during manufacturing. To do this, experienced craftsmen recommend removing the standard shelf and using it for a pattern. In any case, you will have to dismantle it; it is better to do this before cutting the material. This way you definitely won’t go wrong with the size.
Removing the stock shelf is not that difficult. To do this you will need:
- Remove the rear seat.
- Locate the four main acoustic panel fasteners and remove them.
- It is important that the seat belt is fully extended while working. To prevent it from gathering into the tension mechanism, move the two latches and remove the belt guide.
- Unscrew all side frame fasteners.
After dismantling, parts of the old panel can be used as a pattern. In this case, a drawing will not be needed. To do this, first draw them on cardboard, and then transfer them to plywood. You have to prepare the following parts of the structure: main, decorative and adjacent. Next, prepare the side supports and grates.
On the side of the seats, on the main part of the panel, there is no need to make cutouts in the corners, since attaching a homemade shelf can be done differently than a stock one. From the old shelf, cut out the part that fits the rear glass and attach it to the new panel. You can also not take the side walls from the design of the old acoustic panel, but cut them diagonally yourself. By stitching, adjust them to the main part. Assemble the structure with screws. It is enough to screw in only a couple so that in case of a mismatch in size, dismantling can be done easily.
In the main part of the stock panel, two holes are usually pre-made for speakers. If necessary, you can make additional holes, for example, so that the shelf can accommodate several different speakers. In the decorative part, each of the holes should be several millimeters larger. Measure them against the speakers you plan to install. The heads must fit freely into the place prepared for them.
Popular on the site
Currently on the forum:
This page is searched for the following queries: The rear shelf on the Lada 2115 rattles, VAZ-2115 forum, VAZ-2115 discussion.
Currently commenting:
Jet black or grey-black
I would like to know the model of injectors, the type of internal combustion engine, the power supply system of the internal combustion engine..
Dimensions and tidy do not light up. CHY, all relays and presets are in order! New button! Backlight on p
On my smartphone it freezes every once in a while, then crashes, it says the pages could not be loaded
Thanks, I think so too
Often, when opening a page, it says that there is no such page, although a few minutes ago someone
Hello! I can’t find the lower rubber bands for the injectors, I found the upper ones, they fit from ten
Do not bother. Xenon in a headlight not intended for it is definitely already a collective farm. And St.
Mine doesn't understand. Is this the end of the update or what?
Wroom.ru
Media registration certificate No. FS 77-76203 16+
I'm tired of the rear parcel shelf constantly rattling. Previously I tried to bend metal fasteners and pave foam rubber, there was an effect, but it was quite insignificant.
I thought for a long time about how to resolve this issue with the best result. Having looked through the Internet, I realized that people don’t really care and buy rear shelves made of wood or completely cover the original ones with noise or vibration insulation.
I like the way my shelf looks, so I decided to leave it. I didn’t have a large amount of Shumka, only small scraps remained, so I couldn’t paste over the shelf and its adjacent areas.
But I found door seals in the garage that were left after they were replaced with three-pipe ones from a V8. I also had a roll of anti-squeak (madeline).
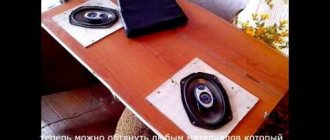
He took down the shelf and started working on collective farms. I simply cut off the required piece of seal and attached it to the shelf. It was decided to attach seals to the entire perimeter of the shelf, so that it would not only be soft in the contact areas, but also provide additional compaction.
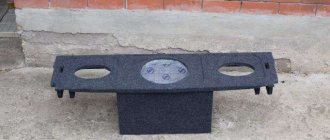
This is what the beginning of the process looks like.
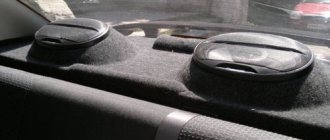
And this is what the finished version looks like. I agree, it doesn’t look very aesthetically pleasing, but the main thing is the result.
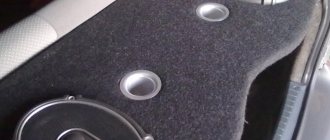
Using an anti-creaking agent, I glued the plastic side posts on which the shelf rests. The foam rubber was laid earlier, it is not visible at all, but the effect is there.
From the Shumka scraps that remained after soundproofing the steering casing, small pieces were cut out and glued onto the metal supports of the shelf and rear mounts.
Now, when installing the shelf in its place, it fits in a little tight, but it fits correctly. The seat back latched, also with a little effort.
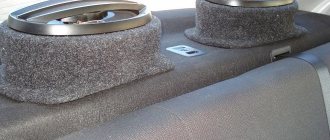
This is what it looks like from the interior.
From the outside, due to the tinting, the seals are not visible at all, and in general they are not noticeable at all.
Now, when driving, the rear parcel shelf is as if it doesn’t exist at all. She doesn't make any noise at all. I was afraid that the rubber seals would creak against the plastic or rear window, but this is not the case, probably due to the fact that the shelf fits very tightly. To make sure of a positive result, he put the passenger back and told him to listen, and so, he only heard the suspension rattling.
So, I can recommend this option for getting rid of the noise from the rear parcel shelf. Probably the cheapest of all options.
Finally, my little new thing, a KIOKI thermometer.
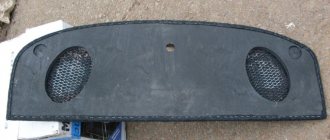
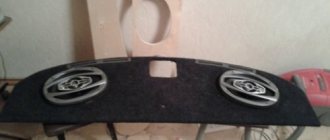
The rear shelf rattled very loudly, made all possible sounds, and creaked and rumbled. I had to turn on the music loudly so as not to hear it. I decided to get rid of it. I read a bunch of advice on the Internet, but I did it my way. I’m sharing my experience with you. It was not in vain that I tried , there is no sound at all now, it’s just a pleasure. I wanted to tear off the original carpet covering on top of the shelf, but after thinking about it I realized that I couldn’t do it as neatly as the factory one. The process was as follows: 1. I tore off the original carpet about 10 cm along the edges 2. I covered the entire shelf with an overlap under the carpet with vibration and soundproofing film 3. I also glued batting material on top of the film 3. At the junction of the shelf with the rear sofa, another layer of batting was applied to remove the gap between the shelf and the seat 4. I glued the original carpet in place 5. I glued the plastic racks around the rear window with Shumka (the material remained just))) 6. In the trunk, I covered 2 iron sticks with the same film (I don’t know what else to call them), which They fit the trunk mechanisms. 7. It was difficult to put the shelf in place, because it had become much thicker) 8. I tightened it on the sides with 2 bolts
The shelf fits better than from the factory) Now I drive as happy as an elephant, no rumble, knocking, squeaking, etc.
How to assemble correctly
The rear acoustic panel is quite easy to assemble:
- Once you have secured the side and main parts, place the speakers in place, secure them and cover them with radio fabric. You can use a grid instead.
- Make a frame from PCB or plywood and cover it with mesh or radio fabric. Glue the material and leave it to dry for several hours.
- Next, glue all the plywood parts and cover the acoustic element with carpet. You can secure the material with glue, but some use a furniture stapler for this purpose.
- A day later, after the shelf has completely dried, you can mount it using the corners. They will be located in the mounting areas of the rear seat of your car. This installation will not take much of your time and effort.
Such a panel will not irritate your ears with squeaks; even speakers that are not of the best quality will sound clearly in it.
Shelf VAZ 2115 Do It Yourself
VAZ 2115 acoustic shelf with subwoofer
For some reason, the following problem may arise: the VAZ 2115 speaker shelf has stopped working. Of course, if it is broken, it will not damage the entire car, so repair work may be delayed for a while. However, if you can't fix it later, try making an acoustic shelf right at home. A do-it-yourself acoustic shelf for a VAZ 2115 will look no worse than a regular one.
Causes of damage to the acoustic shelf
Acoustic shelf VAZ 2115 in the house
Usually it does not break, but snaps into place. There are several reasons for this problem:
- Firstly, they can be tightly pinched. By the way, this is the main reason why they break. Therefore, you can simply replace these fasteners by replacing the old shelf.
- The second reason is that the car is too wobbly on rough roads. Most often this happens on cars whose drivers live in rural areas. However, the wine itself can also be the driver's fault. If you slow down significantly when crossing such a road, you won't even need to change the pins.
Note. In addition, high speeds negatively affect not only the sound system, but also the entire car.
But the failure of an acoustic shelf itself can occur for the following main reasons:
- The mechanical impact of this. This is the case if something falls on him. In addition, it is not recommended to place heavy objects on it. It is not recommended to install an acoustic shelf in the trunk, as objects of different weights are usually placed there.
- Additionally, the shelf may experience some wear and tear during use. And after a few years, it may crack under the influence of mechanical waves emanating from the speakers.
Eliminated squeaking noise in the rear parcel shelf area
There was an irritating knocking noise in the rear of the cabin; at first I thought that the shelf was creaking. But, as it turned out, the shelf was tightly screwed on and didn’t even have any play)
It was experimentally determined that the back of the rear seat was knocking. As it turned out, the solution to eliminate it was invented during the reign of Tsar Pea) We open the back of the seat, there are two pins on which the backrest lock is latched. There are plastic spacers on them, which have some kind of antennae in the middle of the hole, thanks to which this crap is held on the pin exactly in the center. I had one tendril broken off on both plastics, and they no longer performed their function, but just hung there, adding unnecessary noise (the back beats, because it doesn’t fit tightly, and even the plastic hangs on the pin).
We go to any nearest spare parts store and buy a tie rod end boot 2108, 2 pcs.
They cost a penny - 20 rubles apiece.
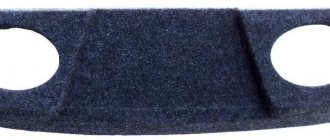
Removing old plastics
The rubber boot is thicker and more elastic than a hard plastic spacer, thanks to it the back will fit tightly and, as a result, will stop rattling
The whole thing changes in 2 minutes right next to the store. As they say, it’s a small thing, but it’s nice. Now there are no extraneous squeaks from the rear seat. Peace to all)
Source
Making an acoustic shelf for a VAZ 2114 with your own hands
Having a hatchback body, the VAZ 2114 is distinguished by an impressive trunk, which covers the entire rear part of the car. It is separated from the interior by a seat and a removable shelf.
The shelf has bending points provided by the design, along which it folds, increasing the volume of the luggage compartment. This design does not cause any complaints, especially if the presence of music is not important, but if music means a lot to the owner, a “surprise” awaits him - there are no places for mounting an audio system in the design of the VAZ 2114.
The standard shelf is thin and light, any speaker will make it heavier, which will lead to its incorrect fixation, the shelf will rattle a lot, the audio system will resonate with the pits and the rumble from behind will be simply unbearable, the presence of such “music” is very doubtful pleasure. Later, the sides will also become loose, and then it will become completely unbearable.
The problem is solved in three ways:
- The shelf is removed, there are no rear speakers, there is nothing to rattle, but there is no music either.
- Acoustic shelf VAZ 2114 is inexpensive to buy, but it will improve the situation significantly.
- Make an acoustic shelf yourself.
In addition to eliminating third-party noise, the acoustic shelf will solve the problem of trunk structural rigidity, provide the acoustic system with a reliable frame, and eliminate the negative impact of acoustic vibrations on the mechanical joints of the rear door and trunk as a whole.
Lada Priora tuning → Sedan, rear parcel shelf.
Folks, is it possible to avoid the noise of the rear stock shelf (with speakers installed). Or can everything be treated with just an acoustic shelf?
- Ivanesko_Klichkov
- October 21, 2012, 21:53
- Vengr_Koguhov
- October 21, 2012, 21:58
- v
- Nikolay_Gorkov
- October 21, 2012, 21:59
- v
- Nikolay_Gorkov
- 22 October 2012, 15:07
- v
- Ivanesko_Klichkov
- 22 October 2012, 20:32
- v
- Nikolay_Gorkov
- 22 October 2012, 20:34
- v
- Ivanesko_Klichkov
- 22 October 2012, 20:46
- v
- Stas_Dmitrenko
- 22 October 2012, 20:58
- v
- Oleg_Menschikov
- 22 October 2012, 21:15
- v
- Nikolay_Gorkov
- 23 October 2012, 20:48
- v
- Nikolay_Gorkov
- 23 October 2012, 21:08
- v
- Dma_Baydauz
- 24 October 2012, 08:44
- v
- Nikolay_Shteyn
- 24 October 2012, 15:14
- v
- Oleg_Menschikov
- 24 October 2012, 15:35
- v
#10 Pavel Gorkov Where did you buy it (if in Moscow, then tell me where) otherwise I don’t want to bother with noise)))))))
I am not from Moscow. I have a sedan body, with acoustic. The music on the shelf is simply amazing, I like it. I think if you want good music and no noise, then you shouldn’t bother with a standard shelf (trying to soundproof it and attach other devices to it). They installed a shelf for me from a VAZ 10 model, they didn’t even adjust it. collapse branch
We are finalizing the factory version
If the VAZ 2114 acoustic shelf is expensive for you, but you don’t want to make it yourself from scratch, then you can modify the factory shelf.
To do this you need the following tools and materials:
- Plywood.
- Putty.
- Upholstery.
- Self-tapping screws.
- Epoxy adhesive.
- Jigsaw.
- Knife.
- Emery (sandpaper).
- Stapler.
The shelf is easy to modify; for a good result, the steps are performed in the following order:
- We draw a template on cardboard, use it to draw places for the speakers on the shelf, and cut them out with a jigsaw.
- We use the shelf as a template, draw what we need on the plywood, and cut out what we need on the plywood.
- Using epoxy glue, we glue the shelf to a piece of plywood cut out for it.
- We cover (glue) the finished result with carpet (another fabric), not forgetting about the plywood ends.
Such a shelf, due to its rigidity, will significantly improve the sound, but in addition, you can soundproof the trunk and the shelf itself, this will make the music even better.
For soundproofing the following will be useful:
- Bitomast and Vibroplast (1 sheet each).
- Smoothing tool (usually a roller).
- Construction hairdryer.
Due to the fact that vibroplast perfectly dampens vibrations, it is enough to cover 2/3 of the trunk with it. Bitomast is applied to the shelf itself; it is a noise-absorbing material, it improves the sound and removes vibration echoes and unnecessary sounds. To apply, the materials are laid out on the desired surface, then heated with a hairdryer and rolled out over it.
Carefully monitor the quality of rolling; if there are bubbles under the material, the results of your work will very quickly fail.
We make it from scratch
The acoustic shelf of the VAZ 2114 is easy to make with your own hands, you will have to spend a little on materials, and do not regret a little of your time.
The following “ingredients” will be useful:
- Centimeter chipboard or MDF.
- Carpet (other fabric).
- Glue.
- Self-tapping screws.
- Jigsaw.
- Drill.
- Grinding machine (emery, sandpaper).
- Stapler.
- Materials for the layout: cardboard, pencils, drawing supplies.
We will do it like this:
- We are preparing a template, then we will try it on the car, it should be a little larger.
- We cut out the shelf according to the template, remove the irregularities by grinding down the gap included in the template.
- We double-check its dimensions on the car, if everything matches the car and the size of the intended speakers, then the shelf is ready.
- We are preparing materials for covering (pasting), everything should be at hand.
- Apply glue to the plywood, apply fabric, and roll everything out to avoid bubbles.
- We fix the edges with a stapler.
- Let it dry for a day.
Acoustic shelf Priora Sedan: advantages and features of creation
Acoustic shelf Priora sedan
The acoustic shelf of a Priora sedan is quite expensive, so many people decide to do it themselves. In addition, the acoustic shelf of the factory model Priora sedan is not of high quality, which is why it can be broken as a result of mechanical stress. And if you make it at home, you can be 100% sure of its quality.
We create acoustic podiums
It doesn’t seem logical to change the shelf, investing effort, time and money into good sounding music, leaving the standard VAZ 2114 podiums, which are made of plastic and eliminates more than half of your work. Plastic does not dampen the vibration of the speakers at all; on the contrary, it enhances it, creating rattling and extraneous noise. Therefore, we will make new podiums, tougher, and making all the previous torment justified.
For the new holder you will need:
- Columns.
- Installation rings (included in the kit).
- Gloves and brush.
- Epoxy glue and hardener.
- Fiberglass and lycra.
If you start creating a podium from scratch, some skills in woodworking and other work with materials will come in handy, firstly, for an untrained person this is unrealistic, and secondly, people with such skills can imagine what exactly needs to be done without this article. Therefore, relying on the option that there are no such skills, as well as special equipment, on the basis of a standard podium we will carry out the procedure for strengthening it using the materials described above.
This procedure is done as follows:
- We cut off the mesh (part of it) from the podium and fix the installation ring; the structure should come out monolithic and rigid.
- We put lycra on the structure.
- Mix glue and hardener.
- We spread the resulting solution onto the lycra and, as in papier-mâché, glue the fiberglass (you need to stick 3-4 layers).
- Let the structure dry.
- We install.
The option of polyurethane foam is “not an option”: firstly, it causes corrosion of the body, and secondly, in addition to vibrations, foam also dampens sound.
Acoustic shelf VAZ 2114
The factory acoustic shelf of the VAZ 2114 is a structural element that secures the rear speakers of the standard audio system. Due to its design, the shelf is also an irritant for most car enthusiasts. And not surprisingly, the element causes a lot of inconvenience for the following reasons: - produces unpleasant squeaks when driving a car; — does not allow installation of large audio speakers; — sound quality leaves much to be desired; — the material is very flimsy and is not capable of supporting non-standard, heavy sound devices. The above circumstances force many car owners to resort to modification procedures.
Installation
We have already talked about how to choose speakers for your car. Now a few words about the correct installation of these speakers in a car. Motorists recommend installing mid- and high-frequency speakers in the front of the car. If they are installed on the rear shelf, the sound quality will be slightly distorted.
When installing low-frequency 6-inch speakers, it is recommended to immediately buy a ready-made non-standard acoustic shelf, since in all cars the holes are designed for 4, not 6 inches.
Well, for louder sound, you can mount a subwoofer in the trunk of your car. But remember that this part takes up a lot of free space and, with its vibrations, unscrews all the nuts and bolts that are nearby.
Troubleshooting solutions
An excellent way out of their current situation is to install the rear shelf of the VAZ 2114 yourself. Today, on numerous websites dedicated to cars, you can find a lot of options for making the necessary design on your own. If you don’t have the skills to work or free time, then an excellent solution is to buy an acoustic platform at an auto supply store. It is possible to select several modifications that differ from each other both in design and in the materials used in manufacturing. The price of the accessory depends on its design and the specific store, on average it ranges from 1,200 to 3,000 rubles.
Benefits of replacing the rear shelf
The main thing that car enthusiasts notice after installing a new, modified element is a more confident design that does not bend under the weight of even the most impressive-sized sound speakers installed on it. In addition, the acoustic characteristics of sound transmission are noticeably improved. This happens due to the fact that wood is the best conductor of sound impulses generated by speakers. In addition, the strength of the shelf and the reliability of its fastening prevent the appearance of unnecessary deformations, looseness, annoying squeaks and extraneous noise.
Popular on the site
Currently on the forum:
This page is searched for the following queries: The rear shelf on the Lada 2115 rattles, VAZ-2115 forum, VAZ-2115 discussion.
Currently commenting:
Stalin is not an unambiguous personality, a bloody tyrant, but I don’t know, maybe just such a ruler is more
Many will, Putin is a global personality, the most respected politician in the world, with
What is the current government doing? Finishes off and steals Stalin's legacy. Yeah
Are the front fenders from the top suitable for a regular w124
Russia has enough fools for a hundred years. Answer why North Korea is now pla
However, when he died, the whole country mourned. How many people do you think will pay
Is there no error message?
Good day. Such a problem. Priora 2008 release. I arrived yesterday evening and
Wroom.ru
Media registration certificate No. FS 77-76203 16+
DIY rear shelf of VAZ 2114
In principle, the manufacturing technology is not complex or unique. All you need is a good drawing, the necessary materials for production and some available tools. Installation does not require special conditions or special knowledge; all you need is good, detailed instructions and a little free time. So, here's a list of what we need:
- Plywood with a thickness of at least 17-18 millimeters (compliance with the size is extremely important);
- Upholstery material. When choosing it, be guided by what material the interior of a particular car is lined with. If fabric is used, then the ideal option for reupholstering would be carpet, which easily lends itself to all sorts of influences.
- Construction stapler with metal staples for woodworking.
- Glue, screws, masking tape.
- Jigsaw.
- Screwdriver.
- Sandpaper or grinder.
- Drawing of the rear shelf of a VAZ 2114.
- Ruler or tape measure.
When all the tools and materials are available, it’s time to start making.
For convenience, we will divide the entire production into 8 stages:
- The first and very important thing is to have an accurate and high-quality drawing. The need is determined by strict adherence to the required dimensions. In other words, a good template will ensure the further production of a workpiece of the required shape and dimensions, allowing the shelf to ideally fit in the car. It is best to transfer the template onto a full-size sheet of paper or tracing paper.
- Now you need to transfer the template to the surface of the plywood; this will require some care, patience and accuracy.
- When all the lines and dimensions of the rear shelf of the VAZ 2114 are transferred to the material, it’s time to pick up a jigsaw and cut the material according to the outlines marked on it.
- To give smooth, neat outlines, use sandpaper or a sanding machine to grind down the uneven corners of the material.
- We cover the surface of the plywood with stain or any other coating that protects the wood from adverse factors. Allow the product to dry in a place protected from moisture or rain.
- Now is the time to reupholster the product with carpet. To do this, prepare pieces of material of the required size, apply them to the surface of the wood, apply tension and secure the fabric to the plywood using a metal staple and a stapler. Carry out similar measures in relation to the holes for installing speakers.
- The seventh step involves installing fasteners and hinges (in cases where you are using a folding structure).
- The final stage is installation of the finished product directly into the car interior. An important task is to attach the new shelf to the factory ones; to do this, take the self-tapping screws and screw them into the standard sidewalls with a screwdriver. In addition, the final fastenings and connections are installed. Audio equipment is installed and connected, operation is tested.
Upon completion of all activities, it is recommended to test the endurance of the product under various road conditions. Drive your car at different speeds over potholes and potholes and listen carefully to how the new shelf behaves (are there any creaks or vibrations).
As you can see, making the rear shelf of a VAZ 2114 with your own hands is quite a feasible undertaking.
How to remove the rear parcel shelf of a Priora sedan
When studying the nuances of the removal process, all work should take no more than 20 minutes.
To remove it you will need a regular Phillips screwdriver.
- First of all, we need to disconnect the wires from the speakers located on the shelf. To do this, disconnect the connector from the brake light.
- Next, we move into the car interior and remove the elements of the rear seat. This must be done in order to ensure maximum convenience and ease of work.
- Now you need to release the armrest. As a result, two mounting screws for the trunk hatch will become available, which you will have to unscrew using a regular Phillips screwdriver.
- We find 4 special locking latches, which are located along the entire perimeter of the metal structure. To unfasten the shelf, you need to press on its protruding base, which is located inside the latch, and at the same time pull it upward. Similar manipulations are performed in relation to all four latches.
- Now that the element is not firmly fixed, you need to slightly lift the front part of the shelf and pull it towards you with a little force. This is required so that three special seals pop out from under the glass.
- This completes the dismantling.
Reinstallation is similar to the above removal process.
Priora 2 (2016) rear parcel shelf is rattling, what do you recommend, can I have a photo?
The original one on Priora costs 7-7
by Adminrive · Published 04/05/2013
Be careful on the roads
by Adminrive · Published 10/08/2015