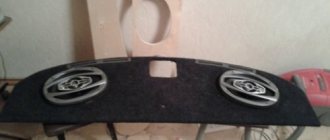
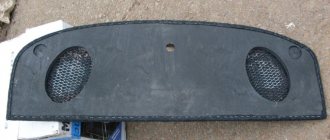
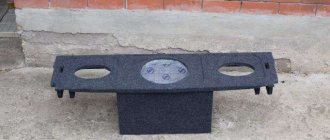
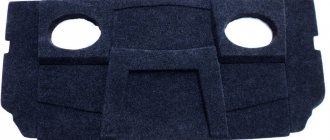
Rear shelf of Lada Granta: features, DIY assembly
The standard rear shelf of the Lada Granta does not have any equipment. What should music lovers do? Of course, improve it a little for the acoustic system. The convenience of such work is that it does not take much time and effort, and the process is quite easy, so anyone can handle it.
Correct assembly with your own hands
The acoustic rear shelf for the Lada Granta can be purchased ready-made. This will make it possible to choose any color in accordance with the desires of the motorist and the existing interior. But you can do it yourself. Automotive experts note that the best option for such purposes would be a wooden shelf.
The trunk space itself will serve as an acoustic box. In this option, it is better to mount music speakers on top. Additionally, decorative grilles will be installed on them. In this case, the brake light will begin to be removed from the shelf. A homemade shelf for the Lada Granta will be created from the following materials:
- carpet; To maintain exact dimensions, measure the dimensions of the factory shelf
- sheet of plywood;
- glue;
- fabrics;
- screws;
- drills;
- saws.
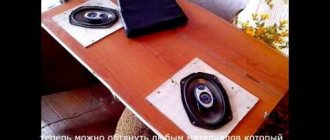
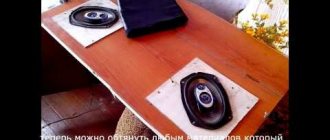
The work begins with the manufacture of the ceiling product. First, a life-size sketch is created on hard cardboard. Once it is compared in size to the interior of the car, it can be transferred to plywood. The sides located near the window are made obliquely, and the ends are well ground.
In order to create a sketch that is correct in size, the rear of the car, or more precisely, the factory shelf of the Lada Grant itself, is measured in length and width. Next, based on the numbers obtained, they make a sketch on cardboard.
After the calculations are completed and the drawing is transferred to plywood, you should work on the holes for the speakers. The circles are cut out exactly to the diameter of the inserted beepers. The radio itself can be disguised using fabric.
You should also think about the pocket in advance. It can be used to store various items. For this design, it is necessary to cut out an vent in the ceiling panel.
All segments are connected and given a day for them to stick together and dry.
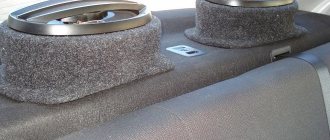
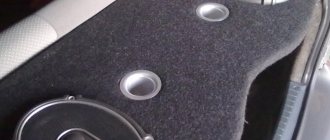
When the shelf is dry, it is covered with carpet or another fabric of your choice. The mounting location for the trim should be as close as possible to the latches on the back seat of the Lada Granta.
High-quality sound insulation
Soundproofing the rear parcel shelf, and indeed the entire car, is a very important step. It will provide a more comfortable stay inside the cabin, and street noise (while driving) will not interfere with enjoying music.
Sound insulation of the shelf is carried out in two layers
First you need to remove the factory shelf on the Lada Granta. To do this, remove the rear seats, after which the seat belt fastenings are dismantled so that they can also be removed. Next, the attachments for the child car seat are removed. To remove the panel itself, you need to snap off the plastic clips.
Sound insulation is performed using two materials. For the first layer, take those that can absorb vibrations well, for example, it can be vizomat, vibroplast, ECO, BiMast, etc. For the second case, use those materials that have good soundproofing properties: accent, bitoplast or isotone.
For the first layer, the material is cut into pieces of the required sizes, after which they should be heated with a hairdryer and only then laid on the surface of the shelf. Using a hard roller, the material is rolled out. The surface area can be covered entirely or partially, but not less than 2/3 of the entire shelf.
For the second layer, the material is glued. But in this case the plates must cover the entire shelf
At this stage, it is important to select the thickness of the material, otherwise problems with attaching the shelf may arise if it is too thick
With high-quality sound insulation, noise from the rear arches and the trunk itself will no longer bother the driver. In addition, the acoustics themselves will be better.
Correct installation of the shelf
The second stage of work will be preparing the space for the new acoustic shelf. First, you should soundproof the interior of the Lada Grant. So that there are no rattles and no noise is heard when moving. The layer of insulating material must be very thin. Otherwise, the new design will not fit into its place.
After isolation, the element with speakers is installed
It is important to take into account the rules for connecting to the audio system, since the rear shelf on the Lada Granta is connected to the front panel. Wires are laid along the thresholds
To prevent damage, the wires are hidden in special tubes. After this, the wiring is connected to the radio wires.
Nuances and advantages of the new shelf
A useful activity for beginners who dare to independently install such a device as an acoustic shelf would be to watch videos of other owners on this topic. This allows us to avoid banal mistakes made during the dismantling procedure or installation of a shelf in the LADA Granta model. Also, familiarization with other people’s experience allows you to find the optimal solution to complete the process in full.
It should be remembered that installing new loudspeakers in the “native” shelf of the Lada Grant is impractical. The new acoustic shelves, which have appropriate quality indicators, have high strength, which eliminates unpleasant rattling when driving.
The factory product is not designed to withstand the weight of acoustic heads and their vibration impact during operation. Therefore, by cutting holes in the shelf for mounting speakers, you can end up with a deflection and, as a result, unsuitability for further protection from the noise factor.
We recommend that you carefully study these aspects, which will allow you to be on the safe side when purchasing an acoustic shelf. Now the buyer can independently decide on the right choice of shelf, which, after installation and connection of the acoustic system, will delight him with excellent sound and the absence of extraneous noise.
Standard car acoustics quite often do not allow you to get truly surround sound. Meanwhile, good sound in a car is the key to a good mood for the driver and passengers.
The solution to the problem will be a new Grant acoustic shelf installed behind the rear seats. Installation of the system is very simple and can be completed in just 1 hour.
Installation features
It is not recommended to install speakers in the standard shelves of the Lada Granta interior. Because, regardless of manufacturer and quality, factory standard shelves are not designed to hold a ton of speakers. Once the holes are cut and the acoustic elements are installed, the shelf will quickly sag and the entire sound system will deteriorate.
Shelf Lada Granta
The acoustic shelf of the Lada Granta liftback differs from the shelf for a sedan in shape. This is worth considering when purchasing a unit. Also, you need to carefully study the tips and instructions written in the documentation for the elements. Even better, before installation, watch a video from specialists in replacing shelves in Lada Granta.
Self-installation of an acoustic shelf on Granta: how to install it correctly?
The new acoustic shelf on the Grant is installed in place of the standard one, behind the rear seats. This allows you to increase the volume of sound and thereby improve the performance of the media system. Therefore, you must first remove the factory shelf. Dismantling is quite simple and is carried out according to the following scheme:
1. The rear row of seats is removed.
2. The fastenings for the seat belts are unscrewed.
3. The plastic pistons are wrung out.
Next, you should prepare for the installation of the new element. In order for the acoustic shelf on the Lada Grant to give a really good sound, and at the same time not to hear road noise, you will need to carry out sound insulation.
You need to attach vibration-absorbing material under the shelf, and then stick on a noise-absorbing insulator. It must be remembered that the thickness of both layers should be minimal. Otherwise, the new shelf may simply not be in its rightful place.
After preparation, the shelf with speakers is installed. It is also necessary to take into account the peculiarities of connecting to a general audio system, since the rear acoustic shelf on the Grant is connected to the front panel. It is recommended to lay the wires along the thresholds and, if possible, hide them to prevent damage. After being enclosed in corrugated tubes, the wires are fed and connected to the radio.
Removing the old shelf
Installation of the acoustic shelf is carried out behind the seats, in the place provided for this. The correct placement of the shelf in both the sedan and the liftback interior enhances the sound. Therefore, installation must be done responsibly. Initially, the factory acoustic shelf of the Lada Granta sedan is removed as well as the liftback.
Acoustic shelf
This is done this way:
- All rear seats are pulled out.
- The seat belt fastenings are unscrewed.
- Plastic pistons are wrung out.
- The factory shelf is removed.
Speaker shelf
General information about music in Grant
In this section, we will consider general non-professional points about music in the Lada Granta.
Installing music
If you have a VAZ 2190 in the basic configuration (or Norma) with audio preparation, then installing music will entail the following steps:
- Removing the radio cover - on the back side there are ISO connectors for power and speaker wires. You will have to run the wires to the rear speakers yourself if you plan to install an acoustic shelf, since from the factory the wires are routed only to the doors;
- Installation of a 1-DIN radio (for 2-DIN you will have to farm, cutting out a jumper in the panel and looking for a suitable frame);
- Finding and connecting the plug of the pre-installed antenna - often the antenna wire on the roof is lost under the ceiling trim and it turns out to be easier to install the antenna separately than to find the factory cable;
- Pulling wires into the trunk to connect an amplifier, subwoofer and speakers installed in an acoustic shelf.
- To install the amplifier, you will also need a separate power cable from the engine compartment directly from the battery terminal through a fuse.
Removing the jumper in the panel cladding is mandatory when installing a 2-DIN GU.
If your car does not have audio preparation, you will have to separate the power wires for the radio and the speaker wires in the door.
What kind of acoustics to put in Granta
Common budget music option:
- radio tape recorder within 5000 rubles with the ability to adjust the equalizer;
- 16 cm component speakers with tweeters at the front;
- acoustic shelf with speakers 6*9;
- amplifier with subwoofer in trunk.
Let's look at an example of such a configuration with a price tag in the table (the calculation is for ordinary people, not audiophiles) based on Pioneer devices:
| Example of a Pioneer device | Average price tag in rubles | |
| Head unit (radio) | DEH-S101UB | 4000 |
| Front 16cm acoustics | TS-G1733i | 2000 |
| Acoustic shelf | 1500 | |
| 6*9 “pancakes” | TS-R6951S | 2200 |
| Amplifier 2-channel | GM-A3702 | 4300 |
| Passive subwoofer in a box | TS-WX305B | 5200 |
| Subwoofer installation kit | 1500 |
As a result, we get budget sound in the region of 20 thousand. If we consider professional head units, premium-segment speakers, installation of custom podiums and other delights, the price tag can easily jump over a hundred thousand, amounting to a third of the cost of the car itself.
The choice of podium depends on the type of windows, budget and number of speakers.
Podiums in the front doors
We will not describe the technology for making podiums with our own hands. Next is a selection from various resources for ready-made podiums and manuals for self-production.
- Here is a link to a store with ready-made options and prices. It's not advertising that's a source of inspiration.
- Here is a photo report on self-production with comments.
- This link is just a photo report without comments.
Professional acoustics
For car audio fans who are ready to invest large amounts of money in Granta, we have selected a couple of bright videos. Look what you can build on the Lada base and look decent in the area and at local car audio competitions. Enjoy.
Acoustics for the front doors of Lada Granta
Installing speakers in Granta doors allows you to be independent of the body type - speakers in the doors do not require an acoustic shelf. This means that you can install speakers in a sedan and a hatchback according to the same principle.
Preparatory work
Before we begin the installation itself, let's figure out how to prepare the car. For this:
- We disassemble the door: dismantle the handle (pry up and remove the trim, unscrew 2 screws), the tip of the limit switch, two screws from the bottom of the door, overcoming the resistance of the retaining pins, pull the door card toward you and remove it from the door;
- We soundproof the door: in the warm season or in a heated garage, we cover all accessible parts of the door with vibroplast. Vibroplast StP M2 is suitable; when applying it to the door, be sure to heat it with a construction hairdryer and roll it with a pressure roller;
- If you have Spleen thermal insulation material, we cover the inside of the door card with it. This will further hide noise from the door when assembled;
- We are preparing spacers, if any are required for installing 16 cm speakers - more about them later in the text;
- We replace the factory terminals on the speaker wire in the door with normal ones (usually good terminals are included with the speakers) - to do this, we simply cut off the unnecessary connectors and attach the terminals we need to the wiring. A high-quality twist with heat shrink is sufficient;
- If the door panels do not have holes for speakers, we prepare them. It would be optimal to supply factory acoustic grids, which are installed on luxury versions of Granta and Datsun OnDo.
Installing speakers in Granta front doors
The standard acoustics in Grant are 13 cm speakers. They do not produce good sound, but they are easily installed in the factory holes for the speakers without unnecessary manipulation. The procedure for dealing with them is simple:
- connect the speaker cables, observing the polarity;
- fix with screws in regular places in the metal of the door or directly on the door card;
- install grids (in common parlance - grills).
An important disadvantage is that the center of the mounting hole and the place under the grill do not coincide. This means that when installed with complete grills, they will look asymmetrical and clumsy.
Standard acoustics most often do not produce a rich sound and, when installed with their own grids, look poor.How to install 16cm speakers with spacers
In pursuit of sound, it is logical to install 16 cm speakers. This is where all the disadvantages of the AvtoVAZ design appear - the speakers either are not centered, or do not allow the window to roll down, or interfere with the glove compartment lid.
Why are spacers needed? In order not to cut the door, if you do not put the acoustics in the spacer rings, you will have to attach it to the metal of the door. This may result in the need to cut the door itself in order for the speaker to fit in, and is dangerous for the glass.
For this reason, speaker rings made of plywood are attached to the metal of the door, and the speaker itself is attached to them.
The procedure is as follows:
- we make or buy spacers for speakers - thickness 10 mm, material plywood;
- cut a hole for the speaker in the card and mark the installation location along it;
- put the spacer on 4 self-tapping screws;
- We install a column in it - observe the polarity!;
- install the map + install the standard mesh so that it doesn’t interfere with the glove compartment.
If the spacer bursts during installation, this may result in a rattling noise coming from the door while driving.
What speakers are better to put in the front doors instead of standard speakers?
We recommend the Pioneer TS-G1733I model. At a price of about 2 thousand rubles, they are freely installed through spacers in Granta doors without cutting metal and do not interfere with the glass. Easy installation will save you nerves and time.
The speakers are easily pumped with a radio without an amplifier and produce medium bass. Not component acoustics!
Installing speakers in the rear shelf of Lada Granta liftback
The installation process is somewhat complicated by the need to pre-prepare the shelf, cut holes, and install podiums.
- Open the back door of the Lada Granta Liftback, remove the shelf;
- We apply the speakers one by one, projecting their oval silhouette onto the shelf from the back side;
- We cut out holes with a jigsaw and clean them around the perimeter with sandpaper;
- We buy in advance and cut out the podiums for the speakers ourselves. We apply and assemble the structure.
The most crucial moment comes - laying the cable. Some masters practice feeding from side doors, which is fundamentally wrong. As the load on the circuit increases, the speakers will begin to sag. It is best to connect to the ISO connector on the back of the tape recorder.
- We dismantle the plastic linings - thresholds between the front and rear rows of seats.
- We lay the wires from the rear speakers and bring them out to the inside of the dashboard.
- We route the ISO connector and connect it to the free sockets.
- We reassemble the pads.
Provided you follow the recommendations and follow the algorithm, the performance of the speakers is guaranteed. During the warranty period, the buyer has the right to present to the seller any demands provided for by law.
Shelf material
The standard design is made of impact-resistant polymer material.
A tuned version of a shelf made of wooden inserts - supports, covered with felt fabric, which also serves as a noise absorber.
At the customer's request, the shelf for acoustic speakers can be made of special wood. This is practiced if you want to achieve an “ideal” sound. Obviously, the cost is several times more expensive than analogues.
So, if the owner has firmly decided to upgrade on his own, then we prepare the following:
- set of automotive tools;
- new shelf, insert;
- speakers (optional);
- blocks with electrical wires for connecting to the central power circuit;
- other components at the discretion of the owner.
The shelf on the Granta sedan is located behind the rear row of seats. By default, the design does not have holes for speakers. This is precisely the stumbling block for many owners.
Acoustic shelf Lada Granta: installation and manufacturing
Often, a factory-assembled acoustic shelf is installed on the Lada Granta. This product is designed to reduce the noise level in the trunk of a car, it significantly improves the sound from the speakers. The rear acoustic shelf is easy to install with your own hands. If desired, it can be purchased in any color.
Making a shelf with your own hands
Ready-made panel for high-quality music
Auto mechanics recommend installing a wooden shelf for acoustics in the Lada Grant. This product significantly improves sound quality by using the trunk volume as an acoustic closed box. In this case, the speakers are installed on top, and a decorative grille is mounted on them. The brake light can be removed from the car's standard shelf.
Many Lada Granta car owners make their own acoustic shelf. For this you will need:
- carpet;
- plywood;
- glue;
- textile;
- screws;
- drill;
- saw.
First of all, the ceiling of the product is made. First, the Lada shelf is outlined on cardboard, then the diagram is transferred to plywood. The side that will be located near the window is cut out obliquely, its ends are ground down.
To ensure that the resulting product matches the dimensions of the rear of the car, calculations are initially carried out. To do this, you will need to measure the standard shelf. A sketch of a homemade design is made taking into account the data obtained.
The next step is cutting out the holes for the speakers. The radio can be covered with fabric. Often they make a pocket in which various things will be stored. To do this, you will need to cut an vent in the ceiling of the shelf. Then the remaining parts are glued together. Drying such a shelf lasts no more than 24 hours. Now the product is ready for finishing work. The shelf is covered with carpet or other fabric. It is necessary to take into account that the fastenings must be located near the Granta rear seat latch.
Sound insulation installation
Sound insulation of car interior
An important point in the manufacture of an acoustic shelf is its sound insulation. The standard product does not provide sound insulation.
First, it is recommended to lay some kind of vibration-absorbing material, for example, vibroplasts, ECO, and visa mats. The sheet will need to be cut into pieces of the desired size. Using a hairdryer, the material is heated and rolled out onto the shelf. A hard roller is used for this. The absorbent material needs to cover 60-100% of the shelf area.
The second layer is sound-absorbing material. It could be “Isotone”, “Accent”. This material covers the entire shelf area. Please note that the sound insulation layers should not be thick, otherwise installing the shelf will not be possible. The entire complex of these works is aimed at reducing noise from the trunk and rear arches and improving acoustics (if the speakers are in the rear parcel shelf).
Audio system installation
When buying a Lada Granta, a car enthusiast cannot always determine whether the vehicle is prepared for the subsequent installation of an audio system. Typically, such a system includes simple speakers with average sound quality. However, this option rarely satisfies drivers.
Lada Granta is quite well prepared for the installation of modern audio systems. This preparation includes having the necessary wiring to connect the car radio and speakers. To carry out this work, you will need a screwdriver, bits, edges, a knife and insulating tape.
Before installing the acoustics, you need to turn off the power to the vehicle. To do this, remove the minus terminal from the power supply. Please note that the antenna is often installed in the upper right corner of the windshield. A place for it is cleared in advance.
The electrical wiring must be routed under the dashboard to the glove compartment. There is a small plastic trim on the right side of the glass that will need to be turned off. The modern antenna is equipped with an excellent self-adhesive panel that can be easily and quickly mounted to the windshield. In order for the antenna surface to bond well with the glass, you will need to degrease it. A special tool is used for this. A similar technique is used when installing speaker systems on various brands of cars.
The next step involves installing the main instrument holder. Before installation, the serviceability of the radio is checked. To do this, you need to turn it on and listen to the radio station.
To ensure the speakers are installed correctly, first remove the door trim. To do this, glue a special ESP connector located on the back side. The manufacturer took care of the presence of an opening with a diameter of 30 cm for the speaker. Speakers are installed in these places. The final stage is to turn on the minus terminal and tighten the screws.
expertvaz.ru
Do-it-yourself manufacturing and installation
Shelf acoustic fret grant
For installation you will need simple standard materials:
Like any creative action with a car, installing an acoustic shelf is a job that requires increased precision and extreme care. Before starting the process, we carefully take measurements and measurements. We transfer the future view of the workpiece onto a sheet of cardboard with a marker or pencil.
Note. The higher the accuracy of the measurements on the paper version, the better and better the board will fit after the work is completed. This means we will get the long-awaited high-quality sound in the car interior.
Acoustic shelf Lada Granta
Let's get started:
Note. If necessary, we make overlays, grind them and secure them with self-tapping screws. There is no need to screw it tightly yet; this will need to be done at the very end, when the shelf is already firmly installed. If there are joints, we treat them with putty or construction putty and allow time to dry.
Note. You immediately need to decide whether the speakers will be directly on the workpiece, or whether an additional pedestal will be made for them. In this case, it is recommended to leave a large space under the speakers in the shelf itself. Firstly, to easily route a thick wiring harness, as well as to divert most of the resonating sounds into the trunk.
Advice. On the workpiece between the columns there is often a small pocket for the necessary automotive items, which can be open or closed with a door like a kitchen bread bin.
Advice. If you wish, you can deviate from the engineers’ idea and drill new channels in the metal of the car, but still the most acceptable option is to use standard grooves.
Noise insulation
Acoustic shelf noise
Noise insulation is a mandatory element to achieve the best acoustic sound, maximum noise insulation of the trunk, and minimizing the noise of the rear arches. There are two layers of “Shumka”. The first is damping (vibration-absorbing) material:
The next layer is a sound absorber:
In the most extreme case, if there is an acute shortage of funds, you can lay a thick layer of batting under the shelf, which can also soften vibrations. But this material is flammable, and its use by specialists is not recommended.
Padding
We wrap the resulting result with pre-prepared fabric. With an unlimited budget, the choice of a true music lover is karpet (Armenian word, emphasis on the second syllable). Comfortable, soft fabric, stretches well, easy to cut. For an alternative upholstery option, you can choose less popular, but more economical, fleece or Alcantara. It is necessary to fasten the fabric using aerosol glue, but if it is unavailable or to save time, an ordinary furniture stapler can come to the rescue:
How to install an audio system on a Lada: features
The standard equipment of the Lada Granta consists of elementary speakers with average sound quality. Accordingly, there is a desire to install something more serious in your car. In fact, this car brand has good preparation for a really high-quality audio system. The car has the necessary wiring for the car radio and beepers.
Before making the connection, disconnect the power from the vehicle.
In order to do the installation yourself, you should have:
So, the work is carried out in several stages. Since the audio system is connected to wires, you should first turn off the power to the car. Otherwise, there is a risk of getting burned and receiving a strong electric shock. De-energizing occurs by removing the terminals with the “-” sign from the power supply. You should not forget about the antenna, which is most often installed in the right corner at the top of the windshield. Therefore, you should make room for it in advance.
Correctly the electrical wiring is laid under the car's dashboard and all the way to the glove compartment. You should also remove the plastic trim located on the glass on the right side. It is recommended to use modern antennas, as they have a self-adhesive base, which means the installation process will be much easier. But it should be remembered that any glue does not like dirty surfaces. Therefore, the future location of the antenna must be thoroughly cleaned and degreased.
Next comes the installation of the main device holder. First you need to check whether the car radio is working well, for which it turns on and tunes to any radio wave.
Then comes the installation of the speakers. They can be installed on car doors, since the main speakers will be located at the back. For this there are holes with a diameter of 30 cm.
source
Preparatory work
So, if the owner has firmly decided to upgrade on his own, then we prepare the following:
- set of automotive tools;
- new shelf, insert;
- speakers (optional);
- blocks with electrical wires for connecting to the central power circuit;
- other components at the discretion of the owner.
The shelf on the Granta sedan is located behind the rear row of seats. By default, the design does not have holes for speakers. This is precisely the stumbling block for many owners.
Installation of speakers in the rear doors of Lada Granta, Kalina 2
The rear doors of the Lada Granta and Lada Kalina 2 are identical and have space for acoustics. But in order to install speakers in them, the design will have to be modified. Let's consider the standard option for installing speakers in the rear doors of modern Lada cars.
- Remove door trim
- Buy speakers measuring 13 cm (you can also install 5x7 “pancakes” if desired)
- Buy spacers for the speakers (or make them yourself from 10 mm plywood using a template)
- Buy a decorative plastic mesh (or cut it yourself from a universal piece of aluminum mesh)
It is recommended that all modifications be made according to the standard scheme offered by the manufacturer, so we will use spacers for the speakers and decorative mesh for the door trim from the “Lux” package.
The first thing to do is to fit the speakers to the spacer. If their depth turns out to be too great, you will have to slightly modify the plastic spacer in place (for example, cut off the bottom). Next, secure the spacer to the door using screws and nuts. One mount may not match. Then install the speaker onto the spacer using screws
It is worth paying special attention to fixing the spacer and speaker; they should be firmly fixed (this will improve sound quality and prevent rattling). Use vibration material for this
The second stage is finalizing the door trim. Holes should be cut in it to attach the mesh. The plastic is thick, so during work you will need a sharp knife, file and drill. At the end of the work, the mesh is fixed in the casing using clamps. It remains to reassemble in reverse order.
The entire process of installing speakers in the rear doors is also shown in the video:
Depending on the vehicle's configuration, audio preparation may vary. In some cases, you will need to install additional wires for the speakers in the rear doors. If you are going to connect a radio along with the speakers, use these instructions. Let us remind you that to improve the sound of the acoustics, it is recommended to soundproof the doors.
Some points of sound insulation
You can increase the level of noise and vibration insulation in various ways. If we are talking about a standard design, then they practice pasting with felt fabric on the outside / underneath.
When it comes to a liftback shelf, it is already soundproofed from the start; there is no need for additional noise reduction.
We’ll look at how to remove the Grant liftback trunk shelf below.
When installing custom shelves, they are soundproofed by default during the manufacturing process.
Installing speakers in Granta rear doors
The procedure for working with the rear doors is identical to the front ones.
An important difference: homemade spacers are not required here. The plant produces a set of special mounts for installing 13 cm speakers in the rear doors
Articles for ordering online:
| Speaker Mount - Rear Left | 21907901033 |
| Speaker Mount - Rear Right | 21907901032 |
| Rear left column trim | 21906202095 |
| Rear right column trim | 21906202094 |
| Trim for front left door | 21906102097 |
| Trim for front right door | 21906102096 |
Installation sequence:
- Disassemble the door;
- Cut a hole in the door card for the lining;
- Install the speaker mount on the door;
- Replace the standard audio terminals with normal ones;
- Connect the wires to the column, secure it;
- Install the trim and assemble the door.
Sound insulation installation
Sound insulation of car interior
An important point in the manufacture of an acoustic shelf is its sound insulation. The standard product does not provide sound insulation.
First, it is recommended to lay some kind of vibration-absorbing material, for example, vibroplasts, ECO, and visa mats. The sheet will need to be cut into pieces of the desired size. Using a hairdryer, the material is heated and rolled out onto the shelf. A hard roller is used for this. The absorbent material needs to cover 60-100% of the shelf area.
The second layer is sound-absorbing material. It could be “Isotone”, “Accent”. This material covers the entire shelf area. Please note that the sound insulation layers should not be thick, otherwise installing the shelf will not be possible. The entire complex of these works is aimed at reducing noise from the trunk and rear arches and improving acoustics (if the speakers are in the rear parcel shelf).
Installing acoustics in Lada Granta yourself
It's no secret that acoustics in a car are very necessary and perform various functions. Installing it is a bit of a concern for novice motorists: they find it difficult to choose the right speakers, they do not have enough money for high-quality installation, etc. This article was written solely to help everyone in this matter and we will find out how to install acoustics in a Lada Granta with our own hands. The Lada Granta and the acoustics, installed correctly in its interior, taken together, will create a completely different car, which even the owners of some foreign cars will look at with envy.
As a rule, installing acoustics in a car has three main stages of development:
- Car radio installation.
- Installation of front speakers.
- Installation of rear speakers.
VAZ cars: repair, maintenance, tuning
Installing acoustics in a car is a delicate job that requires knowledge and certain experience. However, without setting the task of installing Hi-End class sound, you can easily handle it yourself. Especially if you need to install speakers in the rear doors of a Lada Granta or Kalina, a budget car, budget speakers, budget sound. Installing speakers in the rear doors of Grants, as well as what is needed for this, which speakers are best not to install, we’ll figure it all out right now.
General information about music in Grant
In this section, we will consider general non-professional points about music in the Lada Granta.
Installing music
If you have a VAZ 2190 in the basic configuration (or Norma) with audio preparation, then installing music will entail the following steps:
- Removing the radio cover - on the back side there are ISO connectors for power and speaker wires. You will have to run the wires to the rear speakers yourself if you plan to install an acoustic shelf, since from the factory the wires are routed only to the doors;
- Installation of a 1-DIN radio (for 2-DIN you will have to farm, cutting out a jumper in the panel and looking for a suitable frame);
- Finding and connecting the plug of the pre-installed antenna - often the antenna wire on the roof is lost under the ceiling trim and it turns out to be easier to install the antenna separately than to find the factory cable;
- Pulling wires into the trunk to connect an amplifier, subwoofer and speakers installed in an acoustic shelf.
- To install the amplifier, you will also need a separate power cable from the engine compartment directly from the battery terminal through a fuse.
Removing the jumper in the panel trim is mandatory when installing a 2-DIN GU. Installing an acoustic shelf entails dismantling it behind the back of the rear seat. The non-standard shelf will cover the ISOFIX mounts!
If your car does not have audio preparation, you will have to separate the power wires for the radio and the speaker wires in the door.
What kind of acoustics to put in Granta
Common budget music option:
- radio tape recorder within 5000 rubles with the ability to adjust the equalizer;
- 16 cm component speakers with tweeters at the front;
- acoustic shelf with speakers 6*9;
- amplifier with subwoofer in trunk.
Let's look at an example of such a configuration with a price tag in the table (the calculation is for ordinary people, not audiophiles) based on Pioneer devices:
| Example of a Pioneer device | Average price tag in rubles | |
| Head unit (radio) | DEH-S101UB | 4000 |
| Front 16cm acoustics | TS-G1733i | 2000 |
| Acoustic shelf | 1500 | |
| 6*9 “pancakes” | TS-R6951S | 2200 |
| Amplifier 2-channel | GM-A3702 | 4300 |
| Passive subwoofer in a box | TS-WX305B | 5200 |
| Subwoofer installation kit | 1500 |
As a result, we get budget sound in the region of 20 thousand. If we consider professional head units, premium-segment speakers, installation of custom podiums and other delights, the price tag can easily jump over a hundred thousand, amounting to a third of the cost of the car itself.
The choice of podium depends on the type of windows, budget and number of speakers.
Podiums in the front doors
We will not describe the technology for making podiums with our own hands. Next is a selection from various resources for ready-made podiums and manuals for self-production.
Please note that most of the podiums in the front right doors interfere with the opening of the glove compartment.
- Here is a link to a store with ready-made options and prices. It's not advertising that's a source of inspiration.
- Here is a photo report on self-production with comments.
- This link is just a photo report without comments.
Professional acoustics
For car audio fans who are ready to invest large amounts of money in Granta, we have selected a couple of bright videos. Look what you can build on the Lada base and look decent in the area and at local car audio competitions. Enjoy.
