The water pump is the main component of the car's cooling system. The speed of coolant circulation in the ducts of the cylinder block depends on its proper operation. This ensures heat removal and maintains engine operating temperature. In the early stages, diagnosing and troubleshooting a water pump is not very difficult. Ignoring signs of pump malfunction can lead to severe overheating of the engine and deformation of the cylinder head. In this case, an expensive engine overhaul will be required.
Basic cooling system malfunctions
The main indicator of the performance of the cooling system is the engine temperature sensor. It is located on the dashboard inside the car.
The engine temperature sensor on the dashboard of the VAZ 2108/09 is located to the right of the fuel sensor
If the engine overheats, the gauge needle is in the red zone. There may be several reasons.
- Insufficient coolant level or leakage in the system.
- Thermostat failure.
- Problems with the water pump.
- Temperature sensor malfunction.
First of all, you should lift the hood and inspect the cooling system. The very fact of a coolant leak is easily determined by the liquid level in the expansion tank. It is much more difficult to find the exact location of the leak. This often requires a thorough inspection of all areas of the engine compartment.
The most unpleasant option is a breakdown of the gasket under the valve head and coolant entering the oil sump. A symptom of this development of events is a change in the color of the oil. It turns dull white with rainbow streaks caused by ethylene glycol.
Sometimes the cooling system hoses leading to the interior heater are damaged. This usually happens after severe frosts or prolonged inactivity of the machine. In this case, the coolant leak should be looked for under the “dashboard”, lifting the floor mats and removing the interior trim. The leaking liquid accumulates under the floor mats or is absorbed by the interior insulation.
Overheating of the engine often occurs due to the fact that the radiator honeycombs become clogged. Dirt, dust and fine sand, falling on the front plane of the radiator while driving, form a dense crust, which prevents engine cooling. In this case, it is enough to clean the radiator with a jet of water under pressure. It is not recommended to use a wire brush.
A clogged radiator honeycomb leads to engine overheating.
A thermostat failure, as a rule, does not lead to engine overheating. The valve that falls on it opens a large circle of coolant circulation, thereby reducing the temperature of the liquid.
How to Check the Fuel Pump of a VAZ 2109 Injector
Fuel pump VAZ 2109: injector, how it works
You will need to consider the features of fuel pump. The injector, if in the fuel injection system, the pump is electric. Its use is due to the fact that it becomes necessary to control the flow of fuel into the combustion chambers. But, as you know, gasoline is first supplied in a special ramp, in which it is mixed with air in a certain proportion (14 to 1). It maintains a constant pressure at which the mixture is supplied to the combustion chamber through holes in the electromagnetic injectors. These are devices that transform the air-fuel mixture into very small droplets. In fact, the mist is ignited in the combustion chamber in which the gasoline is suspended.
How does a fuel pump work?
There is nothing complicated about the fuel supply system. A conventional rotary pump is an electric motor. The filter is used to protect the entire fuel system from small particles. But that's not all, as it's worth noting that you need to maintain the pressure level in the rail. And the VAZ 2109 gasoline pump (the injector simply cannot work without it), provided that it constantly pumps gas, increasing the pressure higher and higher. And because of this, the operation of the system is disrupted.
Therefore the pressure must be adjusted. For this, a special device called a pressure regulator is used. It is installed in the fuel rail, connected to a pipeline that serves to discharge excess gas into the tank. When the ignition is turned on, the rail pressure sensor is polled, and then the fuel pump drive is turned on. After the pressure in the rail increases to the required value, the fuel pump is turned off. So it doesn't work all the time.
Lada Samara VAZ 2109 (injector). The engine will not start. Repair
video quick guide to troubleshooting fuel pump
2110 and the like.
The VAZ 2110 gas pump does not work, I’m looking for the reason (injector)
VAZ diagnostics
This is a public page created for study, discussion and repair.
How to remove the fuel pump
Located under the rear seat of the gas pump VAZ 2109 . The injector assumes its installation directly in the tank. The fact is that the pump is a submersible type. On the same platform there is a fuel level float sensor. This works because float moves the slider on the support variable. In this case, the current in the power circuit changes. The number of changes determines the amount of gasoline remaining in the tank. To remove the pump you will need pliers, screwdrivers and 8 wrenches.
It is possible that the reason that fuel is not supplied is a non-working VAZ 2109 . The injector has it, as well as a fuse, which can easily burn out. Clean the entire cap thoroughly before using it to prevent dust from entering the tank after removal. Then use a screwdriver to unscrew the clamps that secure the hoses. Remove them if it doesn't work with your hands, then gently pinch them with pliers and twist. Next, use an 8-lug wrench to remove all the nuts that secure the cap to the tank body. Note the fact that there are washers. Don't lose them. That's it, the pump can now be safely removed for replacement or repair.
Diagnosing water pump faults
The design of the water pump is quite simple. In most cases, the bearing on which the impeller rotates fails. There are two possible types of failure, varying in severity.
- The bearing has failed. In this case, the motor begins to “squeal” - make a loud, high-pitched sound. The source of the “squealing” is usually located at the front of the engine near the timing belt. As the rpm increases, the sound frequency increases, and as the rpm decreases, it decreases.
- The bearing is stuck. This happens after prolonged use of a pump with a worn bearing. The “squealing” suddenly stops, but the engine temperature rises sharply. The pump stops working, and the coolant continues to move slowly through the channels without pressure. This, of course, is not enough to cool the engine. If such a situation arises, you should drive at low speeds and with frequent stops to the nearest car service center.
If the liquid level in the expansion tank is normal, but the coolant is boiling and steam is coming from the air valve, do not rush to open the cap. Firstly, you can get burned by the steam. Secondly, boiling antifreeze can burst out in a stream. You need to wait a certain time for the coolant to cool down and only then unscrew the expansion tank cap.
There is another way to check the pump's performance. To do this, you need to partially pinch the thick hose going from the engine to the radiator with your hand and start the engine at idle speed. If the hose pulsates under your fingers, the pump is in working condition. If there is no pulsation, the impeller does not rotate and the pump is faulty. To avoid injury, such diagnostics should be carried out very carefully, without touching the rotating fan with your hands. You need to compress the hose by 10–20% - this is enough to feel the pulsation of the coolant. You should also not touch the engine with your hands - you can get burned.
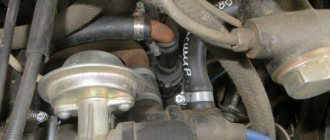
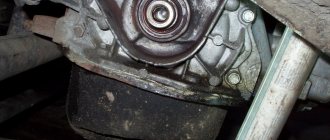
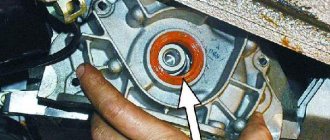
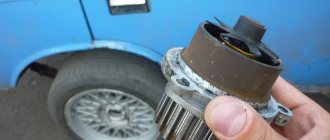
Then, after removing the protective plastic casing above the belt, you need to inspect the pump mounting location. Typically, when a bearing fails, characteristic leaks appear on the axis of rotation. Under the influence of vibration, the oil seal is deformed. It may look dry, but it leaves a dirty brown mark on the body. This indicates that coolant leakage occurs at high speeds. When the engine is not running, the fluid does not flow out, and the leak area dries out.
The location of a coolant leak due to a faulty pump is marked in red.
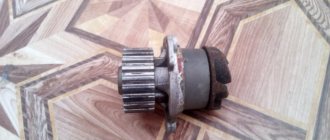
The serviceability of the bearing can be checked by rocking the pump drive pulley by hand. To do this you will have to remove the transmission belt. If the bearing is worn out, then when you rock the gear by hand, a certain amount of play will be noticeable, which should not be there.
Replacement process
The sequence of the process is as follows:
- The VAZ 2109 is placed in the garage and the handbrake is tightened. The gearbox must be in the “Neutral” position. If the car is just back from a trip, you need to let the power plant cool down.
- The working fluid must be drained from the system using drain plugs and a container to collect the fluid. At the same time, you can assess the condition of the system - brown and dirty liquid will indicate that the system is very dirty and needs to be flushed.
Using keys “10”, unscrew the three bolts securing the protective cover of the timing belt. It is located on the left side of the power plant. Afterwards, the cover is removed, but is not removed far, since there are marks on it for setting TDC in the 1st cylinder.
Removing the protective cover
Aligning the marks on the camshaft
Using a key set to “17”, the tension roller nut is first loosened and then completely unscrewed. Then the video is removed. It should also be checked for wear - there should be no play in it, and it should rotate without jamming.
Remove the belt from the camshaft gear and lower it down. Next, use a “17” key to unscrew the bolt securing this gear, and it must be locked using a powerful screwdriver through the technological holes in the gear.
The gear must be removed carefully, since it is locked on the shaft using a key; when removing it, it is important not to lose it.
Then the nut and three bolts securing the back cover are unscrewed, this is done with a “10” key. This cover is then removed, providing access to the pump mounting bolts.
- The pump mounting bolts are also unscrewed. To remove the faulty pump, you will need to pry it off with a screwdriver.
- Simply removing the pump from its seat will not work, since the distance between the engine and the fender liner is not enough. To pull the pump out, you will have to jack up the engine itself a little from the pump side until it becomes possible to remove it.
Removing the pump - Before installing a new one, the pump seat will need to be thoroughly cleaned with a knife to remove any remnants of the old gasket and wiped well.
- The new pump is placed in place so that the markings on the end of the housing are at the top. The pump mounting bolts must be tightened well, but carefully, since they are screwed into a block made of aluminum.
Assembly Features
When installing the drive belt, you must again make sure that all the marks match, otherwise the gas distribution and ignition system will be disrupted. After installing the tension roller back, it is important to properly tension the belt.
If the car does not start after complete assembly or starts poorly, it means that the belt on the camshaft gear is misaligned by one tooth . To eliminate such a malfunction, you will have to remove the belt from the gear again, turn the gear a little so that it moves relative to the belt by one tooth, and then put the belt back.
The operation of replacing the liquid pump is shown more clearly in the video:
What is a pump for?
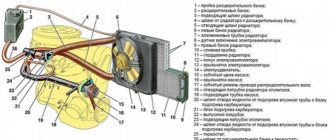
Using a liquid pump, forced circulation of antifreeze is ensured through the circuits of the cooling system. With the help of this simple mechanism, the elements of the piston group and cylinder head are cooled much better. The service life of the liquid pump on a VAZ-2115 car can be almost anything; it depends on many factors. The maximum service life can be just over 100,000 km.
The pump consists of a lightweight aluminum body and flange. In the inner part there is a bearing, which is mounted on the shaft. To prevent antifreeze from leaking out, a seal is installed in the housing. There is an impeller on the inside of the shaft, with its help antifreeze is pumped through the cooling system. On the outside there is a gear drive for the liquid pump.
Rust, deposits
Signs of a malfunction of the VAZ-2110, 2114 or other car models may be different. When examining the pump externally, you can notice rust. Most often, corrosion affects the impeller blades. This leads to a decrease in the rate of pumping antifreeze in the system. The cause of rust may be dirty coolant or a composition that is incompatible with the pump. Mixing antifreeze with different chemical compositions can also lead to a similar malfunction.
Another reason for rust on the pump may be damage to its cover. In this case, it will not be able to close hermetically. Because of this, air bubbles appear in the composition, which causes oxidative processes.
In this case, the pump will need to be replaced. The cooling system will need to be thoroughly flushed and filled with new antifreeze. You need to check the lid for tightness. It may need to be replaced.
You also need to replace the pump if deposits appear on the internal surfaces. Such signs of malfunction of a pump 2114, 2110 or another model can only be assessed by visual inspection of the system. Resinous, mineral or other deposits appear on the internal surfaces of the pump. They clog the pump and prevent the system from working properly.
see also
Which pump should I put on my car?
- 163 21 145k
water pump
Determining pump faults
Malfunctions of the pump are manifested in significant play in its shaft, violation of the tightness of the seal, wear (corrosion or breakage) of the impeller. All of these defects lead to the fact that the car’s water pump does not work properly, which is why the required pressure is not maintained in the engine cooling system, which, in turn, leads to an increase in the temperature of the coolant until it boils. You have to buy a new pump and install it in place of the old one.
Question on the agenda: when to change the pump?
Of course, we are not talking about emergency replacement now. There are different cases: the pump housing could have cracked, or the oil seal had a manufacturing defect, or the timing belt was too tight, causing the bearing to break. Now we will talk about a normal, standard situation. Timely service, high-quality spare parts, not harsh operation. In this case, the VAZ 2109 should be replaced every 90 thousand mileage.
Now pay attention to the fact that the timing belt must be replaced every 60 thousand. But this is provided that the car is less than seven years old. Unfortunately, there are no such young nines; they were discontinued. Therefore, it is recommended to reduce the mileage to 45-50 thousand. Therefore, the pump must be changed through one belt.
Work stages and materials
In general, the entire repair can be divided into the following stages:
- Preparatory part. This can include preparing tools and places for repairs.
- Draining the coolant system.
- Dismantling an old device that has become unusable.
- Purchase and installation of a new coolant pump
To replace the pump on a VAZ-2115 with your own hands, you will need the following tools and materials:
- Socket and open-end wrenches.
- Sockets and ratchet.
- Jack, supports, wheel chocks.
- Cone-shaped pliers.
- Screwdriver.
- Capacity of at least 10 liters.
- Clean rags.
You will also need a sealant. But it must be used carefully, in small quantities.
What to expect from a pump failure?
What can happen if the fluid pump fails? Firstly, with any practically breakdown of the pump, liquid will leak. It will start to drip slowly at first, but as it wears, the pressure will increase. But don’t be sad about this, replacing the VAZ 2109 pump, the price of which is 700-900 rubles, will improve the situation. The kit also includes a gasket and three mounting bolts.
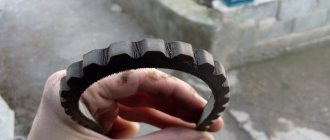
But if a bearing is destroyed, for example, a leak may not appear, but you will be able to observe another phenomenon that will confuse you. The timing belt will begin to wear on the outside. Moreover, a thin edge will remain. This happens because the pump pulley begins to move to the side, and the belt slides behind it. the latter begins to rub against the tension roller, which gradually destroys it.
Installing a new pump
Before proceeding with installation, it is necessary to apply a thin layer of sealant to the gasket. The holes in the block and the flanges match only in one position. It is enough to combine them, and then tighten the bolts. The final tightening of the bolts should be carried out after approximately 20 minutes to allow the sealant to harden slightly.
In this case, you will ensure maximum tightness of the assembled unit. Further assembly is carried out in the reverse order of dismantling. Try to install all the fasteners, nothing should remain. At this point, the replacement of the VAZ-2115 pump is completed, the cooling system will function normally.
Disconnect the cable from the battery terminal and drain the coolant.
| 1. Unscrew the three bolts securing the front camshaft drive cover and remove it. | 2. Install the piston of the first cylinder to the top dead center. To do this, turn the crankshaft by the crankshaft pulley mounting bolt so that the mark on the camshaft pulley is opposite the mark on the rear camshaft drive cover. |
| 3. Loosen the nut securing the tension roller and release the belt tension by turning the roller. | 4. Remove the belt from the camshaft and water pump pulleys. |
| 5. Remove the bolt securing the camshaft pulley. To prevent the camshaft from turning, insert a screwdriver into the hole in the pulley and press it against the nut securing the rear cover. | 6. Remove the camshaft pulley using two screwdrivers. |
| 7. Unscrew the nut and four bolts securing the rear cover. | 8. Move the rear cover aside and remove the water pump by using a screwdriver to hook it onto the toothed pulley. |
| 9. If the pump cannot be removed, push the motor to the side. | Assembly is carried out in reverse order |
Possible damage to the pump
So, what can happen to a liquid pump, why is it necessary to replace the VAZ 2109 pump? If you look at the reviews from drivers, it turns out that cracks appear on the body, but not very often. This is a breakdown that occurs only due to an initial manufacturing defect. To avoid getting caught in it, carefully inspect the pump before purchasing. The fact is that many stores will not accept the part back, even if you did not try to deliver it.
More often the pump bearing is damaged. It is lubricated with antifreeze, so when operating a car with water poured into the system, severe wear of the balls and races begins. Also, the bearing is destroyed if the timing belt is too tight. After all, it sets the pump in motion. Often the seal that prevents antifreeze from leaving the system along the pump rotor becomes unusable. It is extremely rare for the impeller to collapse. This is a mechanism that cannot be damaged.
