Purpose and design of the pump
The water pump is the most important element of the engine cooling system. Its main function is forced circulation of coolant through two circuits - small and large. On an unheated engine, antifreeze circulates in a small circle - from the water jacket of the engine to the radiator of the cabin heater and the carburetor cooling unit (or the throttle valve on the VAZ 21099 injector). When operating temperature is reached, the thermostat opens a large circuit and coolant begins to circulate through the main radiator.
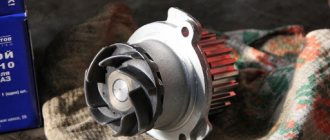
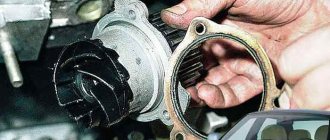
The water pump impeller, driven by the timing belt, forces antifreeze to circulate through the cooling system.
If the pump fails, the movement of coolant through the channels will stop, and the engine will inevitably overheat. Aluminum pistons expanding in volume will damage the cylinder walls and compression will be lost. In this case, a major overhaul of the engine will be required, which is several times more expensive than the cost of a new pump.
Preparation of tools and workplace
To replace the water pump on a classic VAZ model, you will need a flat, illuminated area or a warm garage (in the cold season). Since all work is carried out from under the hood, a surveillance channel is not needed.
You will need the following tools:
- set of socket wrenches and heads;
- flat screwdriver; crowbar;
- Gloves made of material and rags.
- In addition, high temperature sealant and 1 liter of coolant are required for refilling. To seal the coolant, prepare a 10-liter container with a wide neck (a plastic container or cut from the side of a canister) and a stretch meter for a regular hose.
To avoid burns, all work must be done on a cold engine.
To remove the pump on classic VAZ models, you don't need to rotate the crankshaft, align the toe markers, or disassemble the gear drive like you do in the housing on front-wheel drive vehicles. Simply park your car on a level platform and immobilize it with the handbrake.
Pump location
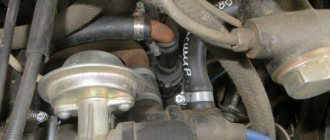
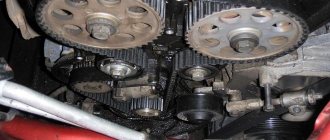
The water pump is installed on the right (in the direction of travel) side of the engine under a plastic cover. There is also a gas distribution mechanism that drives the pump toothed pulley through a belt. This arrangement creates a number of problems.
- To inspect the pump you have to remove the plastic casing.
- Due to a leaky seal and a small leak, antifreeze gets onto the belt, which quickly fails.
- If the bearing is severely worn, the shaft may jam, and the timing belt may jump off or break. In 90% of cases this leads to pistons hitting the valves, and subsequently to expensive repairs.
The cooling system pump is installed on the right side of the engine. For these reasons, it is necessary to periodically (every 10–15 thousand kilometers) inspect the gas distribution mechanism for belt tension and pump functionality.
How to check the cooling system pump?
How to properly replace the clutch cable on the Lada Kalina
By checking the pump without removing it from the engine, we can only indirectly assess its performance. When the volume of pumped coolant decreases, the stove begins to heat poorly. But before removing the water pump to inspect the impeller, we recommend checking the thermostat and also making sure that there is no air lock in the cooling system.
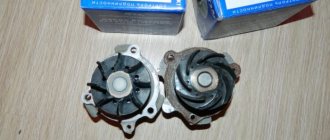
After removal, pay attention not only to the integrity of the blades and where the impeller fits on the drive shaft, but also to the shape of the blades. For example, on the VAZ 2121 over many years of production, impellers were installed that differed in the diameter of the pump wheel, the number and profile of the blades
Installing a less efficient pump on a more heat-loaded engine modification will result in the cooling system fan turning on more frequently and an increased risk of overheating.
Be sure to inspect the engine block where the housing fits and the pump itself. Fogging or a slight leak of coolant from the drain hole does not mean that the pump should be replaced. If a significant leak is detected, try to pinpoint the location of the leak. If the leak is only at the junction of the housing and the engine block, most likely the problem can be eliminated without replacing the pump. It will be enough to apply sealant and install a new gasket.
Risk of timing belt breakage
The danger of a misaligned water pump timing belt is that there are no obvious signs of failure.
First of all, you need to pay attention to the timing belt. If it is pulled to any side, uneven production is observed, it is necessary to check the pump and rollers
The cause of the misalignment may be a manufacturing defect, bearing wear, or uneven fit of the housing to the engine block (dirty, rusty mating planes). Sometimes the malfunction begins to manifest itself after an accident, when elements of the body or attachments hit the pump pulley.
If a misalignment is detected, the defective pump must be replaced as quickly as possible. Also, do not hesitate to eliminate noise and whistling from the water pump. If wear is critical, the bearing may collapse, thereby blocking the toothed pulley. A jammed pump is guaranteed to lead to a broken timing belt. If on your car the pistons meet the valves when they break, then eliminating the consequences of the malfunction will cost a fairly large sum.
Bearing check
The easiest way to check is a pump whose pulley is in an accessible place and is rotated by a drive belt. It is enough to grab the pulley with your hand and shake it in different directions (video check). If there is a malfunction, you will feel a lot of play. To determine that the noise or whistle when the engine is running comes specifically from the cooling system pump, remove the drive belt and unscrew the pulley by hand. A worn bearing with washed out lubricant will rotate with noticeable noise and rolling motions.
Checking the pump, the pulley that is rotated by the timing belt, is somewhat more difficult. Overcoming the tension force of the belt, you can try to shake the gear in different directions. But to fully check and evaluate the smoothness of rotation, the timing belt will still have to be loosened.
The main cause of breakdowns
If the oil seal or rubber seal leaks, the coolant washes the lubricant out of the bearings. The problem will get worse if you use cheap antifreeze or water instead of high-quality antifreeze. The lack of anti-corrosion additives and minimal lubricity will very quickly “kill” the pump bearing.
But it is much more important to use high-quality antifreeze for a long service life of the oil seal. At the point of contact with the drive shaft, the rubber seals must be lubricated, which does not happen when using aggressive antifreeze or water.
Necessary equipment
To carry out the work of replacing the liquid pump on a VAZ-2109, not much equipment will be required. All you need to have is:
- Open-end and ring wrenches for “10” and “17”;
- Heads with collars of the same sizes;
- Powerful flat screwdriver;
- Knife;
- Container for draining working fluid;
- Rags;
- Sealant;
- Jack;
- New liquid pump and gasket;
It is also better to carry out all work in the garage. Having collected the necessary tools and purchased a new pump, you can begin the replacement.
Installing a new pump
Before starting installation, thoroughly clean the surface on the block that comes into contact with the pump. Get rid of any remnants of the old gasket. Now, to make the repair as high-quality as possible, take the sealant and apply a thin layer of it to the surface of the gasket. Do not install immediately, wait 1-2 minutes. After this, install the gasket on the pump, aligning the holes. That's all, now mount the pump housing, if necessary, tap it with a hammer through the wooden spacer.
Done, now you can attach the bolts and tighten them by hand. It is better to tighten after 15-20 minutes so that the sealant begins to set. That's all the repairs are, all that remains is to check the condition of all the system pipes and, if necessary, replace them. And you can safely pour the liquid into it. It is also worth noting that replacing the VAZ 2109 pump oil seal may not bring the desired result. Yes, the leak will go away, but the bearing may soon break. In order not to do double work, it is easier to immediately install a new pump.
Self-diagnosis
Based on indirect signs, one can guess whether the pump needs to be replaced, but this issue can only be more accurately understood by removing and inspecting this unit from all sides. You can preliminary judge the condition of the pump only by some indirect signs. For example, when the engine is operating in normal mode, a pump malfunction may be indicated by the temperature of the upper radiator hose and the presence of liquid in it. The hose must be warm. This can be determined by touch.
An external inspection can easily determine the condition of the oil seal. To do this, just remove the timing cover and inspect the oil seal hole. If there were leaks, deposits of a characteristic color will tell you about it.
Signs that the water pump needs to be replaced
The most vulnerable point of a centrifugal pump is the oil seal - the same sealing part that prevents antifreeze from leaking. Over time, the seal wears out and leakage becomes inevitable. There are enough reasons for the oil seal to wear out: these are wild temperature changes, and the ingress of pollution from outside under the hood of the car, plus antifreeze always absorbs some of the combustion products of fuel and engine oil. Such an aggressive environment cannot but affect the tightness of the VAZ-2109 pump.
Water pump bearings often become unusable. At such moments, a characteristic knock appears under the hood of the car. If you do not resort to “surgical” intervention in the engine compartment, it is not far from jamming or distortion of the pump shaft.
We can briefly list the following symptoms of a malfunctioning centrifugal pump:
- Coolant leak.
- Howling sounds that appear when the engine is running.
- In critical situations, if the problem goes unnoticed after the first two signs, the motor may overheat, especially when the pump rotor is damaged.
Is it possible to eliminate a pump leak on the way?
The loss of some antifreeze on the road is indicated by an increase in the temperature of the coolant and a decrease in the level in the expansion tank. If you have located the leak and are convinced that the pump is to blame, you can try to fix the problem. Failures that cause antifreeze leakage are as follows:
- The joint between the flanges of the pump and the cylinder block has lost its tightness, antifreeze is leaking from under the gasket;
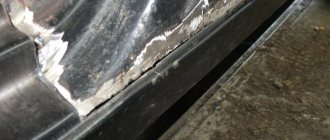
- a crack has formed in the pump body;
- the housing was destroyed by the impact of the impeller.
You can insert a wedge into the hole in the housing from the front side and coat it with cold welding.
As a rule, problems with a leaking water pump are critical and are quite difficult to fix on the road. Try to tighten the leaking gasket by tightening the 4 pump mounting nuts, which will require removing the generator drive belt and pulley. Don't overdo it - it's easy to strip the threads on Ø8mm studs.
Try to seal a small crack with a chemical composition - cold welding. If possible, tape the patch to the body with something so that it does not fall off, add water and get to the garage. It will not be possible to seal a large hole from the impeller; you need to look for an option to tow the car or call a tow truck.
Video: repairing a hull crack
From a financial point of view, pump restoration is more profitable than a complete replacement; the savings are about 50% of the cost of a new part. Considering how often minor breakdowns occur on Zhiguli cars, such a difference in price plays a role. The technology for replacing the bearing and oil seal on the VAZ 2101 water pump is also suitable for other cars equipped with a classic engine: VAZ 2121 Niva and its modifications, Niva-Chevrolet.
Reasons for failure
A centrifugal pump does not always survive until scheduled replacement, since there are many other reasons for its failure. First of all, the malfunction is a decrease in the level of antifreeze in the system, which often happens when the oil seal is damaged. The reasons for this may be the following:
- sudden changes in temperature;
- contamination, for example, liquid dirt that accidentally gets under the hood;
- rare changes of antifreeze (it may contain a lot of oil and combustion products);
It is possible to detect oil seal leaks by characteristic leaks that are visible during external inspection. If you notice a knocking sound from this unit, this may indicate bearing failure. With this symptom, it is necessary to immediately replace the VAZ-2109 pump, since driving such a car can lead to jamming of the pump or displacement of its shaft.
The following signs may indicate that the pump is faulty:
- traces of antifreeze on the ground after parking the car;
- Howling sounds are heard while the engine is running;
- engine overheating (usually this happens due to rotor failure).
If you are not sure whether to replace the pump, it is advisable to feel the upper hose going to the radiator. If it is warm, then it is necessary to urgently replace the failed part.
When you change the timing hose, remove the casing from the unit and inspect it for integrity. In some cases, the water pump fails due to defects or cracks in the housing.
Danger of water in oil
Car owners are really afraid of this disease, very afraid. And they do it right, because over time the consequences can be very sad. Let’s say right away that the oil is changed on time and you won’t have any problems, but here’s what can happen if you don’t do this.
Consequences:
- Over time, everything turns into an emulsion with poor density and, accordingly, fluidity. Lubrication decreases and over time this can easily lead to the repair of many components of the power unit. The parts that will suffer the most are the parts that are lubricated by pressure, such as the piston pins, crankshaft and camshaft.
- Piston rings may fall off, as the emulsion gradually remains in the cavities.
- All this affects the piston group and thus fuel consumption can increase significantly, and this is an extra expense, in general, no one needs it.
When do you need to change timing rollers?
Most motorists cannot determine in time that the timing belt rollers need to be replaced. It's not the motorists' fault. After all, most of them are accustomed to the fact that the on-board computer informs the driver about the need to replace consumables. It processes data received from various sensors. If necessary, displays a corresponding notification on the dashboard.
In most foreign cars, it is the on-board computer systems that monitor the general condition of the engine. But in this case, the car owner will have to monitor the technical condition of the consumables. The VAZ 2109 does not provide any kind of on-board computer. Everything is the old fashioned way here!
Therefore, you should listen to experienced owners of a car of this model! They recommend replacing rollers when the following symptoms appear:
- When the engine starts, a whistle is heard, after which the smell of melted rubber may come from under the engine compartment shield.
- At high engine speeds, a sharp drop in speed may occur. In ordinary cars, this may indicate some kind of malfunction in the gearbox. However, in the VAZ 2109, this indicates an idle rotation of the rollers, during which the shaft rotation speed drops.
- While driving, a metal grinding sound is heard from under the hood. This happens because the rollers are jammed. As a rule, this happens when they are over-tensioned, or the spacer rings and washers are worn out. In this case, you will also have to replace the rollers, since if such parts are damaged, the roller itself is damaged. Therefore, you will have to replace them with a set. There is an important thing to consider here: additional timing roller parts are not sold separately. They can only be purchased complete with a set of rollers.
- Also something to consider! In the case of an installed modification shield, the motorist will have to spend a much more impressive amount than 3,500 - 8,000 rubles.
- If noise is heard when the engine is running, and when removing the protective casing, the owner sees that when the engine is running, the belt moves not only in a circle, but to the sides along with the roller, then an urgent replacement is necessary.
- If you hear a squeaking sound when starting the engine, then most likely the cause will be either excessive tension on the rollers or damage to their bearings. In this case, it is necessary to urgently remove and check. If during inspection it is discovered that the bearing moves with play, or lubricant is leaking from it, then it must be replaced. Fortunately, the cost of bearings varies from 145 rubles to 356 rubles.
- If, when inspecting the engine, oil smudges are found on the belt, it means either the bearing is leaking or the attachment rings have ruptured. As a result, lubricant from the roller bushings got onto the belt.
We recommend: Lada Vesta head unit - price, replacement, connection and pinout
Don't be lazy, in this case it is best to carry out a detailed inspection of the rollers, belt, shaft gear, generator gear. It will take about 30 minutes and can save you up to 50,000 rubles. Since ignoring problems with the timing system can completely damage the engine.
The cost of restoration work on the model 2109 engine varies from 45,000 rubles to 78,000 rubles.
modified timing shield
regular timing belt
option of a modified timing system panel
There are also cases of installing a special double chain instead of a rubberized belt. As a rule, for the operation of this type of system, the installation of a turbine is necessary. Otherwise, it will not have enough power to rotate the chain. Since the chain requires 0.56 times more power to operate than a standard engine produces.
As you can see, the modified timing shield is slightly wider than the usual one. This change in design is due to the presence of an additional number of timing belt tension rollers. As a result, the size of the shield increases.
The modified shield is installed in the form of an overhead panel on the engine. In this case, all gears are removed. Their bushings are inserted into special grooves on the panel. Then the gears return to their place. The panel itself is fixed with 5-8 bolts, depending on the model.
To avoid serious problems and any malfunctions in the engine, you should replace the rollers on the VAZ 2109 in a timely manner. The manufacturer recommends updating these consumables at intervals of 40,000 - 50,000 kilometers.
The actual condition of the rollers must be checked every 19,500 kilometers.
Compliance with intervals:
- checks;
- replacements.
Allows you to extend:
- timing belt service life;
- the operation of the entire engine as a whole.
It is worth considering the following things that affect the wear of timing rollers:
- use of low-quality bearings;
- the car owner uses rollers from one manufacturer and bearings from another;
- use of low-quality lubricant for roller bushings;
- excessive tension on the rollers, as a result of which excessive pressure is exerted on them - this can lead to their breakage;
- use of parts made from low-quality materials.
Repair of pump (coolant pump) of domestic cars.
When operating any car, there comes a time when the pump (coolant pump) fails, which usually has only two main faults: bearing wear or oil seal wear. We will look at how to disassemble, repair and reassemble the pump of classic domestic cars, of which a huge number are still driven in the CIS countries, in this article. And when a novice driver learns how to repair a domestic pump, it will not be difficult for him to restore a pump from a foreign car, because the principle of operation of the pump and its repair is the same, only the design may be slightly different.
Before you begin to disassemble and repair the coolant pump (pump), it is first useful to familiarize yourself with its design. The pump of classic (rear-wheel drive) Zhiguli is shown in Figure 1 and has a housing 1 and a cover 4. Most pumps use special double-row bearings, the inner race of which is the pump shaft itself (the cover with such a bearing is supplied under number 2101-1307045).
But there are spare parts on sale, that is, covers for the Zhiguli pump under the number 2101-1807020. These covers have two conventional two-hundred-thirds (No. 203 - 17x40x12) bearings.
And on front-wheel drive domestic cars (VAZ 2108 - 09), engineers turned the pump cover into a pump housing, which is mounted to the engine block. Such a pump is shown in Figure 2.
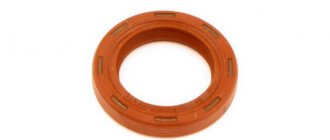
The design of the pump oil seal can be examined in detail in Figure 3. And as I already said, there are only two main pump malfunctions - wear of the oil seal, which results in leakage of coolant and wear of the bearing (or bearings) of the shaft.
Any driver naturally wondered how to delay pump repairs? The durability of the pump, or rather the wear rate of its oil seal and bearing, directly depends on the tension of the pump shaft drive belt. And the belt tension should naturally be what the factory recommends. In general, the belt tension is precisely controlled using a special device, which you can read about here.
But many people don’t have such devices, which means that when checking the belt tension, you need to use at least an ordinary bisman (pointer scale with a hook). On classic Zhiguli cars, the tension of the V-belt is checked so that in the middle (between the pump and generator pulleys) of the belt, its deflection from a force of 10 kgf is 10 - 15 mm.
For the durability of the bearings, it is still better if the belt is tensioned a little looser, but when installing a new belt, it will subsequently stretch a little and begin to slip on the pulleys. Slipping will occur most often when the headlights are turned on, as the load on the generator will increase. And as the new belt is pulled out, it will need to be tightened.
Slipping will worsen the operation of the generator and its cooling, but the main thing is that the belt itself will quickly wear out (burn out) and the pulleys will wear out. Therefore, slipping due to the belt not being tightened to the value prescribed by the factory (we find it in the manual of your engine) is just as harmful as over-tensioning the belt.
You need to take the correct timing of the toothed belt tension even more seriously in front-wheel drive domestic cars (VAZ 2108-09, Oka, Tavria) and foreign cars. Since slipping of the belt relative to the teeth of the pulleys (from insufficient belt tension) will lead to serious troubles (meeting of valves with pistons). As a result, from a banal belt failure, you can end up with expensive repairs to the engine or its cylinder head.
In general, before the advent of devices for controlling the tension of the timing belt (about which the link is higher in the text), many repairmen considered normal tension if in the middle (between the pulleys) the timing belt can be twisted 90 degrees with finger force (approximately 1.5 - 2 kgf), pressing on the edges of the belt. But in order to actually achieve an accurate finger force of 1.5 - 2 kgf, this is not so easy to do, especially for beginners, and requires good experience.
And for novice drivers who decide to service their car themselves, I still do not advise trusting their fingers, or the fingers of a neighbor in the garage, to check the belt tension, but still look for a tool on sale and buy a tool for checking belt tension. Who doesn’t want to look for and buy such a tool, then take the car to a service center to replace the belt. At least there will be someone to ask if the belt is not tight enough or tightened. Although the belt tension is easy to detect, there is a characteristic noise from under the hood, which will begin to appear as the engine speed increases.
But even if everything is in order with the correct tension of the pump drive belt, then quite often, even before the mileage of 100,000 km, the pump bearing begins to make noise or creak, indicating a lack of lubrication. When a squeak occurs, in order to prolong the life of the bearing, experienced drivers unscrew the locking screw 6 (see Fig. 1), which holds the bearing, and instead of this screw, screw in a grease nipple through which grease is supplied with a syringe. If the squeak appears on the road, then after unscrewing screw 6, it is useful to fill the hole with at least ordinary motor oil using a medical syringe.
But there comes a time when even adding lubricant no longer helps and does not eliminate bearing noise. This means that it’s time to change it, and this will be discussed in more detail below. If drops or smudges of coolant appear outside near the pump shaft, this means that the oil seal is worn out and it’s time to change it too. By the way, the oil seal may leak not because it is worn out, but because the bearing is worn out and the pump shaft has increased play as a result, and the contact geometry of the oil seal seal is disrupted.
The figures show that the passage of coolant occurs in such a way that it bypasses the bearing from below. This means that in some cases (when the bearing does not make noise, but the pump is simply leaking), you can limit yourself to only replacing the worn oil seal without affecting the bearing (or bearings if there are two 203s).
But if you disassembled the pump to replace noisy bearings, then replace the oil seal with a new one, because leaving the old one is pointless (it costs a penny). You can easily verify bearing wear (except for increased noise) by shaking the roller by hand - as a rule, increased play (more than 0.13 mm) is easily felt. And when you quickly turn the roller by hand, you can hear a crunching sound in the bearing, which means that both the race tracks and the balls themselves are worn out.
The process of destruction (pitting) will develop progressively and may result in a bearing wedge, and even a breakdown of the pump shaft, since the shaft is the inner race along which the balls roll, but this naturally does not apply to pumps that have two 203 bearings.
By the way, if the bearing wear is very severe, it may happen that the pump impeller begins to cling to the housing when the shaft rotates (as in Figure 1) or touch the body of the engine cylinder block (as in Figure 2). In this case, an unpleasant noise appears, and if you remove the V-belt on a classic (naturally, this cannot be done on front-wheel drive cars with a timing belt) and start the engine again, the disappearance of the noise will confirm that the impeller is catching.
In any case, if the oil seal or bearing fails, the pump will either need to be repaired or replaced. It is now possible to buy an entire pump for any car, but the price (especially for foreign cars) may seem quite high for some drivers. And replacing the entire pump on domestic cars (and even foreign cars) is not particularly difficult, even for beginners, and there is no point in describing it. But pump repair, which will allow you to save a certain amount of money, is worth describing.
Replacing the pump bearing.
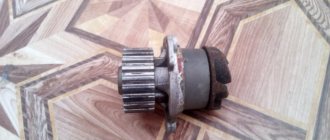
Rice. 7 a. Removing the pump hub using a universal puller 1 - pump cover, 2 - pump hub, 3 - puller foot.
When replacing the coolant pump bearing, you will have to remove hub 8 (in Figure 1) or remove pulley 7 (see Figure 2). Naturally, you need to remove these parts not with a hammer, but using a simple puller, which is useful in other operations, for example, as in Figure 7 a.
And for classic rear-wheel drive Zhigulis, or rather to remove the pump hub of these cars, you can make a simple puller, as in Figure 7b.
Fig. 8. Pressing out the bearing with the pump shaft. 1 - mandrel, 2 - bearing, 3 - cover.
Before pressing out the bearing, you need to unscrew the locking screw of the outer race of the bearing, and press the impeller off the shaft, and then begin pressing out the bearing along with the shaft and oil seal, towards the oil seal (see Figure 8). It can be useful to slightly heat the pump body or cover to make pressing out much easier.
Rice. 9. Pressing in the pump seal. 1 — mandrel, 2 — new oil seal, 3 — pump cover.
Having prepared the new parts, reassembling the pump begins by pressing in a new oil seal (see Figure 9), while not forgetting to control dimension B, shown in Figure 3. To do this, you will need a rod or at least a ruler. By the way, size B can be easily seen on the old oil seal, since over time a characteristic mark (line) in a circle is “imprinted” on it. When pressing in a new oil seal, you need to act carefully and not put pressure on the graphite ring, which is quite fragile and easy to split.
After pressing in the new oil seal (read about replacing the oil seal below), you can press in the new bearing with the shaft (see Figure 8). Before pressing the bearing into the shaft, it is important to correctly align the hole (for the locking screw) in the outer race of the bearing with the locking screw hole in the cover (or housing), so that both the hole and the screw will then align.
When pressing, you can use the device (mandrel) shown in Figure 6 (parts 4, 1, 2) and a large vice, but a press is better. When pressing a bearing with a shaft, you only need to press on the outer race, but as a rule, pressing a bearing does not require much force. The end of pressing occurs when the hole in the outer race and the locking screw are on the same line (in both planes). The locking screw is then screwed onto the thread sealant that prevents it from being unscrewed and tightened until it rests against the hole in the outer race and locks the bearing in place.
By the way, if you want to significantly extend the service life of the bearings, I advise you to order a turner to turn a locking screw with a thin hole inside, and in the expanded head of this screw, cut a thread and screw in a grease nipple (there are grease nipples with a thread of only 8 mm - M8). This will allow you to add Litol to the bearing at any time (after a certain mileage).
Fig. 10. Pressing the hub and impeller onto the pump shaft. 1 - support, 2 - pump shaft, 3 - pump cover, 4 - impeller, 5 - wood or plywood lining.
When pressing hub 8 with an interference of 0.06 - 0.1 mm (see Figure 1), to press on hub 8, use support 1, shown in Figure 10, or pulley 7, shown in Figure 2, you can use a bench vise or press . In this case, it is important to press the parts to the required depth, otherwise the planes of rotation of the pulleys may then not coincide, which will lead to misalignment of the belt.
To press the impeller 4 onto the shaft, you need to use support 1 at the front end of the shaft, and a wooden lining 5 on the impeller side. Next, the entire “sandwich” is compressed using a vice or press. Many people do not use support 1, but it is important not to distort the parts at the beginning of pressing, and not to damage the front end of the pump shaft.
When pressing the impeller onto the shaft, size A should be monitored. After all, the gap between the impeller blades and the walls of the channel in the block depends on this size. The pressing force of the graphite ring also depends on size A. It should be remembered that reducing the required gap of 0.9 - 1.3 mm between the blades and the walls of the channel in the block can lead to contact with these parts, noise and abrasion of the blades. And if the required clearance increases, the performance of the pump will deteriorate, and the pressure (clamping force) on the new graphite oil seal ring will be stronger, and its wear will be faster.
By the way, it often happens that there is no need to press the hub onto the shaft, since there is no necessary tension and the hub is put on the shaft by hand. Such a fit is unacceptable, and there is no point in putting such a hub on the shaft (it will turn during operation). Finding a new hub on sale separately is quite difficult.
This means that you need to grind a new hub, according to the drawing in Figure 11, and you should specify the diameter of the pump shaft in order to obtain the required tension after grinding the new hub. But you don’t have to order a new hub from the turner, but simply increase the outer diameter of the shaft, or the inner diameter of the standard hub using the galvanic method, which is described in this article.
Replacing the pump seal (coolant pump).
Figure 5. Pulling the pump impeller. 1 — puller bolt, 2 — impeller, pump cover.
It often happens that the bearings are fine (do not make noise), but the pump is leaking, which means that only the oil seal needs to be replaced. To replace a worn oil seal, you need to press the impeller off the shaft and remove cover 4 (in Figure 1) or pump housing 2 (in Figure 2). The impeller can be pulled off the shaft using a puller (as shown in Figure 5).
Indeed, to pull the Zhigulevskaya impeller from the shaft, an M18x1.5 thread is also provided, which allows you to pull the impeller from the shaft using a threaded puller shown in Figure 4.
By the way, for these purposes you can use an adjusting bolt with its bushing from the Zhiguli timing belt (unless, of course, you have such a bolt with a bushing available separately). Before removing the impeller from the shaft, so that later when pressing the impeller back, you don’t have to guess at what depth to press it onto the shaft (and don’t guess what gap there should be between the impeller and the walls of the block channel), you should definitely mark with a sharp scriber what depth was The impeller is pressed on at the factory.
Rice. 3. The design of the oil seal for the pump of a classic Zhiguli 1 - oil seal body, 2 - rubber cuff, 3 - spring, 4 - graphite sealing ring, B - size controlled during pressing, equal to 11 mm.
After removing the impeller, it is very difficult to remove the entire oil seal from the pump, and this is not necessary. You can simply bend the tabs that hold the internal parts of the seal (see Figure 3) and remove these parts. After removing the oil seal parts, the remaining oil seal body 1 can now be pulled out using pliers. The main thing is not to damage the housing seat (in the pump or its cover) of the oil seal. Naturally, in this case it deteriorates and is thrown out, and in its place a new housing with internal parts (oil seal) is installed.
The new oil seal is carefully pressed in using a textolite or wooden mandrel (its diameter is 40 mm), in the center of which there is a hole with a diameter of 16 - 16.5 mm. Well, for those people who are thinking about repairing pumps professionally in the future (or who have a lathe), it will be useful to make the device shown in Figure 6 (see above). Parts 1, 2, 4 of such a device are used when pressing the pump bearing (described above), and parts 2, 3, 4 are used when pressing the oil seal.
The pressing of both the oil seal and the bearing should be done not using impact equipment (hammer), but using a press or at least a bench vice. Since the impacts will be disastrous for both the bearing and the oil seal and its graphite ring.
After pressing the new oil seal into place, the impeller is naturally pressed back into place, to the mark that you hopefully marked on the shaft in advance, even before removing the impeller (I mentioned this above).
I hope that this article on repairing a pump (coolant pump) will help beginners replace both the oil seal and bearing on their own, and save a certain amount of money that they will no longer need to spend on a new pump, good luck to everyone.
If this article is useful to you, please share it on social media. networks by clicking the buttons below. Thank you.
RќСЂР°РІРёС‚СЃСЏ
Help in choosing a timing belt and rollers
The reliability, efficiency and operating life of the motor depend on the quality of the rollers and belts chosen for replacement.
Research shows that the cost of a belt is from 450 rubles, and rollers will cost you at least 600 rubles.
When buying spare parts, be guided by the opinions of VAZ 2110 car owners. There are many forums. Also consult with specialists at the service station. They will be able to give professional advice, or even order quality components for you.
Surveys among owners of AvtoVAZ’s creation, namely the VAZ 2110, showed that the most popular belts are products manufactured by the following companies:
- Gates;
- Bosch;
- Kraft;
- Power Grip;
- Dayco;
- Contitech.
As for videos, it’s better to pay attention to the following brands:
- Gates;
- Power Grip;
- VPZ;
- BRT;
- Dayco;
- Marel.
Of course, the choice is purely individual and depends on the financial capabilities and available assortment of a particular store. But if the necessary elements are not available in your city, you can always order them online. Nowadays this is not a problem.
Timing belt price
Separately, a timing belt on a VAZ 2112 costs about 1,000 rubles. However, all drive elements should be replaced at the same time. This will make it more clear what the shared resource is. The cost of a set, including a belt and 2 rollers (tensioner and support) is about 2500-3000 rubles.
At service stations they can charge you from 800 to 1200 rubles for replacing a kit.
To save money, you can replace the timing drive kit on a VAZ 2112 yourself, but first you need to choose the right spare parts. The table below shows several types of kits from trusted manufacturers, indicating catalog numbers
Manufacturer's recommendations
- Your primary task as a car owner is to periodically visually inspect the unit.
- In addition to replacing the element, it is necessary to simultaneously replace the tension rollers.
- VAZ 2110 comes with 8 and 16 valves. The replacement process also depends on this. So, in an 8-valve valve, one tension roller is installed, and in a 16-valve valve, a support and a tension roller are installed.
Replacing the timing belt of a dozen is not difficult. It is not necessary to contact specialists. It is quite possible to do it on your own.
Set of tools
To complete the job of replacing the timing belt you will need:
- A set of spanners and open-end wrenches;
- Mount;
- Screwdriver Set;
- A special key with which to tighten the roller or simple pliers with curved rings;
- Car jack;
- Rags, protective gloves.
Many people ignore the advice on using gloves. Especially in the summer when it's hot. But they are needed to protect you from injury.
There is no need for an inspection hole. You will need to remove the right wheel to remove the timing belt if your Ten is equipped with power steering. So you can't do without a jack.
Visual belt check
Before replacing the timing belt on a VAZ 2110 8 valve, it is necessary to inspect it. It is carried out after a run of 15 thousand km.
Tools are prepared for this:
- keys: overhead and open-end.
- different types of screwdrivers;
- a mount is required;
- pliers with special jaws for proper installation of the roller;
- jack.
The check consists of the following points
- There is a special plug on the front protective timing cover that can be removed.
- The belt is removed from the generator pulley. This is important for ease of use.
- The timing cover is held in place by 6 bolts that need to be unscrewed.
- The belt opens. He is visually inspected.
We recommend: You can find money at a pawnshop
Do-it-yourself replacement of the VAZ 2110 8-valve injector timing belt is carried out in the case when all defects are clearly visible.
Detailed instructions for replacing the pump on a VAZ-2115
Replacing a water pump is a fairly simple operation, provided you follow the instructions properly and have the tools prepared in advance.
- The car is driven into a viewing hole. Before starting repairs, the engine is given one to two hours to cool down. The protection is removed from the crankcase, using keys 17-19, the protective casing is removed.
- The hood rises.
- Coolant (antifreeze, antifreeze) drains through the open valve located on the left side of the radiator.
- Unscrew the bolt on the cylinder block. Through the resulting hole we drain the coolant from the engine. It will be a little easier if you loosen the clamp on the radiator pipe and drain everything into a basin, and then add a new one, thereby completely replacing the fluid.
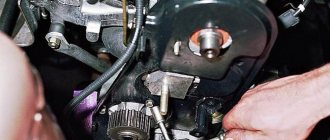
- Using a 10mm wrench, unscrew the three bolts that secure the outer casing of the timing belt. Using a 17 key, we tear off the bolt of the toothed pulley (the main thing here is not to lose the key, having set the marks in advance).
- Using the same wrench (17), unscrew the belt tensioner roller nut.
- Remove the belt tensioner.
- We move the belt on top of the standing toothed pulley and pump, moving it towards the radiator.
- We unscrew the bolt holding the toothed pulley and remove it (again paying attention to the safety of the key, it is better to remove it and put it aside). Using a small ratchet and a 10mm socket, unscrew the required number of bolts and nut holding the rear belt cover.
- We remove the protection.
- Use a flat screwdriver to carefully lift the pump and remove it.
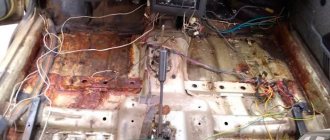
- In the cylinder block we remove possible remnants of the old oil seal.
- We clean the future installation site of the new water pump. It is very important to thoroughly clean the area in the cylinder block, because if this is neglected, the pump will be installed unevenly (crooked) at the end of the work, which will lead to new leaks in the future. That is, all the work will go down the drain.
- We lubricate the new seal on both sides with a special automotive sealant and return it to the pump seat.
- We install the new pump in place so that the marking on it is on top.
- We install the parts obtained during disassembly in the reverse order.
Installing an additional pump
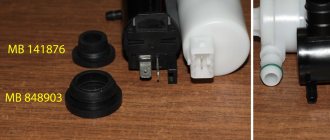
The disadvantage of the first front-wheel drive VAZ cars was the poor performance of the interior heater. Until the engine warms up to operating temperature, the cabin is cold. This is due to the design of the small circulation circuit, into which coolant enters in small quantities. The problem is solved by installing an additional electric pump from GAZelle.
An additional electric pump is installed in the stove pipeline
To install an electric pump, you must purchase:
- four-pin relay;
- multi-core wires and a two-pin connector;
- fuse socket;
- hoses and clamps for connection to the cooling system;
- electric pump from a GAZelle car.
The pump is placed on a homemade bracket, screwed to one of the bolts on the mounting flange of the gearbox. The antifreeze is first drained and the thermostat is removed, which will interfere with the installation of an additional pump. This is especially true for the injection model VAZ 21099.
To turn on the pump, a small circuit with a relay is assembled
The insertion is made into the return pipe coming from the cabin heater. In this case, the electric pump will create a vacuum in the heater radiator. To turn on the pump together with the ignition and from a separate button, a simple electrical circuit is assembled. A relay with a fuse is placed in the cabin under the dashboard, and any free button is selected as a switch.
Choosing a pump for your car
So, you have decided to replace the pump. Now you need to go to the auto store and buy the required element. However, sellers offer a huge assortment of different water pumps for the VAZ 2110/2112 - which pump to choose so as not to go wrong with the price and quality?
The price of a pump for an 8-valve VAZ 2110/2112 engine is from 800 rubles, for a 16-valve engine - from 1 thousand rubles. However, regardless of the cost and brightness of the packaging, when purchasing, you must pay attention to the following details:
- manufacturer (take products only from companies that you know well);
- the pump has its own catalog number (for example, the standard VAZ pump in all catalogs in car stores and on Internet sites is numbered 21081307010);
- the pump is sold in clean, uncreased packaging;
- The kit includes a gasket;
- A factory quality guarantee is provided with the pump.
Car enthusiasts prefer a pump produced by TZA. A water pump from a domestic manufacturer is easy to install, lasts a long time and is inexpensive. However, there is a risk of purchasing a defective product.
The Russian-made product is characterized by affordable cost and high quality work
Assembly Features
When installing the drive belt, you must again make sure that all the marks match, otherwise the gas distribution and ignition system will be disrupted. After installing the tension roller back, it is important to properly tension the belt.
If the car does not start after complete assembly or starts poorly, it means that the belt on the camshaft gear is misaligned by one tooth. To eliminate such a malfunction, you will have to remove the belt from the gear again, turn the gear a little so that it moves relative to the belt by one tooth, and then put the belt back.
The operation of replacing the liquid pump is shown more clearly in the video:
How much does a pump and labor to replace it cost?
Any auto repair shop can replace your pump.
The cost of work will depend on the type of engine. On carburetor engines, work will cost 1,500 rubles, and on more modern inverter engines the price will rise to 2,000. The price of the spare part itself is about 1,000 rubles, but remember that it is additionally worth buying and filling in a new antifreeze fluid for winter or antifreeze for summer. You can purchase a water pump either domestically produced or made in Germany, Italy or Spain. Among car enthusiasts, pumps from the Italian brand Graf are more valuable.
Replacement cost
Not everyone takes on a water pump with their own hands if it must be replaced. They prefer to go to service centers or just some garage-type workshops, where prices are usually lower.
It is important to note that the cost of replacement directly depends on the car make, model and availability of the spare part itself. In some cases, replacement is carried out in literally 20 minutes. In other situations, craftsmen spend several hours. Moreover, most of the time is spent on getting to the pump and removing it.
All this has led to the fact that price tags vary greatly, depending on certain conditions and circumstances. In one case, you will pay about 1000 rubles. In another you will have to pay 5-6 thousand. And this does not take into account the cost of the newest pump for your car.
Timing and frequency
According to the regulations for carrying out technical work, on the VAZ 2114 the procedure for replacing the timing belt and rollers should be carried out every 120 thousand kilometers. However, in reality this deadline usually comes earlier. Many car enthusiasts advise preparing for replacement after 90 thousand kilometers. Do not forget about regular inspection of the components of the gas distribution system. If you notice the slightest problem, the defective components should be replaced immediately. Failure to promptly replace faulty parasitic rollers will sooner or later lead to a broken timing belt. During a break, desynchronization of the valves and piston occurs, which leads to breakdowns and deformation of these components.
how to change the pump of a VAZ 2108.
| Replacing your pump is easy |
| Click to view | Before you start replacing the pump, you need to make sure that it really is not working. |
| Tags: |
| Replacing the pump on a VAZ 2108-099. Reasons for replacement. Difficulties at work. |
| Click to view | I tell you in detail how you can replace the pump yourself. What symptoms of replacement emerged? Link to… |
| Tags: |
| Repair of VAZ 2109. Replacement of timing belt, replacement of VAZ pump, replacement of oil seals. |
| Click to view | Repair of VAZ 2109. Replacing the timing belt, replacing the VAZ pump, replacing oil seals, replacing the alternator belt... |
| Tags: |
| Replacing the timing belt VAZ 2108-21099 carburetor, replacing the pump |
| Click to view | Replacing the timing belt VAZ 2108-21099 carburetor, replacing the pump. New stages. |
| Tags: |
| Replacing the pump and timing belt VAZ 21099 At Home |
| Click to view | Contacts for communication. Emel VK Wallets if you want... |
| Tags: |
| How to replace a pump in a VAZ 8 valve engine |
| Click to view | It is shown how you can independently replace the pump in a VAZ 2114 at home. Contacts for communication... |
| Tags: |
| Replacing the pump with your own hands on a VAZ 2108 |
| Click to view | Replacing the pump with your own hands on a VAZ 2108. I made the replacement for the first time. I apologize for the quality and... |
| Tags: |
| replacing a pump for a VAZ 8 valve internal combustion engine |
| Click to view | The Auto_Repair channel will help you troubleshoot your car with your own hands... |
| Tags: |
| Replacing the VAZ 2110 Pump |
| Click to view | Replacing the VAZ 2110 Pump. Removing and installing the timing belt and replacing the pump. Don’t forget to subscribe to the channel... |
| Tags: |
| REPLACING THE PUMP VAZ 2108 |
| Click to view | replacing pumps #VAZ2108 #engine Great video! you should like it! |
| Tags: |
| Replacement of timing belt, pump and installation of split gear VAZ 2108, 09, 99, 13, 14, 15. |
| Click to view | In this series, we will change the tension rollers on an 8-valve engine (we will not change the belt itself, since it… |
| Tags: |
| replacing pump 2114 part 1 (removal) |
| Click to view | We do everything without panic and take our time. Everything is elementary, weakly tightened, strongly weakened. Roller when moving... |
| Tags: |
| Ignition marks on the injector. Replacing the timing belt on an 8kL engine. Gap between DPKV and ignition pulley. |
| Click to view | replacing the timing belt on an 8 cl engine. The belt tension roller was not shown correctly! Everything needs to be reversed... |
| Tags: |
| Why does antifreeze press into the expansion tank? |
| Click to view | replacing the pump, installing the timing belt according to the marks on the VAZ 2114, 8-valve. |
| Tags: |
| Timing belt tension. What are the dangers of tightening the timing belt? |
| Click to view | Review analysis of the VAZ 2108 pump. 2110. 2114. Priora 2170, details of the inside of the device. |
| Tags: |
| Replacing the timing belt on the 8 cl engine VAZ 2108,2109,2110,2111,2113,2114,2115 |
| Click to view | This video shows how to solve the problem of the timing belt slipping off the gear, which leads to rapid… |
| Tags: |
| the pump leaked, replaced the pump, and marks on the timing belt, again VAZ 2114 8-valve |
| Click to view | It's time for a replacement. Car repair in the garage - with your own hands. A step-by-step guide for replacing the pump and timing belt in the garage... |
| Tags: |
| How loud is the VAZ pump? |
| Click to view | In this video we will show you how to replace the pump (water pump) on a VAZ 2110-12 8kl car. |
| Tags: |
| Review analysis of the VAZ 2108 pump. 2110 .2114 Priora 2170 |
| Click to view | quick replacement of a timing belt with a roller and pump. for all front-wheel drive vases (2108-2115) with a volume of ... |
| Tags: |
| Replacement of the VAZ 2109 pump. Replacement of the timing belt and gears.” rel=”spf-prefetch |
| Click to view | Description missing |
| Tags: |
| VAZ 21099 Replacing the pump and timing belt” rel=”spf-prefetch |
| Click to view | Description missing |
| Tags: |
| Replacing the VAZ 2110-12 pump with 8 cells. AUTOpraktik” rel=”spf-prefetch |
| Click to view | Description missing |
| Tags: |
| Replacing the timing belt, rollers and pump on a VAZ 2108-2115 (8 valves)” rel=”spf-prefetch |
Final work
Having finished tensioning the belt, we assemble all the components in the reverse order:
- The drive pulley is installed.
- Securing the alternator belt with tension afterwards.
- Installation of timing belt protection.
After this work is completed, fill the system with coolant, install the wheel and lower the car.
Sources
- https://prometey96.ru/ustrojstvo/pompa-vaz-2109.html
- https://ladaautos.ru/vaz-2109/pompa-na-vaz-2109-kak-ee-zamenit.html
- https://scart-avto.ru/remont/zamena-remnya-grm-na-vaz-2109-kak-pravilno-pomenyat-detal/
- https://motorchina-online.ru/marki/kak-pomenyat-remen-na-vaz.html
- https://portal-mashin.ru/lada/zamena-pompy-lada-2109i-vaz-2109i.html
- https://carnovato.ru/zamena-pompyi-vaz-2109/
- https://luxvaz.ru/vaz-2109/180-zamena-pompy.html
- https://paradiz-nt.ru/karbyurator/zamena-remnya-grm-vaz-2109-karbyurator.html