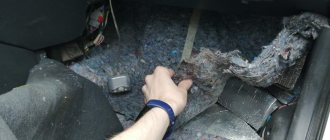
The LADA Granta station wagon has very serious problems with noise insulation, which I solved on my car for relatively little money. And it only took me... 3 hours!
Or rather, not from me, but from the masters, which I really liked with its convenient calculator for calculating the cost of sound insulation. Please do not consider this publication an advertisement for “Avtoshum”, I don’t have any goodies from them, but I can’t do without mentioning their masters.
Further text will be large, there will be many numbers and photographs of the work being performed. And there I also measured the noise level and made interesting conclusions...
All photos: author
The photo shows the same car of mine in which problems with sound insulation were observed. They are explained like this: LADA Granta Cross
- a budget station wagon, and all budget station wagons, by definition, are distinguished by a not very pleasant booming body - like a bucket. Sedans (especially sedans!), hatchbacks and liftbacks are not so burdened with booming noise and this is a plus for them!
I knew this and even once drove a similar Granta (they drove me up and there was a buzz), but the practicality of the station wagon body was in the first place for me. And making a car “noisy” is just a matter of money.
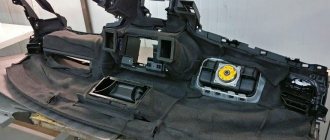
Tuning the instrument panel of Grant and Kalina 2
| To change the backlight of the instrument panel of Grants or Kalina 2, you will have to try, the old way (as on the VAZ 2110 or Priora/Kalina) will not work to change the backlight due to the different design of the part. However, if you know how to hold a soldering iron in your hands, tuning the instrument cluster is not a problem. |
You will need : disassemble the instrument panel, prepare a soldering iron with a narrow tip and a desoldering pump.
After the instrument cluster board of the Lada Granta or Kalina 2 (they are the same), we check the display. If it turns out to be soldered (soldered legs are visible, not holes), then we desolder it using a desoldering pump so that the display legs (iron soldered antennae) move freely in the seats.
As a result, we have access to all the dashboard LEDs:
- blue - display LEDs
- red - arrow LEDs
- white - scale LEDs
- green - low beam indicator LED
- purple - high beam indicator LED
We replace the necessary LEDs with our own ones of a suitable color and check their operation before assembling the instrument panel; to do this, just connect the board to the cable and turn on the ignition.
When reassembling, the display antennae must fit exactly into the grooves, otherwise they will break and you will have to build them up with copper wire. Before installing the device, it is recommended to glue the panel with anti-squeak.
Before tuning the instrument panel of Grants or Kalinas of the 2nd generation, once again evaluate all the pros and cons. During the modification process, there is a possibility of breaking the instrument panel. In addition, such tuning of the instrument cluster may bring problems with the warranty.
Source
Floor tunnel and ashtray from Granta Kalina.
This entry will not be a revelation to anyone, many people have already moved the tunnel from the grant into their viburnum, so I don’t see the point in describing the process in detail, you just need to type it into a search engine.
By the way, I remade it a couple of months ago, I kept forgetting to write about it. Let's start with the fact that I saw a dia2 in a friend's BZ and wanted one for myself too. But the difficulty is that after visiting all the shops and markets of our city, I did not find this very tunnel, everyone looked at me like I was an idiot. I didn’t want to order online (delivery is expensive). I was already upset, but I still found the part I needed, although the price tag was too high, but my desire overpowered me and the tunnel was purchased for 820 rubles in my city (I know it’s expensive)). This is the tunnel:
In addition to the tunnel, we will also need a gearshift lever cover 21900-5109070-00, because the Kalinovsky one will not fit the mounting frame and a couple of seat heating buttons (or plugs if heating is not provided). I found the case in the same store - 180 rubles, but with the buttons the ambush, one button cost 150 rubles, and you need two of them, without really thinking I decided that I would make do with the old ones, and when I found the buttons at a normal price, I would rearrange them. Yes, to celebrate, I also bought an ashtray from Granta, although I don’t smoke, it’s great for small things, here’s its code: 21900-8203010-00.
A detailed report on the installation can be found from the same friend dia2 in his post Installing a floor tunnel lining from Granta Kalina, but I will limit myself to my photos of the installation process, there are not many of them:
Remove the gearshift knob cover, unscrew the 4 screws that secure the tunnel:
Source
Which LEDs to choose for instrument panel illumination
To highlight the readings in the Granta or Kalina instrument cluster, green SMD-3528 LEDs are used. Instead, you can use SMD LEDs of different brightnesses. Here are the most commonly used:
- very bright SMD 5050 (luminous flux - 15 Lumens);
- bright SMD 3825 (brightness 7-9 Lumens)
- medium brightness SMD 3528 (about 5 Lumens);
- medium brightness SMD 3028 (about 5 Lumens);
- not bright SMD 3020 (about 4 Lumens);
- not bright SMD 3014 (about 3 Lumens).
The numbers after SMD mean the ratio of width and length, for example, an SMD 3528 LED has dimensions of 3.5 mm by 2.8 mm. You can buy everything you need on AliExpress (see catalog).
The approximate difference in LED brightness is shown in the photo:
Please note that using very bright LEDs to illuminate the instrument panel, reading readings in the dark may not be comfortable (they will dazzle). In this case, you can reduce the brightness by tinting the dashboard with a film (we select the light transmittance to taste). We recommend using SMD LEDs with a luminous flux of up to 5 Lumens for tuning the instrument panel.
How to change the color of the instrument cluster illumination
1. Use SMD of the desired color. For example, use white LEDs to illuminate one part of the panel, and blue LEDs for the other.
2. Use a light filter (electrical tape or film of different colors) together with white LEDs. We stick it on the desired area, as a result of which we get the illumination of the desired color. To change the color, you do not need to use a soldering iron, just disassemble the instrument panel and stick a film of a different color.
It is worth noting that the hands have an orange coating. To change the illumination of the hands, wipe off the varnish with nail polish remover and, if necessary, apply a new varnish of a suitable color. Another option is to use LEDs for the arrows of the desired color.
You can change the backlight of the screen (display) not only by replacing its LEDs, but also by turning the film over. First, we tear off the film from the display, clean the remaining adhesive with a solvent and glue the film on the back side. This results in an inversion of the panel display:
3. Use RGB-SMD LEDs. If you want to change the backlight color at once. In this case, you will have to additionally output switching control.
Granta/Kalina-2 tunnel to Kalina-1 + improvements
Finally, I installed a grant tunnel in my berry. The main reason for wanting to install this tunnel, of course, is the CUP HOLDERS! I'm tired of throwing the thermal mug in the back seat, then in the passenger seat, or even near the handbrake)
What you need to buy for this kit:
The tunnel itself (RUB 885) with seat heating buttons (RUB 354) and the gear knob cover/frame (RUB 216) reached me at the end of January. I ordered on the website emex.ru. For installation, only one thing was missing - a customization from the Chinese brothers in the form of a high-quality charging unit, including a button to turn on the module, a voltmeter, a cigarette lighter socket and a socket for 2 USB charges of 2.1A each (RUB 891.90).
To begin with, I prepared the tunnel for installation.
I liked this arrangement of devices more than other options.
Next came the dismantling of the old tunnel. It can be removed without problems and dancing with a tambourine.
Next, we unscrew the fuse block, remove the diagnostic connector, unscrew the 4 side screws on the tunnel itself (first 2 distant ones, remove the covers, and 2 main ones. This is the difference between the tunnels, the Grant one comes as a single element).
Also, for convenience, we remove the ashtray; it is held on by 4 screws.
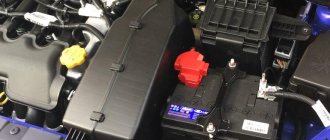
The entire charging module is powered by standard cigarette lighter wires. My cigarette lighter was connected permanently, from the battery, so a separate on/off button came in handy!
There were no problems with the installation of the grant tunnel. I was afraid that the USB sockets and cigarette lighter socket would not fit into the required gap between the floor and the tunnel, because... They are quite large in size, but fortunately everything worked out well and I didn’t have to perform dances with a tambourine)
I was also pleased that the connectors for the seat heating buttons are the same. Yes, I also installed a subwoofer power regulator in the empty space between the cup holders. Now it has its rightful place) I “planted” it with glue, so the photo shows a pressure insert in the form of an already unnecessary rug. Now it is no longer there, everything is holding up well)
I'm really pleased with the result! True, there was a problem with the Chinese) I ordered this module with a green backlight, under the tidy, and they sent it with a blue one. I specially checked the order - Green! And this is not a blue color) Yes, together with the central blue LED interior lighting lamp they go together, but I still wanted to have a green backlight) they will pay me out of their own pocket, I have to answer for the mistakes