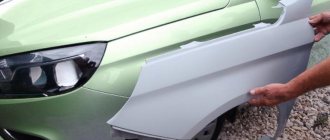
One of the features of the Lada Granta Cross is the presence of protective linings and moldings that protect the body kit from damage and scratches. How to remove and install these body elements with your own hands is described in the technological instructions.
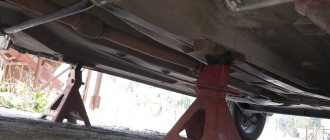
Place the car in the workplace, turn off the ignition, and apply the parking brake. If necessary, raise the car to a height convenient for work (electro-hydraulic lift type P-3.2 G with a lifting capacity of 3.2 tons).
REMOVAL AND INSTALLATION OF FRONT WHEEL ARCH LINING
The front wheel arch trim is attached to the car body using plastic clips, adhesive double-sided tape along the upper edge of the trim, along the arch opening with a self-tapping screw and a nut at the bottom.
Removal
:
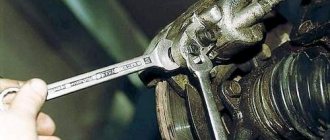
Unscrew nut 5, Figure 2-1, securing trim 1 to the front fender mounting bolt (spanner 10).
Unscrew the 2 self-tapping screw securing the wheel arch trim and flap to the fender (Phillips screwdriver).
Unscrew the self-tapping screw 3 securing the front wheel mudguard to the fender (Phillips screwdriver).
Figure 2-1 — Fastening the front wheel arch trim: 1 – front wheel arch trim; 2 – self-tapping screw securing the lining; 3 – self-tapping screw for fastening the mudguard; 4 – front wheel mudguard; 5 – nut securing the front wheel arch lining
Detach the upper edge of the trim (the area where the double-sided adhesive tape is attached) from the body. Overcoming the resistance of the holders, detach the trim from the body.
Installation
:
Install the plastic pistons for fastening the trim, remove the protective liner from the adhesive tape, carefully place the edge of the trim under the sill fairing (if the sill fairing was not dismantled) and, aligning the holders (pistons) of the trim with the holes in the wing, firmly press the trim to the surface of the wing to ensure reliable contact of the adhesive tape with the surface of the wing.
Bend the flanges of the trim and secure them with a screw and nut to the body (Phillips screwdriver, wrench 10).
When reinstalling a removed pad, prepare the surface of the pad in the area where the adhesive tape is attached. Apply new adhesive tape 6 mm wide and 920 mm long (along the entire length of the upper outer edge of the trim), install plastic pistons on the trim, install the trim on the body (3M type double-sided adhesive tape).
NOTE
: As spare parts, the pads are supplied with adhesive tape attached.
AvtoVAZ’s grandiose plans – there’s no harm in dreaming
Realizing that it was losing its tuning skills, AvtoVAZ decided to start producing a new proprietary system, which will be equipped with a neutralizer from the well-known company Eberspaecher. In the meantime, until the plans became a reality, car enthusiasts were offered an alternative replacement - a chrome-plated miracle, which in its expressiveness, beauty and power can easily compete with the famous MIGs.
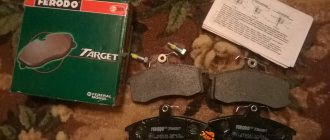
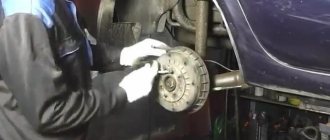
Improving the braking system is an indicator of qualified tuning
Brakes are not only an important part of a car, but also a life-saving element in critical situations. Therefore, many tuning enthusiasts do not limit themselves to external changes, but pay special attention to the braking system, replacing standard disc brakes with new, more powerful ones. Of course, this pleasure is not cheap, and it cannot be assessed from the outside. But you are guaranteed peace and confidence while driving.
We're having fun
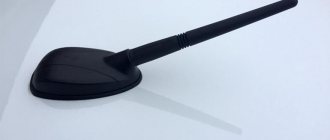
Along with all the above advantages, this machine also has one significant drawback - a weak electronic gas pedal. The car stubbornly refuses to accelerate quickly, especially when there is an additional load or when climbing a mountain. This gap of engineers can be eliminated by installing a booster on the gas pedal as a specific and effective signal amplifier.
Installation and installation of this device does not require any additional skills or abilities; it can be carried out easily and quickly in a garage. Using standard connectors, the booster is attached between the gas pedal and the electronic unit. Practice has shown that installing such a booster can eliminate the existing problem of car acceleration and speed up gear shifting.
For greater driver comfort, the booster provides several economical and sport modes. Those who have tested this device in practice claim that it has a positive effect on the car’s reaction speed. And the reasonable price of 4,300 rubles speaks in favor of booster tuning.
Granta Lux - almost perfect factory tuning
If car tuning is not your thing, but you really want to drive the most stylish, extravagant and comfortable car possible, choose the luxury version of the Lada Granta, which went into mass production in 2012. The joint work of factory designers and constructors was crowned with unprecedented success - the car has almost all the modern bells and whistles and does not require any additional modifications.
The factory Granta Lux is equipped with a heated front seat function and has a heated and electric mirror system. Exterior features include alloy wheels, built-in fog lights, chrome edging on the center console and deflectors.
Rewiring the “brains” - the effect is noticeable
Lada Granta is a fairly versatile car. It can be effectively used for quiet movement in urban environments or upgraded to the popular sports version. Speed lovers do software flashing - a procedure that affects the speed of the on-board computer. The benefits of such a re-flashing are obvious - dips at low speeds almost completely disappear, average fuel consumption is reduced to 9.6 liters per 100 km.
Do-it-yourself installation of an armrest on a Lada Granta in the video:
How to install a rain sensor on a Lada Granta with your own hands:
Below we propose to get acquainted with the most successful (in our opinion) methods of tuning the Lada Granta in the photo.
REMOVAL AND INSTALLATION OF REAR WHEEL ARCH LINING
The rear wheel arch trim is attached to the car body using plastic clips, double-sided adhesive tape along the top edge and nuts at the bottom.
Removal
:
Unscrew nut 2, Figure 3-1, and nut 3 securing the trim to the body sill (wrench 10).
Detach the upper edge of the trim (the area where the double-sided adhesive tape is attached) from the body. Overcoming the resistance of the holders, disconnect the trim from the body.
Figure 3-1 — Attaching the rear wheel arch trim: 1 – rear wheel arch trim; 2 – nut for fastening the sill fairing and trim; 3 – nut securing the lining
Installation
:
Install the plastic pistons for fastening the trim, remove the protective liner from the adhesive tape, carefully place the edge of the trim under the sill fairing (if the sill fairing was not dismantled) and, aligning the holders (pistons) of the trim with the holes in the wing, firmly press the trim to the surface of the wing to ensure reliable contact of the adhesive tape with the surface of the wing.
Install and tighten the nuts securing the trim to the body sill (spanner 10).
When reinstalling a removed pad, prepare the surface of the pad in the area where the adhesive tape is attached. Apply new adhesive tape 6 mm wide and 1027 mm long (along the entire length of the upper outer edge of the trim), install plastic pistons on the trim, install the trim on the body (3M type double-sided adhesive tape).
NOTE
: As spare parts, the pads are supplied with adhesive tape attached.
conclusions
The Lada Granta Sport body kit will allow a person to significantly change their car without spending a lot of money. There is a wide selection of body kits on the market, everyone can choose the right option for themselves.
Before purchasing, you need to find out what types of body kits there are and how they differ from each other. You need to have an idea of the difference between plastic and metal bumpers and sills.
Installation of all components must be carried out in a car service center. You can replace the body kit yourself only if you have the skills of an auto mechanic.
REMOVAL AND INSTALLATION OF THE THRESHOLD FAIRING
The sill fairing is attached to the car body using plastic clips, double-sided adhesive tape along the upper edge and nuts at the bottom.
Removal
:
Unscrew nuts 2, Figure 4-1, securing the sill fairing 1 to the body (replaceable head 10, extension, knob).
Detach the upper edge of the fairing (attachment area with double-sided adhesive tape) from the body. Overcoming the resistance of the holders, disconnect the fairing from the body.
Figure 4-1 — Fastening the sill fairing: 1 – sill fairing; 2 – nut securing the sill fairing to the body
Installation
:
Install the plastic sill fairing fastening pistons, remove the protective liner from the adhesive tape, align the fairing holders (pistons) with the holes on the body, press the fairing firmly to the body surface to ensure reliable contact of the adhesive tape with the body surface.
Install and tighten the nuts securing the sill fairing to the body sill (replaceable head 10, extension, knob).
When reinstalling a removed sill fairing, prepare the fairing surface in the area where the adhesive tape is attached. Apply new adhesive tape 6 mm wide and 1322 mm long (along the entire length of the upper edge of the fairing), install plastic pistons on the fairing, install the fairing on the body (3M type double-sided adhesive tape).
NOTE
A: The spare parts for the door sill fairing are supplied with adhesive tape attached.
REMOVAL AND INSTALLATION OF DOOR MOLDINGS
The molding of the front 1, Figure 5-1, and rear 2 doors are attached to the car body with plastic clips and double-sided adhesive tape along the contour
Figure 5-1 — Side door molding: 1 – front door molding; 2 – rear door molding Removal:
Remove the edge of each side of the door molding (the area where the double-sided tape is attached) from the door panel. Overcoming the resistance of the holders, disconnect the molding from the door.
Installation
:
Install the plastic pistons securing the door molding, remove the protective liner from the adhesive tape, align the molding holders (pistons) with the holes in the door panel, press the molding tightly to the door surface to ensure reliable contact of the adhesive tape with the door surface.
When reinstalling a removed molding, prepare the surface of the molding in the area where the adhesive tape is attached. Apply new adhesive tape 6 mm wide and top edge length 980 mm for front door molding and 712 mm for rear door molding, bottom edge length 935 mm for front door molding and 625 mm for rear door molding, front edge length 71 mm for molding front and 113 mm for the rear door molding, a length along the rear edge of 98 mm for the front molding and 108 mm for the rear door molding (3M type double-sided adhesive tape).
NOTE
: For spare parts, the moldings are supplied with adhesive tape attached.
REMOVAL AND INSTALLATION OF THE FRONT BUMPER SIDE COVER
The side front bumper trim is attached to the car bumper with threaded fasteners, self-tapping screws and adhesive double-sided tape along the top edge of the trim.
Removal
:
Unscrew screws 2, Figure 6-1, securing trim 1 to the bumper (replaceable Torx T20 head, knob).
Disconnect the clips securing the wheel arch mud guard 3, remove the shield (a tool for removing decorative body elements or a flat-head screwdriver).
Through the opened opening, unscrew the four nuts securing the trim to the bumper (replaceable head 10, knob).
Detach the upper edge of the trim (the area where the double-sided adhesive tape is attached) from the bumper and remove the trim.
Figure 6-1 — Side trim of the front bumper: 1 – side trim of the front bumper; 2 – self-tapping screw securing the lining; 3 — wheel arch mudguard
Installation
:
Install the screws securing the trim, remove the protective liner from the adhesive tape, place the flange in the front part of the trim under the lower trim of the front bumper, align the screws securing the trim with the holes in the bumper, press the trim tightly to the surface of the bumper to ensure reliable contact of the adhesive tape with the surface of the bumper. Secure the cover with self-tapping nuts and screws, and install the removed parts.
When reinstalling a removed pad, prepare the surface of the pad in the area where the adhesive tape is attached. Apply new adhesive tape 6 mm wide and 740 mm long along the top edge (3M type double-sided adhesive tape).
NOTE
: As spare parts, the pads are supplied with adhesive tape attached.
REMOVAL AND INSTALLATION OF REAR BUMPER SIDE COVER
The rear bumper side trim is attached to the car bumper with threaded fasteners, a self-tapping screw and adhesive double-sided tape along the top edge of the trim.
Removal
:
Unscrew screw 1, Figure 7-1, of the front fastening of the trim 2 (Phillips screwdriver).
Unscrew screws 3 of the lower mounting of the trim to the bumper (Phillips screwdriver).
From the inside of the bumper, unscrew the five nuts securing the trim to the bumper (replaceable head 10, knob).
Detach the upper edge of the trim (the area where the double-sided adhesive tape is attached) from the bumper and remove the trim.
Figure 7-1 — Rear bumper side trim: 1 – self-tapping screw securing the trim; 2 – rear bumper side trim; 3 – screw securing the trim to the bumper
Installation
:
Install the screws securing the trim, remove the protective liner from the adhesive tape, align the screws securing the trim with the holes in the bumper, press the trim tightly to the surface of the bumper to ensure reliable contact of the adhesive tape with the surface of the bumper.
Secure the cover with nuts and screws.
When reinstalling a removed pad, prepare the surface of the pad in the area where the adhesive tape is attached. Apply new adhesive tape 6 mm wide and 783 mm long at the top edge (3M type double-sided adhesive tape).
NOTE
: As spare parts, the pads are supplied with adhesive tape attached.
Have you ever had to change the body kit trims and moldings on a Lada Granta Cross yourself?
How Grant Sport body kits for cars are created
A variety of materials can be used to create body kits. Among the most popular are:
- metal;
- plastic;
- composite (fiberglass, carbon);
- polyurethane.
The material of the body kit determines its characteristics, namely, appearance, strength, weight, aerodynamics, and cost. Most often on the market there are body kits made of plastic and metal.
Each product is created in specialized auto repair shops. The features of the Lada Grant are taken into account. This allows you to create parts that perfectly replace original components.