Signs of malfunction and replacement of the crankshaft position sensor on a VAZ 2114
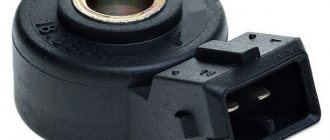
First, let's look at what a crankshaft position sensor is. The crankshaft position sensor of the VAZ 2114, like many other VAZ models, is an electromagnetic device that transmits information about the position of the crankshaft to the electronic “brains” of engine control. This sensor is very important; the correct operation of the fuel injectors and the ignition system depends on it. It doesn't break down often. But if you are going on a long trip, it is advisable to have a spare one.
Crankshaft position sensor VAZ 2114
Sensor types
Sensors differ in operating principle and design features.
- inductive type. Inside there is a metal rod with a magnet at the outer end. It is designed to magnetize the rod. A winding of copper wire is wound around this rod, the ends of which are brought out in the form of connectors for connecting wires. The operating principle of the inductive type crankshaft position sensor: when a steel object is located next to the rod, a signal appears at the terminals.
- The operating principle of the next type of crankshaft sensor is slightly different. It has a hall sensor inside. When a metal object is brought close to it, its state changes (from logical zero to one and vice versa).
- frequency Let's look at how this type of crankshaft sensor works. The engine control unit generates pulses of a certain frequency. They are fed to the sensor and when a metal object is brought to the sensor, the generation frequency changes. By changing the frequency, the controller determines the presence of an object near the sensor. The sensor reacts to the metal of the crankshaft ring teeth (on some cars it is located on the flywheel).
Symptoms of a problem
Signs of a malfunction of the DPKV can be different. Often, dirt adheres to the end of the sensor itself, which can interfere with reading. Also, symptoms of a faulty crankshaft sensor may be as follows:
- The idle mode is unstable;
- Engine speed rises or falls spontaneously;
- Power drops;
- During acceleration, a “failure” is felt;
- The car doesn't start well.
In these cases, for the most part, the VAZ 2114 crankshaft position sensor is replaced.
In addition, the VAZ 2114 crankshaft sensor may well be in good working order. And on the “tidy” the DPKV error will appear (0335 or 0336). The reason for this may be a broken wire near the connector. This is easily determined visually; then it is enough to replace the connector without replacing the sensor itself.
If the owner notices signs of a malfunction of the crankshaft sensor on his car, then this is a “signal” about the need for diagnostics.
It is not difficult to guess where the crankshaft sensor is located on a VAZ 2114. Like many other VAZ models, it is attached to the engine, and more specifically to the oil pump, near the generator drive pulley, on its cover. The sensor is attached with one bolt, which is typical for many models of this family.
Here is the crankshaft sensor on the VAZ 2114
Typical causes of failure:
- Physical damage to the case;
- The interturn closure of the winding turns entails a change in the generation frequency transmitted to the control unit (frequency type sensors);
- Emergency wear or loss of pulley teeth.
Functionality check
If you decide to check the serviceability of the sensor yourself, treat this procedure responsibly and carry it out correctly. On a VAZ 2114 car, the crankshaft sensor is checked in several ways.
- Using a multimeter. The serviceability of the induction sensor can be assessed by the resistance of its coil. In a working product it is 500-700 Ohms.
- On the multimeter, set the measurement limit to 200 millivolts, connect the probes to the terminals (where the standard wires are connected). Pass a steel object several times in front of the core. The working sensor will “see” the metal and there will be voltage spikes on the multimeter display. If there are none, replace the part.
- But the most accurate results when checking are provided by an oscilloscope. When using this device, one hundred percent results can be guaranteed; it reads all the information from the sensor while the engine is running. It can be observed on the device screen. The engine, during tests, should operate at different speeds. They start with eight hundred revolutions, then two thousand, and raise it to six thousand. If the lines (on the device screen) are of different lengths, you need to look for the cause of the malfunction. Remove dirt, check the pulley for defects, and so on.
How to choose
When choosing a toothed pulley, you should pay attention to the processing class, the distance between the teeth and the manufacturing shape. The tooth surfaces and the belt are subject to constant loads, so high demands are placed on the quality of cutting and processing. Cutting teeth is carried out in several stages on a milling machine or devices designed specifically for the manufacture of these parts. Cast iron products are somewhat different from other varieties; they are cast in forms that completely replicate finished pulleys for timing belts and are processed using a milling machine.
The flanges on the pulley can be either absent or located on one or both sides. They are fixed in three ways:
Remove from the engine
The malfunction has been identified. Let's start eliminating it. Let's look at this operation using the VAZ 2114 as an example.
Turn off the car ignition. We open the hood, fix it firmly, and visually determine where the VAZ 2114 crankshaft sensor is located. Before removal, it is advisable to remove all contaminants in the area where it is located. Next, carefully remove the block with wires from the connector.
Connector DPKV VAZ 2114
Using a “10” wrench, unscrew the fastening bolt.
Removing the crankshaft sensor on a VAZ 2114
Removing the DPKV VAZ 2114
After dismantling the sensor, it is advisable to check the generator drive toothed pulley for defects. Since its damage can introduce errors into the operation of the entire system.
After we are convinced that there are no defects of any kind, we proceed to assembly. The seat must be clean. We install the new part in place and fasten it with a bolt (the tightening torque should not exceed 8-12 Newton meters). In this case we use adjusting washers. They are sold complete with a new sensor. Thus, using a special probe, we ensure that the gap between the pulley and the sensor core is one millimeter. The permissible error is 0.41 millimeters in the larger direction.
The gap between the pulley and the crankshaft sensor core on a VAZ 2114
Types of pulleys
As we wrote earlier, automakers can introduce various pulleys into the design of their cars. Although a part from a car of one brand may not be externally different from a part from another, there is always a difference. And the point here is not only in form, but also in balancing . However, pulleys are divided into several types. Namely:
- Under the V-belt. It is pulleys for such a belt that are installed on the vast majority of cars, trucks, and sports cars. The belt pulley is the same one-piece or all-welded part mentioned above. A key on the crankshaft prevents the pulley from turning, and the part itself is secured with a nut (in rare cases, a bolt);
- Toothed pulley. Modern timing belts do not always use a chain drive. In order to facilitate the entire system, the designers decided to use special belts. The toothed pulley has teeth on its outer rim that engage grooves on the inner surface of the belt. Despite the apparent vulnerability of the teeth, they hardly wear out;
- Damper pulley. Toothed pulleys made it possible to solve the problem of mismatched rotation angles, and damper pulleys make it possible to solve the problem of impulse mechanical influences that inevitably arise in the gas distribution system of a car. Such a pulley has a rubber layer that separates the working disk and the inner race - the damper.
All three pulleys have their advantages and disadvantages. It is important to understand that the design of the pulley also depends on how the elements adjacent to them are arranged and what are the features of their operation. The same damper pulleys made it possible to solve the problems of mechanical impacts and vibrations that occur when starting the engine and changing the frequency at which the crankshaft rotates. At the same time, the pulley damper fails quite quickly. Let's pay a little more attention to this.
We connect the block with wires into place.
After installation and checking the gap, we try to start the engine. With a confident start and stable operation of the engine, we can say that the repair was carried out successfully.
Despite the fact that the breakdown of the synchronizing sensor is not frequent, knowledge of its symptoms and consequences, as well as methods of elimination, will be useful to the car enthusiast.
New sensors are available in almost any auto parts store. The price of DPKV can vary between 200-400 rubles. How much a VAZ 2114 crankshaft sensor costs depends on your region, the location of large spare parts stores nearby (usually cheaper there) and the greed of the seller. Can be ordered in the online store. When purchasing, take the old one with you so as not to make a mistake in choosing a model. To avoid defects and repeated purchases, it is advisable to purchase from well-established sellers.
Replacing the crankshaft position sensor VAZ 2114
One of the most common problems of the VAZ-2114 car is the failure of the DPKV crankshaft position sensor. The fragility and unreliability of the sensor design forces motorists to either shell out considerable sums for repairs at a car service center, or learn the basics of repairs on their own, and, in our economically unstable life, the second option is best. Next, we will teach you how to replace the DPKV with your own hands. So, let's go!
Crankshaft position sensor: principle of operation, types
DPKV is a small electronic device located near the pulley under the hood, which performs a critical function: by transmitting an impulse of the crankshaft position to the engine, the sensor coordinates the movement of the injectors, which directly affects the fuel supply, which, in turn, determines the operation of the ignition system. You need to monitor the condition of the sensor regularly, especially if you have planned a long trip.
Sensors are divided into two types, each of which has its own operating principle:
- Inductive. It consists of a magnet and a metal rod wrapped with copper wire. The inductive sensor gives a signal by reacting to the approach of a steel object, that is, the crankshaft.
- Impulsive. The sensor consists of a hall, which changes its position when a metal object approaches it. Due to this, impulses arise, which are then sent to the power unit and determine the operation of the ignition system.
Signs of breakdown
You can determine that the sensor has failed by the following signs:
- Idling malfunctions, instability in engine operation is observed;
- The engine loses power;
- The engine accelerates chaotically or, conversely, slows down;
- Heavy plant;
- During high-speed movement and, especially during acceleration, dips are observed.
The main malfunctions may be the following:
- Mechanical deformation;
- Broken wires or shorted wires (this problem is especially common in used cars);
- Wear of the pulley and other parts.
Repairing the sensor is difficult and almost impossible at home. But replacement is not difficult, and it is not that expensive. Let's now find out how to replace the sensor on a VAZ-2014.
Step-by-step instructions for replacing the sensor
If you strictly follow the instructions, the replacement procedure usually does not take much time.
- First of all, to make further work safe, turn off the ignition and raise the hood.
- We find the device and, if it is covered with dust and dirt, which is observed quite often in the practice of motorists, be sure to use a rag to clean both the sensor and its installation location, so that when installing a new device, there is no short circuit in the wires.
- Now we have access to the device. A positive point is the ease of removing the sensor, which cannot be said about other parts. But here it is very important to observe the subordination of actions: first, by bending the fasteners, remove the block and wires, then, after unscrewing the bolt, carefully, slowly, remove the DPKV
- Just in case, it is worth diagnosing the condition of the pulley; toothed parts are often deformed, which also causes a disruption in the fuel supply system and leads to errors in the data transmitted by the sensor, which can already be dangerous.
- We check that the installation site of the new part is clean.
- We mount the sensor.
Installation is carried out in the reverse order of dismantling: tighten the bolt, fasten the block, start the engine, check the sensor data.
An important point during installation is to maintain the required gap, which should not exceed 1 mm. If the gap is too large, you should select a device of the appropriate size: do not try to fix the DPKV of the wrong type, as this connivance can lead to negative consequences.
How to check for sensor malfunction with the device?
Despite the fact that a sensor malfunction is usually determined by the above symptoms, this may not be enough for a correct diagnosis, since different types of breakdowns have the same symptoms. Dips during acceleration can also occur when other parts are deformed, such as the ignition system or braking system, and this also occurs when the engine itself malfunctions.
You can definitely check the sensor using the following method:
We buy a voltmeter (it’s easy to find in any car store) or a multimeter, which is even better. On the multimeter we turn on the voltmeter function, measuring 200 mV. Now we connect the probes to the sensor. And then the most interesting thing: take any screwdriver (necessarily with a metal rod) and hold the screwdriver close to the sensor. The data on the voltmeter will change, monitor its data: if the device shows 0.3 V, then the device is working properly; If the readings fluctuate, replace the sensor without a doubt.
Pulley removal
Unscrewing a fastening bolt or nut is only half the battle. Next you need to pull the pulley out of the shaft. The pulley cannot be removed easily by hand unless its seat is broken. In addition, if the pulley fits tightly onto the shaft, it is also secured against turning by a key.
There are special pullers for removing the pulley from the shaft. There are mechanical and hydraulic pullers.
The design of a mechanical puller is simple. Usually it has three legs, with which you need to hook the pulley itself, and rest the central rod against the shaft. After which, you need to rotate the rod, the legs will straighten and pull the pulley towards you.
There are even simpler pullers that you can make yourself.
If there is no removable device for the pulley, then you can use pry bars. If one person is filming, then take turns, moving it a little on each side so that there is no distortion. If there are two, then at the same time, from different sides, the pulley is pressed out from the crankshaft with a sharp movement.
It also happens that when using a puller, the walls of the pulley grooves cannot withstand and break off. Therefore, when using pry bars, they must be engaged as close to the shaft as possible.
Why do you need to twist the crankshaft pulley?
Removing the crankshaft pulley is performed for various reasons.
Crankshaft pulley
Most often it has to be removed when replacing the timing belt or replacing crankshaft seals. Usually the belt is changed either according to the regulations, or when defects are identified that require its replacement. Oil seals are replaced when oil leaks occur due to product wear.
On a VAZ 2114, the crankshaft pulley is secured with a bolt. During removal, a problem arises when unscrewing the mounting bolt. Firstly, it is inconvenient to get to. Secondly, at the factory they always tighten it very tightly so that it does not unscrew on the road. If a fastener comes loose while driving, it can result in costly repairs. During operation, thanks to the right-hand thread, the tightening is enhanced. In addition, coking and sticking of the part occurs. Thus, sometimes the bolt is very difficult to remove.
Tools
To successfully dismantle the VAZ 2114 crankshaft pulley and replace consumables, you should prepare the following tools:
- standard set of keys;
- jack;
- support or stump;
- socket head;
- extension;
- pulley puller;
- pry bar, screwdrivers.
It is more convenient to carry out work on a lift or ditch for inspection.
Stages of work
In order to remove the crankshaft pulley on a VAZ 2114, you need to dismantle some parts and components. The entire process of removing the crankshaft disc consists of the following steps:
- First, to dismantle the generator belt, you need to unscrew the locking bolt and loosen the tension bolt.
- Next, you need to lift the front of the car and remove the right front wheel.
- In the upper part of the engine compartment of the VAZ 2114, remove the air filter and the engine mud shield.
- Next, remove the alternator belt.
- To secure the flywheel from turning, you need to open the plug on the side of the VAZ 2114 clutch. Then insert a screwdriver or pry bar into the opened opening between the flywheel teeth.
Fix the flywheel and unscrew the bolt - Next we move on to unscrewing the fastener. To make it easier to unscrew, you need to apply special liquids to the threaded connection that corrode corrosion. For this purpose, special WD lubricant, brake fluid, and vinegar essence are suitable.
- Then the head of the key is put on and, using a lever, it is turned counterclockwise so as to tear the bolt from its original position.
We put the head on the bolt - If you are unable to unscrew the fastening element by hand, you can use the starter.
Unscrew the fastening bolt - Place the lever coming from the head against the spar or the floor in the direction of the shaft movement, and then turn the starter several times, giving the crankshaft a rotational impulse.
- After unscrewing the fastening element, you need to remove the crankshaft pulley. It is held in place by a key and is difficult to remove easily. You can use a special device with paws that cover the edges of the disk.
- If you don’t have a puller, you can use pry bars or screwdrivers by inserting them between the crankshaft and the pulley on each side, gradually moving the part to be removed away from the shaft. The touch point should be chosen closer to the crankshaft.
- Before removing the disk, it is advisable to tap it with a wooden hammer to avoid possible distortion. The part should be dismantled carefully so as not to damage the key and groove.
After completing the necessary replacement, when reinstalling the crankshaft pulley, the seats should be treated with grease so that the parts fit without effort. In this way, distortions can be avoided.
Dismantling
In order to remove the old toothed pulley, it is necessary to remove the cover that hides the wires of the units, thus providing free access to the motor parts that require replacement. Next, the tension of the drive chain is released. After which the tank with antifreeze liquid and the electric generator are removed. If the car is equipped with power steering, it is necessary to remove the belt for this system.
Next, all that remains is to remove the mounting bolt that secures the toothed pulley to the crankshaft, but difficulties may arise here due to the direction of the thread. While the engine is moving, the bolt is constantly tightened, so at this stage of the work a pneumatic impact wrench may be required if the manual effort is not enough.
In the absence of special tools that significantly simplify the task, it is recommended to secure a wrench to the bolt to prevent it from turning. During work, the vehicle must be on jacks or with the drive wheels removed. This is necessary to ensure that the transport does not move from its place. The bolt will be unscrewed by sharply turning the ignition key, while the starter will make several turns and all that remains is to remove the bolt. After replacing the pulley, all parts are installed in the reverse order.
How to remove the crankshaft pulley of a VAZ 2114 yourself: instructions, photos and videos
The crankshaft gear is the gear through which the engine equipment rotates. Depending on engineering solutions, it has the shape of a gear with teeth for a chain or belt.
Crankshaft Gear for Chain
Crankshaft Gear for Belt
As a rule, timing gears (lower) and oil pump drives are installed on the crankshaft. The gears are mounted with a tight fit, fixed on the keyway, and pressed with threaded fasteners.
Crankshaft gear malfunctions
Common crankshaft gear problems include:
- Natural mechanical wear of the teeth. High speeds and vibrations affect the contact surfaces of gears. Over time, wear appears on the gears, and they are replaced with new ones. The wear on the timing gear can negatively affect the valve timing;
- Wear or damage to the keyway of the crankshaft gears. The fact is that even a slight gear play, which will not have a noticeable effect on the operation of the engine, will eventually develop into a problem. The crankshaft gear backlash will increase. If the problem is not addressed, the keyway may become severely damaged, requiring the crankshaft to be replaced.
Replacing the crankshaft gear
The easiest way to remove the gear from the crankshaft is if the shaft itself is removed from the engine. As a rule, gears are installed on the shaft with interference, so a puller will be required. The sequence is as follows:
- install the puller and by rotating its rod, gradually “press out” the gear;
- Remove the gear from the shaft, remove the key, and inspect the keyway on the shaft.
Replacing the crankshaft gear
To mount the gear, you will need a round attachment similar to a steel tube, which will easily fit onto the shaft. Necessary:
- install the key;
- lightly press the gear;
- placing the tube on the shaft, rest it against the gear;
- lightly tapping the tube with a hammer to “seat” the gear into place.
If you only need to replace the gear, this can be done without removing the engine and crankshaft. Removing the crankshaft gear must be done after the engine has completely cooled down and the car has been immobilized.
Let's consider the procedure for replacing the timing gear of a VAZ 2110 engine.
- The first step is to remove the timing case;
- Then install the timing mechanisms according to the marks on the crankshaft and camshaft pulley (this is necessary so as not to disrupt the engine’s timing);
- If you did everything correctly, the marks on the flywheel should match. To check this, remove the rubber plug on the gearbox;
- Then you need to fix the rotation of the engine. For this it is better to use special clamps. If this is not possible, you can insert a regular flat-head screwdriver into the transmission inspection window;
- Unscrew the pulley and remove it;
- Check the position of the mark on the timing sprocket;
- Loosen the timing belt tension roller and remove the belt;
- Remove the crankshaft gear and inspect the keyway;
- Reassemble components and mechanisms in the reverse order of disassembly, checking the timing marks.
Also interesting: TOP 10 best brake pads for VAZ and Lada (Front, rear)
You can change the crankshaft gear in a home workshop, but you should understand that an error in setting the gas distribution mechanism can lead to serious engine damage. If you do not have experience with such repairs, it is better to contact specialists.
Lada 2109 › Logbook › 17. Replacing the damper pulley and crankshaft gear
Let me briefly remind you of what I wrote in the last entry. It's been 2 days since I replaced the timing belt and the car refused to drive at speeds above 2000 rpm. More precisely, it drove, but when the revolutions rose above 2000, it began to twitch and did not drive at all. The bortovik showed an error - incorrect DPKV signal. On the side of the road, I checked the DPKV chip and wires (at one time they were blowing my mind!) I realized that something was wrong here and decided to leave it as is until the morning. In the morning I decided to check my favorite sore! Crankshaft gear pin! And how he looked into the water! Once again it was torn off. More precisely, it broke halfway, but due to the fact that I also drove a self-tapping screw there, to be sure, the damper pulley did not turn due to this.
