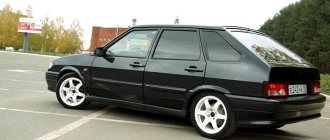
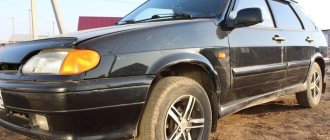
The VAZ 2114 is a restyling of the five-door hatchback VAZ 2109, the model was produced until 2013 by the Volzhsky Automobile Plant and continued the Samara-2 family. Unlike its predecessor, the fourteenth model received an update in the front part of the body: a modified radiator grille, bumper, and moldings. The power unit was supplemented with a new engine from the VAZ 2111 line.
The rear wing of the VAZ 2114 is not a frequent consumable; the part must be replaced after mechanical damage during an accident, if there is a metal rupture. Unlike the front fender and sills, the rear wheel arch and fender as a whole are not so affected by corrosion; the element is more protected from water and dirt. The first repairs using the VAZ 2114 rear wing repair insert begin three years after purchasing a new car.
How to prepare a car and what tools are needed
Before starting a full-fledged repair, it is necessary to prepare the cars, select the necessary tools for dismantling, installation and related work. The rear fenders are installed on the body by spot welding; to replace them, the part must be cut out from the car. The front part is installed with self-tapping screws from the manufacturer's factory.
- The car is installed on an overpass or other flat surface, preferably above floor level. If this is not possible, then you need to jack up the car.
- The battery is removed.
- When replacing, the bumper and trim are removed.
- Before removing the front bumper, the fog lamp terminals are disconnected.
To dismantle the bumper you will need the following tools:
- Phillips screwdriver, flat;
- set of wrenches;
- knife;
- pliers;
If repairs are required, you should prepare an anti-corrosion kit, automotive primer, and auto enamel. To dismantle the rear wing you will need:
- chisel with a sharp edge;
- Sander;
- sandpaper R-80;
- semi-automatic welding;
- anti-corrosion mastic, primer;
- putty, set of spatulas;
- auto enamel.
Rear wings are considered difficult to repair and replace parts for the VAZ 2114. When replacing an element, it is recommended to carefully inspect the part and replace it partially if there is a small defect. Original repair kits offer both a solid element and repair inserts. The price of an original complete replica of the front wing starts from 2,500 rubles, the rear from 7,000. Replacing part of a replica with a complete element is easier and cheaper.
How to paint arches: materials, tools, equipment
- Abrasive materials for careful grinding of wheel arches: sandpapers of different structures, polishing wheels for a grinder;
- Two-set auto putty for do-it-yourself putty work. The kit includes: a universal type of putty - to eliminate deep scratches and a finishing (fine-grained) type - to remove shallow roughness and damage. The putty is applied with metal and rubber spatulas;
- Various types of primers (depending on the complexity of the damage);
- Polishing pastes;
- Degreasing solvents and liquids;
- Sander;
- Electric drill with hard and soft attachments;
- Spray gun or spray gun;
- Small compressor;
- Masking tape, electrical tape, paper for marking and pasting the boundaries of the repair area and protecting the unpainted surface from unnecessary splashes.
If the owner is responsible or wants to drive the car for a long time without thinking about rust in the arches and on the edges of the wings, then he will definitely install the wheel arch liners himself or at a car service center. In general, they are installed to protect against stones flying from under the wheels. The fact is that stones fly out at great speed and when they hit the wheel arch they spoil the paintwork, which in this place is very weak due to mechanical influences and reagents that are so generously sprayed on our roads. Additionally, an owner who loves his car will definitely cover the arches with anticorrosive. This, among other things, will make sound insulation better, because most extraneous sounds enter the car from the wheel arches.
Algorithm of actions
Dismantling and subsequent insertion of the front wing takes up to 1 hour, even for inexperienced craftsmen. It is important to perform the entire sequence of actions correctly:
- Unscrew the two nuts in the bumper fasteners and lower the edge of the bumper down.
- Remove the outer part of the sill trim.
- Remove the headlight cover.
- Remove the turn signal from the headlight.
- Remove the side turn signal.
To quickly remove the side turn signal, you need to squeeze the latch, disconnect the block, pull out the block with the socket and the light bulb, and push the socket inside.
- Using a 10mm wrench, unscrew the self-tapping screw that secures the part to the bracket.
- Unscrew the screws under the threshold, two bolts that secure the part to the rack, they are located on the inside.
- Unscrew the 4 bolts that connect the element and the front part of the body.
- Using a knife, cut off the sealant on which the wing is mounted on its top shelf on the body.
Pre-treatment of the car wing before installation
Polyethylene fender liners are highly durable and resistant to temperature changes. But the quality of the installation will be leveled, the body will quickly begin to become covered with corrosion plaques if the wheel arch is not treated first. Order:
- Thoroughly wash and dry the inside of the wing.
- Clean out possible pockets of corrosion and treat with an inhibitor.
- Carry out anti-corrosion treatment of the surface with wax-based anti-corrosion agents, liquid compounds with a large amount of zinc.
It may be necessary to reapply anti-corrosive or anti-gravel (depending on the condition of the metal).
Repair kit
If you need to replace the rear left wing of a VAZ 2114, which has significant deformation, it is recommended to purchase a complete repair kit, which includes two sidewall panels, moldings, bolts, and inserts. The number that the AvtoVAZ manufacturer uses for its repair kits for 2114 is 21090-5401065-00. In addition to the main enterprise, parts for the Lada are produced by companies and experimental workshops:
- Nachalo software;
- Kamaz (Naberezhnye Chelny).
All replicas are supplied in original packaging; parts are made from black steel up to 0.8 mm thick. The part must be covered with transport primer.
Problem areas of the VAZ 2113, 2114, 2115 body
The body of VAZ 2113, 2114, 2115 cars is susceptible to corrosion and destruction, as it does not have special treatment under the paintwork.
In addition, deformed and damaged body parts begin to deteriorate at an increased rate.
Let's consider the most problematic areas of the body of VAZ 2113, 2114, 2115 cars, the condition of which you need to pay special attention to, for example, when buying a car. Moreover, we will not include problems with wings, doors, and hood in the list, since these parts are removable and their condition does not affect performance and safety.
Problem areas of the body of VAZ 2113, 2114, 2115 cars
— Places for attaching the rear beam to the car body
The rating opens with perhaps the most dangerous problem with the body of these cars - the areas with amplifiers and the body around them rot under the rear beam mounting brackets.
The rear beam of VAZ 2113, 2114, 21015 cars is attached with its levers through rubber-metal hinges to triangular brackets on the right and left sides of the body. The brackets, in turn, sit on studs and are secured with nuts (three studs and three nuts per bracket). The studs are welded to a special thicker metal reinforcement located inside the rear of the sill.
Over time, a corrosion center appears around the brackets (possibly due to a violation of the protective layer of the threshold, untimely treatment of its internal cavity with a protective composition, vibration loading of this part of the body, etc.). First, corrosion eats away the metal of the threshold around the bracket, then it is taken over by the amplifier. After some time, the attachment of the beam to the body simply breaks out, and the car becomes uncontrollable as the beam with the rear wheels begins to take on a life of its own. It is very important to repair this connection at an early stage of destruction (before the amplifier inside the rear part of the threshold is destroyed).
In this case, the metal of the threshold under the brackets can be replaced with a thicker one. In severely advanced cases (for example, when a beam has already been torn out), repair is also possible, but more labor-intensive, since it requires the restoration of destroyed elements in compliance with geometric parameters (otherwise the car may be pulled to the side and the tires of the rear wheels can be eaten away by no means).
— Places for attaching the front suspension brace brackets (“crabs”) to the front of the car body
A similar situation occurs when corrosion forms in the area where the “crabs” are attached to the lower part of the radiator frame. In the places where the brackets are attached, the radiator frame also has reinforcements made of thicker metal. Basically, the destruction begins around them. Repair inserts for brackets are available for sale, which need to be welded in place of the damaged ones. Repairs must be carried out in compliance with all geometric dimensions, since otherwise the alignment of the wheel angles is disrupted, which cannot be adjusted in the future.
— Car thresholds
Destruction of thresholds is the most common problem with the bodies of VAZ 2113, 2114, 2115 cars. Operating a car with rotten thresholds is generally possible, but the rigidity of the body decreases sharply in direct proportion to the degree of destruction. Rust especially progresses under plastic decorative door sills. Replacing thresholds in most cases is impossible without restoring the floor elements to which the thresholds are attached. The threshold of VAZ 2113, 2114, 2115 cars consists of four elements (two amplifiers, a lower part and an external lining). Replacement is carried out either as a whole or those elements that are most corroded.
To prevent destruction and prolong the life of car sills, it is recommended to carry out additional treatment under the plastic sill covers, periodically treat their hidden cavities and external elements with special compounds, and clean the drainage holes in the lower edge of the sills.
— Destruction of the body under the rear support (“pillow”) of the car engine
The rear engine mount bears a large load, which over long periods of use of the vehicle results in weakening of the metal around its mount. In addition, this part of the body is not protected in any way and is constantly exposed to reagents. Over time, the body around the rear engine mount rots and the engine falls back, which makes further operation of the vehicle problematic.
There are repair inserts for the engine mount on sale that can help you cope with this problem.
— Trunk door (rear door) VAZ 2113, 2114
Constantly flying dirt settles on the car's tailgate and causes corrosion of its lower edge, which eventually leads to destruction. In principle, repairing this part is possible, but the price is comparable to replacing the door with a new or used one, but in good condition. As a preventative measure, it is recommended to install a spoiler on the rear upper part of the body above the tailgate. Door contamination will be greatly reduced.
In addition, the rear door hinges can cause problems. At best they become loose, at worst they crack and break.
— Glasses of front suspension struts
Dirt accumulating in the front wheel arches eventually leads to the destruction of the engine mudguards and, accordingly, the front strut cups. The constant vibration load of the places where the upper part of the struts (support bearings) are attached to the body causes cracks to appear near their studs and nuts. The repair part is commercially available, but replacing it is labor-intensive. As a preventative measure, it is recommended to periodically renew the protective coating of wheel arches and use plastic wheel arch liners. Rear suspension strut cups (rear wheel arches)
The same situation occurs with the rear suspension strut cups. Rust here usually begins to appear from the side of the wheel arches, behind the pillars. If the rack glasses themselves have not collapsed, then everything can only be done by replacing the rotten areas with fresh metal, which is not so difficult. Recommendations for prevention are the same: protective coating of wheel arches, filling hidden cavities with special compounds and using fender liners.
Repair insert
If there is a need to replace not a whole wing, but a part of it, then it is recommended to use repairs: the wheel arch of the front and rear wing, moldings. Repair inserts are installed in factory locations. The replica parts are made of industrial steel, with a maximum wheel arch thickness of 1 mm.
Original body parts are manufactured by AvtoVAZ and Kamaz, they are treated with shipping primer and are intended for painting. The cost of a repair insert for one wing is from 120 rubles. The price of the rear side panel starts from RUB 3,000.
What are universal wheel arch covers?
Wheel arches are often considered by most drivers to be the inner parts of the wings, although they are different parts of the car body. The wheels of the car are “hidden” in the arches; they protect the remaining elements of the body from impacts from stones and the adhesion of dirt.
The arches themselves are subject to aggressive environmental influences; the edges of the part are the first to be destroyed, and over time they rust and become deformed. There are special parts for protection. Their second name is wheel arch extensions or fenders.
Arch extensions are classified into three groups:
- Original spare parts. Parts are intended only for a certain brand of car, for example, standard fender flares for the VAZ 2114 and their replicas.
- Homemade, made with your own hands.
- Universal. Suitable for almost any car, not only the VAZ model range. Replicas are made to a specific shape from plastic or rubber.
Main purpose:
- Protection of wheel arches from corrosion.
- Preventing small chips and scratches of the paintwork resulting from the ejection of dirt and stones from under the wheels. Due to the peculiarities of the configuration, the modifications most susceptible to damage are the VAZ 2109 and the restyled version 21099.
- Protection of thresholds, fenders, car doors from dirt.
- Improved appearance. Fenders give the car a more brutal look. For example, for the VAZ 2115, the fender arches of an exclusive design have an additional extension that is connected to the body kit.
Universal rubber expanders are a budget-friendly, easy-to-install option. They are produced in rolls of 5, 10 or more meters, the price for 1 meter starts from 50 rubles. They are very easy to install - just measure, cut the required length, and glue.
Rubber fenders do not improve the appearance of the car. Their only function is to protect car body elements from aggressive environmental influences. You can install a spare part in 20 minutes by gluing the part with special glue.
Plastic lining for the arches of the VAZ 2114 is also a budget option, but more labor-intensive. The elements are made of ABC plastic, polystyrene with the addition of hardeners, and have different thicknesses and arc shapes.
Unlike rubber fenders, plastic fenders, in addition to protection, serve as tuning elements and improve the appearance of the car.
How to remove the rear wing
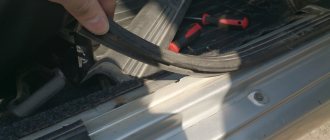
The rear wing on the VAZ 2114 is attached to the load-bearing parts of the body by spot welding. Dismantling and replacement require skills in welding and the presence of a semi-automatic welding machine to install a new element. If the rear fender has a significant dent from an impact, the metal will need to be pulled out before dismantling and cutting. Dismantling process step by step:
- Prepare the car: remove the battery, bend the carpet.
- Empty the trunk.
- Unscrew the rear bumper and disconnect the headlight unit. If the right rear is to be replaced, then the fuel tank must be removed.
- Remove the seal.
If you are making a cut for a repair insert, then you need to remove the side glass: pull out the rubber seal and press out the glass. During installation, the seat is processed and the old sealant is cut out.
- Using a thin chisel or machine, cut out the old part, retreating 1-1.5 cm from the joint.
- Drill out the welding points with the frame cross member.
- Disconnect the part.
- Cut off the remaining metal, grind it, straighten the edge.
- Attach a new part, secure with spot welding, check the gaps.
- Weld by contact welding, in increments of 4-5 cm.
At the final stage, the part is primed, treated with anti-corrosion agent and painted to match the body color.
Features of the material
One of the main materials from which fender linings for VAZ cars are made is ABS plastic. It is used due to its optimal characteristics:
- Plastic. A product made of ABS plastic can change its shape when heated without changing its performance properties. For example, if the expander does not fit tightly to the wing due to some kind of defect (convexity, concavity), then it is enough to heat it with a hair dryer so that it takes the desired shape.
- Flexibility. A fender made of ABS plastic or polystyrene can be bent without fear of it breaking. The universal trim is easy to install on wheel arches of any diameter.
- Softness. In many cases, when installing the lining, it is necessary to adjust the length, i.e., cut it. This can be easily done with a simple knife or hacksaw. To make the cut area look neat, just wipe it with a piece of waffle towel soaked in acetone.
Metal extensions on VAZs are used quite rarely; they are made to order for a specific model and are not produced as standard.
Repair parts
Replacing the rear wing of a VAZ 2114 in 70% of cases is associated with straightening out a dent from an impact. When there is no metal rupture there is no need for replacement. They straighten, putty and install back. The rear wing can be repaired without dismantling it from the car if there are small dents. Repair methods:
- reverse hammer;
- PDR method;
- vacuum suction cups.
If there are small pockets of corrosion in the area of the wheel arch, then use the method of welding metal patches and sealing through holes with epoxy glue.
Regardless of which repair method is chosen or whether a full replacement of the part is carried out, it is recommended to simultaneously check the condition of the sills and the general geometry of the body along with the fenders.
Replacement procedure
So, the need to replace the wheel arch liners on your car has been determined. You also managed to correctly select a set of new arched elements. You can start replacing.
You will need to purchase:
- Set of fender liners for front and rear wheels;
- Body 90 type product. This is a bituminous material with anti-gravel and anti-corrosion properties. It is applied with a simple brush or spray;
- Degreaser;
- Brushes;
- Self-tapping screws.
Fender liner kit
We replace the fender liner:
- Try to wash the car thoroughly, paying special attention to the fender liners.
- It is better to start dismantling work from the rear arches.
- Loosen the wheel bolts, jack up the desired wheel, and remove it.
- There is no need to remove the spring, brake disc or boot. But wrapping them in protective film or simple bags is a completely unnecessary undertaking.
- Now use a brush and water to wash away any remaining dirt that you could not get rid of during the car wash process.
- Let the car dry thoroughly.
- Now soak a rag in degreaser and treat the arches. There is no point in sparing the remedy.
- Again, wait until the product dries.
- Apply a coat of Body 910. You may have to change brushes as one is unlikely to be enough for you.
- The bitumen-based product must dry.
- Now attach the fender liner, press it as tightly as possible to the wheel arch. This must be done in order to mark the screws.
- Having made the markings, you can proceed directly to installing new arched protective elements. Use a screwdriver if possible. Working with a simple screwdriver is quite difficult, but possible.
- Apply a little more bitumen-based product to the resulting seams.
- Now you can remove the bags and films from the units, put the wheel in place, lower the jack and proceed to the next one.
- Using a similar method, the wheel arch liners of each of the four wheels are changed. It is better to enlist the support of a friend, since some steps are extremely difficult to complete on your own. First of all, this concerns applying markings to the fender liners. There you will have to carefully, evenly and tightly press the fender liner, plus at the same time work with a marker. Two hands are clearly not enough here.
The procedure for replacing fender liners is not complicated, but it requires a fairly large amount of free time.
It is worth adding that the factory front fender liners do not completely cover the wheel arches, but they cover the area under the front bumper better than their analogues.
Therefore, it is better to give preference to the originals. Although some analogues from other manufacturers have their advantages. Here, take into account your own judgments in this regard.
