Clean air in the cabin is pleasant and useful for every car owner. And the usual road dust, gas pollution and small debris can seriously spoil the ride quality. To ensure that such “troubles” continue to remain behind the glass, the cabin filter on the VAZ 2114 will help. This is a special air purification device, the second name of which is the VAZ 2114 stove filter. The equipment purifies air masses that enter through special openings located above the hood.
Some numbers: about two hundred thousand liters of air mass is filtered inside the car in just one hour of operation.
Functionality and appearance
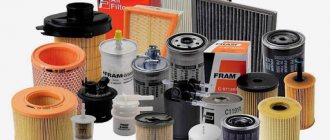
Cabin filter VAZ 2114
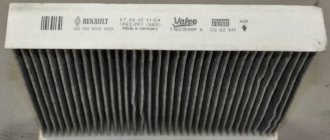
The structure of the VAZ 2114 cabin filter is very simple. This is a plastic frame with a special material inside.
Interesting fact: to enhance the cleaning effect, many experienced car owners install an additional, homemade fabric barrier into an existing one.
Functions:
- Purifies the air entering the car interior from the street.
- It traps debris, dust, and harmful fumes from car exhausts.
- Provides clean and fresh air into the cabin.
Filter selection
The manufacturer recommends using only original spare parts for repairs. Therefore, it is better to buy a cabin filter produced by VAZ. The article number of the original device is VF 014.
How to do it yourself?
Instructions for making a cleaner at home:
- Remove the old VAZ 2114 cabin filter from its seat.
- Remove dirty padding from the device. You can use a utility knife to quickly remove residue.
- After removing the padding polyester, you will be left with a plastic frame. Cut a new piece of padding polyester from the prepared material. The dimensions must correspond to the dimensions of a standard filter. Glue the material to the base.
User Dmitriy Belogrivtsev showed in his video how to make your own cabin filter element.
Cabin filter adapter
If the cleaning device cannot perform its task and the air flow entering the cabin remains dirty, a special adapter can be used. This component is a more advanced housing for the ventilation blower. The adapter is designed as a detachable device, made of steel and powder-coated.
Main functions:
- using the adapter, the car owner can install a more effective cleaning device in his vehicle;
- increases the service life of the cabin filter as a whole;
- cleans the air flow entering the cabin and makes it fresher;
- prevents the formation of dust and dirt deposits in the car interior.
You can build such an adapter with your own hands from metal, using drawings and diagrams that can be found on the Internet. If such a task is beyond your capabilities, then it is better to purchase a ready-made device in a store.
What models are there?
The list of functions may vary significantly depending on the modification of the device. The most primitive ones only retain dust and dirt. More expensive and high-quality ones are equipped with activated carbon sorbent. They prevent dangerous bacteria and microorganisms from entering the cabin air.
Filters of both domestic and foreign production are suitable for the VAZ 2114. Of course, each model has its own consumer properties and service life. The average cost in the store is about two hundred rubles. Experienced car owners recommend asking the store if there is a cabin filter for the VAZ 2114 VF-014. This model is preferred.
Installing the adapter on the car
DmitryCorsten Blog Error codes for on-board computers of the Samara-2 family VAZ 2113, VAZ 2114, VAZ 2115
Installation work, when compared with the manufacture of an adapter, is an order of magnitude simpler, however, even here there are enough nuances, ignorance of which can seriously complicate the completion of the task.
Since we have already decided that we will use a filter element from the VAZ-2110, which is larger in size than the original product, all that remains is to decide on the type of cabin filter. Recently, reusable products have appeared on sale. Even if you know a thousand and one ways to clean the old cabin filter of a VAZ-2115 stove, we do not recommend buying a reusable element: the savings here may turn out to be imaginary, since the initial service life of such products is significantly shorter, and cleaning it properly (to a new state) is all it takes it will not succeed, and re-installation will lead to even faster clogging.
Therefore, the choice remains between a cheap ten-point dust filter and its carbon version, which provides better and more effective protection. If preventing foreign odors and volatile substances from entering the cabin is not important to you, purchasing a filter with a layer of activated carbon does not make sense, but if caring about the health (yours and your passengers) is not an empty phrase for you, it is better to fork out for the carbon option. Sequence of steps to install the adapter:
- We assume that you have already removed the old SF, preparing a springboard for the subsequent set of works;
- take a car vacuum cleaner and vacuum the air ducts within reach;
- carefully clean the place where we will install the adapter so that nothing interferes with it;
- before installing the adapter, check its tightness in a bath of water (if air bubbles are detected, the gap must be sealed);
- The contact points between the adapter and the car body should also be treated with automotive sealant (we strongly do not recommend using silicone sealants for this);
- After installing the adapter, we mount a rubber seal on top, which will protect the hood trim from mechanical damage;
- install a new cabin filter in the rear part of the adapter;
- We assemble the body parts in reverse order.
Those carbon filter elements that are installed on the VAZ-2110 have a good service life, comparable to the best foreign analogues (about 20,000-30,000 kilometers), therefore, from the point of view of saving money, this option is not much more expensive than using a conventional filter (the cost of which is approximately double lower, but the service life is noticeably shorter). So the choice here is obvious - a filter with a carbon layer allows you to protect the interior from the penetration of almost all harmful factors present in the atmospheric air.
Location
Where is the cabin filter located on the VAZ 2114? Let's start with the fact that it may not be in the car at all. The fact is that not all previous VAZ models entered the production line with ready-made, installed filters. We are talking about VAZ 2114, 2113, 2115.
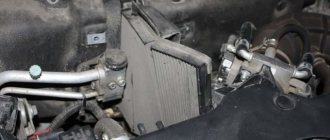
Here is the cabin filter on the VAZ 2114
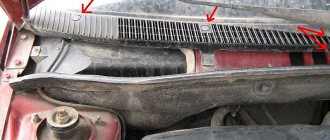
However, its presence in the car can be easily determined independently; you just need to press down the heater casing with force. If, when pressing under the stove, a free cavity is felt, it means there is no filter, and if the space is occupied, then, to the joy of the owner, it is already installed. As you probably understand, the filter is located directly under the hood of the car. In more detail, under the frill, or under the casing of the car heater.
Making your own adapter
If you are confident that you can make an adapter yourself, this will allow you to save a lot of money, which you can spend on purchasing a good carbon filter element. First, you need to find the adapter manufacturing diagrams on the Internet (taking into account the fact that this product is designed for installation in a VAZ-2114, since there are a great many such diagrams on the Internet for a wide variety of cars).
It is advisable to first make a paper model according to the diagram with exact dimensions - this will allow you to understand which part fits to which and in what order. To make the case you will need galvanized or stainless steel sheets. Plastic is also not bad, but processing it will require a special tool, and working with polyvinyl chloride itself is much more difficult than with metal, especially if curved surfaces and bends are required.
Since you have already cut out the parts for the layout, you should have no difficulty reading the drawing. All the required bends can be made using a large vice and a rubber (or, alternatively, a wooden) mallet. To connect metal parts, you can use either rivets or bolts. Rivets are good because they do not require drilling holes, but you need to know how to work with them - otherwise there is a risk of damaging the thin-walled metal.
When assembling the adapter, it is advisable to treat all connections, holes and other similar places with sealant, which is an excellent sound insulator and will not allow vibrations to occur when driving at high speed or on uneven roads. If you have enough experience, the process of making an adapter will take you a maximum of 5-6 hours, not counting the time spent searching and studying the circuits.
https://www.youtube.com/watch?v=eWi3Ruv3qPo
What to do with a dirty filter
Like any other part, the VAZ 2114 cabin filter is not durable. Its wear and tear is comparable to the mileage of the car. Every six, seven thousand kilometers it needs to be changed or cleaned.
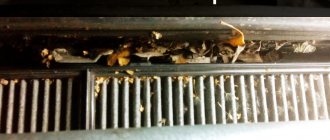
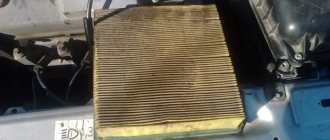
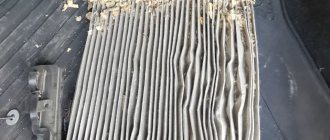
Dirty (old) cabin filter on a VAZ 2114
The picture of a dirty filter is always sad. Some car owners, for reasons of economy, wash, ventilate, dry it and put it back into operation. However, you need to be super skilled to carry out such work without errors. Not only is the material “tired” of use, but its structure is quite fragile. So, washing will most likely lead to new holes appearing on an old, semi-dirty device.
The best thing for the VAZ 2114 is replacing the cabin filter. But how to install a cabin filter on a VAZ 2114 correctly?
Replacement frequency
In order for the heater air purifier installed in the car to remove dust and debris to work correctly, it must be changed periodically. According to official regulations, the cabin filter in the VAZ 2114 must be replaced every 10 thousand kilometers. But if we take into account the dustiness of domestic roads, then the replacement interval for the device must be reduced to 7-8 thousand kilometers.
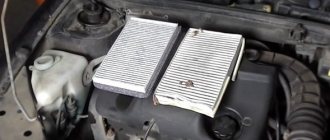
Used and new cleaner
There are several signs that indicate the need to replace the device:
- The air flow leaving the heating system has become too weak.
- There was an unpleasant smell of dampness in the car interior.
- The car windows sweat regularly.
From words to action
The replacement algorithm is quite simple, even a novice car owner can easily master it:
- Open and lock the hood in the desired position.
- Remove the rubber band (seal) and fixing devices.
- Unscrew the screws secured with nuts.
- Remove the special plastic plugs. This is where a knife or straight-slotted screwdriver will come to the rescue.
- Unscrew the remaining self-tapping screws.
- Next, disconnect the frill.
- Remove the screws again.
- Remove the plastic mesh.
- Carefully remove the old filter.
- Install a new air purification device in its place.
- Install it behind the air collector.
- Press it to the body.
- Secure with mastic.
By the way, installing a completely new filter is not at all necessary. After all, in a plastic frame most often there is an ordinary padding polyester. You can buy this material yourself. It is inexpensive and easily adheres to glue. Now you know how to change the air filter on a VAZ 2114 yourself!
Interesting fact: ordinary water can shorten the life of the cabin filter. Seeping into the filter device, it allows bacteria, fungus and mold to multiply. If the driver does not notice this in time, an unpleasant odor will soon appear in the cabin. At the same time, the operation of the air conditioner may be disrupted.
On the one hand, the surface of accumulated dust prevents new dirt from entering the cabin along with the air. On the other hand, the filter can become so clogged that the air flow practically runs out. Timely replacement of the cabin filter on a VAZ 2114 will free your lungs from hard and thankless work. Let the car solve the problem of dirty air, not your own body.
Video “How to correctly change the filter product on a VAZ 2114”
User Alexander Chkalov provided a video that shows in detail the procedure for replacing the air purification device in the cabin of the Four.
Do you have any questions? Specialists and readers of the AUTODVIG website will help you ask a question
Was this article helpful?
Thank you for your opinion!
The article was useful. Please share the information with your friends.
Yes (66.67%)
No (33.33%)
X
Please write what is wrong and leave recommendations on the article
Cancel reply
Rate this article: ( 3 votes, average: 4.67 out of 5)
Discuss the article:
Why is the cabin filter adapter useful?
If the cabin filter does not cope with its task on its own, and the air in the cabin is still dirty, you should resort to using a special adapter.
Its capabilities and functions:
- Allows you to install a more modern filter in your car.
- Extends its service life.
- Makes the air in the cabin clean and fresh.
- Eliminates dangerous deposits of dirt inside the cabin.
You can buy such an adapter online or make it yourself using stainless steel drawings. If you are not a jack of all trades, but you like the drawings, look for craftsmen who have already mastered this craft and sell adapters online.
When replacing the filter, you should not rely on the car’s operating instructions and wait until the due date. Check its cleanliness as often as possible.
In any case, it is worth seriously fighting for clean air in the cabin. After all, we spend a good half of our lives in the car.
Photo gallery
Photos of filter replacement are shown below.
1. Remove the old cleaning device from its seat
2. Install a new filter, securing it with sealant to the frill
