Tool:
- Medium Phillips screwdriver
- Medium flat screwdriver
- Driver for socket attachment
- Extension for socket bits
- Knob attachment 10 mm
1. We disconnect the engine control system wiring harness block from the mass air flow sensor and, loosening the clamp with a Phillips screwdriver, remove the air supply hose to the throttle assembly from the sensor branch pipe.
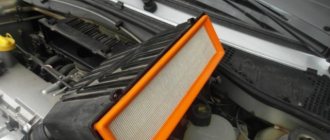
2. After unscrewing the screws securing the cover, remove the cover with the replaceable element, as described here.
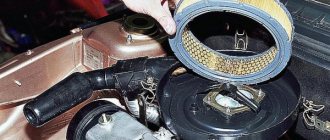
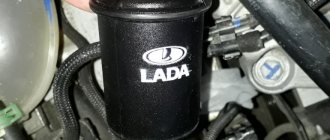
3. We remove the solenoid valve for purge the adsorber by sliding it up the bracket on the air filter housing.
4. Using a screwdriver, squeeze the petals of the steam exhaust hose holder and disconnect it from the air filter housing bracket.
5. Using a 10mm socket with an extension, unscrew the nut securing the air intake to the radiator bracket.
6. Using a wrench or a 10mm socket, unscrew the bolts securing the two brackets for the rubber supports of the air filter housing to the upper cross member of the radiator frame.
7. We remove the third rubber support of the filter housing from the bracket slot on the battery platform.
8. Remove the air filter housing.
9. Install the air filter in reverse order.
The article is missing:
- Photo of the instrument
- High-quality photos of repairs
Hello everyone, today we’ll talk about how to remove the air filter along with the housing and, if necessary, replace it, Lada Kalina car.
So, first, let's figure it out, why does it need to be removed? After all, it would seem that you don’t need to do this to replace the air filter. My answer is that in most cases, when repairing a car under the hood, you will have to remove the air filter, and you will learn how to do this below. To work, we only need a Phillips screwdriver to loosen the clamps.
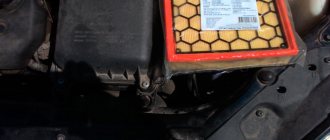
So, let's start first of all, you need to open the hood, after which in the engine compartment we find a black filter housing, it is located near the battery, or slightly to the left of the expansion tank.
How to replace the Lada Kalina air filter yourself
We purchase a new filter and prepare the following tool:
- Phillips screwdriver;
- damp cloth;
- car vacuum cleaner.
All work is performed in the following sequence:
Raise the hood and disconnect the air flow sensor by disconnecting the plug. To do this, you need to press a little from below and pull to the side.
- It is better to take the released wiring to the side and secure it somehow so that it does not interfere.
- Unscrew the bolts securing the filter to the box cover. There are 4 of these bolts.
- Now you can freely remove the cover. The filter has been accessed.
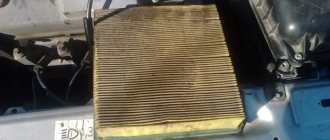
- Take out the element and thoroughly wipe the interior. For a better effect, you can turn it on and vacuum around.
- The new filter is installed so that its ribs point in the direction of movement.
- Then everything is tightened and connected in the reverse order.
How to find out if the filter is dirty: advice from professionals
- engine performance has decreased;
- starting the car is difficult;
- Fuel consumption has increased noticeably.
The bolts are tightened tightly and you don’t have to climb here again for the next 15 thousand kilometers.
Replacing the Lada Kalina air filter is a planned procedure and is included in regular maintenance. The cost of the part is low; the process takes up to ten minutes for experienced drivers. Timely replacements will prevent engine problems. It is much cheaper and easier to regularly install a new filtration element than to overhaul the engine. Average service intervals are 10-15 thousand km, but you need to take into account operating conditions and pay attention to alarming symptoms.
conclusions
According to various forums, there is a legend among car enthusiasts that if you wash the air filter, it can be reused. Unfortunately, this is only a fiction, since the smallest dust particles settle deep in the filter, and they can no longer be washed out again, and the dirt that is washed off from the surface of the filter will not change anything significant in its operation.
Today’s article will not be large in volume; it will tell you how to independently replace the air filter on a Lada Kalina.
In general, the instruction manual says that on the Lada Kalina the air filter is replaced after thirty thousand kilometers, many do this, but this is not entirely correct.
The role of the filter in a car
The Lada Kalina engine requires about 12-14 cubic meters of air for every 100 km of travel. In the intake manifold, it is mixed with fuel sprayed by the injector nozzles. The mixture then enters the cylinder chambers, where it is burned. The optimal proportion of air to fuel ensures that the engine achieves the characteristics declared by the manufacturer. It is no secret that a large volume of dust, suspended dirt and other compounds enters the intake receiver along with the air. The role of the filter is to ensure high-quality cleaning of the intake air, because it is a kind of barrier in the path of these negative particles.
If there was no air filter, then all the suspended dirt would inevitably fall inside the engine cylinders, gradually settling on its walls and accumulating in the oil system. This would lead to scoring on the walls of the liners and liners, which would require a major overhaul.
Gradual clogging of the filter element leads to a deterioration in its throughput and, as a consequence, to air starvation of the LADA Kalina engine. This is fraught with the formation of carbon deposits on the parts of the valve assembly and elements of the cylinder-piston group, because such combustion will be characterized by the presence of a fuel-enriched mixture above the permissible limit. This inevitably leads to increased fuel consumption and a decrease in the power level of the unit. Also, exhaust gases are endowed with increased toxicity.
Tips and tricks
It is important to understand that any particles that may be contained in polluted air and will not be filtered can lead to disruption of operating modes, as well as breakdowns of various systems and the internal combustion engine itself. The throttle valve, flow meter, various sensors, etc. come under attack.
Also, contaminants in the air can lead to scoring in the cylinders. For this reason, experienced car enthusiasts know that driving without an air filter is strictly prohibited. You also need to constantly monitor the condition of the element, and also know how often to change the air filter.
The throttle valve, flow meter, various sensors, etc. come under attack. Also, contaminants in the air can lead to scoring in the cylinders. For this reason, experienced car enthusiasts know that driving without an air filter is strictly prohibited. You also need to constantly monitor the condition of the element, and also know how often to change the air filter.
Usually the check is carried out in parallel with monitoring the oil level in the boat and other technical fluids. Many people additionally blow the filter and its housing with air from a compressor or pump.
We add that some owners, in order to save money, try to wash the air filter instead of replacing it
Please note that such external cleaning does not help, since the smallest contaminants between the fibers of the filter element cannot be washed off. Moreover, dirt gets wet and clogs the filter element even more, preventing the normal passage of air.
If the operating conditions of the car are “difficult”, constant driving is practiced on dusty dirt roads, etc., then it is advisable to reduce the replacement intervals for both filters and the engine oil itself by 30-50%.
As for turbocharged gasoline and diesel engines, increased demands are placed on such engines in relation to the quality of air purification and the intensity of its flow into the engine. In simple words, on a car with a turbine, it is highly recommended to change the air filter more often.
Finally, I would like to add a few words about zero resistance filters, better known as zero filters. Such filters differ from conventional ones in that the degree of their resistance to air flow is reduced as much as possible. As a result, it is possible to supply maximum air to the engine.
Typically, elements of this type are installed on sports and racing cars, as well as on specially prepared forced internal combustion engines. At the same time, you need to understand that the service life of “nuleviks” is very limited. In other words, they need to be changed very often. Moreover, such a filter on a civilian car does not provide any obvious advantages. This creates an increased risk of engine contamination.
How often should you change the air filter?
The air filter on Kalina must be changed according to the regulations, otherwise the engine will come under attack and the atmosphere in the cabin will sharply deteriorate. You can use paper and carbon elements - the former are cheaper, the latter are better at eliminating contamination, and of all types at once.
Important! High-quality filters can clog faster than low-quality filters because they are better able to capture contaminant particles. The manufacturer recommends maintenance every 30 thousand
km, but experts say that this is a lot. This frequency is suitable under ideal operating conditions; in other situations, the intervals are reduced by 2-3 times. If starting is difficult, fuel consumption has increased, vehicle dynamics have suffered, work must be carried out immediately
The manufacturer recommends maintenance every 30 thousand km, but experts say that this is too much. This frequency is suitable under ideal operating conditions; in other situations, the intervals are reduced by 2-3 times. If starting is difficult, fuel consumption has increased, or vehicle dynamics have suffered, work must be carried out immediately.
Carbon elements eliminate debris, germs, and unpleasant odors
How to change the Lada Kalina air filter with your own hands?
We purchase a new filter and prepare the following tools:
We open the hood of our “swallow” and disconnect the plug from the air flow sensor. This operation is performed in literally a couple of seconds without using any special tool. The sensor is secured with a conventional fastener, which follows:
- wait from bottom to top;
- pull to the side with some effort.
The freed wires can be hooked onto something so that they do not get in the way when replacing the filter (if the procedure is performed by an experienced motorist, he simply moves them to the sides). After this, you need to unscrew the four bolts that secure the air filter to the cover. It is advisable to perform this operation with a Phillips screwdriver. But it doesn’t matter if you don’t have it on hand. On most Kalinas, the tightening of the mentioned bolts is not strong, which means they can be unscrewed with a simple flat-head screwdriver.
After removing the bolts, safely open the cover, pulling it out with little force. Before us is an old filter that we want to replace. We take out the spent element, carefully wipe the free space with a rag, and then also use a vacuum cleaner to completely get rid of fine dirt and dust. We take the new filter in our hands, orient it so that its ribs are located in the direction of movement (that is, forward), and insert it into the housing.
Hello everyone, today we’ll talk about how to remove the air filter along with the housing and, if necessary, replace it, Lada Kalina car.
So, first, let's figure it out, why does it need to be removed? After all, it would seem that you don’t need to do this to replace the air filter. My answer is that in most cases, when repairing a car under the hood, you will have to remove the air filter, and you will learn how to do this below. To work, we only need a Phillips screwdriver to loosen the clamps.
So, let's start first of all, you need to open the hood, after which in the engine compartment we find a black filter housing, it is located near the battery, or slightly to the left of the expansion tank.
First of all, we need to disconnect the mass air flow sensor.
Now unscrew the clamp screw that secures the pipe fitting to the body.
Next, we remove the adsorber from the body; to do this, pull it up and remove it from its seat; there are no other fasteners there.
We unscrew the nut that secures the air intake, it is located at the top near the radiator. Next, carefully remove them from the cushions and disconnect the expansion tank hose from below; I think it won’t cause any problems. Well, that seems to be all, put it back together in reverse order, don’t forget to connect the mass air flow sensor.
Replacement for VAZ 1117-1119
Note! This procedure will require interaction with electronics, we recommend that you remove the negative terminal from the battery! (For more details, see the article: “Replacing the battery in a car”, point 1)
Removal
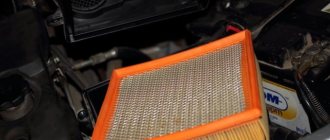
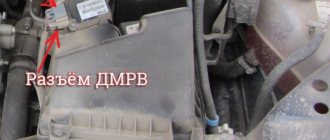
- First, disconnect the Mass Air Flow Sensor (indicated by the blue arrow) from the housing (indicated by the red arrow) by pressing the mounting latch from below and pulling it out.
- Using a screwdriver, slightly loosen the fastening screw of the air supply pipe on the filter housing, then disconnect the pipe and move it aside so that it does not interfere with removal.
- Carefully inspect the new filter, is there a mass air flow sensor housing on it? If not, then use a wrench to unscrew the two mounting bolts (photo 1), remove it and the gasket behind it from the filter housing (photo 2).
- Then look under the TV - the front of the car, where the headlights, radiator grille, etc. are located. Find the nut that secures the filter housing to the radiator frame and unscrew it completely with a wrench (photo 1). Now remove the two top housing bolts (Photo 2). Find the bracket on the battery holding bar; it includes a rubber filter support (photo 3, red arrow), and remove it. The case no longer holds anything - remove it (photo 4).
Installation
Proceed in the reverse order of removal. Important point! Most cases are sold empty in auto stores, which means you need to remove all the parts from the old one and replace them with the new one:
- pull the pipe against the force of the clamps;
- disconnect it from the body as shown in the first picture;
- Using pliers, remove the rubber supports along with the brackets (photo 2): grab the ends, pull them out and install them on the new body.
Note! Lubricating the rubber bearings with engine oil will make the installation process easier!
Detailed instructions for replacing the air filter of a Lada Kalina car
The air filter is designed to clean the air entering the car engine. It refers to consumables that require replacement during routine technical inspections. The article describes how to replace the Lada Kalina air filter.
In what cases is replacement necessary?
For a car, especially with an injector, it is very important what condition the air filter is in. For high-quality operation of an internal combustion engine, a large volume of air is required, much larger than fuel, which is taken from the environment. The purpose of the filter element is to clean this air from these contaminants, because the quality of the air-fuel mixture depends on its purity
The purpose of the filter element is to clean this air from these contaminants, because the quality of the air-fuel mixture depends on its purity.
The filter is a filter paper folded into an accordion to increase the filtering surface. During operation, the pores of the filter become clogged, which reduces its throughput and deteriorates the quality of the air that comes from the environment. The air filter also acts as a device that reduces noise during air intake, as well as a thermostat. This is especially true in winter; the incoming air, passing through the filter element, heats up, so the temperature difference will not be so noticeable.
The following factors influence the frequency of replacement:
- quality of road surface;
- quality of the filter element;
- terms of Use.
According to manufacturers' recommendations, the filter material should be changed at least after 30 thousand kilometers or after a visual inspection if it is heavily contaminated.
If the car is operated on unpaved roads or in a metropolis with polluted air, the air filter must be changed after 15 thousand kilometers.
Replacement procedure
To carry out the procedure, you need to install the machine in a comfortable position, prepare the necessary tools and buy a new air filter.
Set of tools
You should prepare in advance for the procedure: prepare the tools you will need for the job:
- Phillips screwdriver;
- clean rags;
- consumables;
- compressed air cylinder or vacuum cleaner.
In order for consumables to last for the stated period, you should buy original products.
It is best to purchase parts in specialized stores to eliminate the risk of buying a fake. The manufacturer recommends installing filters with VAZ certification.
Stages
To replace the air filter on Kalina, you need to follow these steps:
- To access the filter housing, you need to open the car hood. It is located on the right side of the engine compartment. Engine compartment of VAZ 2107
- First you need to turn off the mass air flow sensor so that it does not interfere with operation.
- Then you should remove the air supply hose from the pipe.
- The air filter housing is secured with four bolts. You need to unscrew them and you can lift the housing cover. Removing the cover from the housing
- To remove the old filter element, you just need to pull it up.
- Before inserting a new consumable, the housing should be cleaned of dirt and abrasive particles that have accumulated in it during operation. You can blow out the housing with compressed air or a vacuum cleaner, and then wipe with a clean rag. The body should be wiped with a rag
- The new consumable is installed with the fins forward in the direction of the air flow. There may be a hint on the case.
- Before installing the cover, you need to check the seal. Then screw the housing cover into place.
- Reconnect the mass air flow sensor.
This completes the replacement procedure, and you can continue to operate the car.
Recommendations for use
For proper operation of the engine at full power, it is necessary to ensure the cleanliness of the filter material. You should not wait until it becomes completely dirty, as in this case the engine power decreases and fuel consumption increases. In addition, abrasive particles coming from contaminated material can scratch the cylinder walls, which will lead to wear of the cylinder-piston group.
Thus, it is not necessary to follow the recommendations specified in the operating manual for the Lada Kalina car and change the filter element after 30 thousand km. It should be changed as it gets dirty, most often after 15-20 thousand km. The procedure does not take much time, but the engine will last longer and operate efficiently.
https://youtube.com/watch?v=gEFgQhoHs_A
What does air filter resistance indicate?
Lada Kalina Hatchback MyLittleFriend Kalinich Logbook Floating speed or Replacing the idle air control
Filter mounting locations
This is a value indicating the resistance provided to air flow. Filters can have different indicators of this value. It depends on many parameters and is calculated when designing the engine. Mass production cars are equipped with filters with a coefficient of 0.6%.
https://youtube.com/watch?v=gEFgQhoHs_A
https://youtube.com/watch?v=gEFgQhoHs_A
Would you like to learn more about how to replace the air filter?
on
Kalina
? And you are also interested in which ones.
https://youtube.com/watch?v=OkdPXUaMrEU
Such details have an extremely insignificant effect on engine power. But if it drops and fuel consumption increases, most likely the air filter is dirty. Which means it's time to change it. Moreover, if you re-read the instructions for your Lada Kalina, you will find information there about the need to change the air filter every 30,000 km in the city and 15,000 km when traveling in rural areas.
This is just a recommendation from the manufacturer of the Lada Kalina, but remember that after this mark you need to more closely control the operation of the engine.
Replacing air filters. — Lada Kalina Sport, 1.6 l., 2012 on DRIVE2
Hello, dear friends and colleagues!
Today I would like to bring to your attention the topic of air filters, which are used on all cars with a traditional engine and power system. Like all consumables, car air filters must be periodically replaced with new ones.
And the more often, the better.
Because a clogged engine air filter leads to deterioration in performance and increased fuel consumption, and the filter element of the ventilation and heating system leads to premature wear of the fan and some problems with the air conditioner...
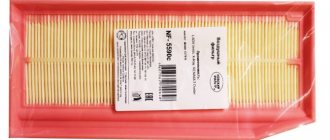
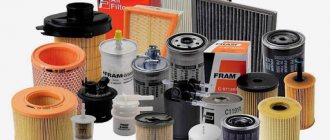
So, let’s look step by step at how to properly replace air filters, and at the same time carry out a little preventive maintenance for your health =) The choice of manufacturer does not play a big role here. The filters most often found in stores are the Russian brand - “Big Filter”.
Full size
Big Filter brand air filters.
1) Replacement of the engine air filter.
This is perhaps the simplest thing that can be. To access the filter, you need to open the hood and use a Phillips screwdriver to unscrew the 4 screws securing the air element housing cover. If necessary, you can disconnect the mass air flow sensor and also loosen the clamp securing the air corrugation to the housing cover.
- It is a good idea to clean the cavity of the air filter housing from dust.
- The new filter must be installed so that its guides are parallel to the arrow indicated on the bottom of the filter housing.
- Further assembly is carried out in reverse order.
- 2) Replacing the cabin filter.
Unlike engine air filters, cabin filter elements come in two types: regular (standard) and carbon. The latter are recommended for use for allergies.
But for greater prevention of your health, I recommend using the following recipe: 1) Chlorhexidine solution
(3 pcs), Boric acid
(1 piece),
Lavender essential oil
or any other oil of your choice (1 piece).
All these substances are sold at pharmacies and can be bought without a prescription.
Full size
prophylactic substances.
Next, we make the mixture. Mix and pour into the spray tank.
Now you need to remove the old filter element located under the right windshield trim. The cladding is held on by 5 screws with a Torx head T-20
, a couple of which are located under the plastic plugs and another one under the right wiper blade.
Then you need to use a Phillips screwdriver to unscrew the 2 screws securing the cabin filter cover and the screw securing the windshield washer tube holder.
By pressing the latches on the sides, we dismantle the worn element. Before installing the new filter, I cleaned the installation area and sprayed it with a pre-prepared mixture.
The filter itself was treated in the same way.
The cabin filter cover has undergone some changes. The factory plastic is very hard and that's good. But the left side of the lid remains open and thus a gap is formed.
Full size
gap between the cabin filter and the cover.
To fix this, I cut the side rim from the “Grant” lid. She herself also fits, but the size is a little larger than the Kalinovskaya one. Therefore, it was inconvenient (for me personally) to remove and install it.
Full size
cabin filter cover from Granta.
Full size
Factory cabin filter cover without side panel.
Full size
Grant cabin filter cover with side flange.
The results of the work done are quite expected - the car has become faster, and the air in the cabin with the air conditioning on is fresher and more pleasant. Thank you all for your attention.
Price: 550 ₽ Mileage: 59,000 km
Replacing the cabin filter on a viburnum
Welcome! Cabin filter - the name itself speaks for itself, namely the cabin filter, thanks to it all the air entering the car that flies into the car when driving is cleaned of dust, leaves and unnecessary dirt, but over time the filter becomes dirty and becomes very dirty, due to with this, it is no longer purified air that flies into the cabin, but all the dust that has accumulated on this filter over the entire time, because of this it becomes very unpleasant to drive and you are constantly thinking about replacing this filter with a new one.
Note! The filter is easy to change and all you need to take from the tools is: A set of several screwdrivers and, if possible, also take a vacuum cleaner and be sure to have a rag, the vacuum cleaner is very convenient to collect all the dirt from the place where the filter was installed, therefore, when you turn on the stove , it will no longer get into the interior of your car!
Where is the cabin filter located? To get to it, remove the right facing (As the car is moving) you will need to lift the brush that cleans the glass, then use a flat screwdriver or a knife (we don’t recommend using a knife, because the plastic is soft and, besides, it’s black and therefore if you do not do the work carefully, then at best you will scratch it, and at worst you will pierce it) pry off the two plugs indicated by the blue arrows, after prying them off, take them out and unscrew the two screws that were located behind these plugs, besides this, open the hood and find two more screws (there are four in total) that secure the right facing and then slightly lifting it (see small photo), remove it completely from the car, behind this facing there will be a protective cover (you will see it immediately) by removing it, you will provide access for yourself to the cabin filter in the car, you will learn more about how to remove it as you read this article.
When should you change the cabin filter? It all depends on you, if the air in your cars has ceased to be fresh (It has become dusty, it has become difficult to breathe, etc.), then you can already think about replacing this filter with a new one, but in general people recommend replacing it once every 15,000 thousand km. but at the same time, you also need to take into account the fact on which roads the car is driven, if on dusty roads or just in a metropolis where the surrounding air is polluted, then this filter must be replaced much more often (For example, once every 10,000 thousand km), in addition you need to take into account There is also the fact that the stove is connected to the cabin filter when working (It is only connected to it, there is nothing else the filter is needed for) and if you want to turn on the stove, then all the air will pass through this filter and if it is dirty, it will get into the cabin, and besides all this, the stove will also work worse (it will be harder for it, because air will be much more reluctant to pass through a clogged filter).
Note! Any filter elements have one goal, to prevent debris and dust from passing through the place where they are installed, but at the same time they also take in all this dirt and dust, and over time (When the filter is full of dirt) it ejects of all dirt, this process is called desorption (It only occurs in carbon filters; cabin filters, by the way, are mostly carbon) in connection with this process, it throws most of the dust and dirt into the car interior, so do not spare money on this thing and change it as often as possible, because in addition to dust, it also absorbs toxic emissions from the exhaust systems of passing cars, which are subsequently also sent into the car interior if you do not replace the filter with a new one!
Filter replacement steps
The replacement procedure is so simple that you shouldn’t even think about turning to the services of car service workers. Even a driver who is behind the wheel for the first time can do it.
To do this, you must follow the instructions:
- prepare a new filter and a Phillips screwdriver;
- open the hood of the car and unscrew the 4 screws that secure the plastic protective cover;
we take out the old filter, wipe the standard seat and install a new consumable
It is important that the direction of air movement coincides with the direction of the fibers of the cartridge;
close the lid.
Replacing the air filter housing on Kalina
Welcome! Despite the fact that the car can drive without an air filter, it is one of the important engine systems. In its absence, all the debris and dust from the environment will fall into the engine and spoil it. The filter performs the function of air purification, extending the service life of the engine. Removing the housing with the filter will increase the car's power by about 3-5%, but this is practically not noticeable and is not worth it.
Note! To replace the air filter housing, you will need the following tools: screwdriver, wrench, pliers (a knife or thin flat-head screwdriver will do instead).
Location of the building
We open the hood, look for the engine, and a long hose comes from it, thanks to which the engine receives air. Let's look at this process in more detail.
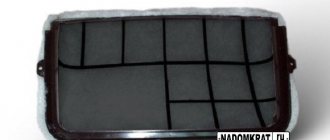
Air enters the engine from the environment; it is necessary for the combustion of gasoline, and therefore for the operation of the car as a whole. The air enters the air intake located at the very bottom of the air filter (indicated in red). When driving through deep puddles, you need to be careful: water entering the filter pipe leads to water hammer - when it hits the hot engine cylinders, it cools the engine sharply, leading to cracks and damage to parts. Large amounts of water cause deformation of the pistons. The consequence of water hammer, as a rule, is a major engine repair (a very expensive service, so be careful when driving and take care of your car).
How often to change the filter
Kalina's official instructions provide for the following standards for operating the air filter:
- for urban areas - once every 30,000 kilometers;
- for regular suburban and rural trips - once every 15,000 kilometers.
This is the best option for servicing the first and second Kalina, allowing the car to operate properly for longer. The less debris and dust gets into the mixture formation system, the more stable the engine will operate.
The process of removing and replacing the viburnum air filter takes no more than 15 minutes. As a result of such basic manipulations, the engine will work much more clearly and efficiently.
https://youtube.com/watch?v=OkdPXUaMrEU
We repair the Lada Kalina car ourselves: