Sometimes it happens that after buying a Lada Priora car, especially a used one, after a while the owner begins to be alarmed by noises, creaks and knocking in the cabin. If this happens in a completely new car, the owner is completely overwhelmed by panic, and the joy of the purchase is overshadowed by the possibility of breakdowns or malfunctions.
There is no need to panic, first, let's look at the problem. So, what to do if the interior of a Priora rattles?
The cause of the noise may lie in banal things - metal things in the glove compartment may rattle. Antennas, mirrors or a removable trunk can rattle, as the parts are not securely fastened. If you are sure that everything is in order with these points, you should analyze the noise further.
Try to determine the place where the knocking or noise is coming from - if it is the engine compartment, you should contact a service professional for diagnostics. But the reason may be that the fan belt is frayed; it also happens that pebbles and pieces of dirt get knocked between the oil pan and its protection. Then you can get away with a slight fright.
If you hear knocking in the suspension, you should rock the wheel in different directions or the body, pressing on it with your hand. It's a good idea to remove the wheel and look at the brake mechanisms. If the cause of the knocking is not determined while the car is static, you need to drive it and listen to the sounds while driving.
The interior of the Priora often rattles because the car’s sound insulation is not sufficiently developed. The window regulator mechanisms or door lock rods may be knocking. In this case, the owner only needs to perform a couple of simple manipulations, which will require:
• Vibroplast, • Polyurethane foam, • Primer, • Solvent, • Anti-corrosion agent, • Brush, • Spatula.
To improve sound insulation, you will have to disassemble the interior of the car, remove trim from the doors and ceiling. Clean and treat areas where rust has appeared with an anti-corrosion agent. If necessary, before processing you will also have to prime it and fill all voids with polyurethane foam.
Next, in the car interior, you need to glue sheets of vibroplast, self-adhesive ones are available for sale. It is preheated according to the instructions with a hair dryer.
If the power windows or door locks rattle, you need to insulate them using pieces of foam rubber. When assembling the interior, secure all screws and nuts, and inspect all plastic parts by securing them with double-sided tape. To protect the engine, you can purchase a protective cover.
Good day, Drivers! I don’t promise an opus, but I’ll say a few words about the noise of the door cards... Not long ago, the trim began to rustle, first at the front, then at the back... I decided not to wait for next summer and slowly get rid of them and other removable plastic, and in the summer the noise of the doors, etc.
I tightened all the wires into bitoplast, the photo was taken before... I took the casing home, warmed it up and off we went:
The Priora dashboard rattles
- To the beginning of the forum
- Forum Rules
- Old design
- FAQ
- Search
- Users
There are three plastic clamps under the steering wheel, try to tighten them tighter.
I'll try, thanks, but it seems to me that it's somewhere higher! I was thinking of going to a mechanic I know to make a noise reduction for the front panel, but when I learned that it costs 4000, the green creature strangled me!
I'll try, thanks, but it seems to me that it's somewhere higher!
The signaling unit is unlikely to knock, it lies under the plastic near the right leg of the driver and there is a carpet there and it cannot knock there since everything lies tightly there.
But the location of the signaling depends purely on the imagination and desire of the installers to work. For me, they just threw it behind the dashboard on a small piece of double-sided tape and it immediately rattled. It turned out to be easier to glue it on myself. A friend’s - I still don’t understand how they sandaled him under the torpedo - his hand can barely fit there.
Maybe your steering column cover is rubbing against the dashboard?
Yes, not rubbing, but knocking!
there is nothing higher to knock on. I completely disassembled the torpedo
Aren't there any connectors there?
the location of the signaling depends purely on the imagination and desire of the installers to work
Source
Eliminating door card chatter
Good day to all.
I decided to add this entry to the blog about eliminating rattling door cards, maybe it will be useful to someone. I needed (for 4 doors): — 1 sheet of STP Silver; — 1 sheet of Biplast; — 2 sheets of Vialon. We remove the card and unscrew this foam plastic: In its place we sculpt a piece of stp:
Next, unscrew the top part of the cladding and glue the biplast onto the card:
We unscrew the “pocket” for trinkets and glue the joints and places of contact with the plastic of the card:
Next, remove the fabric cover and sculpt small pieces of biplast into the places where the screw is screwed in:
I didn’t change the clips, I replaced some with new ones, but I put biplast under everything. They stopped rattling:
The “bracket” that secures the handle lining also makes a lot of noise. We also push biplast under it and under the overlay itself:
We pull through all the screws and seal the entire card with violon:
We make holes for the handle, wiring and put everything in place. We use the same technology to make the remaining 3 doors. It took a day to do everything, with smoke breaks and breaks))) The effect is noticeable, the rattling from the cards has disappeared + the doors have become a little warmer, they have become even easier to close, although there are factory locks.
Source
The Priora dashboard rattles
- To the beginning of the forum
- Forum Rules
- Old design
- FAQ
- Search
- Users
What if the central nozzles are removed? and to look. maybe you'll get there. I got there when I changed the damper lever, and it rang.
Have you pinpointed the location of the chatter? I also thought for a long time that there was a rattling noise under my dashboard, but it turned out that it was the gearbox lever that was rattling. And the sound definitely came from somewhere under the panel.
+1 At first it also seemed like something was rattling behind the panel. It turned out to be the gearshift lever. How to treat? There was a lot of talk about this in the search.
“warrior” look, when do you have rattling throughout the entire rpm range or closer to 3000? If around 3000 then the gearshift lever.
+1 At first it also seemed like something was rattling behind the panel. It turned out to be the gearshift lever. How to treat? There was a lot of talk about this in the search.
I cured the rattling of the gearbox lever by replacing 2 plastic bushings on the axis where the gearbox lever connects to the gearbox drive rod.
Lol. Just LOL FUCK
This is where you GUYS https://www.autolada.ru/viewtopic.php?t=104421&highlight= !
topic started, the essence of the problem: when overclocking, I got sick of (to put it mildly) a metallic rattle in the panel (in the area of the central nozzles), in general, somewhere under the top (this is the soft one)
And in the end it started talking about the gearshift knob... Maybe AFTARA has a gearbox on the Torpedo? :ooo:
Source
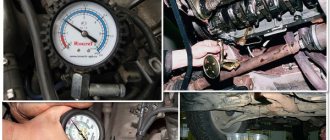
How is detonation formed?
If the engine runs stably and without interruptions, the combustion process of the air-fuel mixture maintains its consistency. The motor operates quietly, there is no extraneous noise. The process begins with a spark from the spark plug, after which the entire combustion chamber is filled. This happens equidistantly.
In the case of detonation or detonation combustion, the process looks different. The entire amount of the mixture of fuel and air injected into the chamber ignites simultaneously. This leads to a sharp and strong increase in the temperature of the cylinders and the pressure inside them. During detonation, the mixture does not burn completely. In areas where the largest volume of unburned fuel remains, active chemical compounds gradually appear.
If their concentration reaches high levels, a chain reaction may occur, resulting in explosive ignition. In fact, it is an explosion that creates an impressive shock wave. They spread quickly and with great force crash into the cylinders and walls of the combustion chamber. At the same time, new areas appear where spontaneous combustion of fuel residues occurs.
As a result, vibrations occur, which manifest themselves in the form of strong engine vibration.
The interior of the Priora is thundering
Sometimes it happens that after buying a Lada Priora car, especially a used one, after a while the owner begins to be alarmed by noises, creaks and knocking in the cabin. If this happens in a completely new car, the owner is completely overwhelmed by panic, and the joy of the purchase is overshadowed by the possibility of breakdowns or malfunctions.
There is no need to panic, first, let's look at the problem. So, what to do if the interior of a Priora rattles?
The cause of the noise may lie in banal things - metal things in the glove compartment may rattle. Antennas, mirrors or a removable trunk can rattle, as the parts are not securely fastened. If you are sure that everything is in order with these points, you should analyze the noise further.
Try to determine the place where the knocking or noise is coming from - if it is the engine compartment, you should contact a service professional for diagnostics. But the reason may be that the fan belt is frayed; it also happens that pebbles and pieces of dirt get knocked between the oil pan and its protection. Then you can get away with a slight fright.
If you hear knocking in the suspension, you should rock the wheel in different directions or the body, pressing on it with your hand. It's a good idea to remove the wheel and look at the brake mechanisms. If the cause of the knocking is not determined while the car is static, you need to drive it and listen to the sounds while driving.
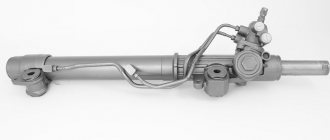
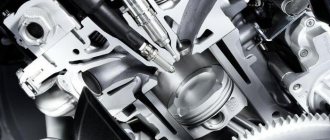
Basics of the design and operation of a hydraulic compensator
The negative side of the design approach is the capriciousness of the system. Very often the hydraulic compensators on the Priora 16 valves knock and the reasons for this phenomenon are unknown to the inexperienced owner. The situation becomes clearer after studying the features of the compensatory mechanism.
Configuration
The idea of automatic regulation of thermal clearances can be implemented in two versions: a conventional hydraulic pusher and a hydraulic support. The latter is used in gas distribution modules with rocker arms. On the Lada Priora in the sixteen-valve version, the intake and exhaust are equipped with individual camshafts. The optimal solution for this arrangement is the use of a hydraulic pusher.
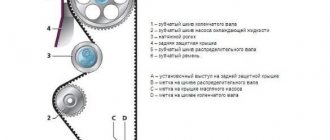
The Priorov hydraulic compensator on the 126 engine consists of the following parts:
- A plunger pair, including a cylindrical cage and a piston with a ball valve.
- The outer housing is a pusher.
- System of grooves and holes for oil supply.
Principle of operation
The oil composition enters the internal cavity of the piston and, overcoming the resistance of the spring, pushes the ball away to fill the closed cylinder. When filling the liner, oil pushes the piston out and the hydraulic tappet rests against the cam. Next, the ball valve is locked and the assembly unit works like a regular pusher on motors with an adjustable valve mechanism.
FakeHeader
Comments 21
Did you check Bordacek?) Looks like a cricket just killed him.
Can you imagine yesterday I adjusted the glove compartment, my left side is slightly lower than the right bvla, I lifted it and everything disappeared)) I slightly raised the panel on the left side. But I still didn’t understand what it was. Where did you find it?
I stuffed paralon into the guides of the boarding area, which go into the metal pin from below. It sat tightly, but there was still a slight sound. My glove compartment itself was also lower on one side, only on the left. I have a new black bordache, I didn’t have this on my native one. I decided it this way - instead of small rubber buffers that are attached to the sides on top, I screwed in self-tapping screws with foam rubber and rub everything tightly and there is no rattling)))
I have everything there sealed with splen there was nothing to rattle at all. I even took off the glove compartment lid and drove around without it, there was still a cricket. I think something was rattling behind the panel. I lifted it up a little with a self-tapping screw from below and generally the knocking stopped, in short, you can say the cricket died from old age) it tormented me for half a year and so on until now I don’t know what it was) but your sound was similar, right?!
he’s the only one that can be heard throughout the entire cabin. It’s already infuriating me. When I’m driving I hear only him and don’t think about anything else)) I’ve already hit the dashboard a couple of times out of anger
Try, when driving in a warm car, to press your finger on the central silver console, on top, above the hazard warning button and the heater nozzles. Perhaps it's her.
I glued it, in theory it shouldn’t. Tomorrow I’ll try really hard. What’s strange is that this creaking appeared unexpectedly. I started the car in the morning and drove off and it started
Well, or from the place where the sounds come from, you can see better, or rather hear better)
I’m already in despair. I climbed through everything, touched everything, moved it, spilled silicone grease, nothing helps. I removed the frill there, moved everything to no avail! Maybe something got into the stove and there was such a squeaking sound from there, I don’t know. I already want to give up on this matter I've been driving like this for a month now
Well, or from the place where the sounds come from, you can see better, or rather hear better)
It looks like something is hitting the glass, don't you think?
And you film and drive and listen to everything strictly one by one!
It looks like something is hitting the glass, don't you think?
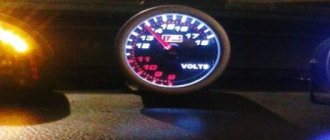
Generally a strange sound. I lost a lot of sound even after installing three spacers, by the way!
I also want to install them. They say that the controllability increases and there are fewer crickets
Exactly, look at my blog, there in the beginning somewhere. But if you have money, then it’s better to lower the subframe with protection, there will be fire.
Looked great. The money will appear, I’ll take the same!
Exactly, look at my blog, there in the beginning somewhere. But if you have money, then it’s better to lower the subframe with protection, there will be fire.
Soundproofing stages
The front and rear row of seats are removed. The central tunnel is being removed. Remove plastic trim and floor covering. Clean the surface from dirt and treat the interior with solvent. The first layer is a heated vibration-isolating layer. Roll over the top. The next layer of material is overlapped. Instead of this material, mastic made from bitumen is suitable. There is no need to cover technical recesses in the floor. Application of splen or bitoplast. They are applied to the entire surface of the floor by priors. To avoid rattling, it is recommended to weigh down plastic elements with pieces of noise-absorbing composition. Cover the joint area with anti-squeak. Install factory sound insulation on the Prior floor.
Getting rid of squeaks in the cabin
Once upon a time, when the trees were big, I didn’t understand why car enthusiasts value soft dashboards. After all, the owner doesn’t feel them all the time—and you can’t tell the softness by looking at them.
My very first car, a Moskvich-2140, which I purchased new, had soft instrument panels and door trims, so I don’t remember any particular squeaks. But when, six years later, I changed it to M-2141, that’s where it all started. One day I was picking up passengers - a mother and daughter. So, on one of the many bumps in Moscow in the early nineties, the instrument panel vibrated and rumbled so threateningly that the child got scared, and the mother instructively said: “This is Moskvich, Masha.” Oh, and I was offended! But the woman was right: the car, in an amicable way, should not make extraneous sounds.
Well, now, from the height of accumulated experience and taking into account that the second decade of the twenty-first century is slowly coming to an end, we will still consider why the malicious “crickets” still do not leave our cars.
Of course, even now you hear squeaks mainly either in used budget cars or in models with hard and noisy plastic. Manufacturers of more expensive cars use plastics with a rough surface or Soft-Touch coating, which feels like rubber to the touch.
In cars with high mileage, a nasty squeak can also be produced by the seat, often the driver's seat. Please note that cars that have been in an accident and have been poorly repaired tend to be more creaky. And although an ordinary cricket sings its songs in the summer, in a car such sounds can be heard much more often in cold weather, when the plastic panels are completely tanned - as, indeed, are the latches with caps on which these panels are held.
Ways to fight
with malicious “crickets” there are basically only three:
- go to a professional for service without delving into the details;
- find and eliminate them on your own;
- Turn up the music in the car louder.
If you are a “hands-on” person, then the second method is suitable for you. Let's start looking for sound sources. At the same time, keep in mind that acoustics is a subtle science, and the paths of sound propagation are mysterious. It is not for nothing that sometimes it seems that the front wheel bearing is noisy, but in reality it turns out that the source of the noise is from behind.
Remove all items located in the glove box, armrest, door pockets and all other storage areas, including the eyeglass case. At the same time, check that all items in the trunk (spare tire and tools) are securely secured. Take it for a ride - perhaps the unpleasant noises have already been eliminated?
Life hack: hydraulic compensators for a Priora car with 16 valves, device, price
Compensators are needed for automatic valve adjustment; if they were not there, it would be necessary to adjust the valves every 10 thousand, as on 2109. On the Prior, hydraulic compensators knock under different circumstances - and this is not always a malfunction. They have a special knock, so experienced car enthusiasts will recognize it almost immediately.
A knock that comes from the engine of a Priora car is not a very good sign that should alert you. Each car needs to be approached differently. Therefore, when hydraulic compensators on a Priora knock, make proper preparations for repairs - you need to find out what is the reason for what is happening and how you can eliminate it by correcting the situation. In this article, we have collected for you the main signs: why these parts make noise, whether the car is cold or hot.
These parts have 16 valves on the Priora. (if taken as a complete set) they are not so little. The price starts from 4000 rubles and above. Replacing hydraulic compensators is labor-intensive and I don’t recommend getting into the engine yourself without experience. At a service station, such work for a Priora car will cost from 5,000 rubles and more.
The standard “hydriki” for the Priora were inherited from the “ten”. Even the catalog number testifies to this - 21120-1007300-86. A complete set will cost approximately 4,000 rubles. A set from (she collected Priora coupe, Sport and Premier), article number - 1-59718-219, sold in eight pieces, price - about 300 rubles.
Configuration
The idea of automatic regulation of thermal clearances can be implemented in two versions: a conventional hydraulic pusher and a hydraulic support. The latter is used in gas distribution modules with rocker arms. On the Lada Priora in the sixteen-valve version, the intake and exhaust are equipped with individual camshafts. The optimal solution for this arrangement is the use of a hydraulic pusher.
The Priorov hydraulic compensator on the 126 engine consists of the following parts:
- A plunger pair, including a cylindrical cage and a piston with a ball valve.
- The outer housing is a pusher.
- System of grooves and holes for oil supply.
Principle of operation
The oil composition enters the internal cavity of the piston and, overcoming the resistance of the spring, pushes the ball away to fill the closed cylinder. When filling the liner, oil pushes the piston out and the hydraulic tappet rests against the cam. Next, the ball valve is locked and the assembly unit works like a regular pusher on motors with an adjustable valve mechanism.
crickets in the car
It is possible that this will be the end of all the creaking. The polish, once in the gap, eliminates dry friction and the sound stops. True, only for a while. If you want to solve the problem radically, then you will have to dismantle the panel and carefully inspect it. Areas that cause squeaking will be marked by abrasions and a thin layer of wear debris - plastic dust. Now, having seen the enemy in the face, begin the fight. You can stick double-sided tape to the contact point: the connection will subside, but will become conditionally inseparable. By gluing the Velcro halves to the mating parts, we will also stop the mutual movement of the parts, while maintaining the possibility of disassembling the connection. Many sources recommend using the advertised “fungal” Velcro, but it seems to me that there are no such commonly disassembled joints in the car.
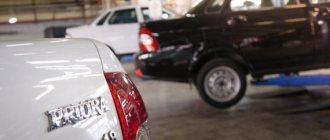
Which cars are structurally more prone to squeaking and which are not? Examples are in the photo below.
Trunk
Particularly relevant for Priora hatchbacks and station wagons. Soundproofing the trunk begins with removing the flooring of the interior space and the trunk lid. The surface of the body is cleaned, washed, treated with a degreaser and solvent. Soundproofing of the Lada Priora trunk is carried out according to the standard scheme. A vibration-insulating base is applied in two layers, which is preheated to a sticky state. Then splen and bitoplast are laid. The layers are rolled with a roller.
It is especially important to perform high-quality sound insulation of the luggage compartment arches. It is worth paying attention to plastic elements. The holes must be left open. The wires are insulated with anti-creaking, and the plastic parts are made heavier.
How and with what to properly lubricate car door hinges when they squeak if they are rusty
Proper application of lubricant to the stopper and hinge will help avoid unpleasant consequences. Car enthusiasts can carry out such maintenance themselves.
Lubricating the door hinges on your car is one of the options to combat squeaking. For this purpose, professional substances sold in stores and materials of our own production are used.
Replacement process
To carry out this procedure you will need:
This is a sufficient set for the procedure. Open the engine compartment cover (hood) and secure it well with the stop. Unscrew and remove the windshield wipers. Pull out the decorative plugs holding the air intake panel of the Priora heater. You will have access to the base of both loops. Carefully place the fabric on the glass, under the lower edge of the Priora hood. Now unscrew the nuts securing the hinge to the lid itself. The second person must fix it so that it does not fall. When all four nuts are unscrewed, remove and carefully set the hood aside to avoid damage. Now you can remove the hinges themselves for replacement or repair.
Be sure to use a marker to mark the points where the old hinges stood and dismantle them. Under them there are rubber gaskets that also need to be replaced. Remove any dirt that has accumulated under the base of the loop and wipe the area. The main thing is not to erase the marks. Install according to the marks and carefully fasten the new hinges. Lubricate moving parts well with grease. Now, together with your partner, carefully put the Priora’s hood back in place.
When the cover is in place, without large gaps and evenly, tighten all the nuts well. Reinstall the air intake panel and wipers. Close the decorative caps.
Homemade compositions
Car enthusiasts, wanting to save money, are developing their own formulations for lubricating the vehicle. Most often they create a “liquid key”. This is a universal lubricant based on kerosene. It was originally developed to penetrate rusted and stuck joints. It has the ability to displace water and remove rust.
Universal bottle for applying lubricant
In addition to kerosene, the liquid contains solvent and oil. Car enthusiasts are experimenting with the contents of the substance, changing some of its components.
One of the compositions for lubricating doorways, which is recommended by car owners on thematic forums:
The latter substance means a mixture consisting of distillate and petroleum solvents.
In their pure form, such substances are practically unavailable, so they are replaced with simpler ones, similar in composition. The main property of the finished product is the removal of stuck-on elements. If the solution copes with this task, then you can use it for hinges.
Source
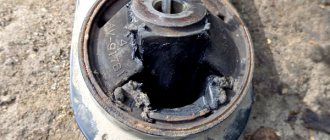
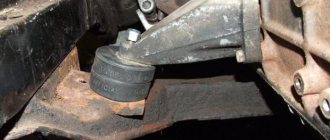
Hood hinges, their annoying rattling.
Greetings to all dear car enthusiasts. Everyone has probably already encountered such a problem as the rattling of the hood, or, more precisely, the hood hinges, how the hood jumps while driving over uneven roads (we simply don’t have smooth roads). You drive on uneven roads (and in Russia we only have such roads), and a constant rattling begins, or rather a constant rattling for some reason, from the glove box. The sound is not pleasant, annoying. Well, I'm faced with this stupid problem. I wanted to write in the BZ yesterday, but I was so nervous that I forgot about everything. So…
I drove yesterday, and that was the limit. In short, I couldn’t stand this moronic sound. I came home and started looking for someone who solved or solved this problem. I found a million articles on how to get rid of this sound.
Guys, the photos are not mine, but downloaded from the Internet, I just didn’t take a photo, that’s why I was nervous yesterday.
In short, the advice is this: you need to make the hood hinges quiet by inserting anthers, rubber bands, hoses, pipes and some other crap.
Guys, I don’t want to offend anyone, however, maybe these methods helped someone, and the sound really disappeared, but this is complete bullshit! Yesterday, in order not to disassemble the whole thing, not to remove the hood, I tried EVERYTHING! And rubber bands, and hooks, and everything else I didn’t put in there, all I had to do was put my x... in the hinges... as the hood rattled and jumped, so it continued in the same rhythm... I thought I was patient and calm, not a damn thing like that. Having tried +100500 rubber bands, methods and all sorts of crap, I had no patience left... In short, I removed the hood, before that I made marks so that the hinges would stand exactly as before, and removed the hinges completely. And what I observe. The loop on the passenger side had such play that you could take the loop to school on the first bell instead of a bell and go ring it. But the driver's side, surprisingly, had almost none. there was some play, but not significant. I took the hammer and hit the rivet a couple of times, and voila. Like a virgin. True, he hit it so hard that the hinges caught the tight movement. WD40 solved the problem, sprayed it and everything was fine. I put everything back together, the loops according to the marks, and set everything up evenly and clearly. The hood stands firmly, confidently. I decided to drive by and listen to what happened. Uffff... High... It became much quieter. There is still some faint sound, but these are clearly not loops. Yes, and the hood shakes, but also barely.
Source