What is a brake pedal sensor, what problems can arise with it and how to fix them yourself. You will learn about all this below.
The introduction of updated standards regarding the level of toxicity of exhaust emissions from vehicles into the atmospheric air has created conditions for the development of new engine control devices by the Volzhsky Automobile Plant.
In addition, a brake pedal sensor appeared on Lada cars, including Grants. But many car owners, after using their car for a very short time, begin to notice error P0504, signaling a breakdown of this element. Let's try to understand this issue in more detail.
Error P0504 for Lada cars
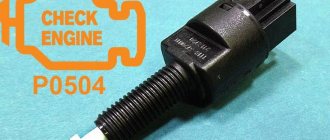
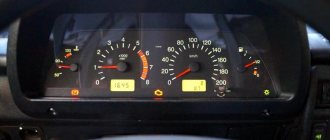
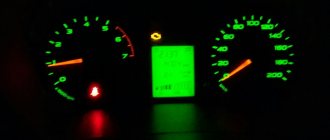
During operation of a modern car, defects in engine operation may appear: failures, short-term lack of response of the gas pedal, etc. At the same time, the “Check Engine” icon lights up on the instrument cluster panel, which translated from English sounds like “check the engine.” The car owner goes for diagnostics, where a computer connected to the car detects error P0504. The brake pedal position sensor (frog) is responsible for this failure in the system. Next, we will tell you where the sensor is installed, how to check, repair and replace it.
Reasons for error p0504
The appearance of a malfunction and, as a consequence, error p0504 on the on-board computer has long been identified by specialists working at the Lada manufacturing plant, that is, at AvtoVAZ:
- A short circuit that occurred in the side lights and brake light network. This could have occurred due to improper installation of the lamps.
- Operating lamps that do not meet standards.
The essence of this design is that on the Lada Granta, instead of the usual “Stop” signal, a double one is installed. The first chain of this design is designed to operate at the moment when the brake pedal is depressed, and the second, on the contrary, when the pedal is completely released. When the driver presses the brake pedal, a signal is sent not only to the stop signal, but also to the controller. And when you release the pedal - exclusively to the controller. In this regard, when these factors are combined, the controller, during its operation, begins to “suspect” that not everything is in order with the “Stop” signal, and therefore issues a similar error.
Remember, before you go to a service station and tell the technicians about a similar problem, you need to check for yourself whether all rear lighting fixtures have been installed correctly and whether they correspond to the established parameters.
Causes and symptoms of malfunction
Most often, error P0504 worries owners of Lada: Grant, Priora, Kalina and other VAZ cars with an ECU. Often a defect appears on GAZ cars, for example, GAZelle NEXT. But owners of foreign cars are less likely to contact the service to eliminate error p0504 and replace the sensor (frog). Most likely, the quality of foreign spare parts is much better. What symptoms indicate that the brake pedal sensor is faulty:
The cause of incorrect operation of the “frog” can be: mechanical damage, oxidation of contacts or wire breakage. Sometimes a failure occurs due to the burnout of both brake light bulbs. Due to the listed defects, an error appears in the system under code p0504. It can be removed, but it will appear again soon.
Let's summarize: what to check for error P0504
Summarizing all the possible reasons that caused failure 0504, you can create an approximate checklist that you need to follow to find the cause and reset the error:
- Adjusting the gap between the pedal and the limit switch rod.
- Checking fuse F23 (in some cases the fuse number may not match).
- Checking and replacing brake light bulbs.
- Checking and cleaning the contacts in the rear light, on the end of the brake pedal and further along the circuit.
- Checking or replacing the on-board computer, flashing the ECU.
Cleaning and repair, replacement of the brake pedal sensor (limit switch). We check the return of the rod and the stiffness of the spring. Catalog number of the pedal end switch - 2118-3720010.
How to change
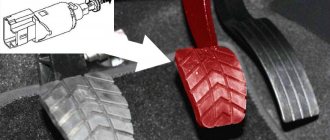
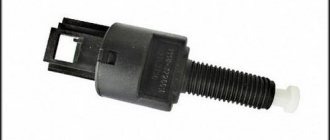
The sensor is located slightly above the brake pedal lever. To find it, you need to look under the torpedo. On Lada Priora, Grant and Kalina, a 19 mm open-end wrench will be required for dismantling. The replacement process looks like this:
The old sensor is quite repairable. In most cases, the cause of the malfunction is a broken spring. If you disassemble the body and install a new spring, the “frog” will work again.
Car owner's comment: On my Lada Grant, a spring broke in the sensor and began to close the contacts of the limit switches. When I left the car overnight, the ignition did not seem to turn off, which is why the battery ran out completely several times. I bought a new battery, but the problem did not go away until I made diagnostics and replaced the sensor. At the same time, the Check Engine did not light up.
Which car to choose - “automatic” or “manual”?
Heated debates are taking place among drivers of different ages, driving experience and gender: which is better - a car with a manual transmission or an automatic one. And here we should remember one important fact: all beginners in all driving schools are taught in “mechanics”. And all because it is always much easier to switch from “mechanics” to “automatic”. Driving a mechanical car is, of course, more difficult, but at the same time you control the entire process, every movement of the car, and are more concentrated.
Which one to buy
Experts and service workshop specialists recommend purchasing an original brake sensor. It is of better quality and lasts longer.
Table 1. Price of brake pedal position sensor
| Manufacturer | Code | Cost, rub. |
| AvtoVAZ | 11183720010 | 170 |
| Avar | 2113720 | 180 |
| AMY | 11183720010 | 95 |
Before changing the “frog”, you can “ring” it with a tester to make sure the part is working.
Error in brake sensor signal on grant
Welcome to ChipTuner Forum.
Theme Options
wryip
anatoli
wryip
wryip
I didn’t adjust it on the grant, but maybe this instruction will be useful or you’ll find something similar when adjusting
Adjusting the brake pedal switches:
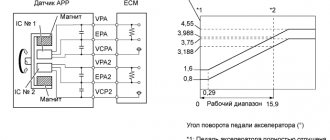
Connect the scanner, turn on the ignition. Check the parameters: the state of normally open switch 1 and the state of normally closed switch 2. When the brake pedal is pressed, the switches should move from the “NO” state to the “IS” state in the sequence: first No. 2 = IS, then No. 1 = IS. If, when the brake pedal is not pressed, switch 2 is in the “IS” state or when you lightly touch the pedal it goes into this state, then it is necessary to adjust the switch using the adjusting nut to the “NO” state, that is, “press” switch 2 to the pedal in order to eliminate possible “blinking” of the switch when the pedal plays when it is not pressed. Reset the error codes, turn on the ignition again, press the brake pedal 3-5 times and check for their presence. Please note that if there is an error due to an incorrect signal from the brake pedal position sensor, the malfunction lamp does not light up.
electromechanic
Fedorov
I didn’t adjust it on the grant, but maybe this instruction will be useful or you’ll find something similar when adjusting
Adjusting the brake pedal switches:
Connect the scanner, turn on the ignition. Check the parameters: the state of normally open switch 1 and the state of normally closed switch 2. When the brake pedal is pressed, the switches should move from the “NO” state to the “IS” state in the sequence: first No. 2 = IS, then No. 1 = IS. If, when the brake pedal is not pressed, switch 2 is in the “IS” state or when you lightly touch the pedal it goes into this state, then it is necessary to adjust the switch using the adjusting nut to the “NO” state, that is, “press” switch 2 to the pedal in order to eliminate possible “blinking” of the switch when the pedal plays when it is not pressed. Reset the error codes, turn on the ignition again, press the brake pedal 3-5 times and check for their presence. Please note that if there is an error due to an incorrect signal from the brake pedal position sensor, the malfunction lamp does not light up.
Source
Automatic transmission operating modes
Basic modes
The first thing you should do is familiarize yourself with the operating modes of the automatic transmission, since you won’t be able to drive an automatic without these nuances. So, what are the designations of the letters on the automatic transmission and what gears do they represent?
- P – Parking . This mode involves blocking the shaft and drive wheels. The relevance of use is observed if the driver leaves the car or during a long stop. Only after the vehicle has come to a complete stop can this mode be activated, otherwise the gearbox may be damaged. To activate another position from this mode, you must use the brake pedal. If the surface is relatively flat, there is no need to use the handbrake. On a steep slope, you must follow the procedure for applying and releasing the handbrake. To set it up, you need to pull the handbrake while holding the brake, then release it, and the car will move slightly. All that remains is to activate the “P” position. To release the handbrake, move the lever to the driving mode and remove it from the handbrake while holding the brake.
- N – Neutral gear . It is relevant if it is necessary to move the car a short distance with the engine running, for example, in a car service. Some drivers believe that activating this mode while driving downhill will save fuel. In fact, this is not the case, since you will still have to switch to mode D, which is why the gearbox will undergo additional load. Also, driving with an automatic transmission does not require activation of the neutral position during short stops, for example, at a traffic light.
- R – Reverse . The mode must be activated if you need to move in reverse. It is permissible to switch to this mode only after pressing the brake pedal and stopping the car completely. Activating the mode in question while driving will lead to damage to engine components, transmission and the gearbox itself (read our expert’s article on how to enter the box in reverse using an automatic transmission).
- D – Basic driving mode . It is this mode that is often used to move forward. Movement is possible at any available vehicle speed from zero to maximum.
- L – First gear only . Used for off-road driving or other difficult road conditions. Switching to this mode is unacceptable if the car is moving at a speed above 15 km/h.
- 2 – Only the first 2 gears . Suitable for driving a vehicle on a winding mountain road. Another option is towing another car or trailer. Driving at speeds above 80 km/h is an obstacle to activating the mode in question.
How to brake
Since driving an “automatic” after a “manual” is quite difficult, gaps in knowledge can be both at the starting stage and at the braking stage. There are few rules here, the main principle is to press the brake pedal when you need to stop, but there are some nuances.
- Stopping in front of a zebra crossing or traffic light is carried out in “D” mode. Just press down on the brake pedal.
- You can activate the neutral mode during a long traffic jam if you want to save on gasoline. We are talking about parking for more than 30 seconds. The brake pedal must not be released, otherwise there is a risk of accidentally hitting other cars.
- If you are confident about a long stop on the highway, switch to “P” to allow your right leg to relax slightly.
Using the handbrake
Do not overly trust the vehicle’s automation and refuse to use the handbrake. The relevance of its use is observed at any long stop, according to the car’s operating instructions.
It is also advisable to use the handbrake in the following cases:
- stopping on a slope;
- stopping to change tires;
- stopping while the engine is running.
Towing
The possibility of towing a vehicle with an automatic transmission is considered by many drivers, but the only condition in this case is a speed of less than 50 km/h, the neutral position is activated and the engine is running. The range of such towing should not exceed 50 km. If you can’t start the car, using the services of a tow truck will cost less than repairing the transmission.
If you are acting as a towing driver, keep the following points in mind:
- the automatic machine copes well with trailers that are not too heavy;
- the vehicle you are towing must be the same weight or lighter than your vehicle;
- It is better to avoid such manipulations altogether if there are alternative options.
Brake pedal sensor for Lada Granta
What is a brake pedal sensor, what problems can arise with it and how to fix them yourself. You will learn about all this below.
The introduction of updated standards regarding the level of toxicity of exhaust emissions from vehicles into the atmospheric air has created conditions for the development of new engine control devices by the Volzhsky Automobile Plant.
In addition, a brake pedal sensor appeared on Lada cars, including Grants. But many car owners, after using their car for a very short time, begin to notice error P0504, signaling a breakdown of this element. Let's try to understand this issue in more detail.
Operating principle of the gearshift mechanism
The gearbox control rod, or shift linkage, is a structure that connects the gearshift lever to the gearbox rod. This lever itself is often mistakenly called a rocker, but this is not so. The slide is a complex mechanism that transmits a given command to the shafts.
In older cars it was traditionally located under the gearbox, but in newer ones it was placed under the floor. Absolutely all manual cars and some automatic cars have a rocker. In CVT cars and robots, commands are transmitted directly.
Causes of sensor malfunction and their symptoms
In most cases, the above error occurs because the sensor (frog) has not been adjusted properly. It is for this reason that the car owner notes the emergence of such problems as:
The sensor combines two functions: it is both an element of the brake pedal position and a brake light switch. Most often, the malfunction is caused by the sensor misalignment already mentioned above, or by a broken spring. The problem that has arisen manifests itself by the “check” icon lighting up and error P0504 (implying a mismatch in the operation of this part).
So, we found out that error P0504 on Grants is caused by:
If problems occur, you can repair the sensor yourself by changing the spring, or change the element itself.
The car skids or pulls to the side when you press the brakes
Most often this happens if the piston in the wheel cylinder is jammed. It will need to be disassembled and cleaned. All detected damaged elements must be replaced with new ones.
In some cases, the problem also occurs if one of the metal pipes in the brake system has been broken or clogged.
Similarly, skidding when braking is caused by oil getting on the following parts of the system: discs, linings, drums. In this case, they need degreasing.
In addition, this may indicate a breakdown of the pressure regulator - repair of this part is not provided, so it is simply replaced with a new one.
And finally, the car skids when braking due to:
- incorrect wheel angles;
- low pressure in one of the tires;
- failure of any of the brake circuits.
How to replace the pads on a VAZ-2115 is described in detail in this video:
Carrying out pre-installation diagnostics
Before purchasing and installing a new sensor to replace a broken one, it is recommended to diagnose the old sensor and, if there is a breakdown, fix it yourself. There are two nuts on the sensor body, the first of which is located at the bottom, and the second at the top. The nut located at the top should adjust the clearance of the part (sometimes it is set incorrectly). This leads to disruption of the normal functioning of the button, therefore, you will need to set the gap so that there are no obstacles to its normal movement.
After the adjustment, the ECU error is reset, then you need to start the engine and wait about fifteen minutes, since errors are not recorded immediately. If error 0504 is not marked, it means that the cause of the engine malfunction was an incorrect sensor setting. If it appears again, you will need to replace this element with a new one.
Brake performance is low
The most common reasons for this problem are:
- brake pads are oily;
- pistons jam in wheel cylinders;
- the linings on the blocks have become unusable;
- the brake system mechanisms overheated;
- the pressure regulator was set incorrectly;
- one of the circuits has lost its tightness.
The linings on the brake pads will need to be cleaned using a wire brush, warm water and washing powder.
If the pistons jam, you will have to change the cylinders and bleed the system.
When the linings wear out, they need to be removed and new ones installed.
Overheating of the system is eliminated by immediate shutdown. It will take some time for it to cool completely.
Carrying out work on dismantling and repairing the sensor
In most cases, repairing a sensor does not take a significant amount of time and does not require the car owner to have either specific knowledge or the use of complex tools. You can do it yourself without going to a repair shop.
First you need to disconnect the negative terminal from the battery, and then move to the driver’s seat in the car. Move the front seats back as far as possible and remove the interior carpet. The sensor is located next to the brake pedal; to remove it, you will need to disconnect the clamp and the block with wires from its connector.
Carefully loosen the fastening nut and carefully unscrew the body of the part, then disassemble it. This element is a two-piece element, and both parts are held in place with latches.
There is a spring in the inside of the sensor, which is often what causes problems. Replacing a faulty spring with a new one, having the same number of turns and suitable dimensions, most often helps to eliminate the problem.
Having completed the repair, reassemble the element by performing the manipulations you performed to disassemble it in the opposite sequence, and then install it in its original place, and if necessary, adjust it. The part is tightened until the brake pedal goes down, after which it is turned 90 degrees clockwise and secured with a lock nut. As a result, with the brake pedal lowered, the switch rod will be in a recessed position, and when you press it, it will go beyond the boundaries of the switch body.
Next, start the engine and wait at least ten minutes; if the error does not appear, you have correctly identified the cause of the problem. If error P0504 appears again, adjust the sensor; if this error continues to appear, the part will need to be replaced.
Self-repair price
The cost of a new reverse sensor depends on the manufacturer. The average price of a part is around 300 rubles; you can find options three times cheaper. Please note that the less a spare part costs, the lower its quality and, accordingly, reliability and service life. It is advisable to place orders in trusted stores.
Replacement will also require contact cleaner such as WD40. Many additionally replace wiring if it is deformed, kinked, or otherwise damaged. We do not recommend working with wires without proper experience; it would be better to contact a specialist.
Sensor bulbs cost up to 50 rubles apiece. It's easy to unscrew the old ones and screw in the new ones yourself.
Carrying out an inspection
To carry out the procedure for checking the brake pedal sensor on a Grant, you will need to turn on the ignition, and then press the brake pedal, while paying attention to the brake lights - have they come on? Then you need to release the pedal, again focusing your attention on the brake lights, which should now go out. If the brake lights do not light up, you should check the sensor itself, and also see if voltage is supplied from the battery to the wiring harness block.
When performing the test, circuit 1-4 should be in the closed position, and circuit 2-3 should be in the open position. Then press the rod, normally circuit 2-3 should close and circuit 1-4 should open.
Similar sensors are installed on other VAZ models: Priora, Kalina and others, so the solution to the problem will be exactly the same for these models.
The article uses photos from the Lada Granta French Platinum logbook.
Source
Lada Priora Hatchback Strict SE Logbook Error P0504 Brake pedal sensor and its solution
Good evening everyone, nothing interesting happened to the car, and then bam, today it means I’m not touching anyone’s food, I didn’t pay attention to how often I pressed the brake, but suddenly the car begins to slow down to such an extent that it seems that it stalls while driving and then but after 1.5 seconds it starts, I couldn’t believe my eyes, at first I thought the gear was knocked out, when I press the gas at 40 km/h it just doesn’t go, so + besides, there are no revolutions at all! In a panic, I went and refueled (it was 5L at that time), I thought it was petrol, I refueled, I gave it a ***, I accelerated, like normal, I parked the car near the house, I started it an hour later, an error pops up, fortunately I have a friend Lyo with a cable and a program in next door, I rush to him. We do the diagnostics, and here’s the most interesting part:
Having read on the Internet that either the sensor is faulty ****, or the stoppers may burn out and because of this it is tripping, but the stoppers are all burning, the previous ones are intact. Someone also wrote that the sensor may be poorly adjusted, and it works too often when the brake is pressed. They cleared the error, now I’m driving and looking, so far everything is fine, so far there is no desire to change the sensor.
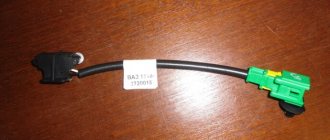
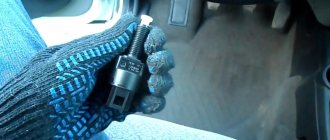
Today I went and bought a sensor, it costs 232 rubles, a little expensive IMHO) I installed it, it’s very easy to install, I unscrewed the nut and unscrewed the sensor itself, before of course disconnecting it from the power supply (which, by the way, only enters the sensor on one side, that is, by mistake you won't be able to connect it).
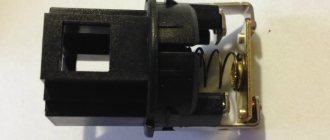
Old on the left, new on the right
The last photo shows that the spring of the old sensor has apparently stretched, because the limit switch no longer snaps off properly, but only moves halfway. I reassembled everything in the reverse order, adjusted it by eye
Then I cleared the error, and now everything is quiet, thank you all for your attention) And for those who will ever do this for the first time, there is no need to remove anything, I moved the seat all the way back, raised the steering wheel as high as possible, pulled out the rug (so as not to get dirty), took off the cover that covers the fuses (to let in more light) and lay right under the steering wheel, and everything is clearly visible there. I used the key for 19. The replacement took 10 minutes maximum
It became interesting, I disassembled the old sensor, everything is visible as is) The upper spring simply broke
Pedals in the car
Every car, regardless of the type of gearbox, is equipped with pedals; the difference lies only in their number. First you need to figure out which car is what. Today there are cars with a manual transmission, with an automatic one, as well as robotic semi-automatic and CVT. The main differences are in the design and method of gear shifting.
Location
The pedals in all cars are always located the same way, whether it is a car with a manual transmission or an automatic one. Only their number differs.
With manual transmission
A manual car has three pedals:
- The pedal on the far left is the clutch. Thanks to her, the wheels begin to spin. It is also used when changing gears.
- The middle one is a brake. It is responsible for reducing the speed of the car.
- The one on the far right is gas. When you press it, the car starts moving. The speed depends on the force of pressing, so you need to do it very smoothly.
With automatic transmission
In an automatic car there is no clutch pedal, but there are gas and brake pedals, which are located in the same way as in a manual car. It should be noted that for convenience the brake is made larger in size.
How pedals work
When you sit behind the wheel of a manual car, you first need to start the engine by turning the ignition key, then press the clutch all the way, which, as already mentioned, makes the wheels spin. Then it’s time for the first gear. After squeezing the clutch, you simultaneously lightly press the gas, supplying fuel to the combustion chambers. Shifting gears both to increase and decrease speed must be done in order so as not to disrupt the operation of the engine. If the car is on the brake, you first need to remove it from it, and then carry out all the above steps.
With automation everything is much simpler. There you do not need to depress the clutch (its functions are performed by shafts and couplings inside), but just turn on mode D or R and press the gas pedal. The automatic transmission will do the rest itself. The limit switch in such a car, which is installed on the brake pedal, is more complex in comparison with a similar one on the mechanics. Any impact on the brakes will be transmitted to various vehicle safety systems.
How to position your feet on the pedals
The main rule when pressing the pedals is to do it with the right foot.
If we conditionally divide a person’s foot into three parts, this will allow us to derive the following rules for pressing the pedals: the front part of the foot, the most sensitive, presses the gas, the middle part presses the brake and clutch, but the heel is not used anywhere, since this part of the foot is insensitive and doing anything with it is inconvenient.
There is currently controversy over the possibility of braking with the left foot in automatic cars, where there are only two pedals (one for each foot). Of course, it is difficult for a driver who is accustomed to braking with his right hand to manually change lanes and start doing it with the other foot, because he has clearly learned that this is absolutely forbidden to do this. However, if you have some experience driving an automatic, it is quite possible and probably even more convenient to brake with your left foot (and in a robotic car it is even permissible to press the gas and brake pedals at the same time).
Removing the clutch pedal position sensor Lada Granta
Medium Phillips screwdriver
Parts and consumables:
Clutch pedal position sensor
Remove the clutch pedal position sensor to replace it.
The sensor is located in a hard-to-reach place under the instrument panel.
Location of the clutch pedal position sensor.
1. Remove holder 1 of the sensor wire block from hole 2 in the pedal assembly bracket (for clarity, shown on the removed pedal assembly).
2. By pressing the latch of the instrument panel wiring harness block, disconnect the wiring harness block from the sensor wiring block.
3. Using a screwdriver, remove the hook of the pressure lever spring from the hole in the sensor holder.
4. Using a Phillips screwdriver, unscrew the two self-tapping screws securing the sensor holder to the pedal assembly bracket, and remove the holder with the sensor assembly.
Removed clutch pedal position sensor.
5. Remove the sensor from the two holder rods.
6. Install the clutch pedal position sensor in reverse order.
The article is missing:
Photos of parts and consumables
Brake pedal sensor Lada Kalina
The Kalina brake pedal sensor is a technical device that is used to monitor the degree of impact on the brake pedal. Quite often, car owners of the VAZ line complain about breakdowns or incorrect adjustment settings of the product.
Fortunately, the process of adjusting or replacing a part is not very difficult if certain nuances are observed.
Performance diagnostics
Checking the functionality consists of: 1. Testing the product with a multimeter. 2. Disassembly and visual inspection of the internal components of the part.
3. Replacement sensor is not known to be good.
The first method involves alternately measuring the contacts of the dismantled sensor. The point is to check each contact individually and in pairs (second and third contact). This is quite convenient to do, since at the place where the contact chip is connected, all connectors are numbered.
The second method is used to identify faulty or deformed internal elements of the product (in most cases, damaged springs).
There should be no traces of oxidation or contamination. If there are any, clean them out.
The third method is quite simple and trivial. Install a new part to replace the one whose serviceability you doubt.
When the system is restored to normal operation, the malfunction indicator (check engine) should go out (if it does not disappear within 15 minutes, the error should be reset manually).
Signs of a faulty brake pedal sensor Lada Kalina
In order to understand that the Kalina brake pedal position sensor is the cause of the vehicle’s incorrect operation, pay attention to the following signs:
Main causes of sensor failure
In order to identify the reasons that interfere with the normal operation of the device, it is necessary to disassemble it and carry out a thorough inspection to identify deformations and damage. The following defects are most common:
Adjusting the brake pedal sensor Kalina
If the sensor is in good condition, and incorrect operation of the internal combustion engine continues to bother you, try adjusting the product yourself
Please pay attention to the following features:
Removal and installation
Replacing the brake pedal sensor on Kalina is carried out using an adjustable wrench set to “19”. The sensor itself is located above the brake pedal under the steering column. Conventionally, the removal stages can be divided into 5 steps:
Grant's brake pedal sensor
Problems with the brake pedal sensor are far from new, which, in turn, is the main cause of error P0504. Regardless of the mileage, the Granta brake pedal sensor causes almost every third owner of the Lada Granta to suffer.
The cost of the issue is 180 rubles, which is exactly how much a new sensor costs. If the car is under warranty, the replacement is free. Why exactly 180 rubles, and not a free replacement with entry into the car’s service book? In all cases, the waiting period for spare parts is at least 4 days, since they are never available (the bitter experience of Granta owners).
The frightening frequency with which the Check on the car's BC lights up forces you to either go to a service station or carry out the adjustment yourself by tightening the adjusting bolts.
A clear manifestation of the problem can be considered those moments when the car does not start with the key fob and shows a problem in the brakes. A temporary, fairly short solution to the problem is to press the brake pedal hard, after which the car starts, but the error on the BC remains.
Incorrect operation of such a sensor makes using the car unsafe, as some owners note freezing of the BC, during which the Granta begins to twitch or even stalls in traffic.
Causes of a malfunctioning brake pedal sensor
You can understand the reasons only by looking at the essence of the problem, namely by disassembling this ill-fated sensor. The obstacle on this path is three fastening clips, which in no way allow it to be disassembled. After the “protective barrier” is overcome, you can see the true causes of error P0504, namely:
• the smaller spring located on the rod is deformed, unlike the larger one;
• sensor contacts are different in height;
• terminals made of bad steel;
• backlash of floating contact.
At the first stage of identifying a malfunction, you can use a “continuity test”. It is necessary to ring each contact individually, as well as in pairs (3rd and 2nd contacts). If we rely on the experience of predecessors, then the specified group of contacts rings in a dull tone, which indicates their malfunction. The remaining contacts beep loudly and loudly.
The operating principle of the brake pedal sensor is as follows:
• the rod is inside and presses the floating contact to the upper group - the pedal is released;
• the rod is inside and presses the floating contact to the lower group - the pedal is depressed.
The principle of operation is quite simple, but as practice shows, it does not work. The whole problem lies in a crooked floating contact that could get caught on the spring, as a result of which a signal was sent to the BC to apply the brake.
Solving the problem by replacing the brake pedal sensor: How to replace the brake pedal sensor?
To replace the Grant brake pedal sensor, you need to get to the pedal assembly bracket, on which the brake pedal sensor is located, directly above the pedal itself. A high-quality replacement is the key to long-term operation, so it is necessary:
• remove the wire from the negative terminal of the battery;
• press out the plastic fastener (you will need a screwdriver);
• remove the wiring block;
• turn the brake sensor clockwise;
Installing a new sensor is performed in the reverse order, but before doing this, you need to depress the brake pedal and insert the new sensor into the mounting hole, then turn it counterclockwise until it clicks.
Solving the problem through the use of alternative spare parts
Since domestic spare parts do not save the situation, you can resort to using others, namely the brake light switch (FACET 7.1126) for Volkswagens. Such a switch is slightly more expensive than a Lada Granta brake pedal sensor, namely 560 rubles. The device is of a similar type and has:
• threaded leg with a similar diameter of 12 mm.
The only thing you need to use FACET 7.1126 is a terminal adapter.
What to do if it is not possible to purchase a sensor
It also happens that error p0504 appears at the most inopportune moment, for example, when you are in some outback and it is not possible to purchase a new sensor.
In this case, you should remove the same sensor and try to disassemble it. It is quite possible that the contacts in it simply burned out. A breakdown of this type is not uncommon, especially on the Lada Granta.
But there is another, fairly common reason for such a breakdown. This is a spring that has become so stretched over time that it can no longer perform its intended functions. To fix this problem, simply replace the spring.
And in conclusion, I would like to note that if error p0504 appears on the on-board computer of your Lada Granda quite often, then we can say with almost 100% certainty that the brake sensor is to blame.
To eliminate a constantly recurring problem, you should simply purchase a new sensor from a specialized store. It is very noteworthy that if your car is still under warranty, you can contact an authorized dealer to fix the problem, since the problem is covered under warranty.
If you do not have such a desire, simply replace the sensor with a new one. It will cost you about 200 rubles. Agree, quite a small amount of money, for the sake of saving which, it may not be worth contacting the service center with a warranty card.
By the way, you can also replace this element of the car either at a service center or with your own hands. But for the last step you will need the appropriate tool and some skills.
Owners of LADA cars with an electronic gas pedal may encounter error P0504 (mismatch of brake pedal sensors). Along with it, malfunctions in the engine may appear (stalls, speed fluctuates, does not start, etc.). Most often the cause is the brake pedal position sensor (brake light sensor or frog).
The brake pedal position sensor and brake light switch are mounted in one housing. Most often, the cause of its malfunction is a broken spring. In this case, you can repair the sensor yourself by replacing the spring with a new one. Or replace the sensor with a new one.
How to change the clutch sensor on a Priora
Well, the widespread computerization of cars has reached such a unit as the clutch. No, the electronic unit does not yet control the process itself, but it already controls this process. To do this, a sensor is installed under the clutch pedal to monitor the progress of the clutch.
Operating principle of the electronic engine control system (ECM)
In a modern car, all process control, except for the rotation of the steering wheel, and even then, is entrusted to the computer, or Electronic Control Unit (ECU). It contains a program with many different tables.
In general, the ECU receives data about the state of the car, speed, revolutions, and activated mechanisms from a large number of sensors.
Based on the results of these observations, the ECU, using these tables, includes certain ignition modes, fuel supply and other executive functions.
The role of the clutch sensor
It would seem, what does the clutch have to do with it? And here's what it has to do with it. When the clutch engages, the most sensible thing to do is to reduce the engine speed. But not to idle, but according to the speed of the car. This is not always available to the driver, especially a beginner. And here the computer will come to the rescue. Reacting to the signal from the clutch sensor, it can independently adjust the engine speed.
Important! In addition, in accordance with the Priora speed sensor, the ECU can obtain information about the serviceability of the clutch. https://www.youtube.com/embed/cqgcTyUkMqg
Summarizing the above, we can say that the presence of a sensor on the clutch allows:
Therefore, its serviceability is an important factor in the Priora control system.
Design and location of the Priora clutch sensor
In principle, this is the simplest switch. In the position when the clutch is disengaged and the pedal is not pressed, the sensor circuit is open. If you press the clutch drive, the limit switch of the sensor closes and the signal “clutch is on” is sent to the ECU.
It is located on the clutch pedal mounting assembly, where the very tip of this pedal is located opposite the sensor end switch.
Symptoms of this part being faulty
Since this element is connected to the ECU, it reacts to its failure first of all. That is, it gives peculiar signals that are reflected on the instrument panel and are noticeable in the behavior of the Priora when driving.
There can be three malfunctions in total: a breakdown of the sensor itself, a break or short circuit in its circuit, and incorrect adjustment of the position of the limit switch on the pedal.
Attention! Only Prioras, which have an electronic throttle, are equipped with such a device. Cars with a regular throttle cable do not have one.
It is also available for all-wheel drive VAZ. It must be remembered that these are two types of sensors, and they are not interchangeable!
In general, the “Check” warning lamp lights up in cases where the ECU has not received a signal within 2 seconds when starting from a stop or during four shifts on the move without a signal. Accordingly, the signs mentioned above appear.
And only after that remove it. This is a simple procedure. The clutch sensor is attached with only two self-tapping bolts, and it is not difficult to remove it with a short, shaped screwdriver. Well, then, on the spot, decide whether to start going to retail outlets in search of a new unit, or try to restore the old part. Well, put it in its place.
After finishing work on the Priora, do not forget to reset the ECU error memory.
Relays and fuses VAZ 2114
- F1 for 10 Amps (A) rear fog lights and rear fog light warning lamp.
- F2 for 10 A turn signal lamps, turn signal relay, hazard lights, hazard warning lights.
- F3 7.5 A lamps for interior lighting (both) and trunk, ignition lighting, powertrain control system control lamp, brake lamps, computer, if available.
- F4 20 A carrier, relay and rear window heating element.
- F5 20 A horn and its relay, cooling fan.
- F6 30 A power windows and their relays
- F7 30 A motor for heater, headlight cleaner, windshield washer, cigarette lighter, glove compartment light bulb, rear window heating relay coil.
- F8 7.5 A right fog lamp.
- F9 7.5 A left fog light.
- F10 at 7.5 A left side marker, lamp signaling the inclusion of the side light, lamps for illuminating the sign, engine compartment, illumination of switches and instruments, instrument lighting switch.
- F11 at 7.5 A right side.
- F12 at 7.5 A right low beam.
- F13 at 7.5 A left low beam.
- F14 for 7.5 A left high beam and a light indicating that the high beam headlights are on.
- F15 at 7.5 A right far.
- F16 30 A - a light indicating insufficient oil pressure, brake fluid level, engagement of the parking brake, low battery, instrument cluster, relay for monitoring the health of lamps, indication of control systems, reversing lamps, turn indicators and their relays, as well as an alarm if turning mode is turned on, computer, generator excitation winding is turned on at the moment the engine starts.