November 21, 2016 Lada.Online 286 857 23
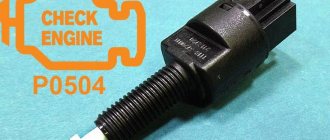
Owners of LADA cars with an electronic gas pedal may encounter error P0504 (mismatch of brake pedal sensors). Along with it, malfunctions in the engine may appear (stalls, speed fluctuates, does not start, etc.). Most often the cause is the brake pedal position sensor (brake light sensor or frog).
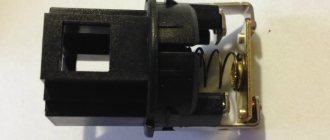
The brake pedal position sensor and brake light switch are mounted in one housing. Most often, the cause of its malfunction is a broken spring. In this case, you can repair the sensor yourself by replacing the spring with a new one. Or replace the sensor with a new one.
What are the reasons that cause sensor failure?
A detailed examination of the essence of the problem that arose, when error code 0504 appeared, will allow us to determine the list of reasons. This refers to the disassembly of the ill-fated sensor in the LADA Granta car. Three clips serve as an obstacle to this noble procedure, preventing the component from being easily disassembled. After overcoming this “barrier”, it becomes possible to observe the real reasons that caused the breakdown:
- deformation of the smaller (of 2) springs located on the rod;
- different heights of the contacts of the designated sensor;
- poor material (steel) used for the manufacture of terminals;
- presence of play on the floating contact element.
“Ringing” can be used as the initial stage of diagnosis. Each of the contacts must be subjected to this action separately, and then in pairs (“2nd” with “3rd”). The experience of LADA Granta owners indicates the presence of a dull tone during ringing, which confirms the malfunction of the contact group. Serviceable contacts are characterized by a distinct ringing “squeak”.
Handbrake lever limit switch Lada Kalina / Granta / Priora / Vesta, Datsun
- 120 rub. /Thing
Product data
- Description
- Characteristics
- Reviews (0)
- Question answer
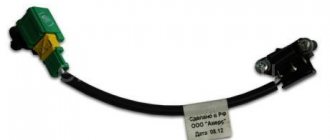
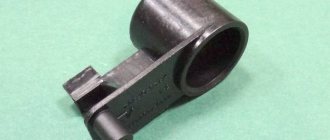
Handbrake lever end cap for Lada Kalina / Granta / Datsun.
The limit switch is also used as a glove compartment lighting switch in Lada Vesta cars.
Product characteristics
New items
Red plastic trim for Granta FL in Drive Active style. Unlike the original cover, it is installed on a regular gr..
MANN oil filter for Lada Largus cars with K4M and K7M engines (Renault). Also suitable for Logan phase 1, Logan phase 2, L..
A new version of the right engine mount for Vesta from the manufacturer Future Technologies. The support is currently undergoing testing. ..
Soft rubber long front mudguards for Kalina Cross and Granta Cross cars. Includes 2 mudguards, fasteners included..
A set of rubber interior carpets with honeycomb-shaped cells for Lada Largus and Largus Cross cars (5 seats). Car mats..
Rear brake drum for Lada Granta, Kalina, Kalina-2, Priora, Datsun cars from the manufacturer BREMBO. Technical specifications..
Front brake pads for Lada Xray (except XRAY Cross) from the manufacturer BREMBO. Brembo disc brake pads...
How to replace the sensor?
If you have received error code 0504, to perform this simple procedure you will need to provide access to the pedal bracket on the Lada Granta, on which our “ill-fated” sensor is actually present, or rather, above the pedal assembly. A well-carried out replacement will guarantee long-term operation.
- Remove the negative terminal from the battery terminal.
- We press out the plastic retainer (use a screwdriver).
- Next, remove the block with wires.
- Turn the sensor in a clockwise direction.
- We remove the faulty part.
We install the new component on a Lada Granta car in the reverse order. Don’t forget to first release the pedal to be able to insert the new product into its socket. We turn the component against the direction of the arrow until the corresponding click appears.
Instructions for replacing the brake controller
- Pump out the liquid.
- Place the vehicle on a support stand and remove the wheel.
- Use a wrench to unscrew the two wheel pins.
- Remove the brake drum.
- Then, using a screwdriver, pull out the hook of the upper tension spring and remove the part. Perform the same manipulation with the lower tension spring.
- Then remove the front pad and spacer bar, while disconnecting the pressure spring and lower the pad.
- Remove the shoe lever from the parking brake hole, straighten the cotter pin and remove it from the parking brake drive.
- Remove the washer and lever.
- Install a new block and assemble the part in the reverse order.
About alternative sensor options
Since domestic “devices” for the Lada Granta car are not able to prevent an unpleasant situation, it is possible to use other devices that act as analogues. Such a component could be a brake light switch from Volkswagen, or more precisely: “FACET 7.1126”. This switch is slightly more expensive than the “native” one (560 rubles) and has the following features:
- four contacts;
- threaded leg with a similar diameter of 12 mm.
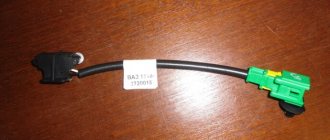
To successfully install the indicated analogue, you will need to acquire an adapter for the terminals.
Owners of LADA cars with an electronic gas pedal may encounter error P0504 (mismatch of brake pedal sensors). Along with it, malfunctions in the engine may appear (stalls, speed fluctuates, does not start, etc.). Most often the cause is the brake pedal position sensor (brake light sensor or frog).
The brake pedal position sensor and brake light switch are mounted in one housing. Most often, the cause of its malfunction is a broken spring. In this case, you can repair the sensor yourself by replacing the spring with a new one. Or replace the sensor with a new one.
New sensor
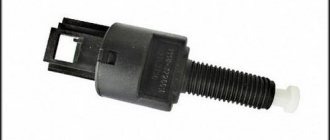
The Lada Vesta, XRAY, Largus, Granta FL uses a Renault brake sensor with catalog number 8200168238 (or 253206170R, 21700372001000).
Brake light switch adjusts automatically
depending on the position of the brake pedal. During automatic adjustment, clicks of transition through fixed positions are heard. However, it may be necessary to extend the stem slightly. To do this, pick up the antennae on both sides with an awl and pull out the rod.
If adjustment of dimension X is required more than three times, replace the brake light switch sensor.
Share on social networks:
Found an error? Select it and press Ctrl+Enter..
Source
How to remove and install
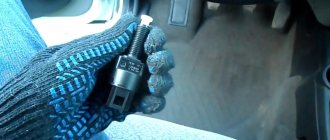
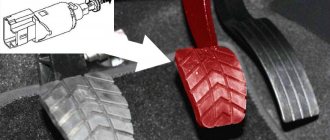
Disconnect the negative terminal of the battery. Move the driver's seat as far back as possible, lift the steering column up, and remove the carpet. The sensor is located near the brake pedal, to remove it you need to remove the block with wires (by snapping the latches), and then:
- (Priora, Kalina, Granta, Niva 4x4) loosen the lock nut and unscrew the sensor.
- (Largus, Vesta, XRAY) turn the sensor counterclockwise 90 degrees and remove it from the bracket.
Installation of the brake pedal sensor is carried out in reverse order. Adjust it if necessary. We tighten the sensor until the pedal goes down. Then turn it out a little (counterclockwise 90 degrees) and secure with a lock nut. It should be so that when the brake pedal is released, the switch rod is completely “recessed”, and when the pedal is pressed, the rod should completely come out of the switch body. The process of removing and installing the sensor is also shown in the video:
Removal and installation
Replacing the brake pedal sensor on Kalina is carried out using an adjustable wrench set to “19”. The sensor itself is located above the brake pedal under the steering column. Conventionally, the removal stages can be divided into 5 steps:
- Before starting electrical work, it is recommended to disconnect the negative wire (terminal) from the battery.
- Then you need to move into the car interior on the driver’s side. For ease of operation, it is advisable to move the driver's seat in the opposite direction from the dashboard.
- Find the location of the sensor. Find a contact chip with wires. Press and hold the 2 plastic fasteners located on both sides of the chip. Pull the connector out of the sensor connector.
- Take the wrench in your hands and loosen the fastening nut. After which the sensor can be unscrewed freely.
- The installation process is similar to the removal procedure, except that you will need to make adjustments (tuning), the process of which is described in detail in the previous section.
How to check
Turn on the ignition and press the brake pedal, the brake lights should light up. After releasing the pedal they should go out. If the lamps do not light up, check the brake pedal sensor and the voltage supply from the battery to the wiring harness block.
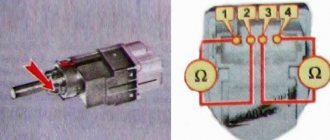
(Largus, Vesta, XRAY) Move the rod lock to the right position using a screwdriver. We check the brake pedal sensor using a multimeter in ohmmeter mode. Circuit 3-4 should be closed (resistance value is close to zero), and circuit 1-2 should be open (resistance should tend to infinity). After pressing the rod, circuit 3-4 should open, and circuit 1-2 should close. Before installation, move the rod to the left position.
(Priora, Kalina, Granta, Niva 4x4) Circuit 1-4 should be closed, and circuit 2-3 should be open. After pressing the rod, circuit 2-3 will close, and circuit 1-4 will open.
Hi all. Today we'll talk about the brake pedal sensor, or brake pedal position sensor to be precise. You will learn about the weak points of this device, as well as how to repair the brake pedal sensor or replace it on a Lada Granta.
Which one to buy
Experts and service workshop specialists recommend purchasing an original brake sensor. It is of better quality and lasts longer.
Table 1. Price of brake pedal position sensor
| Manufacturer | Code | Cost, rub. |
| AvtoVAZ | 11183720010 | 170 |
| Avar | 2113720 | 180 |
| AMY | 11183720010 | 95 |
Source: autopiter.ru
Before changing the “frog”, you can “ring” it with a tester to make sure the part is working.
Removing and repairing the brake pedal position sensor
1. To diagnose the problem, it is necessary to remove the brake pedal sensor. This is done using the key at “19”. Move the driver's seat back and find the desired sensor. Then loosen the nut, turn off the power and remove the brake pedal sensor.
2. Then we disassemble it. Disassembly is quite simple; the sensor consists of two parts and is held on by latches. There is a spring inside the sensor, which most often causes a malfunction.
3. Replacing a spring with a suitable size and number of turns in most cases solves the problem. Also look at the condition of the contacts; there should be no oxides on them, and they should not be burnt.
4. After repairing the brake pedal position sensor, assemble it in the reverse order. And we install it in place.
5. Next, you need to adjust the sensor; for this there are two nuts on it at the top and bottom. The top one adjusts the gap, which determines the correct stroke of the button. The challenge is to find the “sweet spot” and adjust the gap so that the button moves freely.
6. Now that the Grant brake pedal sensor has been repaired, installed and adjusted, you can check its operation, but before that you should reset the error.
7. Then we start the engine and let it run, it may take about 10-15 minutes, if during this time the ECU does not generate an error, then the repair was not in vain. If the error appears again, it means something is wrong with the sensor, or it is incorrectly adjusted. If after all the manipulations you still have not managed to solve the problem with error P0504, most likely you will have to buy a new brake pedal position sensor and install it.
«>
Performance diagnostics
The functionality test consists of: 1. In testing (checking) the product with a multimeter.2. Disassembly and visual inspection of the internal components of the part.3. The replacement sensor is not known to be good.
The first method involves alternately measuring the contacts of the dismantled sensor. The point is to check each contact individually and in pairs (second and third contact). This is quite convenient to do, since at the place where the contact chip is connected, all connectors are numbered.
The second method is used to identify faulty or deformed internal elements of the product (in most cases, damaged springs). Remove all internal elements and pay attention to their integrity and performance. In addition to the condition of the springs, pay attention to the metal contact plate. There should be no traces of oxidation or contamination. If there are any, clean them out.
The third method is quite simple and trivial. Install a new part to replace the one whose serviceability you doubt. Test the operation of the car by driving in various modes, when switching up and down gears. When the system is restored to normal operation, the malfunction indicator (check engine) should go out (if it does not disappear within 15 minutes, the error should be reset manually).
Causes of malfunction and their consequences
If there is an external or internal breakdown of the sensor on the Granta dashboard, the “Check Engine” will light up with error “P0504”. This error indicates a malfunction of the DPT.
Symptoms of a problem
- The car starts poorly and immediately stalls;
- The idle speed fluctuates;
- The motor does not develop the required power;
- Jerks when moving;
Reasons for failure
- The main cause of DPT failure is the spring, which returns the sensor contacts to their original position. If the spring breaks, the contacts do not return and remain in the final position, thereby the ECU continues to receive a signal that the car is braking and thus does not allow it to develop the necessary speed to complete the maneuver.
- A less common breakdown is the failure of the sensor housing, since the sensor is made of plastic, when removing or replacing it it is easy to damage it, which can harm its design and operating mechanisms.
- And the last reason is carbon deposits on the contacts. When the sensor is used for a long time, electrical deposits appear on its contacts, which soon leads to a poor connection between the moving contact and the fixed one.
Error in brake sensor signal on grant
Welcome to ChipTuner Forum.
Theme Options
wryip
anatoli
wryip
wryip
I didn’t adjust it on the grant, but maybe this instruction will be useful or you’ll find something similar when adjusting
Adjusting the brake pedal switches:
Connect the scanner, turn on the ignition. Check the parameters: the state of normally open switch 1 and the state of normally closed switch 2. When the brake pedal is pressed, the switches should move from the “NO” state to the “IS” state in the sequence: first No. 2 = IS, then No. 1 = IS. If, when the brake pedal is not pressed, switch 2 is in the “IS” state or when you lightly touch the pedal it goes into this state, then it is necessary to adjust the switch using the adjusting nut to the “NO” state, that is, “press” switch 2 to the pedal in order to eliminate possible “blinking” of the switch when the pedal plays when it is not pressed. Reset the error codes, turn on the ignition again, press the brake pedal 3-5 times and check for their presence. Please note that if there is an error due to an incorrect signal from the brake pedal position sensor, the malfunction lamp does not light up.
electromechanic
Fedorov
I didn’t adjust it on the grant, but maybe this instruction will be useful or you’ll find something similar when adjusting
Adjusting the brake pedal switches:
Connect the scanner, turn on the ignition. Check the parameters: the state of normally open switch 1 and the state of normally closed switch 2. When the brake pedal is pressed, the switches should move from the “NO” state to the “IS” state in the sequence: first No. 2 = IS, then No. 1 = IS. If, when the brake pedal is not pressed, switch 2 is in the “IS” state or when you lightly touch the pedal it goes into this state, then it is necessary to adjust the switch using the adjusting nut to the “NO” state, that is, “press” switch 2 to the pedal in order to eliminate possible “blinking” of the switch when the pedal plays when it is not pressed. Reset the error codes, turn on the ignition again, press the brake pedal 3-5 times and check for their presence. Please note that if there is an error due to an incorrect signal from the brake pedal position sensor, the malfunction lamp does not light up.
Source
