Connecting the backlight
When installing an additional lamp, the following connection points will be useful:
1. ERA-GLONASS unit (lighting lamp on the ceiling).
- +12V from the battery (permanent): connector A4 of the ISO connector of the radio
- +12V after ignition: connector A7 of the radio ISO connector
- Weight: any point on the body, connector A8 of the radio ISO connector
one of the wires of the block (usually black) is the “ground” limit switch, the other is + 12V.
Standard connection diagram for the rear courtesy light on a Lada Vesta (by Miha062)
How do you feel about this modification of the lighting in the car interior? Let us remind you that other instructions for tuning and modifying cars are in these categories: for Lada Vesta, for Lada XRAY.
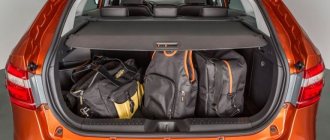
Installation of rear seat lighting Lada Vesta
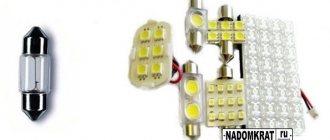
To illuminate the rear passengers, you can use an LED strip, which is placed on a pipe under the front row of seats. The neon glow from below will turn on every time the doors are opened. The LEDs are connected to the standard lighting lamp, to the cigarette lighter socket.
For this purpose, the rear courtesy light is used. Installation rules and sequence of events have already been described earlier.
Does the alarm on your Lada Vesta go off randomly? Is the interior light on or does it not turn off at all? The information below may be useful...
| Door opening sensor Lada Vesta! |
Hello, dear visitor! Surely you also had a chance to see on the roads the new product of the Russian automobile industry LADA VESTA, which displays the features of the best models of Ford, Lexus and Renault. Without a doubt, this is another worthy representative of the budget car line and a direct competitor to Volkswagen Polo, Hyundai Solaris, Kia Rio and Skoda Rapid. Maybe this time the Russian car enthusiast will be shocked by the news that LADA VESTA is the car of the year 2016, and AvtoVAZ will finally wipe the nose of the cocky BRIDES.
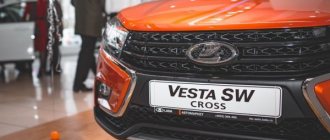
Equipment Lada Vesta SW Cross “Comfort”
What is included in the Lada Vesta SV Cross “Comfort” package:
Comfort
- Multifunction steering wheel
- Bluetooth, Hands free
- USB connector on the front panel
- Audio input AUX
- 4.3" monochrome audio display
- 4 speakers
- Audio system (FM/AM with RDS function, SD card)
- Speed limiter
- Cruise control
- Cooled glove box
- Air conditioner
- Heated side mirrors
- Electrically adjustable side mirrors
- Heated front seats
- Rear electric windows
- Front electric windows
- Folding ignition key
- Cabin air filter
- Driver's seat with lumbar support
- Driver's seat with height adjustment
- Electric power steering
- 12V socket on the center console
- Gear shift prompt in the instrument cluster
- On-board computer
Safety
- Rear parking sensors
- Central locking control panel in the key
- central locking
- Adjusting the height of the front seat belts
- Engine and engine compartment protection
- Hill Start Assist (HSA)
- Traction control system (TCS)
- Electronic Stability Control (ESC) with shut-off function
- Brake Assist (BAS)
- Brake force distribution (EBD)
- Anti-lock braking system (ABS)
- Rear disc brakes
- Emergency call device "Era-GLONASS"
- Immobilizer
- Automatic door unlocking and hazard warning lights in the event of a collision
- Automatic activation of the hazard warning lights during emergency braking
- Automatic door locking when driving
- Locking the rear doors against opening by children
- ISOFIX child seat anchors
- Rear seat headrests 2 pcs.
- Possibility to disable the front passenger airbag
- Front passenger airbag
- Driver's front airbag
Interior
- Adjusting the steering column reach
- Adjusting the steering column height
- Seat upholstery combined fabric/eco leather, choice of color: orange/gray
- 60/40 split folding rear seat
- Center front armrest with box
- Front passenger sun visor with mirror
- Driver's sun visor with mirror
Exterior
- Turn signal repeaters in exterior mirror housings
- Spare wheel with steel rim
- Spare wheel small size 15-inch
- Light alloy wheels
- Wheels 17 inches
- Decorative exhaust pipe nozzle
- Rear spoiler
- Roof rails
- Exterior door handles in body color
- Exterior mirrors in body color
- Light window tinting
- Fog lights
- Daytime Running Lights
Options, necessary and not so necessary
In the winter of 2016, the most affordable version of the Classic received a driver's airbag, heated front seats and mirrors. And a little later, a new driver’s armrest...
With the advent of the station wagon, other options became available:
- Rear disc brakes (previously drum brakes)
- New dashboard
- Armrest of the second row (in top trim levels)
- External trunk release button
- Lockable fuel filler door
- Antenna in the form of a fin.
- Multi-level heated seats
- Climate control
New door stops were introduced in August 2022. The old ones did not perform the function of fixing and holding the door in the desired position. We can say that this (along with the armrest) was the little thing that spoiled the overall impression.
Some changes are difficult to explain by anything other than the desire of marketers to give Vesta the image of a modern car. For example, the smooth opening of the glove compartment lid appeared in the summer of 2022. This also includes the cup holder integrated into this lid. What about the function of atmospheric interior lighting (LEDs in the feet of the driver and passengers)? Is it really needed?
In the near future, Lada Vesta will receive further updates, which will certainly affect the appearance. So welcome to the comments.
- Replacing the low beam light bulb Mazda 3 2008 video
- How to remove a chip from the headlight of an Opel Astra H
- Why do the low beam bulbs on a gazelle business burn out?
- The reason is that the right headlight is brighter than the low beam in the Mitsubishi ASX
- How to replace the low beam light bulb on a Volkswagen Passat B6
Illumination of car handles performs two functions simultaneously
In addition to the fact that it gives the car's interior a stylish and unusual look, illuminated handles help you easily navigate in the dark and make the trip more comfortable. Starting from 2022, Vesta cars in the top configuration are equipped with backlighting as standard. If such a function is not provided in your car, you can purchase and install the backlight yourself.
How does “Luxe / Prestige” differ from “Comfort / Winter”
Differences Lada Vesta “Luxe / Prestige”
- Navigation system
- 6 speakers
- 7.0" color touch display
- Single-zone climate control
- Light sensor
- Rain sensor
- Rear View Camera
- Heated rear seats
- Power folding side mirrors
- Enhanced rear window tinting
- Illumination of entry and exit points in the front doors
- Atmospheric interior lighting
- Automatic headlight switch off
- USB port for passengers in the second row of seats
- Case for glasses
- Combined seat upholstery - dark gray or brown fabric/eco leather (optional)
- Center rear armrest
- Fog lights with turning light function
- 3 rear headrests
- Front side airbags
Differences Lada Vesta “Comfort / Winter”
- 4 speakers
- 4.3" monochrome display
- Air conditioner
- Light window tinting
- Seat upholstery - gray or brown fabric (optional)
- Fog lights
- 2 rear headrests
Laser backlight with logo, LEDs and other lighting options
So, what kind of backlights are there, what are their features? Which option is better to choose for your car doors? Of course, additional lighting can be achieved through simple LED bulbs and shades used to illuminate drawers. This is a fairly inexpensive method that does not require much time, effort, or money. True, you shouldn’t expect anything unique from him. The only thing that can surprise you is to install an additional switch - then it will be possible to deactivate this option even with the door open.
A more interesting option is laser illumination for car doors. Its advantages, of course, include originality, because just ten years ago neither the owners nor even the car manufacturers themselves could imagine that such mini-projectors with a logo would appear in the near future. Naturally, in this case, material costs will increase somewhat, because laser technology appeared in the tuning field relatively recently. However, it is not enormous, so if desired, almost every motorist will be able to afford such a lighting device for the door. And laser illumination with a logo should not cause problems with installation; everything can be done with your own hands.
Another type that requires discussion is the installation of LED strip. So, in this case there is no need to cut the trim to hide the tape inside the doors. True, if there is a desire to protect her from negative external influences, then a similar operation can be performed. By installing this type of door tuning yourself, you will get much more light compared to LED bulbs, and it will not fade, even if there is special plastic or silicone protection. But we are not talking about an exquisite image of the logo when exiting the car. The disadvantages include the possibility of damage to this element during car washing, so do not forget to warn the service personnel in advance about its presence.
Growling or vibration when turning the steering wheel.
If your car starts to growl when turning, this may be the first sign of a failing power steering pump. Please remember, friends, that you cannot ignore the signs of a faulty power steering, since this is primarily a matter of your safety while driving the car.
Today, many modern cars and trucks are equipped with electric power steering. Therefore, you need to know and remember that if your car has an electric power steering, then such a growl and therefore a malfunction when turning the car simply cannot exist, it (the growl) cannot appear.
However, today on the roads of our vast homeland there are still many cars that are equipped with hydrolytic power steering. Therefore, every driver of such a car must carefully monitor the power steering and treat this hydraulic system with care, change the fluid in this power steering in a timely manner and diagnose the entire system for hidden defects.
Materials
Illumination is realized by installing an LED strip. You can buy it not only in many stationary stores, but also on the Internet. The cost of such a product is low, and therefore such a modification will definitely not hit the budget. The most popular sites with articles and prices are given in the table.
However, before purchasing it is worth clarifying some points - the length of the tape, the color and brightness of its glow. For those who are in no hurry to make a purchase, the option of ordering from Aliexpress is perfect, since products there are generally cheaper, although delivery is much longer.
In addition, you will need an aluminum profile (it is recommended to take the thinnest one) and wiring.
Squealing (sharp squealing) under the hood.
If your car's engine makes a squealing sound (squealing), it may be due to an old or worn belt tensioner pulley. Usually, when the belt tensioner roller wears out, the belt tension itself weakens, as a result of which the belt simply begins to slip, and this, in turn, will ultimately lead to its breakage.
Fortunately for any motorist, repairing this part is quite simple and inexpensive. But it’s better not to let it get to such a state that the belt in the car simply breaks. Friends, you just need to change all the drive belts in the car and the same alternator belt on time.
If you do not bother to change all these components of the car in time, then one day, finding yourself on an empty road somewhere at 2 a.m. and even in winter when any belt in the car breaks, you will immediately quickly understand how important it is to carry out regular maintenance of your car. vehicle, how important it is to promptly change faulty car parts
DIY LED lighting installation
In order to get the job done, we will need:
- heat shrink pipe;
- electric wires;
- LED strip and LED lights.
Installation is carried out, as a rule, on the dashboard, in places where lamps and standard lighting elements are located. They can be simply replaced with LEDs if desired. The base of the diode lamp is the same as that of a standard lamp, so replacement is carried out without any difficulties.
Next, you need to install the tape at the bottom in the foot area and around the perimeter of the top of the car. After the necessary measurements, cut off the amount of tape that is needed. Cuts should be made in areas where solder contacts are located.
When measuring, you need to provide some excess wires for reserve. After cutting and soldering to the contacts of the tape, you need to put on the heat-shrinkable tube and heat it with a hair dryer until there is no shrinkage. We process the following fragments in a similar way.
The connection must be made through an RGB block container or in the same way as neon lights. This will ensure that the lights turn on when the car doors are opened.
It is very important to maintain the correct polarity here - this was discussed above
After connecting it yourself, the car door lights will be ready for use - check its operation. If everything is in order, you can be congratulated on your success.
How to replace the door opening sensor on a Lada Vesta:
Thank you very much for the article! A friend had the exact same problem with the sensor on the front passenger door. When the door opened, the light in the cabin did not turn on immediately, because... The elastic band (boot) was too hard. Trimming the boot from the inside did not solve the problem. We didn’t find the boot separately and bought a new end switch assembly for a cosmic sum of 100 rubles.
If anyone needs it, I have the Lada Vesta Technological Maintenance and Repair Instructions! Ask in the comments who needs it I’ll send it to you.
Good afternoon I need instructions. If you don't mind, send it to the address
Dmitry, the instructions for technological maintenance and repair of the Lada Vesta weigh a lot. You can download from the link from the cloud mail: https://cloud.mail.ru/public/Ei4W/nRigLxdBc
Is it possible to see the same instructions for SW Cross?
At -25, all my end caps stopped working, they probably froze.
Hello, Stepan, you can verify that the sensors are working by squeezing the rubber boot with two fingers across the movement of the sensor, that is, so that the boot lengthens. Indeed, in cold weather the original coarse rubber boots freeze and the sensors do not work. It can only be solved by replacing the boot with one with softer rubber (boots from Viburnum, Logan, etc. are suitable).
Thank you, I’ll have to try it, otherwise I have to constantly move them with my hand to get them to work when the door is opened.
Stepan, it’s better not to move, otherwise you may damage the wiring to the sensor. It’s better to simply press the rubber band with two fingers so that it lengthens along the axis of the door sensor rod.
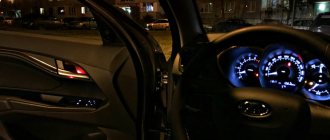
Front panel illumination
The front panel backlight is activated when external lighting devices are turned on. Car owners note that they experience some inconvenience when reading indicators when exposed to direct sunlight. Car owners are trying to independently improve the LED lighting of Lada instruments. Car enthusiasts should take into account that any intervention, modification or improvement of lighting fixtures will result in loss of warranty coverage. If the owner nevertheless decides to improve the lighting, it is necessary to adhere to the algorithm of actions.
Sequence of events
Remove the glove container. To do this, open it and press out the latches that hold the lid. Apply a little force, pull the cover towards you, it will come off. Remove the glove box light. Using a small screwdriver, press out the lamp and disconnect the wires. Unscrew the five bolts and remove the glove compartment. To improve lighting, purchase two 600 V LEDs. Unscrew the hook and screw securing the body of the pulp and paper machine. In connector c1 you need to cut the dark blue wire. In connector c2, strip the blue-red wires. Connect two diodes. In the received kit, connect the dark blue wire to the end of the wire of the same color in connector C1. The green wire is connected to the end of the dark blue wire, which is located inside the harness. The red wire is connected to the end of the blue-red wire in connector c2. Next, the steps are performed in reverse order. If all steps are followed, the panel illumination will be improved. Switching on will be done by turning the ignition key.
Foot light
If there is no lighting in this area, the driver of the car will be able to install the lighting for the feet independently, if he deems it necessary. To perform such a procedure does not require large expenses. The driver will only need a piece of LED strip. Before purchasing a strip, decide what color and power of light you want.
Stages of implementation
Divide the profile into four parts. Each of them is approximately 25-35 cm in diameter. Degrease the surface of the profile. Attach the LED strip to the parts (use available means - glue, adhesive double-sided tape). Connect the LEDs to the standard lighting lamp, or central lighting unit. If you want to install backlighting for the rear row of seats, it is better to place LEDs under the driver’s and front passenger’s seats.
The process of installing LEDs on Vesta door handles
Any warrior can perform tuning of door handles on the Lada Vesta independently. Work must be done in the following order:
- Remove the inner door trim and the power window unit on the driver's side, find the wiring harness for connecting the LEDs. In some trim levels, wiring for this function is provided from the factory, even if the car is not originally equipped with backlighting.
- Make a hole inside the plastic niche on the side. You need to drill it with a drill, with a drill of the same diameter as the diode. The wires will pass through this hole.
- Insert the diode into the hole and seal the gaps with glue. It is important to use high-quality glue or body sealant that will hold the LED well in the socket despite vibration. Before installation, the diode can be lightly sanded so that it produces diffused light.
For those who want to make their Lada recognizable and bright, there are special door trims with a glowing Vesta logo in different colors. They are sold as a set for rear and front doors and include, in addition to the trims themselves and the LED module, fasteners for installing elements inside the door. They are installed as follows:
- A hole is drilled inside the niche for the handle through which the wires will pass. The door trim from the inside will first need to be dismantled
- The accessory with the Vesta inscription is fixed inside the recess for the handle. It is inserted easily, as it is specially designed for this purpose. Before installing the inserts, it is better to bend the edges of the protective film so that it can be easily removed after installation.
- The backlight is connected via a resistor included in the kit. It is necessary so that the inscriptions on the door handles do not shine too brightly and do not distract the driver with their light.
Non-standard way
Required:
- LED strips (4 pcs, 30 cm each), see AliExpress catalog.
- aluminum profile (the thinnest);
- additional wires.
Installation.
We cut the aluminum profile into 30 cm pieces. Then we glue LED strips to it.
You can attach the footlights for the front passengers to three plastic lugs, which are located at the bottom of the panel (dashboard).
The lighting for the rear passengers is located under the seats on the pipe. If there is a box under the front seat (on Lada XRAY), we attach a profile with an LED strip to the top of the box. We fix it with hot melt glue or construction adhesive.
We put the wiring from the LED strips in a corrugated section underneath along with the seat heating wires, which runs next to the air ducts for the rear passengers. We bring the wires into the central tunnel, and then under the torpedo. We also bring out the lighting wiring for the front passengers there.
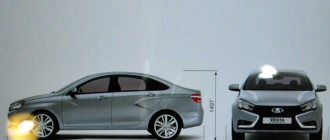
New body
It is unlikely that all external body panels of the new Lada will be new. The owners will not give the go-ahead for this. Therefore, most likely, only the 2022 Lada Vesta restyling will be presented. But quite deep, taking into account the “moving” to a new platform.
Start of sales in Russia and competitors
Sales of the Lada Vesta 2022 will start next year. Unless, of course, VAZ postpones the premiere date - and this has happened at the Togliatti plant more than once. A little earlier you will be able to watch the Lada Vesta 2022 test drive video. After all, it’s possible that the factory workers will let journalists ride pre-production copies.
As for the rivals, among them:
- of course, Renault Logan, assembled in the same place - in Togliatti. The “base” costs only 577 thousand, but is extremely modest - one airbag, amplifier, ABS and, in fact, that’s all. The modification for 645 thousand is equipped much more richly. There is also a “crossover” body kit – such a sedan is valued at a minimum of 696 thousand rubles;
- “twins” Kia Rio and Hyundai Solaris – from 775 and 756 thousand, respectively.
Defects of Lada
Lada Vesta has recently rolled off the assembly line and not all warranty workshops have experience in solving problems on how to eliminate knocking noises that occur in the suspension. The manufacturer constantly maintains contact with the service station and makes changes to the design. Let's consider possible malfunctions and methods for eliminating them in the front suspension of the Lada.
Car enthusiasts may be disappointed by a new car almost immediately. An unpleasant creaking and knocking sound appears when passing speed bumps. Upon analysis, it turned out that the problem was in the stabilizer bar bushings.
It is not recommended to lubricate them with grease; they will stop squeaking, but for a very short period of time, so they only need to be changed. They can be replaced with polyurethane ones from Niva Chevrolet. The bushing has catalog number 17012680. After replacement, the squeaking sound disappears.
You should know that these are not all problems; a characteristic knocking sound may occur from the front right.
This is typical when there is increased play in the right ball joint. Replacement is carried out together with the suspension arms assemblies. AvtoVAZ supplies them complete with a ball joint.
Front suspension of the Lada Vesta The main defects that occur in the front part of the Vesta car, which may cause the car to creak or rattle:
- Grinding noise in the anti-roll bar;
- The right ball joint is faulty, it starts knocking;
- The stabilizer links begin to rattle.
It is recommended that all these defects be repaired at AvtoVAZ dealerships.
When driving on an uneven road, you hear a dull knock on small bumps or a sound reminiscent of rubber friction. This problem can be eliminated by lubricating the Vesta muffler mounting with grease. Vesta's front suspension creaking may be due to worn struts.
To eliminate the defect, you just need to replace them with new ones, the problems with the suspension will be solved.
Front panel illumination
The front panel backlight is activated when external lighting devices are turned on. Car owners note that they experience some inconvenience when reading indicators when exposed to direct sunlight. Car owners are trying to independently improve the LED lighting of Lada instruments. Car enthusiasts should take into account that any intervention, modification or improvement of lighting fixtures will result in loss of warranty coverage. If the owner nevertheless decides to improve the lighting, it is necessary to adhere to the algorithm of actions.
Sequence of events
Remove the glove container. To do this, open it and press out the latches that hold the lid. Apply a little force, pull the cover towards you, it will come off. Remove the glove box light. Using a small screwdriver, press out the lamp and disconnect the wires. Unscrew the five bolts and remove the glove compartment. To improve lighting, purchase two 600 V LEDs. Unscrew the hook and screw securing the body of the pulp and paper machine. In connector c1 you need to cut the dark blue wire. In connector c2, strip the blue-red wires. Connect two diodes. In the received kit, connect the dark blue wire to the end of the wire of the same color in connector C1. The green wire is connected to the end of the dark blue wire, which is located inside the harness. The red wire is connected to the end of the blue-red wire in connector c2. Next, the steps are performed in reverse order. If all steps are followed, the panel illumination will be improved. Switching on will be done by turning the ignition key.
Foot light
If there is no lighting in this area, the driver of the car will be able to install the lighting for the feet independently, if he deems it necessary. To perform such a procedure does not require large expenses. The driver will only need a piece of LED strip. Before purchasing a strip, decide what color and power of light you want.
Stages of implementation
Divide the profile into four parts. Each of them is approximately 25-35 cm in diameter. Degrease the surface of the profile. Attach the LED strip to the parts (use available means - glue, adhesive double-sided tape). Connect the LEDs to the standard lighting lamp, or central lighting unit. If you want to install backlighting for the rear row of seats, it is better to place LEDs under the driver’s and front passenger’s seats.
Interior lighting
LED lighting of the Lada's interior is represented by lighting in the recess on the front panel, lighting of the driver's foot area and the passenger sitting next to the driver. A special feature of the backlight is its operating mode in light-music mode.
Standard interior lighting is represented by a lampshade, which is located at the top, above the front panel. There are five control keys on the lampshade. With their help, you can turn on the lights on the driver's, passenger's side and fully turn on, turn off, and set the backlight mode when opening the car doors. In addition, the car is equipped with lighting fixtures at the bottom of the door for the driver and the passenger sitting next to him. The backlight lights up every time the door is opened.
Other reasons
Of course, there are many minor problems that were not described here and that lead to noise when turning the steering wheel of the Lada Granta. When knocking and squeaking noises appear when turning the steering wheel, the Granta should be examined by specialists if you are not confident in your experience in diagnosing the car. Otherwise, you risk breaking the car.
Comfort when driving a Lada Granta car consists of many factors, one of which is the operation of the front suspension. Knocking, noise, and “breakdowns” of the suspension also affect traffic safety, so timely diagnosis of breakdowns of this unit is simply necessary. It is better to carry it out at a service center, but some faults can be identified yourself.
Materials
Illumination is realized by installing an LED strip. You can buy it not only in many stationary stores, but also on the Internet. The cost of such a product is low, and therefore such a modification will definitely not hit the budget. The most popular sites with articles and prices are given in the table.
However, before purchasing it is worth clarifying some points - the length of the tape, the color and brightness of its glow. For those who are in no hurry to make a purchase, the option of ordering from Aliexpress is perfect, since products there are generally cheaper, although delivery is much longer.
In addition, you will need an aluminum profile (it is recommended to take the thinnest one) and wiring.
Main characteristics of the Lux package
Lada Vesta with the Lux package is available with two power units: 1.6 l 5MT (106 hp) and 1.8 l 5AMT (122 hp). This choice exactly meets the requirements of the Russian consumer, where many prefer to choose cars with less powerful engines, but at the same time in top trim levels.
Lada Vesta 1.6 Comfort Multimedia on mechanics: review of equipment
| 1.6MT Luxe | 742 900 ₽ | petrol 1.6, 106 hp | Mechanical 5 |
| 1.8 AMT Comfort Image | 762 900 ₽ | petrol 1.8, 122 hp | Automatic 5 |
| 1.6 AMT Luxe | 767 900 ₽ | petrol 1.6, 106 hp | Automatic 5 |
| 1.6 MT Luxe+Multimedia | 770 900 ₽ | petrol 1.6, 106 hp | Mechanical 5 |
| 1.8MT Luxe | 777 900 ₽ | petrol 1.8, 122 hp | Mechanical 5 |
| 1.6 AMT Luxe Multimedia | 795 900 ₽ | petrol 1.6, 106 hp | Automatic 5 |
| 1.8 MT luxe Multimedia | 805 900 ₽ | petrol 1.8, 122 hp | Mechanical 5 |
For the city, the 1.6 liter engine becomes the optimal unit. Much more important is internal convenience for the driver and passengers, who are often children.
The starting price at the moment is from 740 thousand rubles. There is no reason to consider the cost too high - it is worth familiarizing yourself with the equipment.
Don’t forget about the standard option for all AvtoVAZ products called “ERA-GLONASS”. It costs each buyer an extra thousand rubles. Taking into account modern security requirements, such a sacrifice should be considered inevitable.
There are several Luxury packages:
- Luxe / Multimedia
- Luxe / Prestige
The choice of equipment does not affect the exterior in any way. The Comfort package has similar additions to the Luxury package. 16" wheels with a 15" steel spare wheel. Handles and mirrors are painted to match the body color.
Is it worth spending time and money on door lighting?
Illumination of the interior handles of the Lada Vesta is not mandatory, but a very functional and interesting addition. Making it yourself is inexpensive and easy. A set of overlays with a luminous inscription will cost the owner approximately 1,300 rubles.
It is easiest to install the backlight on cars that are initially equipped with a special connector or have power windows on all doors, into which it is easy to connect the accessory. But even if there are no such connectors, installing the backlight will not cause difficulties for the driver who has an understanding of what the car’s electrical system is. Including dismantling the door cards, the process takes no more than two hours.
Overall, the idea is very interesting, and its implementation immediately gives the interior of the Russian model a unique ambiance.
Work progress
Installing LED lighting for the interior door handles of the Lada Vesta is not too difficult. You just need to follow the recommendations.
First of all, you should connect the resistance to minus or plus. As Andrey noted, he put it in the positive wire. Resistance is necessary to reduce the brightness of the inscription. Otherwise, it will distract you from the road, especially at night.
The door cards should be removed by unscrewing the bolts and removing the trim from the clips.
You also need to remove the power window control unit on the driver's door. You should work carefully so as not to break the plastic latches of the block.
The next step is to drill a hole in the handle panel. It is better to drill with a 2 mm drill, but it is only suitable if resistance soldering will take place on site, directly during the installation process. Otherwise, a larger diameter drill (4 mm) will be required so that the pre-soldered resistance can be pulled into the hole.
The process of connecting LED lighting for interior door handles of Lada Vesta is easiest on versions with full power accessories. In this case, the connection is made directly to the power window control unit.
Contacts are marked in the photo:
- Black wire – minus;
- The blue wire with a black stripe is a plus.
As for the passenger doors, all the plugs on them are identical. To connect, you will need two contacts:
- Red (5th) – plus;
- Blue (6th) – minus.
The inserts are fixed with a special compound that comes with the kit.
In addition, there are a couple more points.
To protect the inserts, a film is glued to them. It needs to be removed - first tear it a little, and then, after installation is complete, remove it completely. Otherwise it will be difficult to remove it.
If your car has a rear door power window locking function, if you activate it, the inserts will go out. The reason is that in such a situation, “plus” is not supplied to the power windows.
This completes the independent installation of LED lighting for the interior door handles of the Lada Vesta.
The Lada Vesta Prestige car is equipped with additional lighting for the car door handles. The backlight is an LED module, which is attached to the back of the door card and illuminates the handles through a special hole.
However, it is worth noting that not every Lada Vesta Prestige has backlighting, the fact is that they began to be installed only in 2022, but the wiring for the backlight in these trim levels was laid in advance, which greatly facilitates self-installation.
Installation on Lada Granta, Kalina, Priora
- Treat the LED with fine sandpaper so that it shines not as a point, but as a scattering light.
- We make a hole in the plastic door handle of the required diameter (for example, 6 mm) using a drill.
- We install the LED in the hole and fix it with glue (for example, hot glue).
Result:
The installation process is also shown in the video:
Connection
In this case, it is necessary to ensure that the floor lighting on the Lada Vesta and X-Ray works in the same way as the rest of the car, that is, it fades out when the doors are closed. Otherwise, the constantly burning backlight will begin to irritate and tire you, especially on a long night journey.
In this case, there are 2 connection options:
- To CBKE;
- To the ERA-GLONASS lamp.
To CBKE
The connection goes to plug P1, contact C4 (the red wire goes into it) - 12V, provided the car is disarmed. Plug P1, contact C6 (a white wire goes into it) – when the door is opened, a “ground” gradually appears.
The location of the electronics box varies depending on the model.
Lada Vesta
In a sedan it is located behind the glove box, and therefore, in order to get to it, the glove compartment must be removed. To do this, you need to open the glove box lid, then release the latches that hold its upper edge. When this is done, the lid pulls towards itself, overcoming the resistance of the 3 fasteners, and snaps off.
Vesta glove box mount
Next you need to remove the glove box light. It is located in the upper left corner and is held in place by a spring-type lock. You need to pry up the lampshade with a knife or screwdriver and snap it off, then disconnect the wiring.
When the ceiling light is removed, you only need to unscrew the 5 mounting screws that secure the glove compartment to the dashboard. This is done using a T20 Torx bit.
Lada X Ray
In this case, everything is simpler, since the electronics unit is located on the left side of the dashboard, at the driver’s feet.
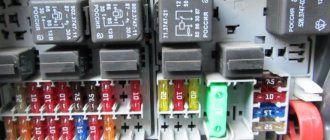
To the ERA-GLONASS lamp
First you need to remove the lampshade itself. Before work, you must reset the negative terminal from the battery.
Next, you need to insert a screwdriver or knife between the roof upholstery and the lampshade, with the help of which you can disengage the latches.
Then unscrew the 2 screws that secure the lampshade to the body, and pry off the spring retainer (also with a knife or screwdriver). In the end, all that remains is to disconnect the plug.
For greater convenience of connecting the floor lighting (and other devices) to the Lada Vesta and X-Ray through the lampshade, the plug is numbered. It is recommended to navigate by the number, since the color of cars of different years of assembly and configuration may differ.
Diagram of the ERA-GLONASS lighting unit
Connection:
- Contacts 11 and 14 (usually white-pink color) - after turning on the main relay (opening the doors, turning the key in the ignition switch), +12 V appears. A few minutes after the key is removed from the ignition switch, the power stops.
- Contact 15 (usually blue-black or black) – ground;
- Contact 17 (usually white) – mass of door limit switches. It occurs only when the doors are open.
The implementation of floor lighting on the Lada Vesta is demonstrated in the video.
Probable causes of suspension malfunction
View of the front suspension “from under the wheel”
The unpleasant creaking of the front suspension of the Lada Grant, “breakdowns” in its operation lie in the malfunction of the elements of this component of the car. Conventionally, they can be divided into two groups: the shock absorber strut with its contents and all the rest. The reason for separating the strut into a separate category is due to the increased load on it: it simultaneously performs the function of an upper arm and dampens vertical vibrations of the wheel.
The main causes of malfunctions of the telescopic stand include the following:
- Loosening of the attachment of its upper support to the supporting body.
- Destruction of the rubber buffer.
- Liquid leakage from the shock absorber, scuffing on its rod, damage to the chrome coating of the rod.
The shock absorber is leaking (needs replacement)
In the photo: lower lever assembly with ball
Damage to the ball joint is also possible, usually caused by an overestimated service life or the installation of a substandard part. Worn rubber bushings in the stabilizer and braces will also affect the smoothness of the suspension. Breakage of the main spring is unlikely, but natural wear or installation of a non-standard model can cause a loss of elasticity of the suspension as a whole.
Self-diagnosis of faults in the front suspension
There are several explanations for even one symptom of a breakdown, so it is better to identify the true cause of the malfunction at a bus station.
The following groups of signs of deviations in the operation of the front suspension can be distinguished:
- Spontaneous deviation from straight-line movement, “yaw” of the machine.
- Noises, knocks, “breakdowns” when driving on uneven roads.
- Reduced service life of suspension elements, their rapid failure.
The paint on the stand has come off and the stand has begun to rust.
The first group usually includes malfunctions of the stabilizer. You can visually inspect the entire suspension and, if there are no signs of dents or deformations, then it is worth checking the setting of the toe-in/camber angles of the front wheels. Externally, their deviation is observed in the uneven wear of the tread of the front wheels, but it will take some time for the tires to wear out.
There is a chance to detect this failure by ear: when entering a turn, you will hear the creaking of rubber, and the steering wheel usually does not return to its original position on its own.
A creaking sound in the front suspension is one of the temporary malfunctions of a Lada Granta car if it is caused by operating the car on a polluted or sandy road. In this case, sand particles may get into the rubber seals (silent blocks) of the stabilizer or braces. After washing the noise disappears.
The “couldn’t be simpler” suspension is just a plus.
After any work that involves disconnecting the hub from the strut, it is necessary to do a wheel alignment. As a last resort, you can try using a chisel to make marks on the strut and on the camber bolt (it's on top).
Lada Vesta “Luxe / Prestige” equipment
What is included in the Lada Vesta “Lux / Prestige” package:
Comfort
- Navigation system
- USB connector on the front panel
- Multifunction steering wheel
- 6 speakers
- 7.0" color touch display
- Bluetooth, Hands free
- Audio input AUX
- Audio system (FM/AM with RDS function, SD card)
- Speed limiter
- Cruise control
- Cooled glove box
- Single-zone climate control
- Light sensor
- Rain sensor
- Heated windshield
- Heated side mirrors
- Electrically adjustable side mirrors
- Heated rear seats
- Heated front seats 3-level (in “Comfort” for AT and “Winter”)
- Heated steering wheel
- Rear electric windows
- Front electric windows
- Power folding side mirrors
- Folding key
- Cabin air filter
- Driver's seat with lumbar support
- Driver's seat with height adjustment
- Electric power steering
- Automatic headlight switch off
- USB port for passengers in the second row of seats
- 12V socket for second row passengers
- 12V socket for driver and front passenger
- Center rear armrest
- Center front armrest with box
- Gear shift prompt in the instrument cluster
Safety
- Rear View Camera
- Rear parking sensors
- Central locking control panel in the key
- central locking
- Adjusting the height of the front seat belts
- Hill Start Assist (HSA)
- Traction Control System (TCS)
- Electronic Stability Control (ESC) with shut-off function
- Brake Assist (BAS)
- Brake force distribution (EBD)
- Anti-lock braking system (ABS)
- Rear disc brakes (only for 1.8 and AT)
- Emergency call device "Era-GLONASS"
- Immobilizer
- Automatic door unlocking and hazard warning lights in the event of a collision
- Automatic activation of the hazard warning lights during emergency braking
- Automatic door locking when driving
- Locking the rear doors against opening by children
- ISOFIX child seat anchors
- 3 rear headrests
- Front side airbags
- Possibility to disable the front passenger airbag
- Front passenger airbag
- Driver's front airbag
Interior
- Adjusting the steering column reach
- Adjusting the steering column height
- Illumination of entry and exit points in the front doors
- Atmospheric interior lighting
- Case for glasses
- Illumination in the passenger sun visor
- Illuminated driver's sun visor
- Mirror in the front passenger's sun visor
- Driver's sun visor mirror
- Leather steering wheel
- Combined seat upholstery - dark gray or brown fabric/eco leather (optional)
- 60/40 split folding rear seat
- On-board computer
Exterior
- Spare wheel 15-inch temporary use
- Light alloy wheels
- Wheels 16-inch
- Spare wheel with steel rim
- Exterior door handles in body color
- Exterior mirrors in body color
- Exterior mirrors with side direction indicators
- Enhanced rear window tinting
- Engine and engine compartment protection
- Fog lights with turning light function
- Daytime running lights halogen
Motors and gearboxes
About the Lada Vesta 2022, the latest news does not indicate what specific engine sizes will be installed on this car, and what gearboxes they will be combined with. Now the motors are:
- 1600 “cubes” (106 forces of our own design and 113 forces from Renault);
- 8 liters (122 horsepower, developed by VAZ, country of assembly – also Russia).
An alternative to the five-speed “mechanics” (only for the 113-horsepower engine) is a CVT, which was replaced by a “robot”. By the way, CVT cars began to be produced only last fall.
Gas cars have been discontinued. And fuel consumption has nothing to do with it. It’s just that the state stopped providing subsidies (115 thousand), and without it, the car became, in fact, useless to anyone.