December 16, 2015 Lada.Online 78 277 3
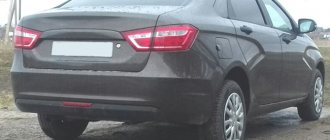
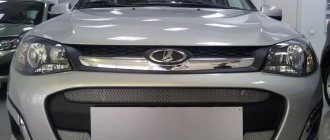
Anyone who has owned a car for a long time knows that it is cheaper to prevent a breakdown than to fork out money for repairs. An example is the engine radiator, which is located at the front of the car. On the Lada Vesta, the standard radiator grille is a mesh with large honeycombs, which is not capable of protecting the radiator from stones, dirt and midges. Let's find out how best to improve it.
The Vesta radiator grille consists of two parts:
- top grill;
- bottom grille.
Available methods of radiator protection:
- Replace the factory radiator grille with a tuning one, with smaller honeycombs;
- Install the protective cover over the standard grille;
- Install a fine metal mesh on the inside of the grill.
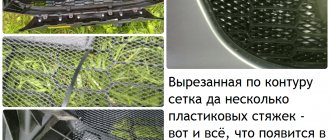
In this article we will focus on the last option. That is, you need to buy a metal mesh (price about 200 rubles), cut out the required piece and attach it to plastic clamps on the back side of the plastic grid.
Lada Vesta car owners often encounter...
...with the problem of damage to the radiator of the cooling system. The reason is not the quality of the radiator, but the imperfect design of the upper and lower grilles. Often, at speed, stones, gravel, and crushed stones fly into the engine compartment, thereby damaging the elements of the cooling system.
There are three ways to deal with manufacturing defects:
- install a branded, non-standard Lada Vesta radiator mesh;
- install a homemade structure;
- install universal protection.
The owner of a Lada Vesta chooses the most optimal option for himself, based on his budget and availability of free time. If you are not physically able to install the protection yourself, contact a service station specialist for help.
Radiator hazard
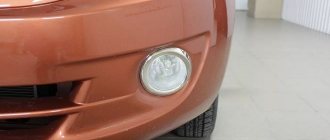
Vesta's radiator grille is distinguished by large slots into which a stone or piece of ice can fly. Such a hit can be critical for the radiator, because the component is not particularly strong. The same applies to the air intake.
Naturally, all this forces many Vesta owners to install protection made of metal mesh, which covers the slots and is able to repel the impact of stones and other debris. In addition, the mesh is fine, which means that insects and other small debris will not settle on the radiator.
An example of what can happen to a radiator if a stone hits it.
Ready-made or homemade protection?
Branded
The mesh is sold in car dealerships, online and at car markets. Installation is carried out from the front side of the grille. The design is represented by four lattices:
- top;
- bottom;
- for the left air intake;
- for the right air intake.
The main material is aluminum, which has high strength and ventilation. The edging is made of ABS polymer.
| Name | Price in rubles |
| Top (chrome) | From 3300 |
| Black color | From 3100 |
| Bottom (chrome) | From 2400 |
| Black | 2200 |
| Set | From 5500 – 5800 |
| *prices are as of May 2022 | |
Homemade
The mesh is made from available materials. Installation is carried out from the back of the bumper with fixation using plastic clips and self-tapping screws. Aluminum is used as the main material, the shape of the structure is rectangular.
Related link:
Review of the book on operation and repair of Lada Vesta
Parameters: cell size from 10 to 15 mm.
| Name | Price in rubles |
| MOTODOR mesh 100 x 25 cm | From 500 / pcs. |
| MOTODOR 100 x 40 cm | From 550 – 650 / pcs. |
| MOTODOR 100 x 70 cm | From 550 – 650 / pcs. |
| MOTODOR 100 x 100 cm | From 550 – 650 / pcs. |
| MOTODOR 100 x 120 cm | From 550 – 650 / pcs. |
| *prices are as of May 2022 | |
Universal type
Installation is carried out from the back of the bumper with fixation using plastic clips or a metal mount. The edging is made around the perimeter from a polymer material.
| Name | Price in rubles |
| Saveradiator ZR.LAD.VES.15 1958-2958 | From 4200 |
| Novline-Autofamily 136003820 | From 1300 |
| Meshmsk 01-551015-151 | From 1900 |
| 01-551015-268 | From 1900 |
| 01-551015-247 | From 1900 |
| *prices are as of May 2022 | |
The required shape is cut out yourself, since the mesh is sold in a standard size of 100 x 100 cm.
Installing proprietary protection
When purchasing an original accessory, installation instructions are included in the kit. If necessary, read the regulations.
The main advantage of the “original” is that there is no need to dismantle the front bumper, which saves time, effort and money.
Installation work is carried out at external temperatures above +10°. The top, middle, bottom are attached in different ways:
- top – on plastic latches (clips);
- middle and bottom - using screw fasteners.
Installation is carried out slowly, carefully, so as not to damage the main perimeter of the radiator grille (hereinafter referred to as RR). The top is installed in the left-to-right direction.
The middle and bottom are installed by analogy, first making holes with an awl for screwing in the self-tapping screw. Then the structure is fixed.
Installing homemade protection
Required materials and tools:
- keys, knobs for “10”, “12”;
- Phillips head screwdriver;
- rags;
- flashlight to increase visibility;
- plastic clamps in the amount of 2 pieces.
Related link:
Which is better Lada Vesta or Lada X-Ray
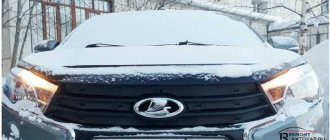
Dressing the car for winter
In winter, in the northern expanses, severe Siberian frosts, the car eats gasoline more actively and freezes faster than you want. It is advisable to insulate the car for winter to feel more comfortable. Attempts to insert a cardboard do not go well; you cannot insert a cardboard into a Lada vesta, and to cover it on top is a “collective farm”. We have to turn to ready-made insulation solutions.
Insulation from YarPlast code: VS-ZIM-Z
lower price: from 550 rub. The top one will cost from 890 rubles.
The winter radiator protection is made of strong black plastic; it fits into the interior of the Lada Vesta and does not disturb the harmony. The engine temperature rises quickly, it cools down more slowly - it uses gasoline more economically. This insulation, like summer insulation, consists of two parts: for the grille and the air intake. When it thaws, it is better to remove the top part if you do not want to drive in the fan. There shouldn't be any problems installing this device; it's fastened with clips and standard bolts. It is recommended to apply adhesive tape or insulating tape to the bumper in the place where the lower part of the shield may come into contact, stripping off the paint.
How to install a protection grid
Step by step guide:
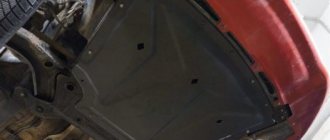
- We place the car over the inspection channel, open the hood, remove the engine sump protection and license plate.
- We gradually unscrew the fasteners of the upper, middle, and lower contours.
- We remove the headlight units from the seat.
- Then we move on to the wheel arches and unscrew the bolts.
- After the front bumper is completely freed from the fasteners, dismantle it.
- Let's start making the protection. We apply a metal mesh on the back side and draw the outline with chalk. We cut out the trim to the shape we need, not forgetting the holes for the screws.
- We unscrew the bolts, remove the standard mount, apply the mesh, and screw it on.
- On the left and right in the central part we fix the cover with plastic clamps, since the design does not provide holes for self-tapping screws.
Installation is complete, let's start installing the front bumper in its original place.
Grill installation
Installation of plastic products requires adherence to technology and accuracy. The process is long and labor-intensive. An assistant will be required to complete the work.
Algorithm of actions
- Remove the bumper and place it on a soft surface to prevent damage;
- Remove the six retaining bolts. In the upper part, remove the small bolts - six pieces, the large bolt in the center of the oval;
- Remove the grille, do not forget about the plastic latches;
- Install the mount on the new element;
- Use two bolts to connect the new plastic grille to the inside;
- Attach the resulting structure to the main part;
- Secure with the six removed bolts;
- Install four small bolts, the large bolt in the middle.
Conclusion
The process of installing a mesh on the radiator grill of a Lada Vesta is not complicated; the task is doable even without experience in servicing equipment. It is necessary to strictly follow the regulations and avoid mistakes.
As for the modification of the protection and the method of its manufacture, this is a “personal matter.” The car owner takes into account the cost of the accessory, budget, and availability of free time.
Obviously, purchasing a ready-made kit with subsequent installation will significantly simplify the process. But not all drivers agree with the high cost of the kit.
A homemade protective mesh costs several times less, but does not always meet the established quality. The choice is up to the vehicle owner.
Total
Insulation of the front end has a positive effect on fuel consumption, throttle response and heat generation of the cabin heater. A sober approach to the issue consists of three steps:
- -10°C – close bottom.
- -20°C – cover the top 75%.
- -25°C – limit air cooling to 100%.
Wide windows in the radiator grille allow you to install plugs in each of them. Material – isolon or a travel mat of a suitable color. Flex tubes will help you quickly resolve the issue, and patterns for covers made of dermantine or raincoat fabric will help you master the creation of barriers.
Reviews
| № | Positive |
| 1 | Andrey (Avtodrom): I bought the cars a year ago and realized that I couldn’t do it without an overlay for the RR. I will contact the service station for installation. |
| 2 | Sergey (Avtotema): I ordered the installation of the cover, the guys did everything promptly, no comments. I have already caught stones several times, fortunately the protection saved me. |
| 3 | Kirill (Autoreview): I’m happy with the cover, now the radiator is safe. My recommendations to motorists. |
| 4 | Alexey (Avtoria): installed the protection last summer, a year has already passed. There are no comments, the fasteners are normal, there is no knocking or vibration. |
| 5 | Alexander (Drom): I installed the overlay myself, everything took half an hour. Everything is simple and logical. |
| 6 | Stanislav (Driving): I live on the periphery, you know what the roads are like there. The overlay always comes to the rescue. |
| 7 | Vasily Alekseevich (“5th wheel”): thanks to the designers for developing the lining, an extremely necessary thing. |
| Negative | |
| 8 | Vitaly (Avtotema): I bought a ready-made set of mesh, installed it, and now it makes a noise when driving. Apparently the fastening is not of good quality. |
| 9 | Svyatoslav (Otzovik.net): a year after installation, the upper pad holds firmly, but the lower one vibrates when driving. |
| 10 | Vlad (ProAvto): installed the cover from the outside, was dissatisfied, weak fixation. Comrades advised to mount it on the back side. |
There are still disputes among motorists...
... regarding the advisability of insulating the engine compartment in winter.
Many drivers are guided by the climatic features of the region in which the vehicle is operated. If the average temperature does not exceed -15°, then the winter grille does not need to be installed. When the temperature drops below, insulation is mandatory.
Also, installation of a “winter plug” is necessary in case of long trips on country roads, when temperature changes are possible literally at every kilometer.
Insulating the radiator for the winter is an individual choice of the driver. Analyze the mode of use of the car and make a decision.
Salon with a C grade
Sitting in the driver’s seat, I immediately noticed one unpleasant detail: on the Lada Vesta, the speedometer and other instruments have an overly inclined upper contour of the “wells,” which is why, given my height of 185 cm, the view of the upper numbers of the scales is blocked. At the same time, the steering wheel, which seemed to me a little larger than I would have liked, does not interfere with the view of the dashboard at all. How could such a miscalculation be made when designing the design of the tidy?
I can’t say anything critical about the landing. Sitting in Vesta is quite comfortable and convenient, especially considering the class of the car. I also confirm the numerous positive reviews about free space - there is more than enough of it, again adjusted for B-class. There are no complaints about visibility, the road is clearly visible, and the mirrors leave a minimum of blind spots.
Now let's move on to the cons. The first thing I will notice is the appearance of the smell after the sedan has been standing for a long time under the scorching sun. It is absolutely impossible to drive without ventilation, so you will have to open the windows, since the standard air conditioner in extreme heat copes with its duties slowly, slowly cooling the air and filtering it even more slowly. Open windows inevitably lead to the ingress of dust, and here the next negative “hero” enters the arena - the relief of the front panel, which with great pleasure will collect kilograms of dust on numerous protrusions, recesses, “ribs” and other design features. In general, it will take a long time to wash the Vesta’s interior; it’s unlikely that you’ll be able to quickly wipe off the dust.
If we talk about the quality of materials and the fit of finishing parts, then AvtoVAZ’s craftsmen can give a four for fit, but the materials get a two plus, no more. But here, as they say, there is no time for luxury, a budget car is just a budget car in order to save on something. VAZ decided to save on interior finishing materials and in general I support their decision, since it is better to feel hard plastic in the cabin than the rigidity of a “wooden” suspension.
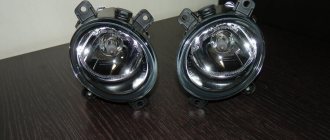
Installation of protective pads
Installing a mesh The most popular way to protect your car from stones and dirt is to install special covers.
They are presented in the form of a fine mesh with a soft plastic edging. The set for the upper part of the radiator opening consists of four parts, for the lower part - of two. Fastening is carried out using plastic L-shaped latches. The kit includes a screwdriver for installation. The entire installation takes no more than 30 minutes.
The trims are available in two colors: black and chrome. In addition to their protective function, these products have an aesthetic appearance and give the car individuality. A set of upper elements costs from 3000 to 3500 rubles, lower ones - from 2000 to 2500. When ordering two sets at the same time, many stores provide a significant discount.