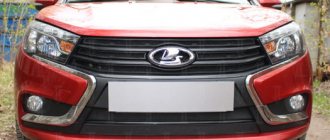
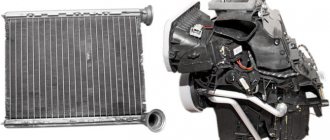
Protection of the cooling radiator in the form of a mesh protects it from dirt. Thermal protection serves to insulate the engine so that it cools down more slowly. Lada Vesta is equipped with a beautiful plastic grille that covers the radiator. Nice large cells are capable of letting a lot of dirt, sand, and insects through, which quickly clog the honeycombs. Therefore, motorists install an additional fine mesh. Before closing the Vesta radiator, you will need to partially disassemble the upper part of the bumper.
There are still disputes among motorists...
... regarding the advisability of insulating the engine compartment in winter. Many drivers are guided by the climatic features of the region in which the vehicle is operated.
If the average temperature does not exceed -15°, then the winter grille does not need to be installed. When the temperature drops below, insulation is mandatory.
Also, installation of a “winter plug” is necessary in case of long trips on country roads, when temperature changes are possible literally at every kilometer.
Insulating the radiator for the winter is an individual choice of the driver. Analyze the mode of use of the car and make a decision.
How to close the grille
Plastic radiator protection
To ensure that the engine heats up faster when driving in cold weather, car owners close the grille in different ways. You can buy protection, or upgrade the device yourself.
How to close the radiator for the winter on Vesta - installation on the factory grille:
- Buy a winter cover: separately the upper part (about 1000 rubles) and the lower part (600 rubles), as shown in the photo above.
- Warming mask. Its cost is about 2 thousand rubles.
- Foil insulation, Flex tubes, cardboard and other available materials.
How to insulate an engine in winter
In order for the Lada Vesta engine to warm up at sub-zero temperatures as quickly as possible, drivers often close the radiator grille from oncoming air flow in various ways.
When deciding how to insulate a radiator, some buy ready-made devices, while others make them on their own.
The following types of grille plugs are available:
- upper and lower covers for the radiator grille for winter, costing from 500 to 1000 rubles;
- mask - insulation (apron), costing 1500-2000 rubles;
- homemade devices from improvised materials (plywood, cardboard).
DIY winter protection
You can make an apron for Vesta yourself using a ready-made pattern or pattern. The picture shows all the dimensions for cutting out the radiator protection for winter.
Pattern for protecting the Vesta radiator
The apron can be made of leatherette with a layer of insulation. At the place where the car number plate is attached, the apron can be made without cutouts. The license plate can be secured over the apron with self-tapping screws.
Fastening homemade protection to the grille is offered in the form of plastic clamps.
After such an upgrade, the temperature of the power unit in bitter cold will not fall below 85 degrees.
How to properly use air conditioning in a car.
Dressing the car for winter
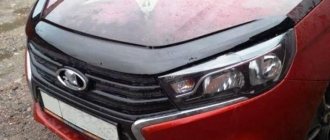
At low temperatures, the car engine consumes more fuel and acceleration dynamics decrease. To prevent increased consumption, some owners install a solid plastic plate on the front of the radiator grille.
Due to the use of such an accessory, heat is retained longer, the internal combustion engine cools more slowly, and fuel consumption is stabilized. The winter lining, like the summer one, consists of three parts: upper, lower and grille for air intakes.
If the frosts are insignificant, then the upper part can be temporarily removed so as not to “drive” the cooling system fan. The cover is attached to plastic clips and two screws.
Homemade insulation
Cutting strips onto the grill is a compromise option with minimal cost. A training mat, rubber, insulation, and other analogues are used as a basis.
Which radiator grille to choose for Lada Vesta
AvtoVAZ engineers offer several options for modifying the radiator grille for the winter:
- branded model from AvtoVAZ;
- overlay in the “winter-summer” style is a universal type.
Branded radiator protection
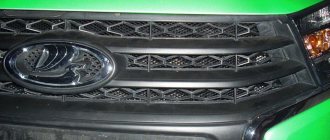
An analogue of the standard summer-type pad, only without cells (honeycombs), is a proprietary protection made of impact-resistant plastic. The AvtoVAZ logo is located on the front. Installation is carried out using plastic clips and screws.
Universal
The upper and lower polymer pads are installed on top of the standard mesh and fixed with self-tapping screws.
The main advantage of the “station wagon” from the original is that the trim can be easily removed without removing the bumper.
Proper insulation or how to properly close the engine radiator for the winter: technologies and tips
The positive results from thermal insulation of the radiator grille are due to the fact that the engine consumes less resources to achieve and maintain operating temperature than with air cooling in winter. An additional effect is the protection of the heat exchanger honeycombs from the ingress of road reagents, which leads to an increase in corrosion resistance and preservation of the factory life of the part.
Requirements
Disrupting air cooling can cause harm. Untimely and hasty cover of the radiator grille leads to overheating of the engine. You can reduce the likelihood of thermal imbalance, and the following tips will help you do this:
- Do not lean the element directly against the radiator - there must be a gap between the heat exchanger and the thermal insulation.
- Install insulation at a temperature of -10°C or less.
- Do not cover the entire area of the heat exchange element.
For your information. The rules apply to both petrol and diesel versions.
A trivial method of insulation is to insert between the heat exchanger and the bumper a piece of cardboard cut from the box of some household product to certain dimensions. A heat exchange element covered 2/3 in this way is a simple solution to the problem of how to properly close a car radiator for the winter using improvised means.
Owners of cars equipped with air conditioning will benefit from another method of insulation: insert a newspaper between the condenser and the main heat exchanger. The total thickness of the sheets should be such that they move freely between the walls of the radiators.
The disadvantage of quick methods is that they ruin the aesthetics of the front of the vehicle and are not as effective in severe frosts. However, advanced ideas require costs, but the effect is better:
- A set of dampers designed for a specific vehicle.
- External masks for radiator grilles.
- Homemade imitation of branded shields.
Factory products
Model-specific plastic covers are attached invisibly. The shape of the damper closely follows the geometry of the radiator grille and does not cover the car manufacturer’s emblem. Synthetic masks, for example, from the Tammers company, hide the architecture of the decorative sieve, and external quick-release fasteners are not to everyone’s taste.
The price of such a solution will not suit everyone. A plastic shield will cost 500-700 rubles. An impact-resistant and waterproof mask made of synthetic fabric costs about 3,000 rubles.
With your own hands
Plastics have low resistance to destruction from a suddenly thrown stone, and synthetic radiator insulation is expensive. However, the idea of quick installation itself is not entirely successful - the style suffers. These two reasons force owners to implement their own design ideas, as in the case of anti-freeze - their own recipe for a winter washer is much more effective.
- Polypropylene with a foil layer (isolon). Attaches to the inside of the bumper and grille with plastic clamps. Cut according to pattern.
- Faux leather. The cover is made according to the pattern made from the outside of the front end. Usually, braid is sewn along the contour and decorative stitches are made over the entire surface. Fastening is carried out with plastic clamps.
- Flex tubes. Suitable for gratings with horizontal ribs. A pipe of appropriate length is cut along the guide and placed on the edge.
For your information. The use of felt materials is not recommended. They are fire hazardous and absorb fuel and lubricants, road reagents.
Installation of winter protection for Lada Vesta radiator
Preparation of the workplace, necessary tools:
- key for “10”, “12”, knob;
- Phillips head screwdriver;
- a lining on the floor to prevent scratching the paintwork of the bumper;
- additional lighting if work is carried out in the dark.
Installation of a plastic product requires considerable effort, accuracy and labor intensity. Use an assistant to complete the work.
Algorithm of actions:
- We place the car above the inspection hole to provide access to the bottom.
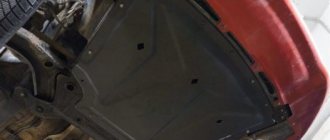
- Open the hood, remove the engine sump protection and license plate.
- We gradually unscrew the fasteners of the upper, middle, and lower contours.
- We remove the headlight units from the seat.
- We move on to the wheel arches and unscrew the bolts.
- When the front bumper is completely freed from the fasteners, dismantle it and place it on a soft surface to avoid damage to the paintwork.
- Using a TORX wrench, unscrew six bolts in the upper perimeter and four in the lower perimeter.
- We dismantle the grille, first unfastening the plastic latches.
- We insert the winter grille, screw the upper and lower fastenings.
- We assemble the front bumper in reverse order.
DIY installation is complete.
Installation
The algorithm for self-installation of Lada Vesta radiator protection depends on what product was purchased. And if so, then all three cases need to be analyzed separately.
Installing proprietary protection
There are almost never any difficulties with it, since the installation process is described in the instructions that come with each kit. The main thing is not to be lazy and read it before installation, and not after. The big advantage of this product is that there is no need to remove the Lada Vesta bumper.
Installation of the protection should take place at an air temperature of +10 ° C and above, and the upper, lower and middle sections are installed differently. In the instructions on the diagram, it is immediately clear that only the upper part is equipped with latches both at the bottom and at the top, while the other components have only bottom fastenings.
Installation instructions.
Radiator screen
As already noted, a total of 4 parts are included in the kit for installation in the radiator grille - the top, 2 middle and bottom.
Upper section
This part is placed in pairs. The direction is from left to right, you need to navigate according to the attached diagram. First, you need to direct the latch (lower) into the cell marked in the diagram, then insert the upper stop and recess the latch into the cell. Everything needs to be done smoothly so as not to break the fasteners.
Next, you should arm yourself with a screwdriver or an awl, which you insert into the hole in the mesh, and use it to press the latches on the back side, snapping them completely into place. To check the quality of fastening, you need to smoothly pull the section towards you. In the end, all that remains is to align it with the contour of the lattice.
Middle sections
There are two of these parts. To install, you need to insert the clamps into the holes marked in the diagram. You need to work from the center to the edge. When the clips are snapped into place, all that remains is to check the quality of the fastening and smoothly align the section. The second one is placed in the same way.
Bottom section
Installation of this part of the Vesta radiator protection occurs in the same way as the upper one. You need to place it from left to right, smoothly inserting the clamps into the marked holes. When they are all latched, all that remains is to align the section.
Air intake
In this case, there are only two parts, and the installation algorithm for them is the same. You can start working from any edge. There are fastenings at the bottom and top of each section, which are used for fixation. For greater convenience, it is recommended to arm yourself with a screwdriver or an awl.
The process of installing Vesta radiator protection into the air intake is clearly demonstrated in the video
Installing homemade protection
In this case, it all starts with removing the front bumper of Vesta, which forces us to take a closer look at this point. It’s worth noting right away that dismantling the front bumper of Vesta is strongly recommended to be done by two people, since the dimensions of the element are considerable, so there is always a risk of scratching either the bumper itself or the wings of the car. To work, it is recommended to either drive the car onto an overpass, or jack it up, or simply drive it onto a stand so that the front end is lifted up a little.
Removing the front bumper of Lada Vesta yourself
Tools required for work:
- Ratchet;
- Head 10;
- Torx bit 20;
- Torx 30 bit.
It all starts with the license plate, which must be removed, since there are mounting bolts underneath it. Next, you should open the hood and unscrew the 2 bolts securing the plastic housing to the bumper - for this you use a ratchet and a 10mm socket.
First, remove the 2 bolts from the top.
Once they are unscrewed, you can begin to work on the bolts that were hidden under the license plate. To do this, you will need a Torx 20 sprocket (regular wrench or socket).
Then comes the turn of the bolts under the license plate.
Then we proceed to unscrew the bolts in the wheel arch (under the wings) - there are 2 of them per side. This is done with the same Torx 20 sprocket.
Next, you need to unscrew 4 more bolts from the bottom of the bumper, which secure it to the body. To do this, you will need a Torx 30 sprocket. You also need to unscrew 4 more bolts with a Torx 20 sprocket - from the bottom of the bumper, 2 on each side. They secure the edges of the bumper to the plastic shields. That's it for now with the bolts.
Next you need to remove the bumper itself. First, both sides need to be removed from the grooves at the junction of the bumper and the front fender. It is worth noting that the edges of the Vesta bumper fit quite tightly in the grooves. If you have to remove it yourself, you need to work extremely carefully, and lay a mattress or cloth in front of the car in case the bumper falls - so that it does not get scratched.
All that remains is to unscrew 4 more bolts under the hood. They are unscrewed with a Torx 30 sprocket. If you work alone, they need to be unscrewed last and the last bolt should be the middle one - the one located opposite the hood lock. If with a partner, you can do it at the very beginning. Next you need to remove the bumper and get ready to install the mesh. Naturally, if you have fog lights, you need to disconnect the wires from them.
The process of independently removing the front bumper of a Lada Vesta with all the explanations and details is demonstrated in this video
Prepare and install the grid
After the bumper is removed, you can begin making the protection. There is nothing complicated here - you just need to attach the mesh to the back of the radiator grille or air intake, mark the outline and cut it out with scissors. The main thing is that when cutting out a piece for the air intake, it is important not to forget to cut out the mesh with areas for the screws.
Once the mesh is cut, it needs to be secured. There will be no problems with the product for the air intake, since the fastening is carried out using standard self-tapping screws on the reverse side (which is why there should be areas for them in the mesh).
The mesh for the radiator grille is a little more complicated, since it will have to be fixed with plastic clamps matched to the color of the products. As practice shows, clamps are the best option.
When the mesh is securely fixed, all that remains is to put the bumper back. Assembly is carried out in reverse order.
Installation of the mesh on the reverse side is shown in the story
Installation of universal protection
This option is similar to that with a homemade mesh, but with the difference that ready-made products are installed, and they also come with fasteners and instructions. First you need to remove the Vesta bumper. Fixation occurs with bolts into brackets on the mesh. However, some duplicate this fastening with clamps for greater reliability. At the end the bumper is put back.
As you can see, installing radiator protection for the Lada Vesta is fully justified, since the aluminum mesh will become a reliable barrier in the way of litter, pebbles, insects, pieces of ice and other things.
Installation of such protection is facilitated by the presence of brackets.
But the choice of installation option is individual for everyone. Some will prefer branded protection as the most attractive. Others will do everything themselves from the mesh, rejoicing at the opportunity to work with the machine and save money, or they will purchase a universal product so as not to waste time. Complete freedom of choice!
Conclusion
It is necessary to install Lada Vesta radiator insulation for the winter. Each car enthusiast chooses the type and modification of the accessory individually.
The branded overlay from AvtoVAZ is relevant in case of long-term operation of the car in harsh climatic conditions. Universal protection is more applicable for temperature conditions in the CIS, including the Russian Federation.
A homemade kit is an economical insulation option when you need to close the radiator from frost as quickly as possible.
The radiator protection of the Lada Vesta car is used to protect it from dirt, and the grille insulation is used so that the engine cools down more slowly and the winter cold is unaffected. The Lada Vesta has a nice plastic radiator grille. It has large cells, design has defeated rationality. Over time, the honeycombs of the cooling system will become clogged with all sorts of rubbish: sand, dirt, flies and beetles, ending with fine gravel, which causes significant damage to the car’s radiator. It is advisable to modify the factory radiator mesh with an additional mesh. Read the article and find out how to protect and insulate your radiator grille.
Branded radiator protection
Designed specifically for Lada Vesta. Summer protection is made of a 4-component set for the radiator grille + two air intake elements. Made of durable aluminum, the protective mesh has optimal holes and is nicely edged with plastic. In the kit, the manufacturer has provided all the necessary supplies, from instructions to a screwdriver. Fastening is done using latches, the description in the instructions is extremely clear, you don’t need to remove or disassemble anything to install the protective grilles. Simple manipulations, and the car becomes prettier right before your eyes. Installation - at temperatures >+10 degrees Celsius. Looks effective. Minus - a little expensive.
Is it necessary to close the grilles of modern cars?
If everything is clear with old cars, then questions remain about modern ones.
It is known that vehicles are now equipped in such a way that there is no rigid connection between the engine and the fan due to the electrical system.
This function allows you to maintain a certain temperature range constantly. Therefore, many people do not understand why drivers close the radiator in modern cars.
On the one hand, you don’t have to do this, especially if the temperature outside the window is down to -10 degrees, as overheating may occur, but if the temperature stays around -30 degrees, then you still need to close the grille so that the vehicle warms up faster .
Universal
This cover for the VAZ 2180 radiator will cost less, but the mesh is installed from the inside, you need to take the trouble to disassemble it. You can't do it without removing the bumper with the standard plastic grille; you'll have to do some work. What distinguishes this method of protection from the cheapest version of protecting a car’s cooling system is the presence of an edging around the mesh fastenings (brackets). Choice by article number: VS-ZSRLVES or ZR.LAD.VES.15
. It is called “Arrow” and is installed at the top of the bumper and down.
The price of such a mesh, upper and lower, in a set, is about 3,000 rubles. You can find them cheaper separately.
Do it yourself - how to make protection anyway
For garage Samodelkin, saving budget, manufacturers have prepared an extremely inexpensive option for protecting the cooling radiator. This is an aluminum mesh, which should be independently attached to the plastic grille and bumper from the inside. The cell size is usually 10-15 mm. The cost is much cheaper than branded, universal ones for the Lada Vesta, purely a cover without frills and claims to classic tuning. Garage technicians will have to scratch their heads trying to figure out how best to mount this thing. It is necessary to take two pieces of mesh, the sizes sold are as follows, for a couple of parts (grille and air intake), there is unlikely to be enough material.
Dressing the car for winter
In winter, in the northern expanses, severe Siberian frosts, the car eats gasoline more actively and freezes faster than you want. It is advisable to insulate the car for winter to feel more comfortable. Attempts to insert a cardboard do not go well; you cannot insert a cardboard into a Lada vesta, and to cover it on top is a “collective farm”. We have to turn to ready-made insulation solutions.
Insulation from YarPlast code: VS-ZIM-Z
lower price: from 550 rub. The top one will cost from 890 rubles.
The winter radiator protection is made of strong black plastic; it fits into the interior of the Lada Vesta and does not disturb the harmony. The engine temperature rises quickly, it cools down more slowly - it uses gasoline more economically. This insulation, like summer insulation, consists of two parts: for the grille and the air intake. When it thaws, it is better to remove the top part if you do not want to drive in the fan. There shouldn't be any problems installing this device; it's fastened with clips and standard bolts. It is recommended to apply adhesive tape or insulating tape to the bumper in the place where the lower part of the shield may come into contact, stripping off the paint.
Dampers for radiators of old cars
The tradition of covering the radiator with some kind of material during the frost season has appeared a long time ago.
To understand why they do this, you need to remember how this mechanism functions in cars of the 80s. The fact is that in such transport the radiator was cooled by a fan, but it was impossible to control its operation at different temperatures.
But in any case, even in winter the fan continued to perform the cooling function, and because of this, malfunctions in the engine operating system began to occur. Consequently, the engine cannot warm up, and this provokes various malfunctions. That is why owners of outdated cars need to limit the cooling process.
To do this, use cardboard as a damper that does not allow cold air to pass through.
Which radiator grille for Vesta to choose
The radiator grille of the Lada Vesta without a badge decorates the appearance. The domestic car looks like it came from Europe. Removing the emblem from the front surface of the hood requires replacing the grille.
AvtoVAZ offers several options for grilles for Vesta.
Grate for the cold season. Consists of two components. Protects against penetration of cold air masses into the radiator. Estimated cost – 1200-1500 rubles. Replacement is carried out at an air temperature of at least -3 degrees.
Removing and installing the Lada Vesta diffuser
Before you start working on the Lada Vesta radiator TV, prepare new coolant, several metal clamps, a set of keys, pliers and screwdrivers. You need to start with the preparatory work:
- Tighten the handbrake, remove the negative from the battery.
- Remove the engine splash guard (the fasteners are located around its perimeter), drain the coolant from the reservoir. Proceed to remove the front bumper.
- Remove the state registration plate. Underneath you will see two bolts that need to be unscrewed.
- Unscrew the screws under the wings (they are hidden near the steering arches). There are 4 more self-tapping screws at the bottom of the bumper; they will also have to be unscrewed.
- Two more screws on the bottom sides closer to the wheels. The last thing is four self-tapping screws that hold the bumper on top.
- It is better to dismantle the bumper with an assistant, and put something soft under the part for landing. From both sides (holding the bumper next to the junction with the wings), you need to lightly pull the part towards you.
Outer mesh
The mesh edging is made of high-quality plastic with fastenings for installation. Fixation takes 2-4 minutes. The cost depends on the material from which the mesh is made. Price – 700 – 3000 rubles. Chrome trim on the bottom edge of the grille. Made of steel, not subject to corrosion. Cost – 4500 rubles.
Car owners most often purchase plastic grilles. The choice is explained by ease of installation, resistance to temperature conditions, a large selection of colors, and strong design.
Grill installation
Installation of plastic products requires adherence to technology and accuracy. The process is long and labor-intensive. An assistant will be required to complete the work.
It is impossible to say for sure whether the engine of a Lada Vesta should be insulated for the winter or not. It all depends on several factors, for example, how low the air temperature drops or in what mode the car is operated, in city traffic jams or frequent intercity trips. If the temperature rarely drops below -15°C and the car is used mainly for city trips, then it is dangerous to heavily insulate the engine, as there is a danger of it overheating with all the ensuing consequences. If temperatures below -25°C are not uncommon in your region and you often drive long distances, then insulating the engine on your Lada Vesta may be vital. During such trips, it may happen that you have a technological plug in the engine housing, an oil dipstick or even a crankshaft seal through which oil will leak out of the engine. This happens due to the fact that during long trips in cold weather on the Vesta, the oil vapor in the tube for crankcase ventilation freezes and a plug appears, as a result of which high excess pressure forms in the engine.
Should I close the radiator in winter?
There is no definite answer, it depends on the climate in your area and how you drive your car. You can drive on an intercity highway or around the city, the difference will be noticeable. If you have a warm climate, the weather rarely gets colder than -15 degrees, and you drive around the city, then you do not need to insulate the engine on Vesta. Otherwise, the motor may overheat.
If the frost is below -25 degrees, and you have to travel long distances, then it is better to insulate the Vesta engine. On such trips, the technological plug, oil seals or oil dipstick are often squeezed out of the motor housing. As a result, oil leaks. This happens due to long driving in the cold.
Oil vapor in the crankcase ventilation system freezes. A plug forms, which causes excess pressure. Therefore, whether to close the radiator in winter is up to you. Analyze your operating mode and make the right decision.
How to insulate the engine of a Lada Vesta with your own hands.
The first option is to close the radiator on Vesta. To do this, you can unscrew the radiator grille and place some kind of damper, for example cardboard. With the radiator closed at idle, the car will not warm up faster, and the damper will not have much effect on the cooling time of the engine. But while driving, due to the fact that the radiator is not blown by the air flow, there is no heat loss, the car warms up faster and retains heat, which also saves fuel. Just keep in mind that when operating in the city in traffic jams, the engine can overheat, since when the fan is activated, the radiator will not be blown either, so you must always monitor the engine temperature.
So, for example, I got out of the situation with coraelstraz:
The second option is to cover the engine compartment of Vesta with insulation; this will help reduce the time the car warms up at idle and significantly increase the engine cooling time, which will also have a positive effect on fuel consumption. This option is not so dangerous for the engine, the main thing is to choose the right insulation material, it should not release heat and have fire-resistant properties. Isolon with foil or foil penofol, a special car blanket or felt are often used as such insulation. When using isolon with foil, it is important to prevent the foil from touching the battery terminals, otherwise it will lead to a short circuit and you can burn the car, in addition, it retains heat worse in the engine compartment. Felt retains heat well and does not burn, but it can smolder when it touches the collector. A high-quality car blanket retains heat best, is not afraid of high temperatures, but is also more expensive than other insulation materials.
This is how, for example, BiffidoK from Drive solved this issue.
While driving, the temperature needle drops. Are natural causes possible?
Yes, this option is also allowed by specialized specialists. Even if there are no malfunctions in the operation of the vehicle systems, the indicator needle may still fall while driving.
Similar situations occur in winter, when the air temperature drops to low values.
For example, when driving on country roads in severe frost, the driver may notice significant cooling of the engine
The fact is that the flow of icy air entering the engine compartment can exceed the heating intensity of the engine. At an average speed of 90-100 km/h, which is optimal for most car models, a minimum amount of fuel burns inside the cylinders.
The relationship between these factors is direct: the less fuel ignites in the combustion chambers, the slower the internal combustion engine will warm up. If we add to this the forced cooling that occurs from the oncoming air flow, the engine may not only not heat up, but even significantly reduce its temperature in the event of preheating.