November 21, 2016 Lada.Online 286 838 23
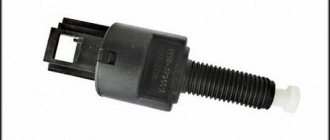
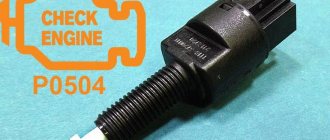
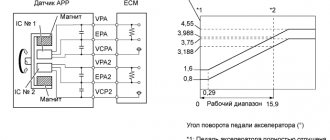
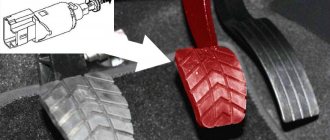
Owners of LADA cars with an electronic gas pedal may encounter error P0504 (mismatch of brake pedal sensors). Along with it, malfunctions in the engine may appear (stalls, speed fluctuates, does not start, etc.). Most often the cause is the brake pedal position sensor (brake light sensor or frog).
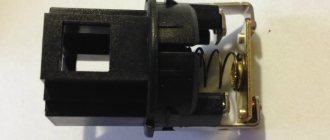
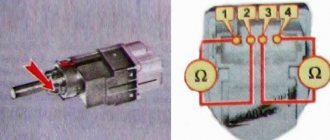
The brake pedal position sensor and brake light switch are mounted in one housing. Most often, the cause of its malfunction is a broken spring. In this case, you can repair the sensor yourself by replacing the spring with a new one. Or replace the sensor with a new one.
“Cure” hard pedals on the “robot” LADA
Owners of LADA cars equipped with an automated manual transmission (AMT) may sometimes encounter a situation where the brake pedal becomes hard when driving slowly. What this is connected with, when it manifests itself and how to fix the problem, we will understand below.
The problem with a stiff brake pedal on LADA cars with AMT may be associated with the brake pedal position sensor (brake light switch or “frog”). During normal operation, the brake light should illuminate when the brake pedal is lightly pressed. If significant pedal pressure is required to activate the brake light, the sensor must be adjusted.
Let us explain that if the sensor does not respond to slight pressure on the brake pedal, then when driving slowly, the increased force on the wheels from the brakes is perceived by the electronics as a slope. In this case, along with releasing the brakes, the power increases. Together, these factors give the effect of a tight brake pedal.
When using the material (in whole or in part), an active link to the Lada Vesta Club website (www.ladavesta.net) is required!
Related news
Handbrake tightening - instructions
On the Lada Vesta, adjusting the handbrake is much more convenient than previously in older AvtoVAZ models - now this can be done while sitting inside the car in the driver's seat. According to the manufacturer's regulations, the tightening should be done every 30,000 km, or better yet, a little earlier.
The Lada Vesta handbrake is tightened as follows:
- Raise the rear of the car so that you can manually turn the rear wheels. Fully lift and release the handbrake lever several times - this will bring the mechanism into working condition. Fully tighten the handbrake.
- Remove the plastic plug under the brake lever. Lift the rubber plug and you will see a nut on the end of the handbrake.
- Using a number 10 wrench, loosen the nut slightly and move the lever to about the second tooth.
- Tighten the nut until the rear wheels are firmly seated and cannot be turned by hand.
- Raise and lower the lever several times.
Sensor location and dismantling process
On the Lada Vesta, the sensor is located near the steering shaft, next to the pedal. If jerking or jerking occurs when changing gear, the car owner should check and adjust it.
To dismantle an element, you need:
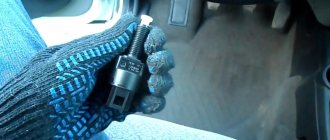
- press the latch and carefully disconnect the block with wires;
- Rotate the component counterclockwise ninety degrees and remove it.
When installing the part in place, you need to make sure that the brake pedal is in the upper position; the actions are performed in the reverse order.
After installation, the pedal is carefully lowered, after which the block with wires is connected.
Basic faults
The main malfunctions of the parking brake system include:
- Reduced brake efficiency (the handbrake has to be pulled harder, higher, to lock the car in place on a slope);
- Failure to release the handbrake (manifests itself when the driver releases the handbrake lever, but the car is still held in place);
- Spontaneous release of the brake when the parking system is engaged (this is really scary, but the raised lever of the mechanism can let the driver down - the car will start to roll away).
It is worth noting that the cause of such breakdowns is not always the parking brake system assembly - it interacts with other components and assemblies of the car, so there are problems:
- Drum wear (Lada Vesta has drum brakes);
- Oily or worn pad linings.
As for the mechanism itself, the cause of the above breakdowns may be:
- Lengthening (stretching) the cable;
- Wear of drive parts, latch teeth, combs of the mechanism assembly;
- Sticky cable.
Causes of error P0504 Granta
An error regarding an incorrect signal from the brake pedal switches occurs in some cases solely due to an unadjusted limit switch. The fact is that after reflashing the electronic control unit M 74 and M 74.9.7, engineers made some adjustments to the engine control algorithm, which ultimately should have affected the reduction of harmful emissions. In practice, changing the firmware only strangled the engine and caused a bunch of problems with sensors and limit switches.
DD
Knock sensor (part number 2346015900). Designed to record high-frequency vibrations of the cylinder block that occur during fuel combustion.
Located on the outer wall of the cylinder block. The service life is unlimited. Cannot be repaired.
Signs of inoperability:
- difficulty starting the engine;
- Unstable engine operation at idle speed.
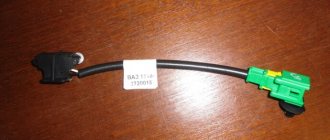
Brake pedal sensor Lada Granta / Kalina-2 / Priora / Vesta / 4x4 (new model)
New model brake pedal sensor for Lada Kalina-2, Priora-2, Vesta, Lada 4×4 cars.
Product characteristics
We recommend watching
Clutch pedal position sensor (clutch pedal position signal switch) for L. vehicles..
New items
The glass on the left headlight for Lada Largus (until March 2022 except Largus FL) is installed to replace the standard broken headlight glass. Ma..
The glass on the right headlight for Lada Largus (until March 2022 except Largus FL) is installed to replace the standard broken headlight glass. M..
Set of 2 stabilizer struts for Lada Vesta (all body types) from the manufacturer Future Technologies. Distinctive feature..
Windshield wiper drive (trapezoid) for Lada Vesta without motor. Manufactured by StartVolt. ..
Original factory seat belt front left (for driver) without pretensioner. The belt is used on Ladder cars..
External CV joint kit for Lada Vesta cars with Renault JH3 and VAZ 21807 gearboxes. The product is released under the LECAR brand, the actual manufacturer..
Internal CV joint kit for Lada Vesta cars with VAZ 21807 gearbox. The product is released under the LECAR brand, the actual manufacturer..
The MAX-2 controller with polarity reversal is designed for automatic control of two vehicle windows. MAX-2..
Original factory courtesy lamp for Lada cars. Used as a lamp to illuminate the glove compartment (glove box) and...
An analogue of the factory coil (ignition module) for 8-valve engines of Lada Granta, Kalina, Kalina-2, Priora, Datsun and...
Handbrake: removal and installation
If tightening the parking brake does not solve the problem, Vesta still rolls away, you will have to resort to heavy artillery. Having prepared to remove and install the handbrake, perform the following operations:
- Drive the car onto the car lift. Release the parking brake, shift into gear, and turn off the ignition. Dismantle the tunnel in the cabin - it will be easier to work;
- Remove the wiring harness block;
- Loosen the handbrake limit nut under the plug using the “tenth” key;
- Loosen the nut that regulates the degree of tension of the cable responsible for the equation of the lever, and then remove the cable fastenings;
- Use a screwdriver and pliers to carefully remove the cable ends. Don't put them off too far;
- Carefully remove both rear wheels;
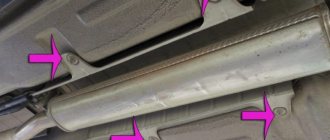
- Proceed to dismantle the body floor. To do this, remove the three nuts with head number 24 and the fasteners. Use a screwdriver (preferably a flat one) to pry up the cables and remove them from under the brackets attached to the body;
- Remove the brake pads. To do this, first remove the tension springs, guide brackets, spacer bar (only assembled with an automatic adjustment mechanism), and then the brake pads themselves. All operations must be carried out strictly in the designated order;
- Use pliers and a screwdriver to remove the cables from the levers, and then remove the cable tips from the guide holes of the brake shield;
- Remove the cables from the lever brackets and the attachment of these levers to the body;
- Take out the cables;
- Place the new cables in the brackets - instead of the old ones, in the guide holes;
- Insert the tips into the brake shields;
- Then insert the tips into the tunnel into the corresponding holes, and secure the cables themselves under the brackets that are attached to the body;
- Put the pads back in place. To do this, clean the drums from dirt. Apply lithol to the threads of the spacer strip;
- Place the brake pads on the brake shield, and then the tension springs. Using pliers and a screwdriver, install the guide pad brackets. Then spread the brake pads with pliers, place a spacer bar between them and set the outer diameter of the pads using the spacer bar nut;
- Place the drum, then press the brake pedal about 10 times, bringing the mechanism into working position;
- Put the wheels in place;
- Connect the cables to the equalizer of the hand brake lever;
- Perform adjustment (“tightening”) of the parking brake lever;
- Check the operation of the parking brake system. After this, you can install the tunnel and plugs.
Source
DBP and DTV
Absolute pressure sensor and air temperature sensor (article 21150382821003). Informs the ECU about the amount of air consumed in order to adjust the enrichment of the combustible mixture in the combustion chamber.
Installed on the air pipe manifold. Resource – 90-100 thousand km. Cannot be repaired.
Signs of inoperability:
- the engine is unstable at idle speed;
- passive acceleration dynamics.
Which one to buy
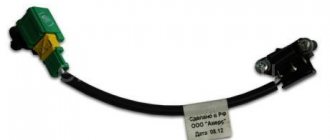
Experts and service workshop specialists recommend purchasing an original brake sensor. It is of better quality and lasts longer.
Table 1. Price of brake pedal position sensor
| Manufacturer | Code | Cost, rub. |
| AvtoVAZ | 11183720010 | 170 |
| Avar | 2113720 | 180 |
| AMY | 11183720010 | 95 |
Before changing the “frog”, you can “ring” it with a tester to make sure the part is working.
DS
Vehicle speed sensor (article 8450006894). Measures the actual speed of movement and transmits data to the electronic engine control unit.
Installed at the top, on the clutch housing cover. Resource over 100,000 km. Cannot be repaired. Signs of inoperability:
- no speedometer readings.
Lambda probe
Oxygen concentration sensor (part number 226A41771RF). Separates the gas flow in the exhaust manifold and informs the ECU about the gas concentration.
Installed on the outer wall of the exhaust manifold. Resource over 100,000 km. Cannot be repaired. Signs of inoperability:
- error indication on the dashboard.
What are the reasons that cause sensor failure?
A detailed examination of the essence of the problem that arose, when error code 0504 appeared, will allow us to determine the list of reasons. This refers to the disassembly of the ill-fated sensor in the LADA Granta car. Three clips serve as an obstacle to this noble procedure, preventing the component from being easily disassembled. After overcoming this “barrier”, it becomes possible to observe the real reasons that caused the breakdown:
- deformation of the smaller (of 2) springs located on the rod;
- different heights of the contacts of the designated sensor;
- poor material (steel) used for the manufacture of terminals;
- presence of play on the floating contact element.
“Ringing” can be used as the initial stage of diagnosis. Each of the contacts must be subjected to this action separately, and then in pairs (“2nd” with “3rd”). The experience of LADA Granta owners indicates the presence of a dull tone during ringing, which confirms the malfunction of the contact group. Serviceable contacts are characterized by a distinct ringing “squeak”.
DDM
Oil pressure sensor (article 8200671275). Installed behind the cylinder head. When the minimum level is reached, the contacts close and an error signal is transmitted to the dashboard.
Resource over 100,000 km. Cannot be repaired. Signs of inoperability:
- error alarm on the car dashboard.
Review of Manufacturer Prices
| Name | Price in rubles |
| Controller (KSUD) | From 1200 |
| Coolant temperature sensor (DTOZH) | From 450 |
| Knock sensor (DS) | From 450 |
| Crankshaft position sensor (CPS) | From 450 |
| Camshaft position sensor (phase sensor) | From 650 |
| Absolute pressure sensor (ABP) and air temperature sensor (ATS) | From 500 |
| Oxygen sensor (absorber) | From 350 |
| Mass air flow sensor (MAF) | From 350 |
| Vehicle speed sensor (VS) | From 350 |
| Oil pressure sensor | From 350 |
| Clutch and brake sensors | From 350 |
| *prices are as of April 15, 2019 | |
Conclusion
Use the specified list of sensor part numbers when purchasing spare parts or new components. Despite the simplicity of the design, install the equipment in certified workshops, where they provide a quality guarantee for the work performed. If any difficulties arise, please contact the managers of the official representative offices of the car brand for advice.
Reviews
| № | Positive |
| 1. | Semyon (www.zr.ru): mileage 70,000 km, clutch is normal. |
| 2. | Andrey (autobann.su): the pedal travel is natural, not increased. I noticed that in severe frosts the PS becomes a little tight. |
| 3. | Georgy (lada-vesta.net): there are no comments on the DS, it works as usual. |
| 4. | Stepan (otzovik.com): standard pedal travel, 68,000 km of active drive without maintenance and repairs. |
| 5. | Vladimir (www.zr.ru): positive review, no comments. |
| 6. | Alexander (autobann.su): I have a pre-installed DS with a stock from Renault Logan, I heard that the quality of the French is better than the domestic one. |
| 7. | Mikhalych (https://forumvesta.ru): all standard units and components are working properly, without any violations. |
| 8. | Vitaly (lada-vesta.net): Lada Vesta is assembled with high quality, I have no complaints. |
| 9. | Timofey (otzovik.com): in four years of operation, I replaced the sensor once, I don’t consider it a defect or defect. |
| 10. | Stanislav (www.zr.ru): I use Lada myself and recommend it to others. |
| 11. | Gennady (autobann.su): mileage 85,000 km without repairs or equipment replacement. |
| 12. | Alexey (https://forumvesta.ru): soon 100,000 km, the condition of the car is a solid “4”. Much depends on the driver, how he observes the technical inspection deadlines. |
| Negative | |
| 13. | Konstantin (www.zr.ru): the Russian sensor served for two years, after which the rod failed. Replaced it with a French one from Renault Logan. |
| 14. | Vitaly (otzovik.com): the DS is not tightly fixed, periodically it turns out of the grooves. |
| 15. | Grigory (autobann.su): after a year of using the car, the DS flew. Fortunately, it was under warranty and was replaced free of charge. |
| 16. | Kirill (lada-vesta.net): I pumped the system several times, but to no avail. |
Related link:
Reviews about the suspension of the Lada Vesta car
Carrying out pre-installation diagnostics
Before purchasing and installing a new sensor to replace a broken one, it is recommended to diagnose the old sensor and, if there is a breakdown, fix it yourself. There are two nuts on the sensor body, the first of which is located at the bottom, and the second at the top. The nut located at the top should adjust the clearance of the part (sometimes it is set incorrectly). This leads to disruption of the normal functioning of the button, therefore, you will need to set the gap so that there are no obstacles to its normal movement.
After the adjustment, the ECU error is reset, then you need to start the engine and wait about fifteen minutes, since errors are not recorded immediately. If error 0504 is not marked, it means that the cause of the engine malfunction was an incorrect sensor setting. If it appears again, you will need to replace this element with a new one.
DPKV
Crankshaft position sensor (article 8200701972-B). Online, the ECU sends data on crankshaft speed and tilt angle.
Installed in the tide hole of the oil pump cover. Resource – 80-90 thousand km. Cannot be repaired.
Signs of inoperability:
- the engine does not start for a long time.
