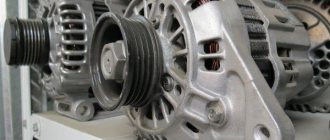
The electrical equipment of a car is an interconnected complex. Generator, battery, starter, lighting, auxiliary equipment...
The entire circuit is built around a source of electricity. Therefore, breakdown and subsequent repair is a serious problem for the owner of a VAZ 2121.
The connection is the same as on other VAZ cars of those years of production. And the load is significantly higher. Modern motors add consumers such as electronic engine control modules. Electric cooling fans and additional comfort systems increase current consumption.
What is a generator
A generator is an alternating current device that produces electromagnetic excitation during operation.
The generator design has a built-in rectifier unit, equipped with diodes made of silicon, as well as an electronic voltage regulator. Thus, the unit creates electrical energy from mechanical energy and energizes the car’s battery, and also provides energy to its devices and systems. The connection diagram for the generator on Niva-2121, 21213, 21214 is shown in the figure.
Checking the combined relay-regulator
Checking the VAZ 2110 voltage regulator
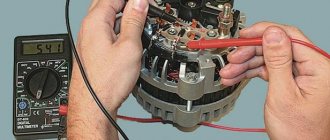
To perform the corresponding check, it is necessary to assemble the circuit shown in the figure. To do this, use a charger or power supply with an adjustable load (it is important that with its help it is possible to regulate the voltage value in the circuit), a 12 V light bulb (for example, from a turn signal or headlight, with a power of 3...4 W), a multimeter, and the regulator itself voltage (this can be from a Bosch, Valeo or other generator). It is advisable to have the wires used for switching with “crocodiles”.
Checking the voltage regulator of the generator 37.3701: 1 - battery; 2 — ground terminal of the voltage regulator; 3 - voltage regulator; 4 – terminal “Ш” of the regulator; 5 — output “B” of the regulator; 6 — control lamp; 7 — terminal “B” of the voltage regulator.
If you assemble a circuit in which the voltage is at a standard value of 12.7 V, then the light bulb will simply glow. But if you use a voltage regulator to raise its value to 14...14.5 V, then if the relay is working, the light should go out. Otherwise the regulator is faulty. That is, when the voltage reaches 14...14.5 V (depending on the model of the machine and, accordingly, the regulator) and above, the light goes out, and when it drops to the same level it lights up again.
It is important that the light does not go out until the voltage supplied to the regulator reaches 14 V. Otherwise, at idle, the generator will not be able to properly recharge the battery.
Checking the VAZ 2107 voltage regulator
Checking the voltage regulator on VAZ 2108/2109 cars
Until 1996, a VAZ 2107 with a 37.3701 generator was equipped with an old-style voltage regulator (17.3702). The verification procedure is given above. After 1996, a more modern generator of the G-222 brand was used (integrated regulator RN Ya112V (V1).
As you can see, the verification algorithm for all regulators is almost the same. The only difference is the cutoff values when the relay is activated.
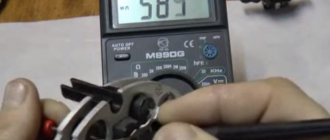
How to check a car generator? 5 ways to test with a multimeter
There are hardware and visual ways to check a car's generator. However, the owner must know the design and purpose of this electrical device in order to diagnose correctly. This guide will help you avoid a trip to the service station and save your operating budget.
Rice. 1 Checking the car generator
If a generator is suspected of malfunctioning, the car owner first tries to identify the breakdown himself. There are several verification methods that involve measuring both a removed and an undismantled device. The verification in both cases will be reliable. In addition to knowing how to check the generator, you need to find out the reasons why it may fail.
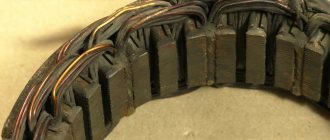
The car's generator serves to power the on-board network, electrical equipment and charge the battery during operation of the power unit. This is a mechanism that produces alternating current by converting the mechanical energy of rotation of the rotor (the “plus” winding) in the stator (the stationary part of the “minus” winding) into electrical energy. Torque is supplied from the crankshaft to the drive pulley.
All generator malfunctions are of two types: mechanical failure of components, electrical failures. In any case, the cause of the violation can be determined by checking the voltage in different areas and elements in several ways.
Table of typical generator faults
Symptoms of malfunction Diagnostics Remedy
| The battery charge indicator on the dashboard does not light up when the ignition is on | Battery is discharged | Charging the battery |
| The fuse in the unit or the indicator light has blown | Replacing fuse, light bulb | |
| Broken ground contact on the generator housing | Secure the bolted connection of the contact, cleaning it from oxides | |
| Broken wiring from the generator to the dashboard terminals, or broken contacts | Repair the break, clean the contacts | |
| Wear of generator commutator brushes | Replacing brushes or generator | |
| The gap on the brushes and slip rings of the rotor is broken | Adjust the gap | |
| Failure of rotor rings | Replacing the rotor or generator | |
| Voltage regulator relay failure | Regulator replacement | |
| The battery charge indicator goes out when the speed increases | Loosening the alternator belt drive | Adjust tension |
| Belt drive break | Replace belt | |
| Failure of the diode bridge | Replacing the diode block | |
| The power cable between the battery and the generator is broken | Replacing power cables | |
| The relay regulator has failed | Relay replacement | |
| The indicator is constantly on | Short circuit in the circuit | Eliminate wiring problems |
| Short circuit in the diode block | Check the contacts in the block, replace the wiring | |
| Failure in the ECU system | Check the controller unit, clear the ECU error | |
| Battery discharged | Charge the battery | |
| The indicator remains on when the ignition is turned off | Short circuit | Eliminate broken wiring |
| Short circuit in the diode block | Clean diode contacts or replace | |
| Overheating and boiling of battery electrolyte | Failure of the relay regulator | Relay replacement |
Design of a car generator link 1 Generator terminal designations, diagrams link 2 How to check the mass air flow sensor with your own hands link 3
How to check a car generator with your own hands
Also interesting: Generator Niva Chevrolet - voltage, repair and maintenance
The generator plays a very important role in the car; for the engine it is like a mini power plant that supplies the entire on-board network of the car, including the battery. A malfunction of the generator will lead to an inevitable complete discharge of the battery, after which the engine of your car will simply stop working, as well as the entire on-board network.
As a result, you will have to “light up” your car or look for a new source of energy. It is very important to detect a generator malfunction in time in order to prevent the above scenario. In order to diagnose a generator, you need to have certain skills and tools.
In this article I will tell you how to test a generator at home using a multimeter.
- To begin with, about precautions and safety rules during inspection
- You need to be extremely careful and understand what you are doing so as not to accidentally damage the generator or its parts (regulator relay, rectifier bridge diodes).
- Forbidden:
Check the functionality of the generator by checking it “for a spark,” that is, using the short circuit method. Connect terminal “30” (sometimes designated as “B”) with terminal 67 (“D”) or “ground.” Allow the generator to operate with consumers turned off, for example, when disconnecting it from the battery.
- Check generator valves with voltages above 12 V.
- You can and should:
Check the serviceability of the generator using a voltmeter or ammeter. During welding work on the car body, it is necessary to disconnect the wires from the generator and battery. When replacing the wiring in the generator system, the wires must have the same cross-section and length as the “original” wires.
Before checking the generator, make sure that the tension of the generator belt is correct and that all connections and terminals are in good working order. The belt tension is considered normal when pressing the middle of the belt with your thumb, it will bend no more than 10-15 mm.
Checking a car generator yourself
To check the voltage regulator you will need a voltmeter with a scale from 0 to 15 V. Before starting the test, let the engine run at medium speed with the headlights on for about 15 minutes.
It would also be a good idea to check the regulated voltage; to do this, connect a voltmeter directly to the battery terminals. True, the results of such a test cannot be considered 100% correct, because there is a possibility of problems with the wiring. If you are confident that the wiring is working properly, then the results can be trusted.
The engine must operate at high speeds, which are close to the maximum, the headlights and other consumers of the vehicle's electricity must be turned on. The voltage size must match the parameters of your car.
Diode bridge
Checking the diode bridge is part of a set of generator checks. In order to check the diode bridge, connect a voltmeter or multimeter to terminal “30” (“B”) of the generator, as well as to ground, and turn the device into AC measurement mode. The alternating current on the diode bridge should not exceed 0.5 V; if you get more, the diodes are most likely faulty.
Breakdowns to ground
Checking the penetration for “mass” will not be superfluous if “the gene composts the brain.” To do this, you need to disconnect the battery and the generator wire that goes to terminal “30” (“B”).
After this, connect the device between terminal “30” (“B”) and the disconnected generator wire.
We look at the readings - if the discharge current on the device exceeds 0.5 mA, most likely there is a breakdown of the diodes or insulation of the generator windings.
Recoil current strength
The strength of the output current of the generator is checked using a special probe (“lotion” is an addition to the multimeter in the form of a clamp or pliers), which is used to cover the wire, thereby measuring the strength of the current flowing through the wire.
Also interesting: Chevrolet Niva rear door does not open
At the end of the measurements, you need to calculate the sum of the readings. Next, turn on all consumers (which you turned on one by one) at the same time and measure the multimeter readings. The value should not be less than the sum of the readings of separately measured indicators, the permissible discrepancy is 5 A.
Checking the generator excitation current is carried out by starting the engine and then running it at high speeds. The measuring probe is then placed around the wire leading to terminal 67 (“D”). A working generator should show an excitation current value of 3-7 A.
Winding check
To check the field windings, you will need to remove the voltage regulator, as well as the brush holder. If necessary, clean the slip rings and check the winding for breaks and short circuits to ground.
It is necessary to check with an ohmmeter; its probes are applied to the slip rings, after which readings are taken. The resistance should be between 5 and 10 ohms. Then connect one electrode of the device to any of the slip rings, and the other to the generator stator.
The display should show an infinitely high resistance, otherwise the field winding shorts to ground somewhere.
"question-auto ru"
Warning lamp
Why can this light be on while charging is in progress? In the VAZ 21213 there is only one reason - voltage is not supplied from the additional diodes to the control unit. This may be due to a broken wire running from the 61st terminal of the generator to the 6th terminal of the instrument combination assembly or contamination of the connecting blocks. We inspect the connections, ring the wire.
In VAZ 2121 there are not much more reasons:
- the warning lamp relay is faulty;
- voltage (negative) is not supplied from the generator to the control relay.
We remove the relay, apply 12 V to its winding from the battery and check whether it works and whether the contacts are disconnected. Well, problems with the absence of negative voltage are still the same broken wire going from the generator to the relay, or poor contact in the blocks of this circuit. We call and clean the terminals.
Expert opinion
Alexey Bartosh
Specialist in repair and maintenance of electrical equipment and industrial electronics.
Ask a Question
Once again, we draw your attention to the fact that the above malfunctions relate to the control unit and do not in any way affect the normal charging of the battery.
Characteristics of the standard generator
The main characteristics of the generator installed by the manufacturer in Niva 21214, 21213, 2121 will be considered using the example of generator type 9412.3701:
- current – 80A;
- voltage – 13.2 V,
- rotation is right.
The cost of standard models of electric generators is 5-7 thousand rubles. If the unit breaks down, it is possible to replace its components or completely replace it with the original or analogues. The prices of the most common ones are presented in the table.
| Analogue | vendor code | Cost, in rubles |
| Generator VAZ-2104-21073,21214 | 9412.3701-03 | 5900 |
| Generator VAZ-2104-21073,21214 | 372.3701-03/05 | 3800 |
| Generator VAZ 2121-21213,21214 | 9412.3701 | 5450 |
The table shows that in the process of replacing a generator on a Niva, you can give preference to a cheaper universal analogue.
Charging circuit diagram and typical problems
Before finding out why charging disappeared on the Niva VAZ 2121, 21213, 21214 injector, 2131 and 2123 (aka LADA Niva and Niva Chevrolet), let’s look at the circuit diagrams of the charging circuit of these models and the principle of their operation. Otherwise, you will have to search at random, and this is a bad method.
VAZ 2121
Let's start with the oldest, because age must be respected. Let's take a look at the diagram below.
The numbers on the diagram indicate:
- - accumulator battery;
- – generator with built-in rectifier bridge;
- – relay-regulator;
- – ignition switch (lock);
- – fuses in the mounting block;
- – indicator lamp for lack of charging;
- – warning lamp relay.
When the ignition switch is turned on, the voltage from the battery through the fuse and the normally closed contacts of the voltage regulator relay is supplied to the generator excitation winding. The relay regulator does not operate yet, since the voltage in the on-board network is below the normal level for charging. At the same time, through the second fuse, the same voltage is supplied to the battery charging control unit, assembled on an electromagnetic relay with normally closed contacts.
Since the generator is not producing anything yet, there is nothing at its middle point of connection of the windings - all the rectifier diodes are locked, it seems to be hanging in the air. As a result, the control unit relay also does not work and the “no charging” lamp is on.
Now we start the engine, the generator begins to generate voltage, which is rectified, charges the battery and powers the on-board network. At this time, at the connection point of the windings, which is essentially the neutral wire, a low potential is established relative to the positive wire of the on-board network. The relay is activated and extinguishes the control lamp.
The voltage level from the generator is monitored by a relay regulator. As soon as it exceeds the critical value (14.2 V), the relay will operate, its contacts will open and a reduced voltage will be supplied to the excitation winding, which means the voltage in the on-board network will also decrease. It becomes below normal (13.5 V), the relay will release again, and the process will repeat.
VAZ 21213, 21214, 2131, 2123
Now let's talk about other modifications of the Niva. All four remaining modifications of the car have the same charging circuit, shown in the figure below.
The numbers on the diagram indicate:
- - accumulator battery;
- – generator with built-in rectifier and relay regulator;
- – instrument cluster;
- – resistor;
- – diode switch;
- – indicator lamp for lack of charging;
- – fuse in the mounting block;
- – ignition relay;
- - egnition lock.
The schemes are very similar, but there are still differences. When the ignition is turned on, voltage from the battery is supplied to the ignition relay, and it is activated. The same voltage, through the normally closed contacts of the relay, is supplied to the charging control unit and from it to the relay-regulator as the initial bias of the excitation winding. An additional 12 V from the battery is supplied to the same relay-regulator built into the generator. In this case, the charging control lamp lights up, since its second output is connected to ground through an open diode and a small resistance (51 Ohms).
We start the engine, the generator rotates. The voltage it creates through additional decoupling diodes (on the left in the diagram) is supplied to the control output of the relay regulator. Based on this voltage, the relay-regulator controls the generator, changing the current in the excitation winding in one direction or another so that the voltage in the on-board network remains at the required level.
Important! The same voltage is applied to the cathode of the charge control diode. It locks and the light goes out.
Well, now let's talk about typical malfunctions of charging circuits and start, of course, with a false alarm that the charging control lamp can raise.
Generator faults
During the operation of any car, unpleasant situations often arise in the form of failure of one or another element. Niva is no exception, and most often the generator suffers.
If the generator seems to be faulty, it is recommended to check its functionality using a multimeter. To do this, you will need to start the engine and check the voltage at the battery terminals. The standard value that a multimeter should read is 13.6 V.
If the readings during measurement are higher, it means that a break or short circuit in the windings has occurred in the structure. The same can be said about the case when the voltage is below the specified number. This procedure is carried out regardless of the engine: injector or carburetor.
Also, if the breakdown is caused by another reason, you can replace the generator itself. Usually, for replacement, they turn to special service stations, but if necessary, the work can be done with your own hands.
How much should a generator produce in the field?
There are three types of generators that can be installed on popular Russian SUVs. The output voltage is the same, but other parameters vary.
For carburetor engines, a power of 600-750 W is sufficient. The maximum current that could be removed was 40-50 amperes.
The generator for old modifications of Niva cannot be installed on new engines. Overloading will quickly damage it and require repairs.
If replacement is necessary, such a solution can only be temporary.
Injection engines produced before 2003 were equipped with power from 1100 to 2000 W. Load current from 80 to 130 amperes. Both generations were equipped with a mono-V pulley.
Generators of this type can be installed on old carburetor internal combustion engines without consequences. Modern overhead motors are equipped with similar energy sources, only the pulley is designed for a larger load - it is poly-V-ribbed, like a belt.
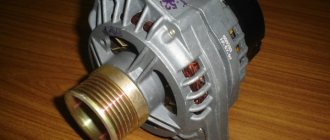
Generator replacement
https://www.youtube.com/watch?v=Mu0Cd5iBH5U
To repair or replace the generator, the car owner will have to remove the unit completely from the car or turn to professionals for work. If you still want to carry out the replacement yourself, then first you will need to prepare all the necessary tools:
- hammer;
- extension;
- keys to "10" and "19".
The procedure consists of the following sequence of actions:
- First, you will need to park the car in a place designated for inspection and repair. The car will also need to be secured using special wheel chocks. Finally, in order for the work to be carried out safely, you should disconnect the battery by disconnecting the terminals from it.
- After this, you need to remove the engine protection. It is attached to several bolts, and they must be unscrewed to get to the lowest bolt of the generator.
- After this, you will need to knock out the mounting bolt using a hammer. It is recommended to knock carefully so as not to damage the thread and to prevent the bolt from coming out in the opposite direction. A hammer is necessary, since a wrench or any other tool simply cannot handle a bolt.
- Next, you need to remove the bolt, swinging the generator from side to side. It is necessary to bolt in any case, as this makes it easier to remove the rod.
- The fourth step involves disconnecting the wiring. To do this, the power wires connected to the housing are disconnected from the unit. In this case, you can first disconnect the plug from the wires.
- Wires are also attached to the generator, tightened with a nut or bracket. In this case, the nuts must be unscrewed with a wrench, and then the loose wires must be pulled out.
- Finally, after disconnecting the wires, you can begin to unscrew the upper fastening element with the belt tensioner. For this you will also need a wrench, as well as a small extension cord.
- Disconnecting the fastener will allow you to remove the belt and alternator. Then you can start cleaning the vacated space with a brush and installing a new unit.
The structure is assembled in the reverse order; the entire procedure will take about two hours if you have all the necessary tools.
Additionally, it is worth noting that when everything is assembled, you will need to adjust the position of the generator using the tensioner. To do this, you need to unscrew the tensioner nut and tighten or loosen the belt, while observing the battery charge.
Also interesting: Niva Chevrolet steering tips
If the indicator returns to normal, then the selected tension is sufficient. There is no need to tighten the structure, as the generator bearing may fail. If the tension is insufficient, the generator will work intermittently, and this can also lead to breakdown.
What to do if the generator fails on the road
A breakdown entails not only loss of battery charge. If the alternator seizes, the timing belt may break. In this case, all attachments of the car will lose their functionality. Further movement will become impossible.
If repair in the field is not possible, try to wait until the nearest service center on the battery. During the daytime, all lights, including DRLs, must be turned off. The comfort units must be de-energized.
Turn off one of the radiator cooling fans (unless it's too hot outside). With economical use of ampere-hours, you can drive up to 3 hours on one battery.
Nuances
When replacing a generator with a Niva 21213, 2121, 21214, a number of subtleties arise, and one of them is the location of the generator unit. It is located at the bottom of the engine compartment.
Actually, this is why problems arise with the operation of the structure: while driving, various contaminants get on the generator, and coolant drips. If you don’t want to constantly change the generator unit, it is recommended to move it upstairs.
To ensure that no problems arise during the operation of the car, it is important to monitor the condition of the car. First of all, it is recommended to regularly inspect the generator.
So, when the “battery” light blinks on the dashboard, if suspicious noises or creaking sounds occur, you should be wary and think that the generator is not working correctly.
Timely inspection will help to avoid unpleasant situations in the form of breakdowns of the constituent elements of the generator, and as a result, failure of entire electrical systems.
Read news about the new Niva
- How to check the generator yourself: checking the generator without removing the relay regulator, diode bridge from the car
- Niva Chevrolet where is the starter relay located?
- Generator Niva 2121, 21213, 21214: which one is installed, replacement
- Generator Niva 2121, 21213, 21214: which one is installed, replacement
- Generator Niva 2121, 21213, 21214: which one is installed, replacement
- Generator Niva 2121, 21213, 21214: which one is installed, replacement
- Moving the generator to the top 21214
- Generator Niva 2121, 21213, 21214: which one is installed, replacement
Types of Voltage Regulators
Having understood what types of these devices there are, what their features and properties are, a complete understanding of the procedures carried out during testing will come. This will also give the answer to what scheme, in what way and how to check the generator voltage regulator. There are two types of regulators:
- combined;
- separate.
In the first case, it is meant that the regulator housing is combined with the brush assembly directly in the generator housing. In the second case, the regulator is a separate unit, which is located on the car body, in the engine compartment, and wires from the generator go to it, and wires from it go to the battery.
A special feature of the regulators is that their housings are non-separable. They are usually filled with sealant or special resin. And there is no particular point in repairing them, since the device is inexpensive. Therefore, the main problem in this regard is to check the generator voltage regulator relay. Regardless of the type of regulator, the voltage symptoms will be the same.
Checking an Individual Regulator
Checking the voltage regulator of the G-222 generator: 1 - battery; 2 - voltage regulator; 3 - control lamp.
As a rule, separate voltage regulators were installed on old cars, including domestic VAZs. But some manufacturers continue to do this to this day. The verification process is similar. To do this, you need to have a power supply with a voltage regulator, a 12 V light bulb, a multimeter and a directly tested regulator.
To check, you need to assemble the circuit shown in the figure. The process itself is similar to the one above. In normal condition (at a voltage of 12 V), the light bulb lights up. When the voltage value increases to 14.5 V, it goes out, and when it decreases, it lights up again. If during the process the lamp lights up or goes out at other values, it means that the regulator has failed.
Checking relay type 591.3702-01
Relay test diagram type 591.3702-01
You can also still find a voltage regulator of type 591.3702-01, which was installed on rear-wheel drive VAZs (from VAZ 2101 to VAZ 2107), GAZ and Moskvich. The device is mounted separately and installed on the body. In general, the test is similar to that described above, but the differences are in the contacts used.
In particular, it has two main contacts - “67” and “15”. The first of them is a minus, and the second is a plus. Accordingly, to check it is necessary to assemble the circuit shown in the figure. The verification principle remains the same. In normal condition, at a voltage of 12 V, the light bulb lights up, and when the corresponding value increases to 14.5 V, it goes out. When the value returns to its original value, the light comes on again.
A classic regulator of this type is a device of the PP-380 brand, installed on VAZ 2101 and VAZ 2102 cars. We provide reference data regarding this regulator.
| Adjustable voltage at regulator and ambient temperature (50±3)° C, V: | |
| at the first stage | no more than 0.7 |
| on the second stage | 14,2 ± 0,3 |
| Resistance between plug “15” and ground, Ohm | 17,7 ± 2 |
| Resistance between plug “15” and plug “67” with open contacts, Ohm | 5,65 ± 0,3 |
| Air gap between armature and core, mm | 1,4 ± 0,07 |
| Distance between second stage contacts, mm | 0,45 ± 0,1 |
Testing a three-level relay
Regulated power supply
Some car owners install on their cars, instead of standard “chocolate bars,” three-level relays, which are technologically more advanced. Their difference is the presence of three voltage levels at which the battery power is cut off (for example, 13.7 V, 14.2 V and 14.7 V). The appropriate level can be set manually using a special regulator.
Such relays are more reliable and allow flexible adjustment of the cutoff voltage level. As for checking such a regulator, it is completely similar to the procedures described above. Just do not forget about the value that is set on the relay, and accordingly, check it with a multimeter.
Generator check
There is one method by which you can check the performance of a car generator equipped with a regulator relay 591.3702-01 with diagnostic elements. It is as follows:
- disconnect the wires that went to pins 67 and 15 of the voltage regulator;
- connect a light bulb to it (excluding the regulator from the circuit);
- Remove the wire from the positive terminal of the battery.
If, as a result of these actions, the engine does not stall, then we can say that the car’s generator is in order. Otherwise, it is faulty and needs to be checked and replaced.