One of the reasons for the loss or weak charging of the Kalina battery is the failure of the diode bridge, or as it is also called, the rectifier unit. A dim glow of the charging indicator on the instrument panel and regular discharge of the battery are reasons to check the performance of the diodes. To remove this block from the Lada Kalina generator, you will need the following tool.
- Open-end wrenches for 12 and 13
- Ratchet head 8 or regular
- Flathead screwdriver (the thinner the better)
How to test a generator with a multimeter
The diode bridge of the generator can be checked with a multimeter, but you can also use the stand that was used to check the regulator.
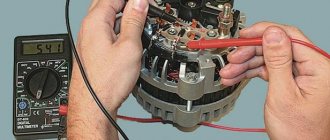
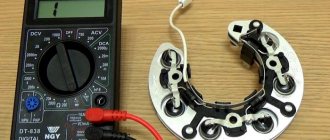
But before that, first of all, without removing the rectifier bridge from the generator, connect the red wire of the tester to terminal 30 of the generator, and the black wire to the housing. Set the tester operating mode to dial (diode icon). If it is not there, then set it to 1-2 kOhm. The multimeter should show infinity. If the readings are different, the diode bridge is faulty.
Then check the current rectifiers for breakdown. Leave the positive (red) probe on terminal 30, touch the negative one to the bridge mounting bolts one by one. The multimeter display should show infinity in all cases; any others mean a breakdown.
Next, connect the positive probe to the axle mounting bolts, and the negative probe to the generator housing. In this case, the tester should also output infinity.
But in practice, such verification is most often not enough. In most cases, it is necessary to ring the generator in more detail.
Careful testing
To do this, unscrew the fastening bolts of the rectifier unit, disconnect the copper wires of the stator winding and remove the diode bridge from the generator. Now you can test each semiconductor individually. Before checking, it is advisable to rinse the stabilizer with running water using a medium-hard brush, and then dry thoroughly. For quick drying, a hair dryer is quite suitable.
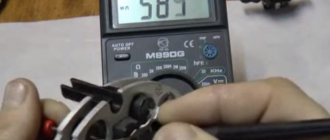
Attach one of the tester probes to the diode plate, connect the second to the central terminal of each diode fixed to this plate. Then swap the probes. In one case, the multimeter should show infinity, in the other - a nominal resistance of approximately 570-590 Ohms. Rectifiers are considered faulty if:
- In the first and second measurements (when the polarity was changed), the multimeter readings are the same;
- Diode resistance is greater or less than nominal values.
Perform the same actions with the second plate of the diode bridge. If a fault is detected in one or more diodes, it will be easier to replace the entire rectifier unit. True, there are craftsmen who replace failed diodes individually, but such work requires a certain skill and dexterity.
Checking the armature and stator windings
Further inspection requires completely disassembling the generator. First of all, visually check the anchor. Brush rings should not show any blackening, chipping or wear on the treadmills. Blackening and slight wear can be smoothed out with zero-grade emery cloth. Rings with deep grooves must be replaced or, if the thickness of the rings allows, turned on a lathe.
The armature winding should not clearly smell like burning. The color of the winding must be uniform and free of damage and breaks. To check the armature winding for a break, you will need a multimeter. Set the operating mode to continuity testing or resistance measurement and connect the probes to the brush rings. The winding resistance should be within 3-5 Ohms. Then leave one probe on the ring, connect the other to the body. The multimeter display should show infinity.
The generator stator is diagnosed after removal from the housing. First of all, carry out a visual inspection. There should be no visible damage to the wire or its insulation. Then connect the tester wire to the stator housing. With the second wire, touch the terminals one by one. There are only three of them. The tester must be in dialing mode. If the display shows infinity, this indicates that the stator is working properly.
Further testing consists of diagnosing the windings. The resistance of all three windings must be the same.
Before assembling the generator, you need to check and, if necessary, replace the bearings. When turning, they should not jam or make a creaking sound. This means that they are very worn out and will soon fail. Therefore, it is better to replace them immediately.
Generator diagnostics - everything about Lada repair - Website about
In connection with the successful elimination of the problem in the generator, I decided to summarize the experience and write separate articles on diagnostics and troubleshooting using the example of the generator 9412.3701 from the VAZ-2107. If you have established for sure that it is the generator that is faulty, then we arm ourselves with a multimeter or a test light (screwdriver) connected to the battery.
| Fig.1 |
First we remove the positive «+»
terminal from the battery to avoid accidental short circuit, then disconnect all contacts from the generator and, bending the latches, remove its back cover (the design of which provides for this). In this way we can carry out a general check of the diode bridge and stator winding, as well as the rotor. To check the voltage regulator, you need to remove it from the car's generator.
| Fig.2 |
So, let's get started: switch the multimeter to the “diode continuity/circuit integrity check” mode.
Fig.3
1. First, check the generator for a short circuit to ground.
We press positive «+»
the multimeter probe to terminal
“30”
of the generator, and the negative
“-”
probe to its body. In good condition, the diode bridge does not pass current in this direction, there is no sound signal, and the light bulb does not light up.
| Fig. 4 “1” - Resistance tends to infinity - no current passes |
When an alarm or warning lamp lights up, we have a short circuit of the diode bridge or stator winding to ground
.) To exclude the stator, it is necessary to remove the diode bridge from the generator.
2. Check the positive diodes for breakdown.
Positive «+»
We press the multimeter probe to terminal
“30”
of the generator, the negative
“-”
to the terminals of the winding and diodes (generators type 9412.3701, where the bolts are insulated from the terminals with textolite washers and connected to
ground
), or one of the bridge mounting bolts (generators type 37.3701, where the bolts are connected to the terminals, but isolated from
the “ground”
- Fig. 5).
| Fig.6 |
| Fig.6 |
If the diodes are working properly, then the resistance tends to infinity, and the light bulb does not light up. If even one of them is “broken,” the light comes on and the multimeter beeps. When changing polarity, they must pass current.
3. Check the negative diodes for breakdown.
To do this, press the positive «+»
multimeter probe to the terminals of the winding and diodes (generators type 9412.3701), or to the bridge mounting bolts (generators type 37.3701—Fig. 5).
the negative “-”
against the generator housing.
| Fig.7 |
If the resistance tends to infinity and there is no sound signal, the lamp does not light - the negative diodes are working. When changing polarity, they must pass current.
4. We check additional diodes for breakdown.
We press positive «+»
multimeter probe to input
“61”
of the generator.
Negative “-”
probe to the terminals of the winding and diodes (generators type 9412.
3701), or to the bridge mounting bolts (generators type 37.3701—Fig. 5). If the resistance tends to infinity and there is no sound signal, the lamp does not light - the additional diodes are working.
When changing polarity, they must pass current.
| Fig.8 |
To determine a break in the diode, you will also have to remove the diode bridge from the generator.
It is worth noting that testing diodes with a multimeter and, to a lesser extent, with a light bulb, in which the diodes are tested under load, are not a 100% effective method.
For this, there are more accurate instruments, such as an oscilloscope.
If the diode bridge is working properly, then we proceed to checking the stator winding. 5. Check the stator winding for an open circuit.
We alternately connect the multimeter probes between all three terminals of the stator winding.
| Fig. 9 “000” - current flows through the circuit |
A sound signal or a lit lamp in all three cases tells us about the integrity of the winding.
6. Check if the stator winding is shorted to ground.
We connect the probe to one of the winding terminals, and the other to the generator housing. If the resistance tends to infinity, there is no sound signal, the lamp does not light - there is no short circuit.
Replacing the generator diode bridge on a Priora
So, in order to remove and change the diode bridge on the 2170 car and its configurations, you must first remove the plastic cover, under which the rectifier unit is located.
After this, all fastenings for this part become available to us. It is worth noting that in this case the repair will be considered specifically using the example of a new type generator - meaning with a conventional integrated circuit and brush assembly, as on Kalina, Grant and other recent VAZ front-wheel drive cars.
From the above photo you can clearly see that the first step is to unscrew the nut securing the brush assembly contact; of course, all this is done using a regular 13 mm wrench. Then unscrew the remaining mounting bolts. It is most convenient to use a ratchet handle or a socket with an 8 mm knob:
Now the most interesting thing remains - to disconnect the winding wires from each of the diodes. To make your work easier, immediately prepare two flat-blade screwdrivers.
After all the diodes have been dealt with, you can easily remove the bridge assembly, as shown in the photo below.
Installing a new one occurs in the reverse order of removal. Of course, the assembly is carried out carefully so that there are no problems after installation - a short circuit or vice versa, an open circuit, etc.
How to remove a diode bridge from a Kalina generator
One of the reasons for the loss or weak charging of the Kalina battery is the failure of the diode bridge, or as it is also called, the rectifier unit. A dim glow of the charging indicator on the instrument panel and regular discharge of the battery are reasons to check the performance of the diodes. To remove this block from the Lada Kalina generator, you will need the following tool.
- Open-end wrenches for 12 and 13
- Ratchet head 8 or regular
- Flathead screwdriver (the thinner the better)
Generator Lada Kalina
A car generator is a rather important design element, without which it would not be possible to even move the car. The unit is designed to convert mechanical energy into electrical energy, which powers the vehicle battery, as well as associated systems, sensors and devices.
In the case of Lada Kalina cars, manufacturers used two types of generators with part numbers:
Both units are three-phase AC units. Their design includes a rectifier unit and an electronic voltage regulator that facilitates the constant transfer of electricity. The cost of original generators is 10-12 thousand rubles.
In case of failure, the owner of the Lada Kalina can replace the generator with its analogue. The table shows the main models, where the article number and price are indicated.
| Generator | vendor code | Cost, in rubles |
| 1118 Lada (90a) LADA art. 11190370101003 | 11190370101003 | 4750 |
| 110A VAZ 1117-1119/2170-2172/Kalina/Pri¬ora/Granta F 000 BL0 652_ Bosch | F000BL0652 | 9000 |
| (115A) LADA Kalina / Granta / Priora | 21700370101082 | 5480 |
Thus, you can replace a failed generator with a cheaper analogue or select a unit of the same cost, but with better characteristics.
Main Generator Components
In general, a generator is a converter that creates electrical energy from mechanical energy. On all cars, the design and operating principle of these devices are similar. The design consists of the following components:
- The stator winding, a thick copper wire is used for it, since it is with its help that voltage is generated.
- The rotor winding is excitation. Without it, it is impossible for current to appear in the stator winding. In order for any potential difference to appear in the frame, the presence of two components is necessary - rotation and a magnetic field. Thanks to the generator belt on the Kalina, the rotor rotates. It is its winding that fulfills these two conditions - a magnetic field is created around it, and it rotates around its axis.
- The rotor is equipped with slip rings, to which voltage is supplied using a brush assembly.
- A pulley mounted on the rotor allows rotation to be transmitted from the crankshaft via the generator belt on the Kalina.
- A mechanical or electronic voltage regulator changes the voltage on the rotor winding. Due to this, the generator produces a stable voltage.
- The block of semiconductors (valves) mentioned earlier is necessary to convert three-phase alternating voltage into unipolar direct voltage.
- Covers with bearings are designed for rotor alignment and normal operation of the unit.
- The capacitor allows you to get rid of residual alternating current after rectification.
How to ring a diode bridge made of discretely arranged diodes
All parts of the bridge circuit can be ringed without desoldering. To do this, you need a multimeter that has a diode testing mode, usually combined with an audio test. The essence of the test is to measure the voltage difference between the probes.
How to properly check the serviceability of a diode bridge with a tester:
- First, make a direct connection to the device. To do this, a red probe is connected to the anode, and a black probe is connected to the cathode. With this connection, current flows freely. For a silicon diode, the voltage drop across the pn junction is approximately 500-700 mV. For Schottky diodes, the voltage drop at the transition between zones is lower and equal to approximately 300 mV.
Direct connection of the diode bridge
Next, the reverse connection is made. The red probe is connected to the cathode, and the black one to the anode. For a healthy semiconductor, the voltage drop value will be 1 or more than 1000 (usually 1500).
Reverse connection of the diode bridge
If, as a result of the test, high values are observed in both directions or an audible signal is triggered, then the diode bridge is broken.
Installation and repair features
Installation occurs in reverse order. If necessary, the generator is replaced or repaired. In some cases, repair will be impractical, since there are many unusable components, including stator and rotor windings. Restoration will be expensive; it will be much easier to completely replace the generator on Kalina. The cost of a new generator in stores is 4-5 thousand rubles. At "showdown" you can buy it 2-3 times cheaper.
Removal and installation with a detailed description of all actions
First, before doing all this, you need to remove the generator from your Kalina, as well as the voltage regulator along with the brushes. How this is done is described in the same section; below in the list of recommended topics there are links to these materials, or just go to the “Generator” section and you will find everything there.
Now that you have already done everything described above, unscrew the upper nut with a 13 mm wrench (it presses the voltage regulator), and then the lower nut securing the bridge:
After this, you need to unscrew all three bolts of the rectifier unit, clearly shown in the picture below:
Now you need to disconnect the windings from the diode contacts with wires. To do this, take a thin screwdriver and insert it into the place as shown below, and turn it a little in that direction to spread the clamp and remove the winding wires.
To release the wire from the left clamp, slightly turn the screwdriver to the left, and to remove the right one, bend the clamps in the opposite direction. And at this time we pull the wire with our hand, disconnecting it from the contacts of the diode bridge:
Then, when all 6 wires are removed from the clamps, you can safely remove the rectifier unit:
If necessary, we replace this part of the generator and install a new block with diodes in its original place, doing everything in the reverse order.
Removing and disassembling the generator
Disconnect the wire terminal from the negative terminal of the battery. Remove the generator belt (see “Checking the condition and replacing the generator drive belt”).
By pressing the lock of the generator pre-excitation wire block. . disconnect the block from the voltage regulator connector.
Using the “13” socket, unscrew the nut securing the wire lugs to terminal “B+”. . and remove them from output.
Using a 17mm socket, unscrew the bolt of the lower mounting of the generator and remove it. Remove the nut from the generator bracket.
Using a 13mm socket, unscrew the nut of the bolt for the upper mounting of the generator.
. and remove the generator. We disassemble generator 5132. 3771 to replace the voltage regulator, rectifier unit, rotor, stator and bearings.
Using the “8” socket, unscrew the three nuts securing the casing.
Rotor and stator repair
First of all, you will need to examine the stator and rotor windings for breaks. To do this, you do not need to remove the generator from the car. It will be necessary to dismantle only its diode bridge. This will require a two- or three-jaw puller, as well as an artificial frame borrowed from a cup puller.
Replacing unit parts
Carefully straighten the wires in the winding and remove the diode bridge. To avoid getting confused during reassembly, you need to mark with a marker the placement points of the front and rear casing of the generator. Using a size 8 socket wrench, unscrew the 4 bolts that hold both trims in place. Carefully remove the front trim using a flathead screwdriver. After this, slide the rear casing and remove the connecting bolt along with the insulating washer, as well as the plastic plug from the bearing.
To check you will need an ohmmeter tester. Having connected its plugs to the rotor rings, check the winding for breaks. In this case, the winding resistance should be 5-10 Ohms. After this, connect the tester plugs to any of the slip rings and to the rotor. Now you need to check the winding for short breaks to ground. If the winding has no breaks and is working correctly, the tester will show the highest resistance value.
In the same way, it is necessary to connect the plugs to the stator and check the winding for breaks. If they are absent and the part is working properly, the tester will show extremely low electrical resistance. When checking for short-term ground breaks, the tester should also show the highest electrical resistance value.
To ensure proper operation of the rectifier unit, its diodes must transmit electric current in only one direction. If they conduct electricity in 2 directions or do not conduct it at all, then the diodes have become unusable and need to be replaced.
Attach the tester plug with a negative value to the diode itself, and the plug with a positive value to the part body or plate in which it is located. A functioning diode will not conduct electric current, and the tester will show the highest resistance value. After this, you will need to swap the plugs and perform the test again. If the diode is working correctly, the tester will show electrical resistance. In the same way, it is necessary to test the remaining diodes in the diode bridge circuit.
How to replace a generator set?
How to remove the generator? In some cases, repairing the generator unit is impractical or cannot restore the functionality of the device.
Replacement is required here. The process itself is not an intricate undertaking, so it will not take much time from the owner of the Lada Kalina.
For a successful replacement operation we will need:
- Remove the belt, first loosening the tension element.
- Disconnect the plug together with the cable terminals.
- Unscrew the nut securing the upper section of the unit and remove the bolt.
- Use the same method to remove the bolt at the bottom of the device.
- Remove the generator unit from the engine compartment.
Replacement and installation of a new device is carried out using the reverse algorithm.
Generator replacement
In cases where the damage to the generator is serious (for example, the stator and rotor burned out at the same time), sometimes it is easier to replace the entire assembly than to repair the device.
Replacing the Lada Kalina generator is not difficult, almost any driver can do it, but it is better to do the work on an inspection pit or a car lift.
We make the replacement as follows:
- we stop the engine, remove the terminal from the battery (ground);
- if there is protection under the engine, remove it;
- Disconnect all wires from the generator;
- Use the tensioner bolt to loosen the generator belt and remove it;
- we unscrew the generator itself, it is attached to two bolts - one of them is unscrewed from above, the other from below;
- We take out the old generator and install a new one, putting everything back together in reverse order.
Main process
Replacing the generator in the case of Kalina with an 8-valve or 16-valve engine involves performing the following steps:
- First of all, you will need to install the car on the repair site and fix the position of its wheels using wheel chocks. It is also necessary to turn off the engine and disconnect the terminals from the battery to ensure the safety of the work being carried out.
- After this, you need to loosen the belt tensioner roller, which fixes the position of the generator. To do this, you will need to unscrew the fasteners and dismantle them.
- The next step is to disconnect the plug secured by a plastic latch. To remove it, you need to lightly press it and pull it to the side. If everything is done correctly, the plug can be removed without problems.
- You will also need to remove the wire terminals located under the protective cap. Therefore, the car owner will first need to dismantle the protective cap by prying it off, and only then remove the terminals.
- The next step is to unscrew the nut securing the upper part of the generator. It is considered the most complex process among those listed, and it is better to familiarize yourself with the structure of the car in advance so that no problems arise. To make the nut give way quickly, you can move it with a wrench and then work it with a ratchet handle. Finally, all that remains is to lightly tap the protruding bolt so that it moves, after which you can remove it from the reverse side.
- Once the top bolt of the generator is removed, you can proceed to the bottom one. The actions are the same - a knob, a ratchet handle, a light knock and dismantling. However, in this case, it is recommended to hold the nut on the reverse side so that it does not turn.
- Next, you should begin dismantling the rod. This should be done carefully and carefully, since there are bearings and bushings inside. They will need to be held so that they do not fall and get lost.
The final step will be to dismantle the generator, clean the internal space of dirt, rust, possible traces of oil, and install a new unit - a standard generator or its equivalent.
You can check the functionality of the generator with a multimeter by connecting it to the battery terminals. The voltage reading should not be less than 13.4 volts.
The pitfall when replacing a Lada Kalina generator with air conditioning is its changed position, so you will have to approach it from the other side.
Thus, in order not to have to change the generator frequently, it is recommended to regularly inspect the technical condition of the car and, if necessary, repair certain parts, devices, and systems. Undoubtedly, repairs will cost the owner of Kalina somewhat less than buying new spare parts and entire units.
What is a generator diode bridge and what functions does it perform?
The rectifier unit (another name for the device) is an integral part of the generator and serves to modify the alternating current produced by the unit into direct current, necessary for charging the battery and powering all electrical appliances of the car.
It is located on the frame of the generator and consists of 4, 6, 9 or more diodes placed on two insulated aluminum or steel horseshoe plates that act as cooling radiators.
The main components of the bridge are semiconductor diodes (most often silicon) that conduct current in the required direction. They are the rectifiers that convert alternating current into direct current. The battery acts as a capacitor, softening the inevitable voltage drops.
Instead of diodes, the circuit can use valves of any type - for example, selenium columns, the principle of operation of the circuit will not change.
Checking the diode bridge using a light bulb
Naturally, not every car owner has a multimeter, and therefore you need to know how to check the vehicle’s generator using improvised means? To do this you need two pieces of electrical wire and a car lamp. The check itself involves the following simple steps:
- The protective casing of the generator is removed and a diode bridge plate is connected to the negative terminal of the battery.
- The wire from one end of the light bulb is connected to the positive of the battery, and with the other you need to touch the terminals of the remaining diodes and the connection points of the starter winding in turn.
- If the lamp lights up at any terminal of the diode, it means that this element is faulty and needs to be replaced.
In some cases, it may be necessary to check the diode bridge for an open circuit, for which you need to carry out the following manipulations:
- The wire from the negative terminal of the light bulb is connected to the negative terminal of the battery and in the same sequence as checking for breakdown of the diodes, they are tested. The only thing is that in such a situation the light should be constantly on.
- If, during the test, the light on any of the diode terminals does not light up or its light is very dim, then the part has broken and will have to be replaced.
You can find out why malfunctions occur in the diode bridge of the generator yourself in a garage. In this case, you will need a regular tester, which almost every car enthusiast has, or a car light bulb with two wires.
Actions when charging disappears
The generator on a Kalina with air conditioning has more power than on cars without an air conditioning system. The design and faults are the same. What to do if charging is lost? Don't panic and check immediately:
- Voltage regulator. The easiest and most expensive way is to replace it with a known good one. But you can also apply voltage of 12 V and 15 V to check operation. Regardless of whether the regulator is mechanical or electrical, it will behave the same. In the first case, voltage will be supplied to the excitation winding, but in the second - not.
- Alternator slip rings and brushes. You can use a simple lamp probe to check the contacts. The length of the brushes must be more than 5 mm, otherwise they should be replaced.
- The integrity of the field winding can be checked with a tester. Moreover, there is no need to remove the generator, just crawl up to the slip rings and check the resistance between them. Please note that they should not short to ground.
- The condition of the stator winding and diode bridge can be assessed only after dismantling the generator.
Replacing the voltage regulator and checking it on viburnum
Welcome! Voltage regulator - it is installed on the generator and is directly connected to it, thanks to it, the entire current that the generator gives out changes and flows more evenly, for example, the more you turn the engine of a car (increase the speed, that is), the generator will work stronger and much more give out current, all this happens because the generator is connected to the engine (namely, it is connected to the crankshaft), but the voltage in the on-board network will also change from this (The more current the generator gives, the stronger this current increases in the entire on-board network car), therefore, when the speed increases, the light will constantly burn stronger, and when it decreases, it will dim because the current strength will decrease, so no matter what happened, a voltage regulator was invented, thanks to which the current strength in the on-board network always remains the same, but it changes when you turn on additional devices that need more current, that is, for example, you turn on the high beam headlights of a car and the current supply increases through the regulator so that there is enough power for these headlights, in addition, the current supply flowing through The regulator is constant and does not jump higher or lower, so the headlights work in the same mode and do not shine either stronger or weaker.
Note! In order to change or check the voltage regulator, you will need: Two different types of screwdrivers, as well as two wrenches that will be “12” in size, and you will also need a DC voltmeter thanks to which you can clearly determine what voltage you have in your on-board network and whether it is jumping, and among electrical appliances, a megohm meter is also useful, thanks to which you can check the regulator’s capacitor for serviceability, thanks to which the current strength remains constant when supplied to the on-board network!
Where is the voltage regulator located? It is located on the generator itself, as was already said a little earlier, a plus wire and a wire block are also suitable for it, so that the regulator does not become dirty; for this purpose it is also closed with a plastic cover, in more detail the pin that comes out of the regulator you can look at photo which is located below, in this photo you can just see the same plastic cover that closes the regulator, and in the other photo (Small) you can see that the cover has already been removed and only one pin sticks out, which comes from the regulator (This pin is on both indicated by a red arrow in the pictures).
When should you change the voltage regulator? It needs to be changed when it begins to pass alternating current into the on-board network (Alternating current is the current that rises or falls under the condition that the circuit leaves its direction unchanged), in other words, if the current strength fluctuates (And this should not happen), then the regulator must be replaced, if the current fluctuates, for example, the headlights may burn either worse or more intensely (Depending on the engine speed, at high speeds the headlights will burn stronger), and the regulator must also be replaced if it begins to produce either less current than necessary (In this case, you will have an undercharge of the battery), or more (With a stronger current, you may burn out the main part of the wiring in the car that will not withstand the heavy load, or if you have fuses, then at best they will have time to open the circuit and nothing bad will happen to the wiring).
Signs that it's time to change your alternator brushes
- The car's electrical appliances suddenly turn off (even while driving);
- Headlights, dimensions and even interior lighting dim and flicker;
- A sharp decrease in the voltage of the vehicle's on-board network;
- A sharp discharge of the battery, which will be very difficult to recharge in the future.
Generator - inspection and repair
Each of these points may indicate wear on the generator brushes, which are located inside this unit. Many people wonder how to check brushes. In order to check the remaining length of the generator brushes, it is enough to disconnect the generator from the battery and remove the voltage regulator. After this procedure, you can determine by eye how worn out any of the generator brushes are. If the length is less than 0.5 centimeters, the brushes definitely need to be changed. Checking the brushes should be carried out during routine inspection of the generator.
Device
The Lada Kalina generator consists of the following parts:
- housing (front and back cover);
- pulley;
- stator windings;
- armatures (rotor);
- voltage regulator relay (charging relay);
- diode bridge (rectifier unit);
- two armature bearings;
- rear plastic casing.
Inside the generator housing, along its walls there is a stator with a winding, and a rotor is located in the center.
At the back of the case there is a diode bridge and a voltage regulator relay; the diode bridge is covered with a plastic casing to prevent dirt and dust from entering.
There is a pulley in front of the housing; it is put on the rotor shaft and secured with a nut.
The generator is driven by a drive belt placed on a pulley.
Generator Problem
I’ll answer right away, there are two working 10x generators, and it suits my khan, the rings where the brushes go are worn out and I’ve already changed the brushes 3 times in 2 years.
Vitaly (Shrikara) rings change...cost 250 rubles
Seryoga (Patti) It will do without any problems, just for charging to start you need to rev it up to 2000-2500 after starting the engine
Alexander (Saturnus) I agree with Vitaly, the rings change without problems, I changed them two months ago.
Anton (Addyson) It’s 100 kilometers to get the rings...
Alexander (Saturnus) I traveled 120 kilometers, and there were no rings in my city.
Andrey (Riina) Why such speeds? How about a push?
Seryoga (Patti) Excitation of genes occurs through a lamp in the instrument panel, there is not enough generator for the 10th
Andrey (Riina) It turns out that at idle, the gene will not work normally.
Seryoga (Patti) It will only be necessary to accelerate initially
Andrey (Riina) In general, as they say, a kick for speed.
Seryoga (Patti) Alternatively, set the anchor from the tenth
Andrey (Riina) You mean, the stator is Kalinovsky, and the rotor is from 10?
Seryoga (Patti) yes
Seryoga (Patti) Or even the back cover with brushes
Andrey (Riina) Is the lid suitable for 10?
Seryoga (Patti) What year of manufacture?
Andrey (Riina) 11
Seryoga (Patti) Okay, I won’t confuse you, there are 3 generators on the viburnum, and the first ones differed slightly from the tenths
Andrey (Riina) Thanks for this
>Design and repair of the Kalina generator
content .. 220 221 222 223 224 225 226 227 228 229 ..
Signs of a diode bridge malfunction
First of all, you need to remember that the diode bridge on the VAZ-2114 is no different from the same unit on the VAZ-2109, VAZ-2110 and other models. Therefore, if you figure out how to determine the malfunction, it will not be difficult to identify it on any of the cars. There are several main symptoms; they can appear together or separately. Any of them requires an immediate check of the generator:
- The warning lamp, which lights up when the ignition is turned on, does not go out even after the engine is started. This is a general indicator of a problem, but if the diode bridge has failed, the lamp will light in any case. If a voltmeter is installed in the car, you can check its readings; the arrow will most likely be either in the red zone or at its very border.
- Another option is that the warning light does not light up when you turn the ignition key and does not light up after starting the engine.
- When measuring the voltage produced by the generator with the engine running, the reading is less than 13.5 Volts. You need to measure at the battery terminals.
- The next morning the car will not start due to a dead battery, although in the evening it was in normal condition. After charging the battery, it discharged again in a short time, and the generator housing becomes so hot that you can burn your hand on its surface.
- Extraneous noise appears under the hood, most often it is a whistle or howl. The noise level may vary depending on engine speed.
- Various errors appear - the ABS, ESP, and so on may light up. The power steering may stop working, the radio will begin to wheeze and freeze. Instead of a turn signal, the light turns on. All this manifests itself against the background of a dead battery, which does not charge due to a broken diode bridge.
- The headlights begin to dim or stop working altogether, and the air conditioner does not cool as it should.
These are the main signs of a diode bridge breakdown, but it is worth remembering that they may indicate other generator failures. Therefore, first of all, you need to accurately identify the faulty unit. It is not necessary to take the car to a service center for diagnostics; the car owner can do the work; a minimum set of tools is needed.
Advice!
If the control light on the panel lights up or, conversely, does not work, first of all you need to check it and the control relay. Often it is these elements that are faulty, and not the generator.
Causes of malfunction
There are several reasons for the failure of the regulator relay on a car. Let's consider the main ones :
- A short circuit in the on-board network, which led to the failure of the regulator relay. This happens quite often because the generator itself serves as the power source and there is no fuse between it and the current produced to protect it.
- Wear . Like any part in a car, the regulator relay can wear out.
- The brushes are worn out .
How to determine that the regulator relay has failed?
Let's consider the main options:
- Insufficient battery charge means that after the ignition is turned off, the car has difficulty starting or may not start at all.
- The light shines normally at 2000 rpm, but dims at idle.
Once the root causes have been sorted out, you can move on to the replacement process.
The process of replacing the generator regulator relay
So, the process of replacing the generator regulator relay will require dismantling the product itself, but it will not require a pit, and all operations can be carried out from the engine compartment. Let's take a step-by-step look at how to replace the generator regulator relay on a Lada Kalina:
- We remove the “minus terminal”.
- To replace the relay, you will have to dismantle the generator.
- Having loosened the generator mounts, let it loose a little and remove the belt.
- Remove the wire block from the connector.
- We unscrew the nut that holds the contact group of wires and dismantle it.
- We unscrew the bolts of the upper and lower fastenings and take them out.
- We dismantle the generator.
- When the generator is removed, you can proceed to replacing the relay.
- We unclip the three plastic latches of the back cover and remove it.
- Disconnect the diode bridge.
- Unscrew the nut and remove the bushing on the contact group bolt.
- Unscrew the two screws that hold the regulator relay in place.
- We dismantle the relay.
- Assembly is carried out in reverse order.
Thus, the Lada Kalina generator regulator relay was replaced.
Choice for Kalina
Selecting a Lada Kalina relay regulator is quite easy. There are no original analogues, but it fits with VAZ 2110, Priora or Grants.
Therefore, as experience and practice show, car enthusiasts, as a rule, install the original, if they do not change the generator to a more powerful one.
Symptoms of malfunction
The following signs may indicate a generator malfunction:
- the warning light on the dashboard is constantly on;
- The battery began to discharge quickly, and recharging does not save the situation;
- there are malfunctions in the functioning of electrical equipment (ventilation and heating, multimedia devices, alarm system and lighting), even if the motor is working properly;
- there was a smell of something burnt in the car interior;
- the generator began to whistle or rustle.
Read also: DIY wooden mechanisms
If you notice these symptoms, you should immediately go to a car service center for a thorough diagnosis. However, you can check the functionality of the generator on your own, especially if you have the skills to use an autotester.
Replacing bearings
AvtoVAZ cars are very often subject to fair criticism from the owners of cars produced by this company. The Lada Kalina model was no exception to the general rule. Almost all current converters installed on cars of this brand break down after 10 thousand kilometers, after which the generator requires repair or replacement.
As practice has shown, the cause of many breakdowns is not only the bearings, but also the Kalina generator bracket. Car owners often fix this problem on their own. Doing this with certain skills is not so difficult.
To repair the generator, it is necessary to disassemble it. To do this, use a screwdriver to hook the tips of the stator wires and pull them out a little from the springs of the diode bridge. Then unscrew the bolts that attach the diode bridge. After this, the connecting bolt is unscrewed.
After disassembling the generator, check whether the rear bearing is in good condition. To do this, you need to twist its outer ring. If it rotates easily, without noise or rattle, and there is no play, then the bearing is in good condition. At the slightest suspicion of a malfunction, it is better to replace the bearing.
Next, you need to dismantle the Kalina generator bracket. Using a screwdriver, the stator is picked up and removed from the device casing. The bracket includes a bearing, which should also be checked. If a malfunction is detected, the part must be replaced.
How to independently replace the diode bridge on a VAZ 2107
Diode
a bridge or rectifier is one of the parts of the VAZ 2107, the replacement of which requires virtually complete disassembly of the generator. Usually, the failure of the generator, or more precisely one of its parts, is first determined by the loss of charging of the battery.
Before you begin the repair, you need to remove the generator from the VAZ 2107 engine. To do this, you will need two keys - seventeen and 19. Use the seventeen key to unscrew the fastening nut on the adjusting plate. This will relieve the tension on the drive belt, which can be freely removed.
Then, using a nineteen key, you need to unscrew the nut securing the generator to the VAZ 2107 engine housing. Having removed the bolt from the holes, remove the generator
from the engine and begin to repair it.
Here you will also find it useful:
- Hammer;
- Heads for eight and 10;
- Head extension
First, let's disassemble the body. To do this, unscrew the nuts located on its back cover.
To separate both halves, you need to lightly tap one of the halves with a hammer in a vertical position at the point of their connection.
As a result, we get two parts - one with a rotor, the other with a stator. The diode bridge that we need to change is located in the 2nd half, so we will deal with it.
A careful inspection of the part and the inside of the diode bridge will reveal that the coils are held on by 3 nuts that clamp the wire terminals. Here you will need an extension cord, because without it it is virtually impossible to unscrew the nuts deep in the housing that secure the diode bridge.
After freeing the coil wires, the stator is simply removed from the iron case and we get open access to the rectifier. Using the method of pressing on the bolts (3 pcs.), we completely free the diode bridge and remove it from the housing.
Then it is replaced with a new one, and you can begin assembly. It is done in reverse order and usually does not cause problems.
But before you begin assembly, it is recommended to check other parts of the VAZ two thousand 100 seven generator for their functionality. First it touches the bearing. Check them for lubrication and lack of free movement, and if even the slightest suspicion arises, immediate replacement is recommended. This easy procedure will help you avoid repeated disassembly and reassembly in the future.
After replacing the diode bridge and assembling the generator, we install it in its original place. Do not completely tighten the nut securing it to the body. Before this, put the belt on the pulley and tighten it in accordance with the recommendations of the VAZ 2107 manufacturer. Usually, a pry bar or a large screwdriver is used for this. Securing the generator
in a suitable position, tighten the nut on the adjusting plate, and check the degree of belt tension. The deflection of the belt, when pressed in the gap between the pulleys, should be 10-17 mm.
This procedure should not be neglected, because if the belt is loose, the charge may be lost, and if it is too tight, it can become a prerequisite for early failure of the bearings.
Separate relay
A separate relay is mounted on the car body, and the voltage from the generator first goes to it, and then to the battery. As an example, let's look at checking the Ya112B relay, which was also installed on traditional Zhiguli cars. Depending on the design option, such a regulator can be mounted both on the body and on the generator itself. We dismantle the part and perform the following steps:
- We assemble a circuit similar to the previous one; instead of brushes, we connect a light bulb to contacts “W” and “B” of the relay.
- We perform the check in the same way as in the above method. The relay is also considered faulty if the lamp continues to light when the voltage increases.
How to replace brushes on a removed generator
How many volts should a car's alternator produce to properly charge the battery?
With the generator removed, work on replacing the brushes will be much easier. Having access from all sides, it is easy to examine the wear of the brushes and replace them. The main problem in this option will be removing the generator from the car. You need to unscrew the generator mounting bolt, loosen the belt tension, remove it and unscrew the mounting bolts connecting the generator to the engine housing. If you can get the generator from above, consider yourself lucky. There are often cases when, to remove the generator, you have to remove not only the air filter and pipes, but even the radiator.
First of all, you need to clean the mounting area of the brush holder from dirt and dust. You can wipe it with solvent and then blow it with compressed air. After this, you need to remove the brushes; to do this, you need to unsolder them. Leaving the generator without brushes, be sure to clean all contacts and check the springs for elasticity. It is advisable to polish the slip ring after this.
Installation of new brushes should be done in the reverse order, after which the generator is assembled and installed on the car. It is recommended to change the generator bearings when replacing the brushes. When installing a generator on a car, the main thing is to correctly adjust the belt tension. If the tension is insufficient, the belt will slip on the rollers.
It happens that the computer in the car begins to show a malfunction of the generator immediately after replacing the brushes. This occurs due to insufficient grinding in of new parts. During operation they will rub in and the error will disappear. If the error persists, the reason is that the case is stuck due to excess dirt. This problem can easily be eliminated by blowing the parts with compressed air. Before checking the operation of the generator, be sure to inspect the brushes for chips and cracks. New parts often have manufacturing defects.
It happens that the brushes are replaced together with the relay and generator regulator. In this case, the replacement process proceeds as follows:
- The negative terminal is disconnected from the battery;
- You need to remove the rubber tip from the positive wire;
- The generator is dismantled (if necessary, the air filter housing must be removed);
- You get a brush block with a relay regulator;
- The fixing springs are removed;
- The brushes are unscrewed;
- All associated wiring is disconnected;
- A new block is being installed.
The generator is connected only after checking the absence of defects on the new brushes. After assembly, we put the generator in place, tighten the belt, connect the battery and start the car.
Main symptom of malfunction
The driver is notified of alternator failure only when the charge level drops below battery voltage. The indicator lamp for lack of battery charging lights up on the dashboard. The danger of the situation is that the vehicle’s on-board network is powered by a battery, which has a limited and, in the event of a generator malfunction, irreplaceable capacity.
Causes of malfunction
Photo of the VAZ 2114 generator
- the unit produces too low voltage;
- the installation is heating up;
- no battery charging voltage;
- The charging voltage exceeds the required values.
Mechanical failure causes increased noise in the unit when the engine is running. The cause of noise may be wear of the bearings. First, the bearings in the front cover wear out. They are subject to increased load, so they wear out faster and may fail.
Cause of generator failure
The failure of the generator in a Lada Kalina car is influenced by several reasons:
- Poor quality of vehicle operation. This implies ignoring regular technical inspections, timely replacement of the timing belt, and repair of structural parts.
- Using low-quality oil. Oil reduces friction between parts and improves their performance. If you use low-quality compounds, the friction index may increase, which will lead to failure.
Also, the generator may fail simply because its service life has expired. In any case, the car owner will need to replace the unit in order to continue operating the car.
How to check the diode bridge on a generator with a multimeter and a light bulb?
The importance of the diode bridge in the generator is determined by its useful properties of rectifying current. You can verify the functionality of the diode bridge only on an installed generator; removing and disassembling it can take a lot of time and effort. However, knowing certain subtleties of the operation of electrical appliances, you can find out whether you are holding a working diode bridge in your hands or not? Today we will tell you how to test a generator diode bridge, but first you will learn what it is for.
The role of the diode bridge in the generator
As is known from electrical engineering sciences, there are two types of electric current - alternating and direct. Their main difference is that in alternating current charged particles move in different directions, but in direct current only in one direction. Alternating current has good economics in terms of transmitting it over long distances, but many electrical appliances now operate only on direct current.
In addition, to charge a car battery and operate many electrical appliances, direct current is required, which cannot be obtained from a generator. It is for these purposes that a diode bridge is installed in the generator.
The diode bridge is made in the form of two metal plates that conduct electric current. Special semiconductor elements - diodes - are built throughout the entire area of the plates, which are installed in an alternating order. The essence of the operation of diodes always and everywhere is that they pass a quantity such as current only in one single direction, thus rectifying the voltage.
The alternating voltage coming from the generator ensures a change in the direction of electron movement. Therefore, to obtain a constant voltage, it is necessary not only to block the passage of electrons in the “wrong” direction, but also to redirect them so that both phases of the alternating current work to create a direct current. This task is performed by the diode bridge. Thanks to alternating current, voltage alternately appears at the terminals of the phases, which makes it possible to separate positive voltage from negative. In this case, each diode of the bridge passes voltage only in one direction, so two diodes are connected to each terminal of the generator, separating the positive and negative voltage. There are often generator models that produce not only positive voltage relative to the body, but also negative voltage, so they have three diodes connected to each winding terminal. On many modern machines, the diode bridge is more complex, but the general principle of operation is unchanged, and the battery acts as a capacitor that dampens voltage fluctuations.
Diode bridge test circuit
It often happens that the diode bridge simply fails. This can happen if the polarity of the battery is reversed or an electrical short occurs in the generator. When purchasing a new one, or when repairing an old diode bridge, it must be checked before installing it on the car. To do this, you can use two methods, which are listed below.
Malfunctions
There are only two constant voltage sources in the car that ensure the operation of the on-board network - the battery and the generator. Therefore, any malfunction of the diode bridge necessarily affects the operation of the on-board network. If your new battery runs out quickly, the headlights are dim, or the starter is difficult to start in cold weather, there is a high probability that the problem is in the diode bridge. If the receiver or CD/USB player begins to distort the sound while the engine is running, then there is a high probability that the problem is in the diode bridge of the generator.
When one of the bridge diodes is broken or broken, instead of a stable pulsating voltage, a voltage with dips appears at the generator output. Indeed, during the corresponding half-cycle, the diode cannot transmit voltage to the on-board network, which is why the failure occurs. The battery to some extent compensates for these failures using its resources, but the overall network voltage becomes slightly lower. In addition, failures are sources of electromagnetic interference, which negatively affect sound-reproducing equipment.
GeneratorLada Kalina
Generators 9402.3701-06 or 5132.3771 are installed on cars. The generator is a synchronous alternating current electric machine with electromagnetic excitation and a built-in rectifier using silicon diodes. The generator rotor is driven by a poly-V belt from the engine crankshaft.
| Generator Specifications | |
| Maximum output current (at 14 V and 6000 min-1), A | 85 or 90 |
| Voltage, V | 14,4-15,1 |
| Engine-generator gear ratio | 1:2,4 |
| Direction of rotation (drive side) | Right |
The stator and generator covers are secured with four bolts. The rotor shaft rotates in bearings installed in the covers. The lubricant placed in the bearings at the factory is designed to last the entire service life of the generator. The rear bearing is pressed onto the rotor shaft and installed in the rear cover with a small gap. The front bearing is installed in the front cover of the generator with a slight interference fit and closed with a pressure plate; the bearing has a sliding fit on the rotor shaft. The rear part of the generator is covered with a plastic casing. The generator stator contains a three-phase winding. The ends of the phase windings are connected to a rectifier bridge consisting of six (or eight) silicon diodes (valves): “positive” and “negative”. The valves are pressed into two horseshoe-shaped aluminum holder plates in accordance with the polarity (“positive” and “negative” - on different plates). The plates are combined into a rectifier unit mounted on the back cover of the generator (under a plastic casing). The excitation winding is located on the generator rotor, its leads are soldered to two copper slip rings on the rotor shaft. Power is supplied to the field winding through two brushes. The brush holder is structurally combined with the voltage regulator and is mounted on the back cover of the generator (under a plastic casing). The voltage regulator is non-separable; if it fails, the brush holder and regulator assembly are replaced. To protect the on-board network from voltage surges during operation of the ignition system and reduce interference with radio reception a capacitor is connected between the terminals of the “positive” and “negative” valves (between the “+” and “ground” of the generator). When the ignition is turned on, voltage is supplied to the excitation winding of the generator (terminals “L” or “D+” of the generator and “+” of the regulator) through indicator and resistors in the instrument cluster (the indicator lights up). After starting the engine, the excitation winding is powered by the diodes of the rectifier unit (the alarm goes off). If the indicator lights up after starting the engine, this indicates a malfunction of the generator or its circuits. Gambling entertainment is now offered by various Internet gaming portals. Any user can choose available licensed casino sites in Russia on edgarpoe.ru. The verified addresses of online gambling establishments presented here can be used by guests from different countries. Russian fans of excitement will also be able to relax comfortably on them.
The “minus” of the battery should always be connected to the “ground” of the car, and the “plus” to the “B+” terminal of the generator. Switching back on will lead to breakdown of the generator valves. It is not recommended to disconnect the battery while the engine is running. The resulting voltage surges in the on-board network can damage the electronic components of the circuit. The generator valves (and other devices in the vehicle’s on-board network when the generator is connected) should be tested at a voltage no higher than 14 V; higher voltage (for example, when checking with a megger) can cause damage to the valves . If it is necessary to check the insulation of windings with high voltage, the generator should be removed, and the winding terminals should be disconnected from the rectifier unit and voltage regulator.
Generator mounting parts: 1 - upper bolt; 2 - nut; 3 - generator bracket; 4 - nut; 5 - bushings; 6 - lower bolt.
The generator is mounted on a bracket fixed to the engine. The generator is attached to the bracket with two bolts and nuts. The head of the upper bolt is kept from turning by two protrusions on the bracket. The lower bolt nut is installed in the hexagonal recess of the bracket. A spacer sleeve is installed in the lower left hole of the bracket for the generator mounting bolt.
content .. 220 221 222 223 224 225 226 227 228 229 ..
Replacing the Lada Kalina generator
The article provides general information about Lada Kalina generators and explains how to replace the regulator relay and the entire generator itself.
The generator must always be in good working order
Any modern car is equipped with electrical equipment that is absolutely necessary for the vehicle:
- without a starter it is impossible to start the engine;
- a car cannot be driven without lighting at night;
- The heater motor creates heat in the cabin;
- The wiper motor clears the windshield of rain and snow;
- FM radio makes it possible for the driver not to get bored on the road.
But all these devices cannot work without electricity, so the car must have a power source.
The current from which all consumers in the car are powered is produced by the generator, and the performance of the entire electrical circuit of the vehicle depends on its condition.
Therefore, the generator must always be in good working order, and if any breakdowns occur with it, they must be eliminated in a short time.
Generator Lada Kalina
Lada Kalina cars are equipped with three-phase generators that produce alternating current; to produce direct current, a rectifier unit is included in the generator circuit.
AvtoVAZ equips VAZ 1118 cars with generators of the type 5132.3771
or9402.3701-06
, there are many different manufacturers producing spare parts for VAZ cars.
The generator for the Lada Kalina can be of different power; the industry produces current sources of 85, 100, 90, 115, 120, 135 Amperes.
Among the most famous manufacturers of VAZ parts are:
- Pramo;
- StartVOLT;
- KZATE;
- LKD (China);
- Eldix (Bulgaria);
- ISKRA (Slovenia);
- BATE (Belarus);
- Bosch.
VAZ generator repair
› Repair of generators in St. Petersburg › Repair of VAZ generator
One of the important activities of the Exclusive automobile service center is the repair and replacement of generators. We service both domestic cars and foreign cars, and we have been providing excellent services such as VAZ generator replacement for more than 20 years.
The generator is the “second heart” of your car.
We are happy to provide our services for all VAZ models, for example:
Important advantages of the Exclusive car service
- We provide a guarantee for all types of work performed in our auto repair shop on Vasilyevsky Island.
- We carry out repairs and replacements of the VAZ generator and all its components extremely quickly - on the day of your call.
- Our tangible advantage is the presence of our own warehouse of spare parts and components for starters and generators.
- At the Exclusive car service center, diagnostics of the VAZ generator are free.
Get a free consultation by phone: 327-99-50
The largest car manufacturer in Russia. The plant was built on the initiative of the Chairman of the Council of Ministers of the USSR Alexei Kosygin in the 1960s. . Equipment and technologies for it were purchased from the Italian concern Fiat. During the Soviet Union, its model range consisted of the following brands: Zhiguli, Niva, Oka, Sputnik, Samara. Today it produces various modifications of cars under the general name Lada, and also assembles Nissan and Renault cars, since these global brands have a controlling stake in VAZ.
Initially, VAZ cars were designed to saturate the domestic market of the USSR. They were affordable, reliable and easy to repair. At the present stage, these qualities have been supplemented by comfort and ease of operation, thanks to many additional options and modern functional equipment. At the same time, the price remained very affordable.
VAZ generator replacement
To identify all generator malfunctions and determine the scope of work, it is necessary to carry out diagnostics.
Our qualified technicians will professionally determine the extent of the breakdown and will be able to say for sure what will be most optimal - replacing or repairing the VAZ generator.
Standard repairs are carried out without interfering with its internal structure, in contrast to major repairs, when it is inevitable to disassemble the unit.
Price list for repair of VAZ generators
Repair services for VAZ generator Price, rubles
| Removing/installing the generator | From 880 |
| Replacing generator brushes | From 330 |
| Replacing the generator bearing (front and rear) | From 770 |
| Replacing the regulator relay | From 770 |
| Rotor replacement | From 550 |
| Replacing a diode bridge without soldering | From 330 |
| Replacing a diode bridge with soldering | From 660 |
| Diagnostics of a generator without a c/o | Free* from 330 |
| Replacing the battery | Check by phone |
| Replacing collector rings | From 770 |
For more information about the service, see the section: generator repair
When you print the coupon, you get a 5% discount on your first visit! There is a cumulative discount system
Our car service center on Vasilyevsky Island repairs and replaces VAZ generators of all the following models:
- Lada Kalina 1117/1118/1119
- Lada Samara 2113/2114/2115
- Lada Priora (Lada Priora 2170/2171/2172/21728)
- Lada Granta
- Lada Largus
- VAZ 2104
- VAZ 2105
- VAZ 2106
- VAZ 2107
- VAZ 2108
- VAZ 2109/21099
- VAZ 2110
- VAZ 2111
- VAZ 11113 Oka
- VAZ 2114
- VAZ 2115
- Niva Chevrolet
VAZ 2107 generator replacement
VAZ 2114 generator replacement
VAZ 2115 generator replacement
replacing the Niva Chevrolet generator
Same day servicequick solution to car problems
We accept payment by any cards
— Without your consent there will be no additional work or increase in the estimate.
— Clear information on the total cost and repair time.
“We’ll tell you what needs to be done urgently and what can wait.”
— Our policy is not to impose unnecessary work on the client.
We fix problems the FIRST time!
— Extensive experience of specialists.
— Professional diagnostic and repair equipment.
Written reviews from our clients:
— Own warehouse of spare parts and consumables, both original and non-original.
Replacing the roller and brushes
If you hear a rustling noise coming from the tension roller of the Lada Kalina generator belt, then you need to check its serviceability and replace it.
To perform this procedure, you need to use a set of wrenches and a flat-blade screwdriver. Replacing the roller is a very simple procedure. To perform this, you must first loosen the belt tension by unscrewing the rod. Then use a flat-head screwdriver to pry off the protective cap of the roller and unscrew the bolt securing the bearing to the bracket.
The bushing and washer are removed from the old roller, then they are installed on the new roller. The entire assembly assembly is placed in place of the old roller and secured with a bolt. Next, the belt is properly tensioned and the car engine is started to check how the new roller works. After replacing the roller, no extraneous noise should be heard from the Lada generator.
One of the reasons that the battery does not charge well is wear on the generator brushes. To eliminate this malfunction, it is not necessary to replace the entire generator; it is enough to change only the brushes. To check their condition, the brushes must be removed and inspected. This can be done both with the generator installed and with it removed.
To avoid a short circuit when performing this procedure, it is necessary to remove the negative terminal of the battery. After this, remove the protective cover of the device and remove the power plug using a flat-head screwdriver. In this case, you need to make sure that the solder does not come off from the voltage regulator.
Replacement process
The process of removing the generator on Kalina depends on whether it has a tensioner on it or not. A belt without a tensioner can only be removed together with the generator or simply cut (if it’s old).
- Disconnect the negative wire from the battery.
- Loosen the generator and remove the belt.
Use a 13 key to loosen the tensioner and remove the belt.
By pressing the latch, we snap off the plastic block.
Lift the boot and unscrew the nut by 10.
The mounting bolts are located at the top and bottom of the generator.
The latches are located on the side surface of the cover.
Mounting the regulator relay: 1 – contact under the bushing, 2 – bolts securing the relay body.
View of the generator with the relay removed.
After assembling the unit, it is necessary to check the reliability of the wire connections and tighten the generator belt.
Important! Before installing a new generator charging relay on Kalina, it is recommended to check its condition: make sure that the brushes are intact (they must protrude from the relay housing by at least 5 mm ); easy, without delay, clicking into the initial position after pressing.
Critical wear of the brushes on the old relay.
Briefly about articles and applicability
We should talk about the applicability of a particular charging relay after the model of the generator from which it was removed has been installed.
9402.3701-06 or 9402.3701-14 ( 14 V , 85 A were predominantly installed on Kalina, Granta and Priora . Part numbers of compatible voltage relays:
- KZATE "Orbita" (Saransk) 849.3702 , costing 500-750 rubles .
New voltage regulator made in Saransk.
Important ! On Priors with a generator 3701010 , which has an output current of up to 115 A, is not interchangeable with the Kalinovsky one !
