The bumper has now become an integral part of the body of any vehicle. It not only completes the appearance, but also performs a completely utilitarian function - it protects the car from minor damage. During a collision, it usually breaks, due to which the inertia of the impact is partially absorbed.
Older car models have metal bumpers. Consequently, this fact led to the fact that the car received much greater damage upon impact. This caused significant damage not only to the vehicle itself, but often to the people sitting in it. Modern bumpers are made of plastic or synthetic resins - they are softer and perform their role perfectly. There is, however, one significant drawback - after a collision, most likely, it will have to be replaced.
When does it become necessary to remove the bumper?
In reality, it is a rare car owner who can boast that he has never had to remove the bumper himself in his life. This is usually required in cases where:
- The power unit is being repaired;
- a new radiator is installed;
- a decorative grille is installed;
- The damaged front (or rear) bumper of a VAZ-2115 is being replaced.
It is worth noting that if this element of the car was damaged, the owner can either buy a new one or try to repair the old one.
We'll tell you more about the repair below.
How to replace a bumper VAZ 2114 2115 2113
The VAZ bumper is an energy-absorbing device in the form of a bar, located in the front and rear parts of the Lada Samara 2 car. This important safety element is a mandatory part of the body and gives the car a beautiful appearance.
Body kits have 2 functions:
- Decorative. The car looks more improved. The manufacturer developed inflated body elements as styling for the VAZ 2114. They look aesthetically pleasing and at the same time increase downforce when driving at high speeds, which improves safety.
- Protective. The bumper protects the car from light impacts and damage, protects the reinforcing beam, body and other parts.
VAZ 2113/2114/2115 models are equipped with 2 bumpers:
- in front of him;
- rear
Body kits are made from 2 types of plastic material:
- thermoplastic;
- thermosetting.
Thermoplastic plastic can be easily softened and is combined into a homogeneous structure during repairs. Thermosets cannot be repaired by welding.
The material marking is located on the inside of the body element.
As the vehicle is used, various collisions and obstacles may occur, followed by deformation of the body kit. Replacing the front bumper of the VAZ 2115 in this case is mandatory.
If you leave the damaged part, then with a possible next impact, all the energy will be directed to the car body, as a result of which many mechanisms will fail:
- radiator, its grille;
- fan;
- wheel arch liners
In case of minor damage, such as scratches, small cracks, the body kits can be glued, puttied and painted. The reasons for removing this part are as follows:
- deformation of an element as a result of a collision or impact;
- engine repair, reinforcement beam, radiator replacement;
- installation of a protective mesh, decorative lining;
- replacement of headlights, installation of optics.
The rear body kit of the VAZ 2114 differs from the front one in the absence of holes for the vehicle registration number.
The reasons for repairing and replacing the rear bumper of a VAZ 2114 are the same as for the front element:
- integrity violation;
- body deformation;
- chips, cracks.
How to choose the right new bumper
Nowadays, stores sell not only products produced directly by VAZ, but also many replicas manufactured by various companies. Quite handicrafts are also often found.
To avoid purchasing low-quality goods, you need to use the following recommendations:
- the thickness of the plastic should be the same as the old one, or better yet, even greater;
- It is important to guess the shade if it is sold already painted.
Of course, no one forces the car owner to replace a damaged bumper, but it significantly spoils the appearance of the car. Moreover, if another accident occurs, then he will no longer be able to protect anyone or anything.
Replacement process
Before the replacement process itself, it is better to go to a car wash and thoroughly rinse the fender liners and the lower part of the bumper. This will help you stay clean during replacement and make it easier to find all the fasteners. If possible, take an assistant with you who will hold the part during removal and, most importantly, help install the new part.
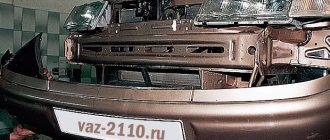
Under the headlights and radiator grille on the bumper amplifier there are teeth on which the part itself is placed with special slots. It may be necessary to remove the headlights along with the grille for safe dismantling. This is very inconvenient, but it is not always possible to cope without these actions.
It is better to remove the front bumper of the VAZ 2114 in order:
- First, unscrew the fender liners. Usually they are secured with three self-tapping screws, but it’s better to look carefully, perhaps in your case there will be more.
- Next, we find the mount to the amplifier, which are located at the bottom under the bumper.
- After this, unscrew the side fastenings. You can get to them by moving the fender liner to the side and turning the wheel all the way.
- The last step is to remove the license plate and see two more mounts to the amplifier.
- After all procedures, the part should be easily removed from the car.
Installing the front bumper of the VAZ 2114 occurs in the reverse order, but try not to immediately tighten the fasteners, which are located under the number. Hang the new element onto the two front bolts, then adjust the side fasteners so that the element fits into the gaps. If it fits correctly, you can finally screw it to the body. If you neglect this advice, the part may not be placed coaxially with the car body and will be shifted to the right or left, which looks awkward. This will be especially noticeable in the gaps with the headlights and radiator grille. If an element is being replaced as a result of a collision, immediately check the condition of other parts hidden underneath it. The front TV, bumper reinforcement, and fender mounts may be jammed. If you don't pay attention to this, no matter how hard you try, the new part will not fit correctly.
Useful : How to properly adjust headlights and PTF?
Removing the bumper
To do this you will need the following tools:
- Phillips screwdriver;
- socket wrench 10/8;
- end at 13.
Usually the procedure takes no more than an hour. To make the replacement more convenient, it is better to install the car in a pit.
To dismantle the bumper you will need to perform the following steps:
- move the protection away from both front wheels, having previously unscrewed the fixing screws;
- use a 10mm wrench to tighten the nuts located inside the bumper (there are 4 of them in total, 2 on each side);
- dismantle the license plate;
- unscrew the bolts hidden under it and located below, in special openings;
- Then the protective element itself is removed.
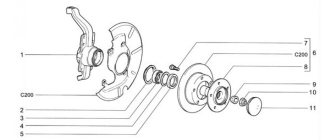
If it turns out that the amplifier has also become unusable, it will need to be replaced with a new one. It is held in place by two nuts, unscrew them using a 13mm wrench.
Now all that remains is to move both side brackets from the old to the new. They are secured with three screws each.
It is important not to forget to adjust the amplifier. There should be a gap between it, the headlights and the fenders. This is not difficult to do, since there are special slots on it.
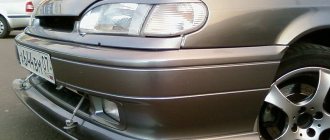
Front bumper
Replacing the front bumper of a VAZ 2114 with your own hands takes a little time. If it is necessary to replace the radiator or grille, the procedure takes longer. Removing the body kit for all VAZ 2113-2115 models is carried out in the same way.
Tool
To replace the body kit you will need the following tools:
- Screwdriver Set;
- open-end wrenches 8 and 10 mm;
- 13 mm ratchet head with crank.
Step-by-step removal
To remove the front bumper of a VAZ 2114, place the car on a viewing hole or a lift. The algorithm for dismantling the body kit is as follows:
- The electrical connections to the license plate and fog lights must be turned off before any work can be done.
- The fastening bolts and nuts are treated against rust, as well as for better loosening, with VD-40 aerosol.
- Unfasten the front wheel fenders.
- Unscrew the fender liner mounting plate with a 10 mm wrench.
- Remove the 3 screws that are attached to the body kit.
- Using a 8 key, remove the 6 screws securing the fender liner to the front fender.
- Pull back the fender liner.
- Remove the radiator and headlight trims.
- Using a 10 mm wrench, unscrew the 2 nuts securing the left side of the bumper.
- Pull it a little to the side so that the studs come out of the body bracket.
- In a similar way, you need to unscrew the right side of the bumper.
- Using a Phillips screwdriver, remove the mounting screws under the license plate and unscrew the 2 screws located below. Disconnect the license plate.
- Remove the bumper.
If the amplifier is damaged, replace it. Using a 13 mm socket, unscrew 2 nuts on each side. The amplifier is adjusted during installation using shims.
Homemade lip for VAZ 2114
I've long had a desire to make a so-called bumper lip, but never got around to it.
But we finally got there) It would have been easier to buy a universal lip, but I wanted to make it myself and see how it would look. They fitted me with a front bumper whose top was broken, but the bottom part was intact, and that’s exactly what I needed) I didn’t know how to take photos of mine, but I’ll show you the example of photos from the Internet) we take any bumper Stock bumper
Mark the line where you will need to cut
Red indicates where the cut will be
We cut the bumper along the line. Basically the lip is ready. But I wanted to clean the paint off the bumper; I wanted a pure plastic color.
Cleaning off the paint
front view
Here is the finished result
This is the mounting location, they are available on every bumper
Next is installation. All standard 2114 bumpers already have holes) and simply attach the lip to the bumper with a bolt, nut and washers.
Here is the finished result
I did it for the first time) and of course there were some mistakes) I will also soon make a second lip, instead of this one, which I want to make better) Also, since my bumper is restyled (i.e., the Sport model) looks great, it is attached just like the factory one. As a result, 0 rubles were spent) but several hours of work)
before
after
Bumper for VAZ 2114 I'm a robot
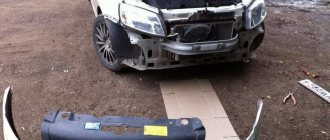
The other day they called from the transport company and said that my order had been completed and I could come and pick it up) I didn’t expect it to be delivered so quickly and I was very happy about it) No sooner said than done and now I’m flying home to deliver this beauty. Along the way, I stopped at a store where they bought two Priora fog lights, a connection kit for VAZ 2114 fog lights, and 2 plugs for Priorov fogs since the sockets in Samara 2 PTF differ from Priorov ones)
I had to tinker with the installation since I was removing the bumper for the first time, which took a lot of time, and at the same time I brought out the wiring for the PTF into the interior and to the bumper. And now the old bumper is removed and a new one is installed.
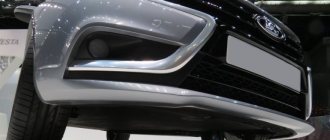
For a long time I could not understand how it was attached. Thanks for the help MichaelKnight who explained what is screwed where. And here is the final result: the bumper is installed. There is a small jamb, on the left side the gap is very large, but this will be eliminated over time.
Final result
Thank you all for your attention, good luck on the roads)
PS Question for BC Multitronics users. These are the readings my on-board vehicle gives) The engine temperature is -40, the car is standing still, and the speed shows 48 and rpm 0, respectively, the instantaneous consumption does not correspond to reality for a second. What's wrong with him, tell me? Hana BK? It's just still under warranty)
And when you start moving, he yells every minute that the speed is over 200 km/h))))) It was cool to see this when starting from a traffic light)
Peace for everyone)
Reasons for withdrawal
In fact, there can be many reasons for removing the front end of your car. Everyone has their own views on this issue.
But let’s still name the main reasons why car owners most often turn to car services or decide to dismantle and even replace the front bumper on their own.
- The replacement was caused by damage to the element as a result of a collision or accident. The integrity of the structure is compromised, and driving with a broken front end is not particularly pleasant.
- Dismantling work with the subsequent return of elements to their place can be carried out due to engine repairs, when replacing the radiator and other components of the engine compartment.
- External modification in the form of tuning the front of the car.
- Replacement of headlights, installation of new optics.
- Installation of decorative overlays, mesh.
Dismantling works
If the bumper is broken, then you have two ways to solve this issue - replace it with a new one or try to restore the old one. This largely depends on the desire and degree of breakdown of the previous element.
How to choose
When choosing a new bumper for the front of your car, you should adhere to several of the most important, but fairly simple rules and recommendations.