In 2008, the Russian AvtoVAZ acquired from the French Renault the entire list of rights to produce and sell models built using the common R90, F90 and B0 platforms. An addition was the fact of a deal to equip cars with engines with 1.4 and 1.6-liter volumes. This approach allowed the universal version of the Lada Largus to appear in the automotive world. This car is a joint project of several corporations, although the Dacia Logan MCV model was used as a prototype.
The exterior of the universal “Russian” Lada Largus is made in a simple style, where the components do not have intricate design delights. Manufacturers have used traditional rectilinear forms of body panels, small overhangs that help quickly overcome potholes, and wide moldings located on the side elements. Also, the sides of the car have an impressive glass area, which contributes to good visibility. The stern doors are hinged and have useful latches that allow you to hold the doors in any position, from perpendicular to the body to fully open. Sometimes the owners of the model install a cover on the rear bumper.
Why dismantle
There may not be many reasons for a driver to remove the bumper on his car. It is not at all necessary to contact a service center for this, where you will have to pay a considerable amount for repairs. Everything can be done with your own hands. Why the driver may need to remove the bumper:
- Breakdown – this happens as a result of a traffic accident or improper parking. It happens that the part itself is intact, but the back panel requires repair.
- Painting – requires dismantling for better painting of the body.
- Body improvements - installation of a new bumper, etc.
- Installation of additional accessories, for example, parking sensors, etc.
- Installation of overlays, etc.
General questions about body kit 2190
Let's answer a couple of basic questions about Granta bumpers.
Why you may need to replace the bumper
Possible reason for replacing the body kit on a VAZ 2190:
- Minor (or major) accident;
- Installation of a non-original body kit;
- Installation of additional devices: emergency parking sensors, rear view camera, etc.;
- Curiosity.
There are many options for non-standard body kits for Lada today.
Non-native body kits are made unofficially. This can lead to problems with joints and color mismatches.
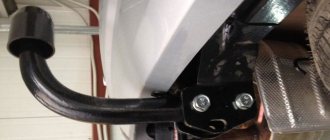
Where to find the front bumper amplifier
Unlike pre-restyling Kalinas, Grant comes with a bumper reinforcement from the factory. Many people confuse it with a regular mount. You will gain access to the part only after dismantling the front body kit.
The amplifier on the Lada is rather symbolic, like the factory crankcase protection. But there is no such thing on Kalina.
Replacement
Lada Largus Logbook DRL from standard Largus lamps
The car received a proven and recognizable body. The Largus bumper is a high-tech solution, but it can also get damaged and break. Dismantling is necessary to carry out repair work on the body element itself or the parts that are hidden behind it. Removing the part is not as difficult as it might seem.
Removing the rear bumper
To work on a car you always need some tools. It is not difficult to remove the bumper, but for this you need at least a minimum set (usually every car enthusiast has one in the garage). We will need:
- Head 10;
- Nozzles type T20 and T30;
- For rear bumper: flat head screwdriver (clip removal tool).
It is not at all difficult to remove the rear bumper of the Lada Largus.
Attention! The whole process will take no more than an hour (you can complete it in half an hour, everything will depend on the skills of the master).
First you need to prepare a workplace and all the tools. Next, provide free access to the bottom of the car. Drive the vehicle into the pit or lift the body with a jack (you can do without lifting, but in this case it will take more time and effort to dismantle).
The process of removing the Largus rear bumper:
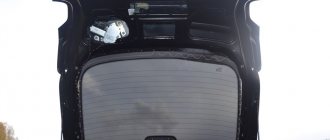
The first step is to detach the fender liners from the base. Take a 10mm socket and unscrew the fixing screws on the back (2 pieces on the right and left of the fender liner). Under the fender liner there are screws connecting the part and the rest of the body. Unscrew them. The next step is more difficult. You have to remove the lights. The part cannot be dismantled together with them. Unscrew the screws that connect the bumper and amplifier. There are 4 screws between the seal on the trunk and the part; they need to be removed (they secure the buffer on the rear panel)
Carefully, using a flathead screwdriver, remove the fasteners from the side. We disconnect the edges of the front side from the wings
With a smooth movement down and back, remove the buffer.
You can install the part in reverse order.
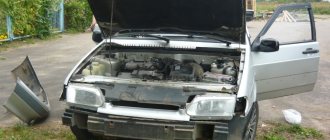
Removing the front bumper
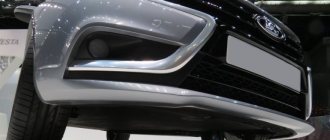
Usually the front bumper of the Lada Largus is removed if it is necessary to carry out body repairs, replace an element, or gain access to parts. Also, the part is dismantled when removing the radiator grille, which is built into it. Its cladding is designed as one piece with the bumper.
Tools:
- Mounting blade;
- Flat screwdriver;
- Key with 10mm head;
- T30 nozzles.
The process of removing the Largus front bumper:
- Unscrew the three screws securing the front lower part of the side motor splash guard (they need to be pulled out).
- Take the tool, pull out the core from the retainer of the rear securing part of the mudguard and remove the retainer itself.
- Remove the piston by removing it from the mudguard mounts with a tool.
- Disconnect the two parts of the mudguard (upper and lower) and remove the upper one.
- Remove the fender liner.
- In the same way, release and remove the lower mudguard and the right fender liner of the car.
- On the left side there are wires stretched to the fog lights; disconnect the block.
- Remove the screws securing the bottom of the lip to the subframe at the front of the car.
- Near the wheels (on both sides in the arches), unscrew one fastening of the side parts of the bumper, which are connected to the wings (they need to be separated).
- Release the top by unscrewing the 4 screws along the edge connected to the radiator frame.
- The rear corners need to be pulled downwards to take the stops from the holes that secure the bumper along the lower edge.
- Point the sides forward and dismantle the part.
- The wire feeding the fog lights can be removed if it is in the way.
- Unscrew all the screws securing the headlights (4 pieces each) and remove them.
- By pulling out certain plastic fasteners (located on the inside of the body), you can remove the radiator grille, headlight trim, air guide shields, and lower grille.
After the work has been completed, the bumper is installed on the car in the reverse order.
Removing the bumper is not difficult; any driver can do all the work independently, without the help of a service center. However, for this you must have at least basic knowledge of working with a car.
- How to change wheels on Largus
- Fuel filter Chevrolet Lanos
- Peugeot Boxer fuel filter
- How to change filters in Mitsubishi ASX: cabin, air, fuel
How to remove the rear bumper of a Lacetti hatchback
If you don’t know how to remove the rear bumper of a Lacetti hatchback, then this photo article will help you do it quickly and without problems with a minimum set of tools.
There are many reasons to remove the rear bumper. But let’s not dwell on this, but let’s get straight to the point.
I’ll say right away that despite a lot of body movements, removing the rear bumper of the Lacetti hatchback is not at all difficult.
To begin dismantling the bumper, you need to remove the trunk trim. This is done quickly, and the entire short process is outlined in the article How to remove the trunk trim of a Lacetti
After removing the trunk trim, we will need the following tools:
- 10 mm wrench (socket or socket)
- 7mm wrench
- crosshead screwdriver
- 14 mm wrench (may not be needed)
- possibly a jack and a wheel wrench
- Movil and rust converter (optional, to make you proud of the work done)
So, let's begin this important process.
How to remove the rear bumper of a Chevrolet Lacetti hatchback
First you need to remove the fender liners, if they are installed on your car.
For these purposes it is convenient to remove the wheel, which is what I did. I don’t unscrew the mudguards, because I don’t see the point in suffering in an awkward position, but I remove them along with the bumper. Then, if necessary, they can be unscrewed in convenient conditions.
- After the fender liner is removed, a 7 mm wrench bolt will appear. It must also be unscrewed
- We carry out the same procedure on the other side of the car.
- Then use a screwdriver to unscrew the plastic holders from the bottom of the bumper
- Now use a Phillips screwdriver to unscrew the four screws along the upper perimeter of the bumper
This completes the dirty exterior work. We move to the trunk.
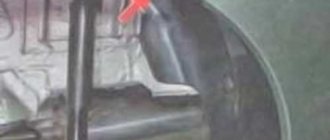
Here you need to unscrew two nuts and one bolt on each side. To make their location more clear, I will first show their places on the removed bumper.
- The red arrows show the location of the nuts, the yellow arrow shows the bolt, and the green arrow shows the bolt, which we have already unscrewed with a 7 mm wrench
- Here are two 10mm wrench nuts on the right
- And a bolt with the same key. It is more inconvenient to unscrew it on the right side than on the left
- All this fastener is on the left side
- All that remains is to unscrew the two bolts securing the bumper amplifier, located on the trunk floor on the right and left
But! Not on all Lacettis the bumper is removed along with the amplifier. For some it’s like this after an accident, and for some it’s like this from the factory... Therefore, you may not need to unscrew these two bolts if the bumper is already in your hands
If you removed the bumper to repair it, then read the article Repairing and gluing the bumper
That’s all, as it were, but since such work has been done, it would be a sin not to give the body a little anti-corrosion maintenance.
Body repair Lada Largus Lada Largus in St. Petersburg
Lada Largus Sound box Logbook Fuel consumption
Lada body repair in SKR is a high-quality and inexpensive repair. At the Body Repair Station, Lada cars are constantly dealt with. We have extensive experience working with this brand, which allows us to easily carry out all repair work on the body and more. Lada body repair is not particularly difficult for us. We are used to working with spare parts for this car. And we will tell the car owner which Lada body parts are best to purchase. And if you want to achieve the highest quality results in repairing Lada cars, leave all the hassle of selecting spare parts to us. Our craftsmen personally inspect spare parts and select the most accurate stamping possible. This allows you to achieve a good final result in the repair. If you are interested in the cost and timing of Lada body repairs, call tel.
The owner of a Lada Largus car came to our car service center to assess the cost of damage. Our master examined the car and assessed the external damage to the body, naming the price. The client was satisfied with the price, and he left the car in our car service center.
Lada Largus has features that do not allow internal damage to be assessed. The bumper with radiator grille tightly covers the entire internal structure. But based on the nature of the impact and external damage, we assumed that the bumper reinforcement remained intact. When removing the bumper, it turned out that the amplifier was damaged, the bumper was a plastic element and after the impact it simply snapped back into place. The amplifier on Largus is not a separate element, but part of the structure, it became clear that the cost of repairs would change. We invited the client to a car service center in order to show the internal damage and agree on further actions. They quoted the full amount of repairs, taking into account all hidden damage, and the client agreed to continue the repairs.
Body repair of Largus consisted of the following work:
- Hood repair and painting
- Replacing and painting the front right fender
- Replacing the right headlight
- Front bumper - replacement and painting
- Front bumper reinforcement - replacement and painting
Repairing the Largus bumper did not make sense, since the price of a new bumper is much lower. There is an option to buy a bumper directly in color, but such elements may have an error in tone and will stand out against the background of the factory-painted body.
The renovation of Largus was carried out efficiently. All elements were painted to exactly match the tone of the body. Further operation of the Lada Largus is possible immediately after completion of the work.
Largus spare parts are not expensive, for this reason it is sometimes more profitable to replace even something that can be repaired. We easily found all the necessary elements and delivered them to the car service center. The client did not have to waste time on the process of purchasing spare parts.
The Lada repair was completed on time, all work is guaranteed. Service of Lada Largus is also possible in our car service center, about which the client was informed.
You can find out how much any repair costs by calling or sending your question through the form on our website:
You can estimate the cost of the work by sending us a photo by email [email protected]
In SKR there is an opportunity to purchase spare parts for your car. All spare parts are ordered to our customers at purchase prices. The price for any repair in our car service does not exceed the price for a similar repair in any other car service. There are a lot of car repair shops offering Lada car repair services in a city like St. Petersburg. But high-quality repairs, combined with a wide range of repair services, are practically non-existent.
SKR is a high quality Lada repair in any area of car repair!
Contacts:
The SKR body repair station is located in St. Petersburg, on the street. Novorossiyskaya, 53 Lit.B, on the border of the Vyborg and Kalinin districts. The nearest metro station is Ploshchad Muzhestva.
Address: St. Petersburg, st. Novorossiyskaya, 53 Lit.B
Telephone:
Every third owner of Lada Largus was faced with the need to dismantle the front bumper. Not every car enthusiast is able to do this, because he is not an expert in this field or simply does not have the necessary knowledge.
Video about removing the front bumper on a Lada Largus and installing a radiator mesh:
Dismantling process
So, let's look at the step-by-step process of dismantling the front bumper:
- Before you start this simple task, you need to prepare. It is best to place the car on a lift, but at worst, you can use a pit.
- Now let's move on to the dismantling process itself. Remove the lower plastic protective mudguard. To do this, unscrew the fasteners that are located in front. The back and middle parts are attached to plugs that can be removed using a special tool or screwdriver.
- Now, you need to unscrew the front fender liners from the bumper.
- Next, you should find the wire connector that is responsible for the fog lights and disconnect it. It is located in the left arch of the body mudguard.
- We unscrew the screws that secure the bumper to the subframe from below.
- You should also unscrew the screws securing the bumper to the fender on both sides.
- Next, unscrew the upper mounts of the buffer to the radiator frame.
- We lower the edges of the bumper where it was attached to the wing and, pulling it forward, remove the buffer.
- If necessary, remove the wiring harnesses from the grooves that are laid along the bumper.
- We unscrew the fog lights and dismantle them.
- Having released the fasteners, remove the radiator grille.
- We also pull out the lower bumper grille.
- Installation is carried out in reverse order.
Now the front bumper has been removed from the car, and the necessary manipulations can be carried out.
The reasons for dismantling can be very different, but the main one remains physical damage. Many people have come across this concept. So, let's look at the cases in which you will have to remove the front bumper on Largus:
- Road accident. The most common reason why a part needs to be dismantled. In 75% of cases this happens due to the fault of the Largus driver. A simple failure to maintain distance can lead to deformation and damage not only to the bumper, but also to the elements underneath it.
- Colliding with an obstacle (even though the Largus has quite high ground clearance), which resulted in deformation of the lower part of the radiator frame. To eliminate damage to the body element, you will have to dismantle the bumper.
- Replacing the radiator grille will also require removing the buffer. This is so because the frame is an integral part of the security element.
- A banal but worthwhile reason is tuning. To upgrade or install a body kit, you will have to remove the bumper.
- Touch-up paint or other reasons will also be a reason to remove the front bumper.
- In some cases, the bumper will have to be removed if the radiator needs to be replaced.
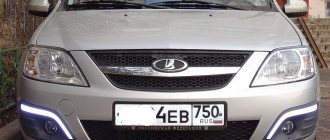
- Installing DRLs (daytime running lights) in the bumper.
All these and other reasons may be a reason to remove the bumper on Largus.
Removing the front bumper on Lada Largus
Lada Largus McQueen Logbook Replacing 5th gear gears
The process of removing the bumper is simple and does not require special knowledge. If you follow the instructions, this operation will take about half an hour.
Necessary tool
Of course, no repair work is complete without tools. To remove the front bumper you will need a minimum set: a flat-edge screwdriver, a 10-mm wrench and a T30 socket. All this can be found in tool kits, which are recommended to have in your car, just in case, or borrow from your neighbor in the garage.
Dismantling process
So, let's look at the step-by-step process of dismantling the front bumper:
- Before you start this simple task, you need to prepare. It is best to place the car on a lift, but at worst, you can use a pit.
- Now let's move on to the dismantling process itself. Remove the lower plastic protective mudguard. To do this, unscrew the fasteners that are located in front. The back and middle parts are attached to plugs that can be removed using a special tool or screwdriver.
- Now, you need to unscrew the front fender liners from the bumper.
Now the front bumper has been removed from the car, and the necessary manipulations can be carried out.
Removing and installing the system cooling radiator
| How to remove the front bumper on a Lada Priora: step-by-step instructions Removal Place the car on a two-post lift, brake with the parking brake, turn off the ignition and disconnect the ground wire terminal from the battery. battery crankcase protection Remove the front bumper Drain the liquid from the cooling system above (see engine). Flush the engine cooling system (see For). higher than vehicles with power steering reservoir Remove 1, Figure 13-4, the power steering pump from the mounting control, without disconnecting the pipelines, and tie it to Figure. engine 13-4 — Disconnecting the power steering pump reservoir: — power steering pump reservoir; — fastening controls; — bracket for fastening the power steering pump reservoir Unscrew two, remove 2 and screws bracket 3 securing the power steering pump reservoir (screwdriver with Torx bit Operation). T30 for all car configurations clamps Remove the inlet and outlet hoses of the engine cooling radiator (tool for removing elastic clamps Mot. 1448). Disconnect the inlet and outlet hoses of the radiator of the cooling system. For air conditioned cars Figure 13-5 — Removing the air deflector: — air deflector; — air deflector mounting screw Disconnect the wiring harness from the electric fan to the holder. Disconnect the air conditioner pipe from the holder at Disconnect. electric fan condenser 2, Figure 13-6, air conditioner from the engine cooling radiator (flat-head screwdriver). |
Fog lights
At the request of potential buyers, LADA Largus cars are equipped with fog lights, which are integrated into the lower part of the front bumper.
Here:
- Halogen single-filament lamp H11.
- Adjustment screw.
Replacing the lamp
Replacing a burnt-out lamp in the fog lamp of the Lada Largus station wagon begins by dismantling:
- front wheel;
- fender liner installed in the front wheel arch;
By removing the fender liner, we gain access to the niche where the fog lamp is installed.
Further:
- pressing the latch, disconnect the block with electrical wires;
- turn the lamp counterclockwise until it stops and remove it from the headlight housing.
In order to install a working lamp in place, repeat the dismantling process in reverse order.
general information
Manipulating the body kit takes no more than 20 minutes, even for a novice auto mechanic. Bolts with soured threads can complicate the situation and prolong the work time. Most often this happens with the four screws that secure the radiator and body kit. The bolts sit as if rooted, and it takes no effort to move them. In such cases, a penetrating lubricant such as WD-40 comes in handy. It must be applied in advance, right under the bolt head. After a short period of time, the lubricant will do its job, and the screw will easily unscrew.
When installing the body kit, it is recommended to lubricate the screw threads with grease or grease, such as “Universal” or “Mobile”. Thanks to this treatment, it is possible to avoid souring and corrosion of fastening joints. This will make it easier to remove the bumper again and extend the life of the screw elements.
A removed body kit is a good reason to inspect devices and parts to which access was denied. Check the condition of the wires, fasteners, inspect the power bumper, etc. If rust is detected on the body, the area is treated with anti-corrosion treatment. This will prevent further damage and hole formation.
Preparatory work
Before replacing the crossover, you need to carry out a number of preparatory measures and stock up on the necessary set of tools. So, for work you may need:
- TOPX key set.
- Curly and flat screwdrivers.
- Rags.
- Jack.
- Wire brush.
- WD solution
For subsequent ease of replacement, perform the following steps:
- Drive the car onto an overpass, inspection hole, or lift the vehicle using a jack. This way you can easily dismantle the fasteners located on the bottom of the car.
- Using a rag, clean the body kit from dust, traces of corrosion, and dirt. Use a wire brush to brush the underside of the car and wheel arches. Dirt and corrosion will not fall on the driver during the replacement.
- Treat bolts, rivets, screws with WD 40 solution and wait 15-20 minutes. During the operation of the car, corrosion appears on the fasteners and they become clogged with dirt. Subsequently, they are difficult to dismantle. If you cannot unscrew the bolts and screws, cut them off with a grinder.
After carrying out the necessary preparatory work, you can begin replacing the Renault Duster buffer.