Domestic cars have finally become truly modern vehicles, the quality of which meets all the latest standards. However, breakdowns also occur on modern cars.
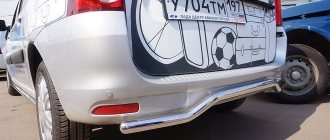
For example, you may need to remove the rear bumper on a Lada Granta as a result of its breakdown. To avoid hitting curbs, you can increase the vehicle's ground clearance. To do this, you don’t have to go to a workshop; you can do everything yourself in your garage.
The process of removing the rear bumper on a Lada Granta
Before starting work, prepare Torx 30 heads, a 10mm socket and a Phillips screwdriver.
1. First of all, unscrew the screws securing the fender liner (bumper) to the body. The screws are on both sides of the car.
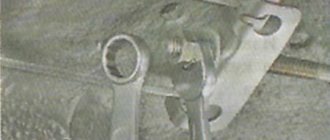
2. Unscrew the three bolts securing the bumper skirt to the body at the bottom.
3. Next, you need to dismantle the lamp to gain access to the bumper mounting bolts located under them. How to remove the lights, read the material: “Removing the rear lights on the Lada Granta.”
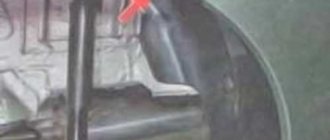
4. Unscrew the 8 bolts securing the bumper to the body, as shown by the arrows in the photo.
5. Grasping the edges of the bumper, disengage the latches. Move the bumper to the side and disconnect the rear license plate lighting wiring harness.
Assembly is carried out in reverse order.
In what cases may it be necessary to remove the rear bumper?
Replacing a bumper as a result of an accident
Considering the popularity of the Lada Granta car in our country, as well as in neighboring countries, you can notice that more and more copies of this car are appearing on the roads. This means that they “injure” their bumpers very often. So, it may be necessary to remove the bumper in order to replace it with a new one.
Removing the bumper is also appropriate when you want to replace it with another model, creating a new image for your car.
Replacing the rear fret bumper of the Grant liftback
Replacing the rear fret bumper of a Granta liftback. the extinguished boys are replacing the broken bumper for the first time, dismantling it.
- Bolt diagram for flaps and bumper mounting to rear fender
- Three bolts securing the headlight to the car body
- The headlight is mounted on these latches
- Two screws securing the bumper under the headlights
- 8 rear bumper mounting points (4 freely accessible, 2 under the left headlight and 2 under the right headlight)
- The removed bumper lies neatly to the side
- Naturally, the installation of the Lada Granta bumper is carried out in the reverse order with strict adherence to all points.
Results
Replacing the rear bumper of a Lada Granta is a fairly simple task. You just need to take into account that the plastic from which the bumper is made can be easily broken. The same applies to fastenings. The fact is that screws made of metal can exert excessive pressure on the surface of the plastic, causing it to simply burst. To avoid this, you need to tighten the bolts with a certain force set on the handle.
But, in general, you shouldn’t have any problems with removing and then installing the bumper.
Tool
- The most necessary thing can be considered a regular screwdriver with a Phillips-type Phillips blade;
- also a wrench with a “10” head and a corresponding ratchet. The key can be open-end or cap.
- In addition, wrenches like TORX T-20 and TORX T-30 will be useful to us.
Among other things, it would be a good idea to lift the car on a hydraulic lift, since this will give you access to the lower part of the mounts. If there is no such lift, then you will need to drive the car into a “pit” or overpass.
As a last resort, have a rag ready to lay on the ground.
Reminder
- To remove the front/rear body kit, it is better to use a lift ;
- You will need: a Phillips screwdriver, a 10mm socket wrench, a 20/30 Torx sprocket, a ratchet with a set of sockets;
- Simple, but important: wash the car before work, since we will be tinkering with the dirtiest part of the car;
- After dismantling all mounting points, check and disconnect all wiring, such as PTF, license plate lights or parking sensors.
Do you like working with Granta? See other articles. For example, how to install acoustics yourself.
Write comments . This is important - otherwise we will miss details or lose motivation.
How to remove the rear bumper on a Lada Granta: photos and videos
Domestic cars have finally become truly modern vehicles, the quality of which meets all the latest standards. However, breakdowns also occur on modern cars.
For example, you may need to remove the rear bumper on a Lada Granta as a result of its breakdown. To avoid hitting curbs, you can increase the vehicle's ground clearance. To do this, you don’t have to go to a workshop; you can do everything yourself in your garage.
How to remove the rear bumper on a Lada Granta?
- The first thing to do is remove the tail lights. This is done as follows. Remove the decorative cover under which the fasteners are located. Unscrew the three nuts with an “8” key. On the side, the flashlight is held on a rubber holder. We pull the lantern and remove it. We do the same in relation to the second lantern.
- After removing the lantern, you will see two 10mm bolts, unscrew them.
- Next, use the same key to unscrew two more bolts located in the center of the bumper.
- Under the rubber stop of the cover there are two more key screws at “13”; we also unscrew them.
- Using a “10” wrench, unscrew the three bolts that are located under the bumper.
- Next, take a screwdriver and free the bumper from the mudguards, unscrew the screws that secure them. We do the same with the screws that connect the bumper to the wing.
Now, in theory, nothing prevents us from removing the bumper...
Is native better?
But we could buy a non-original carpet for the trunk, we decided. The interior was original to the old owner and is in very good condition. The Chinese trunk litter we bought, there is no other way to call it, disappointed us. She warped immediately, although it was not winter. It was problematic to take it out for cleaning and put it back, we were afraid it would burst.
Car owners are right when they say that the original floor mats will not slip under the pedal at the most inopportune moment; the original ones fit like a glove, unlike the universal ones. Moreover, now the difference in price is not big; if you save on rugs, you will blame yourself later.
The same can be said about original covers, unlike universal ones, they fit great, and if we take a non-original one, at least not the cheapest one, this rag won’t last even a year.
Direct dismantling process
It is important to remember that the mounting features of the front and rear bumpers are significantly different. So you need to focus only on suitable guides.
To begin with, you will need to prepare an open-end or socket wrench with a “10” head and a ratchet, as well as a cross-shaped head. Try not to put TORX T-20 too far away. All these tools will be useful to you.
But TORX T-30 is not always needed, but only in some batches of the Lada Granta. Be extremely careful as careless movements may cause the latches to break.
Repairing plastic parts is very difficult.
- The first dismantling point says to remove the license plate of the car.
- Now remove the two mounting screws that you will find directly behind the license plate. For this purpose, you need to use a key with a “10” head.
- After this, twist the steering wheel as much as possible to get to the bolts above the wheels. They press the bumper on the arches. The steering wheel will need to be rotated alternately in one direction and the other to unscrew two bolts on each arch. This is where TORX T-20 type wrenches come in handy. Just remember that the bolts are not nearby. One of them can be found at the top, and the other almost at the very bottom.
- Next, you need to unscrew two more bolts that secure the front element to the fender liner on its lower part.
- There will be three more bolts at the bottom. When unscrewing them, you need to pay special attention to what type of crankcase protection is made. If it was not done at the factory, it can make removing the front bumper much more difficult. In this situation, you will have to disconnect the protection, placing any suitable object under it, so as not to render the rear fastenings unusable.
- Now try to pull the part out of the latches as carefully as possible. That's it, the bumper is completely removed.
If everything is relatively clear regarding the issues of dismantling the front bumper, then why such a procedure may be required still needs to be figured out.
Most often, the bumper needs to be dismantled in order to repair it.
The fact is that it is made of plastic, so it will be very easy to damage it. And, given some difficulties in welding plastic, the best choice would be to completely dismantle the bumper. In addition, if it is no longer possible to repair it, then you may need to completely replace this part with a new one.
But, in addition to the real need to replace the bumper, its dismantling is also required in situations where you install a new tuned radiator grille or new “horns”.
In addition, the bumper will significantly interfere with the installation of fog lights. In any case, working with the body will be much more convenient without a bumper.
Removing and installing the front body kit
Since the bumper of the Lada Kalina car is attached in many places, including from below, it is most convenient to carry out work in the inspection hole. If necessary, you can do it without it, but then you will have to look for the lower screws by touch or lie under the car to see them.
The list of tools for disassembly is quite short:
- Phillips-head screwdrivers of different lengths;
- 10 mm socket wrench or socket;
- extension cord and ratchet wrench.
Article on the topic: Crossover from Aston Martin - first details
At the moment, there are 2 generations of VAZ 1118 cars, and they are disassembled in different ways. Therefore, the order of work must be considered separately for each modification.
Kalina 1
If you have fog lights installed, then before starting work, disconnect the battery and follow this algorithm:
- Open the hood lid and unscrew the 3 screws holding the plastic radiator grille and carefully remove it.
- Do the same with the bottom grille, removing the 2 screws that secure it.
- Behind the grille there are 2 screws securing the bumper itself, unscrew them.
- Move into the inspection hole and unscrew the 3 lower bolts located in the center.
- Remove 2 pairs of lower screws located on the sides. They attach the body kit to the fender liner from below.
- There are 2 more pairs of screws located in the front of the wheel arches; unscrew them last.
- When all the fasteners are unscrewed, the bumper continues to be held on by plastic latches. To remove it and not break off the latches, pry the side edge of the element (near the wheel) with your hands and gently pull it to the side, disengaging the latches.
- Move the body kit forward a little and remove it from the car. At this time, the assistant must support the other end of the part, preventing it from falling.
Corrosion of body parts is often found under the removed element. To see the whole picture, remove the plastic amplifier (you need to unscrew 3 bolts) and remove the rust, then touch up these areas.
In case of corrosion of body parts, remove the plastic reinforcement and remove the rust
An important point when installing a new bumper is that you need to put it in place correctly and secure the latches.
- Put on one side of the element immediately, and pull the other side together with an assistant. He should press on the corner of the part from the front, and you - from the side, until a characteristic click is heard.
- Then screw all the screws into place.
- Connect the connectors.
- Install gratings.
Photo of the attachment points of the part
3 bolts press the bumper to the body from below 2 pairs of self-tapping screws secure the body kit along the edges 2 self-tapping screws connect the element to the fender liner Top fastening points To remove the grille, you need to unscrew the countersunk screws Access to these bolts opens after removing the grille
Front bumper on Kalina 2
On the new Lada Kalina model, the front body kit is attached differently: the lower screws are located far from the plumb line of the element, so it is very inconvenient to unscrew them without an inspection ditch. But you don’t need to dismantle the radiator grilles to get to the hidden fasteners. The removal operation is performed as follows:
- Open the hood and remove the negative battery terminal.
- From the inspection hole, unscrew the 3 bolts screwed to the bottom of the car. Two of them are in the center, the third is to the side (to the right in the direction of travel).
- Unscrew 2 pairs of lower screws located at the edges of the bumper.
- As in Kalina 1, unscrew 2 pairs of screws connecting the part to the fender liner and located in front of the wheel arches.
- Unscrew the 6 bolts of the upper mounting of the body kit; they are located on the horizontal panel above the radiator.
The procedure for dismantling and replacing the front body kit is carried out together with an assistant, as described above. Immediately after removing the element, disconnect the power supply connectors for the fog lights, and when installing, do not forget to connect them back.
Where is the fastener located - photo
The bolts on Kalina 2 are located quite deep A pair of screws connect the fender liner to the bumper 6 upper mounting bolts Article on the topic: At what speed is it better to drive a diesel engine
Procedure for dismantling the rear bumper
Once all the tools are selected and are in close proximity to you, you can begin to work. To do this, you will need to take a TORX T-30 wrench with a 10mm head, as well as a Phillips head screwdriver.
- Carefully remove the mudguards, if present.
- After this, you will reach a part, on both sides of which you can find a screw. They secure the bumper to the wheel arches. As you might guess, you need to unscrew the screws on both wheels.
- Now you need to remove three bolts at once that hold the bumper to the car body.
- After this, you will have access to the rear lights, which will need to be carefully removed. They are practically not held back by anything, so this should not be a problem.
- Unscrew the two screws under the headlights.
- Now comes the turn of the eight screws that secure the bumper to the top of the body. They are all located in one row. Just keep in mind that there are screws under the headlights. And, if you don’t unscrew them, the bumper will remain motionless.
- There are special latches on the sides of the bumper that secure the part to the car. You need to be very careful with them, as they are extremely easy to break. This is especially easy to do if the car has already been sitting outside for several winters.
- And only now can you carefully move the part away from the car body a short distance. But it should not exceed the size of the wiring harness that is located there.
- This tourniquet is carefully pryed off with a screwdriver or any other suitable object. It is important to carefully remove the harness from the rubber, as it is tightly packed into the body holes. If you cannot cope on your own, then you should call another person for help.
- Once the harness is within your reach, you can carefully unplug the wire blocks. This will turn off the license plate light and make it possible to remove the bumper completely.
Naturally, the installation of the Lada Granta bumper is carried out in the reverse order with strict adherence to all points.
Types of headlights
When listing the types of Lada Granta headlights, you should definitely mention the original parts and their analogues, usually used as an alternative or tuning optics. When dismantling and installing these headlights, the car owner will not need to redo the fastenings. Here are their descriptions with catalog numbers:
- Let's start with the original headlight, listed in catalogs under number 21900-3711010-00. It does not cause any difficulties during removal and installation, and its price can range from 1000 rubles and above.
- An analogue of the original headlight with xenon lenses is the headlight produced by the Volzhsky Automobile Plant, which has catalog number 21901-3711010-90. Such headlights are not widely used; in their design they differ little from the original, representing the same original part, but designed and intended for the installation of xenon. Their cost exceeds the cost of the original headlight by about 15%.
- The third type includes models used for tuning optics. So, two analogues of the original were released at once, one of which has built-in LED indicators and is listed in catalogs under the number DM-171052, and the other is equipped with different types of lenses for high and low beam and LED-backlit edging. The catalog number of the second model is DM-171118.
In addition, one of the most useful developments of our time is worthy of special mention - the ability to install lenses in the headlight unit.
Replacing the rear bumper of a Lada Granta with your own hands: video instructions
Every modern car model, regardless of brand, has a rear bumper that absorbs energy. It helps to avoid deformation of the body in case of minor “injuries”, taking most of the impact force upon itself as a kind of buffer. That’s why he himself always suffers first. Usually, a special amplifier is hidden behind the rear bumper, which is made of directionally located metal, which programs the initially designed deformation of the body upon impact in order to protect passengers in severe collisions.
how to remove the rear bumper of a Lada Granta liftback
We remove the rear bumper on a Lada Granta with our own hands: video and photos
Russian cars have finally become truly modern vehicles, the quality of which meets all the most pressing standards. Still, breakdowns happen on modern cars too.
For example, you may need to remove the rear bumper because it eventually breaks. To avoid hitting curbs, you can increase the vehicle's ground clearance. To do this, you don’t necessarily have to go to a workshop; everything can be done independently in your garage.
Dismantling tools
Naturally, to work you will need to acquire some tools. Most likely, you already have them, but preparing them in advance will not be superfluous even in this case.
The list of required tools includes:
- Phillips screwdriver with Phillips head;
- open-end wrench size 10. It can be replaced with a spanner wrench of the same size;
- In addition, you will need another pair of keys such as TORX T-20 and TORX T-30.
It would also be a good idea to take care to place cardboard or cloth under your back so as not to get it dirty and catch a cold. If the car is installed on a lift or overpass, then such safety measures will not be necessary.
Procedure for dismantling the rear bumper
Once all the tools have been selected and are in close proximity to you, you can begin to work. To do this, you will need to take a TORX T-30 wrench with a 10mm head, as well as a Phillips head screwdriver.
- Carefully remove the mudguards, if they are present.
- After which you will get to a part, on both sides of which you can find a screw. They fix the bumper on As you might guess, you need to unscrew the screws on both wheels.
Lada Granta rear bumper removal
Lada Granta remove rear bumper
.
How to remove the Lada Granta bumper, rear bumper of the Lada Granta Repair and service
It is the bumper that is most often exposed to external influences than other structural elements: scratches from branches, high curbs, cracks from stones, damage in the event of an accident, etc. To repair or completely replace the Granta bumper, you will need skills in dismantling this part.
To dismantle the front bumper of the Lada Granta, you will need a small number of tools: a wrench No. 8, a Phillips screwdriver, a TORX T20 wrench and a socket head No. 10. All dismantling work is carried out only with the negative terminal of the battery removed. Before removing the bumper, you must first remove the license plate to gain access to the two bolts that hold the front bumper to its reinforcement structure.
Then, using a Phillips screwdriver, unscrew two side bolts in the arch above the right and left wheels, which secure the front parts of the fender liners to the bumper. Next, by opening the hood, four central and two side bolts are unscrewed in the engine compartment, attaching the bumper to the car body on top. From below, the bumper is attached to the fender liners and body using two screws and four bolts; they also need to be unscrewed.
On both sides of the bumper there are latches connecting it to the fender. By carefully pulling the edges of the bumper with a little force, you need to release the latches from their fixation sockets. After this, you should disconnect the wire connectors and completely remove the bumper from the Lada Granta.
The rear bumper is dismantled using the same tools, only instead of a T20 key you will need a TORX T30 key. Before starting work, you must first remove the rear fender liners on both sides, and then unscrew the two screws that secure the bumper to the wheel arches. The bumper is secured on the underside of the body with three bolts; they are unscrewed using a key.
In order to detach the rear bumper from the fixing elements along the perimeter of the body, you need to remove the rear lights. Access to the lamp mounts opens after removing the car trunk door trim. Having unscrewed the eight bolts securing the part to the body, you need to remove the side latches from engagement with the brackets, slightly move the bumper to the side and, having disconnected the wire connectors, finally remove the rear bumper from the Lada Granta car.
general information
Manipulating the body kit takes no more than 20 minutes, even for a novice auto mechanic. Bolts with soured threads can complicate the situation and prolong the work time. Most often this happens with the four screws that secure the radiator and body kit. The bolts sit as if rooted, and it takes no effort to move them. In such cases, a penetrating lubricant such as WD-40 comes in handy. It must be applied in advance, right under the bolt head. After a short period of time, the lubricant will do its job, and the screw will easily unscrew.
When installing the body kit, it is recommended to lubricate the screw threads with grease or grease, such as “Universal” or “Mobile”. Thanks to this treatment, it is possible to avoid souring and corrosion of fastening joints. This will make it easier to remove the bumper again and extend the life of the screw elements.
A removed body kit is a good reason to inspect devices and parts to which access was denied. Check the condition of the wires, fasteners, inspect the power bumper, etc. If rust is detected on the body, the area is treated with anti-corrosion treatment. This will prevent further damage and hole formation.
Remove the rear bumper of the Lada Granta. We remove the rear bumper on a Lada Granta with our own hands: video and photos
How to remove the rear bumper on a Lada Granta: photos and videos
Domestic cars have finally become truly modern vehicles, the quality of which meets all the latest standards. However, breakdowns also occur on modern cars.
For example, you may need to remove the rear bumper on a Lada Granta as a result of its breakdown. To avoid hitting curbs, you can increase the vehicle's ground clearance. To do this, you don’t have to go to a workshop; you can do everything yourself in your garage.
Preparation
Before removing the front bumper on the Lada Granta, you need to prepare the following.
- Crosshead screwdriver.
- Open-end wrench No. 10 and No. 12.
- Ratchet No. 10.
- Fasteners with Torx slot T No. 20.
- Fasteners with Torx slot T No. 30.
- Rags.
- Any penetrating lubricant, such as WD-40.
- Grease.
If the crankcase protection is of a non-standard type, then you will need some rectangular object on which to place it just right after removal. This could be a small plastic canister, cardboard box, etc.
The dismantling of the front body kit on the Grant, as well as its installation, must be carried out very carefully
A slight misalignment or carelessness can lead to breakage of latches or latches, the repair of which will be quite expensive

