The clearance between the camshaft cam and the valve stem compensates for thermal expansion of the valve. Moreover, if the fuel gap is increased, the valve will not be able to fully open, and if the thermal gap is very small, the valve will not be able to fully close.
Today we will try to convince you that the process of adjusting thermal gaps on a VAZ 2109 car is completely simple and it takes no more than thirty minutes.
When is valve adjustment necessary?
It is necessary to resort to adjustment if the car engine becomes unstable. A characteristic knocking sound appeared while the engine was running. Experienced drivers determine the need for adjustment work based on the following symptoms:
- the fuel consumption level of the car has increased sharply;
- there was a knocking noise while the car was running;
- at idle the power unit is unstable;
The valves need to be adjusted every 25-30 thousand kilometers . This is the optimal period; during this time, structural gaps increase due to wear of some parts. Next I will tell you about the procedure for carrying out adjustment work.
Preparing to adjust valves
Before you start adjusting the valves on the VAZ-2109, you should acquire all the tools that may be needed in the process of this work. Namely:
- screwdriver;
- set of wrenches;
- tweezers;
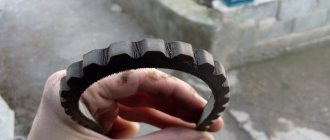
- adjusting washers;
- special kit for adjusting valves;
- valve cover gasket;
- sealant.
The car is set to the handbrake. One of the front wheels is suspended using a jack so that it can be rotated.
In this case, 5th gear should be engaged (if this is not possible - 4th).
Followed by:
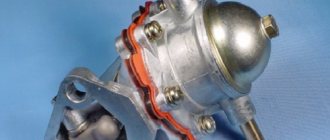
- disconnect the pipes from the valve covers;
- remove the air purifier housing;
- Disconnect all damper wire cables from the carburetor;
- To make the crankshaft turn easier, you can unscrew the spark plugs;
- Unscrew the 2 nuts that secure the cover, and then remove it. Clean the upper part of the cylinder head from any remaining oil;
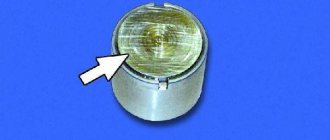
- Remove the front cover from the timing belt;
- Set the piston of the first cylinder to TDC on the compression stroke. To perform this action, turn the wheel so that the mark on the camshaft pulley aligns with the mark on the rear cover of the flat-toothed belt.
Why do you need to adjust valves?
The metal valve stem tends to expand and contract as it moves. The seats in the cylinder head bend, which changes the thermal clearance. And physically it needs a certain cost due to the design features of the engine. The consequences of untimely adaptation are irreversible. A jammed valve during operation of an eight-valve engine loses its seal, and the avalanche flow after ignition burns its edges and the cylinder head seat, which goes back into the head housing. Such repairs are expensive and are not covered by the warranty. It’s better to adjust it in time, especially since the price of adjusting an 8-valve engine at 600-800 rubles per 30,000 km is not that significant.
With the gap set correctly, the car will move freely, without loss of traction, consuming less fuel. The heating cannot be adjusted under any circumstances. Just cool the engine to 30-40 degrees. Otherwise, you can make a mistake and tighten the valves.
There are times when the valves have been adjusted, but the knocking still remains. The reason may not be the gaps. On a cold engine, the piston heads and pusher bushings in the head housing may knock. There can be many reasons, so you shouldn’t rush to conclusions and check everything carefully. There is a special device - a stethoscope, with which you can easily listen to the sounds of a running engine.
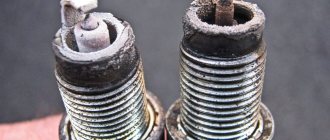
Symptoms of a burnt valve
The main sign of a burnt-out valve is a distinct tripping of the engine in all operating modes. Power also drops noticeably and fuel consumption increases. Signs of failure are similar to other engine problems, and it is easy to confuse it with the following problems:
- Wear of piston rings and loss of compression in the cylinders.
- Breakage of high-voltage wires and spark plugs.
- Failure of injectors and malfunctions of the power system.
To accurately diagnose the malfunction, exclude all of the above options in the following order:
1. Checking the serviceability of the spark plugs is carried out with the engine running at idle speed by sequentially disconnecting the cap of each spark plug. When removing, carefully monitor the engine reaction and stability of its operation. If the engine starts to run worse, it means the valves in the cylinder are intact. If the nature of the operation has hardly changed, then most likely the problem cylinder has been detected.
We recommend: How to quickly and easily replace a generator bearing on a VAZ 2110?
2. On the faulty cylinder, replace the spark plug with a known working one, check the high-voltage wire and ignition coil. After starting the engine, it becomes clear whether there was a breakdown in the ignition system, or whether further diagnostics are required.
3. If, when replacing faulty parts of the ignition system, the engine continues to stall, the cause of the breakdown may be a burnt-out valve or a malfunction in the piston group in the form of sticking or wear of the rings. Both failures lead to low compression in the problem cylinder, but by measuring it it will not be possible to determine which of the two failures occurred. To do this, perform the following additional diagnostics:
- After measuring the compression, pour a few ml of engine oil into the problem cylinder through the spark plug hole and take another measurement. If the compression has increased, then the problem is with the rings, if not, then the valve has burned out;
- The spark plug on the problem cylinder is inspected. If the valve is burnt out, it will be completely dry and without any oil deposits. If the failure is related to the piston group, then the spark plug will be covered with oil, and when the engine is running, bluish smoke can be observed from the removed breather.
When adjustment is necessary
Valve adjustment is required when problems occur with the engine or after passing a technical inspection. Experienced car owners can quite accurately determine the cause of a power unit malfunction; the main signs are the following:
- the appearance of a characteristic knocking sound when the engine is running;
- a sharp increase in fuel consumption;
- Unstable operation at idle.
Valve adjustment is also required after every 25-30 thousand kilometers . During this time, some parts wear out and structural gaps increase. Diagnostics can be done at a service center; this service is inexpensive.
Bottom line
As practice shows, there is no need to carry out repairs yourself. In this case, this can lead to the fact that even with savings, there is no likelihood that installing washers will lead to a positive result. A significant amount of effort and time will be spent.
Service center specialists will perform all work promptly. This will save you time and resources, and provide you with ideal conditions for operating the vehicle.
IMPORTANT! Be sure to keep in mind that the equipment is first diagnosed, after which the need to adjust the gaps is determined. Take advantage of this offer, which will guarantee you the best working conditions.
Why are thermal gaps needed?
The term thermal clearance adjustment is usually used among car enthusiasts, but it would be more correct to call this process this way: adjusting the thermal clearances between the camshaft cam and the valve stem. But usually such a slightly abstruse name is used in technical literature, and in colloquial speech the wording is valve adjustment.
There is a thermal gap between the camshaft cam and the valve stem, which is measured at the manufacturer.
The thermal gap on a VAZ 2109 car is measured using a special probe on a cold engine, that is, with a temperature of up to +20 ⁰C between the camshaft cam and the pusher adjusting washer.
If some metallic knocking occurs, the valves need to be adjusted.
Do not immediately contact a car service center, as you can carry out this fairly simple procedure yourself. This way you can save about a thousand rubles. Believe me, this procedure is not so complicated that you need to pay that kind of money for it, because for this you will only need to purchase a special set of tools.
Valve adjustment process
Adjusting valves VAZ 2109
On VAZ 2109 cars, the thermal gap is adjusted using specially adapted washers. adjustment of thermal clearances on a VAZ 2109 car is carried out with the engine idling.
So, the algorithm for adjusting the valves on a VAZ 2109 car:
- Remove the cylinder block cover. To perform this step, dismantle the air filter, disconnect the pipe attached to the valve cover, but before that, first loosen its clamp. After this, disconnect the throttle valve control mechanism from the valve cover and carefully remove the cylinder block cover;
- Unscrew the spark plugs;
- Remove the front plastic cover protecting the gas distribution system;
- Rotate the car engine crankshaft clockwise until the mark on the timing system pulley aligns with the mark on the rear cover. The crankshaft can only be turned using a wrench using the bolts securing the generator pulley. If you accidentally missed the mark, turn the car engine a few more revolutions;
- After the marks have come together, rotate the crankshaft a few more teeth of the gas distribution system;
- Measure the thermal clearance of the exhaust valve of the first cylinder and the intake valve of the third cylinder. For exhaust valves, according to the standard, it is approximately 0.2 millimeters, and for exhaust valves, 0.4 millimeters;
- If the thermal clearances do not match the standard, then you need to lower the cylinder piston to the lowest position and, using a special device, remove the installed washers;
- We measure the size of the required washer; to do this, subtract the value of the recommended gap from the size of the thermal gap, and then add the thickness of the washers used to the resulting value;
- Measure the thermal clearance value for each valve in turn, with each crankshaft turn half a turn;
- Install washers of suitable thickness and repeat the measurements again.
We recommend: How to install bi-xenon H4 with your own hands: diagrams and connection sequence
What to have on hand
As you already understood, you need to have a set of shims of varying thicknesses. You can buy special kits or first take all measurements, perform calculations and purchase the washers that you need.
In addition, adjusting the VAZ-2109 valves will require you to have a special device that compresses the valve spring, a small metal spacer and a pusher rod. It would be useful to use tweezers and a micrometer to measure the thickness of the washers (if there are no visible markings). You will also need a set of feeler gauges to measure the gap and tweezers to easily remove the washer.
How to adjust valves on a VAZ 2109: instructions
On all VAZ models, the principle of valve adjustment is practically no different. You need to adjust the gaps in the order of operation of the cylinders: first 1 and 4, after 5 and 8. Set the piston of the first cylinder to TDC, then make sure that the marks on the pulley and the rear belt cover match. It should look like this:
Using the “17” key, we turn the camshaft by three teeth, this way we will ensure that the camshaft cams come out of the pushers. We take the dipstick and start checking the gaps. The probe should pass with little effort. If it moves freely or difficultly along the gap, adjustment is necessary.
Using a lever, fix the pusher in the desired position. Next, remove the old washer and set the gap we need. If necessary, install another washer after completing all the work. The procedure must be repeated for each engine cylinder.
Valve adjustment procedure
In order for the work to be carried out more efficiently, the camshaft pulley should also be marked with additional marks located in a circle, every 90 degrees. During a rotation of this number of degrees, the crankshaft must rotate 180. Thus, each subsequent piston will enter the top dead center of the compression stroke.
- We combine the marks on the rear panel of the timing belt housing with the pulley. Turn the camshaft clockwise approximately 2-3 teeth. This is done using a 17 wrench, which needs to be used to grab the pulley mounting nut. Thanks to this action, the camshaft cams will be able to completely move away from the pushers.
- We take the valve adjustment dipstick and measure the existing gap. It should move between the cams thanks to a slight pushing movement.
If the gaps are such that they do not meet the minimum dimensions, the following actions must be taken:
- A device is installed directly onto the camshaft bearing housing stud, with which the valves are adjusted.
- The pusher is rotated until the hole is directed towards the master. Thanks to the lever, you should install the pusher all the way, fixing this position.
- Take in your hands a long, strong and sharp object that can be used to pry the adjusting washer. The latter should be removed using tweezers. Its thickness will be displayed on it.
We recommend: What to do if the VAZ-2112 16-valve engine fails
In order to correctly select the thickness of the new washer, it is worth resorting to the following calculations: to the thickness of the removed washer, add the difference between the result shown by measuring the gap and what is indicated according to the instructions.
Replacing burnt out valves
The operation of replacing the valves of different engines is similar, and differs only in the size of the parts and their placement on the cylinder head. Before performing the operation, prepare lapping powder, new valve seals and a new head gasket. After dismantling the cylinder head, operations are performed in the following order:
1. Valve desiccation. To do this, the head is laid out on a flat surface and a rubber mat is placed under the valve. A tube with a diameter of 13 mm is placed on the valve so that the crackers are inside, and blows are applied with a hammer. The valve desiccates, and the crackers remain in the tube. The operation is also easily carried out using a special device that compresses the vein and allows you to pull out the crackers.
- The valve is pulled out, a new one is inserted, and the bushing guide is checked by shaking. If runout is up to 1 mm, the guide is not replaced.
3. If it is necessary to replace the guide, use a special mandrel. The old part is knocked out in the direction of the camshaft using a half-sledge hammer with a heavy blow so that the part does not crumble. Afterwards, a new bushing is driven into the head, having first put a retaining ring on it.
4. The new valve is secured with a retaining ring and the assembly is lubricated with oil.
5. Valve grinding. The seat is initially treated with a special cutter, after which lapping powder is applied to the edge of the valve, inserted into the head, the other end is clamped into the drill chuck, and by pulling it up and down, the valve is provided with a tight fit to the seat. It is advisable to carry out the operation for all valves.
6. Drying of the valve. To do this, press the spring firmly and insert crackers. The cylinder head is attached to the engine cylinder block.
The described method allows you to replace the burnt valves of all models of the VAZ: 2101, 2102, 2103, 2104, 2105, 2106, 2107, 2108, 2109, 21099, 2110, 2111, 2112, 2113, 2114, Niva, Lada Priora, viburnum, Grant, Grant, Grant. Vesta and most foreign cars.
Adjustment table according to factory instructions
| car model | Entrance | Entrance |
| Priora 21116 | 0,25 | 0,4 |
| Kalina 2 21116 | ||
| Lada Granda 21116 | ||
| grandma 2190 | 0,2 | 0,35 |
| Priora 2170 | ||
| 21114 | ||
| 21102 | ||
| 21099 | ||
| 21093 | ||
| 21083 | ||
| 11186 | ||
| 11183 | ||
| 2190 | ||
| 2115 | ||
| 2114 | ||
| 2113 | ||
| 2112 | ||
| 2111 | ||
| 2110 | ||
| 2109 | ||
| 2108 | ||
| vase 99 | ||
| VAZ 083 | ||
| 1118 | ||
| 11113 oha | ||
| 1111 box |
Checking the quality of work
After completing the repair, it is necessary to check the operation of the engine. First, we install all the dismantled elements in place and screw in the spark plugs. After starting the engine, there should be no knocking of valves or other extraneous noise. We recommend carrying out checks for 15-20 minutes - this will ensure that the cylinders are operating normally even after heating.
It is not difficult to adjust the valves on the VAZ-2109 model yourself. You can do this work yourself, the main thing is to have a special kit and a couple of hours of free time. Using step-by-step instructions and an adjustment diagram, you will do the job efficiently and save on a trip to the car service center.
Which adjustment devices are best to choose?
Conventional tools are not suitable for precise and quick adjustments . Special devices are used with which you can fix the pusher and carry out other work. Today there are special adjustment kits on sale, their cost is low. Purchasing such a kit will be more profitable than trying to make devices from improvised means. Not everyone will be able to find suitable materials and make a dipstick or clamp correctly, and in case of poor-quality repairs, engine performance can become even worse.