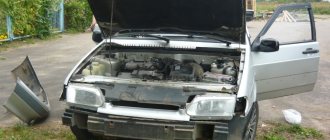
I finally finished the lip on the bumper, painted it the same color and attached it right away the next day. I started doing it already on January 8, although there wasn’t much to do there, but since I didn’t have much time and especially did it slowly and not in my garage + it was all crooked and curved, I had to first work for half a day with a soldering iron and a hair dryer and then Just remove everything with putty.
The idea belongs to ViktorBass for which a big THANK YOU!
I just immediately called a mechanic I knew the next day and asked him for a bumper, went and picked it up, and also got my color)))
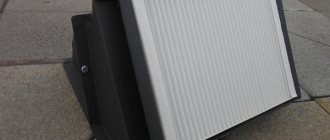
| Original | Yes |
| Factory | not a factory |
| Painting | Not painted |
What can you make a car spoiler from with your own hands?
If you encounter similar problems, then, of course, there is an option to buy a ready-made spoiler, and if there is not enough length, simply saw the object and make an insert. The time required is minimal, but here the cost of the material and paint is added to the cost of the spoiler itself. And this turns out to be quite expensive.
Creating a spoiler from scratch is profitable (the average cost is about 25-35 dollars) and convenient. In order to make a spoiler yourself according to your taste and necessary requirements, we will need:
- Styrofoam; - epoxy adhesive; - Sheet steel; - fiberglass or old silk-look shirts; - paint of the required color.
Materials and tools
After creating the project, you should decide on the materials and tools for the work. The final result depends on this.
Also, before you start upgrading the body kit, you will need to use a mock-up or create a matrix; its peculiarity is that it is a “negative” in relation to an existing part. When designing a bumper, the material of the future body part is applied to the matrix, and a “cast” is obtained. It is used when upgrading or repairing an original body element.
Polyurethane foam
The material is used both to create a bumper from scratch and to modify an existing one. To construct the part, you will need the following materials and tools:
- Polyurethane foam (approximately from 3 to 5 cylinders);
- Foam gun;
- Masking tape;
- Epoxy resin;
- Fiberglass;
- Cooking foil;
- Fiberglass;
- Sharp stationery knife and replaceable blades;
- Sandpaper of different grain sizes;
- Automotive putty.
To create a bumper from polyurethane foam, it is important to have a developed eye, “straight hands”, patience, accuracy and master the skills of manual processing of materials. Only in this case, the quality of the manufactured element will be at its best.
Spoiler creation process
Working with polystyrene foam is quite simple, but there is one caveat. After cutting, a lot of debris remains, which is very well electrified and can stick to the drying element at the most crucial moments. Therefore, try to remove the crumbs immediately.
We cut a sheet of foam plastic measuring 1x1 and 4.5 cm thick (sellers usually say 5 cm) diagonally. Cut out the wing blade. So the width of the foam sheet will definitely be enough for you. Next we move on to the fastenings. It is necessary to cut 1.5 mm plates from sheet steel. We drill 3 mm holes with a distance of approximately 2-3 cm. In order to reduce weight and improve adhesion, bend them with the letter L. After these manipulations, weld two 6 mm nuts to the base. Now you can glue them into foam blanks.
We glue the wing blade with epoxy glue and two layers of fabric. Then we assemble the structure.
Working on the lip
The lip is done the same way - not very difficult. Remove the bumper and turn it over. Next, you need to glue the blank from foam plastic. We give it a shape and wrap it in plastic bags. Ideally, it is better to find ordinary nylon women's tights, pull them onto the form and coat them with epoxy glue. When the two layers of tights are dry, you need to pull the blank out of the lip. The bags are needed just so that the blank can come off easily, since the epoxy glue does not stick to them. We leave the structure for several days so that the epoxy completely polymerizes.
Then we take the fabric and glue the lip from the inside again. In order to make the structure even more durable, you can buy reinforcing mesh at a building materials store and glue it with it. Next, we sand the structure, prime it and paint it. After the paint has completely dried, it is advisable to polish it.
Adviсe
1. Practice shows that a lip not made of fiberglass is quite vulnerable to impacts. Therefore, if you have the opportunity to purchase fiberglass, or better yet carbon fiber, the structures will be many times more impact-resistant and reliable.
2. Apply glue only with a brush, it is convenient and safe, and you can clearly calculate the amount of substance. The brush can be washed well in a solvent or running hot water.
3. Do not prepare all the glue at once, there is a possibility that you will not have time to use it up. The largest portion at a time should be no more than 200 ml.
4. If you did not manage to remove the foam chips in time, then try to touch the water tap in the kitchen more often, this will remove the electricity.
What function does the lip perform?
This is a very interesting question. If you approach its purpose strictly, then on sports cars it is mandatory to be installed on both the front and rear bumpers of the car, and serves to reduce the aerodynamic drag of the car. In other words, the front bumper lip improves the aerodynamics of the racing car. In addition, such cars are also equipped with spoilers that improve the grip of the wheels on the road surface by creating additional aerodynamic downforce.
For driving in the city, where speed is limited by traffic rules, such body kits are no longer so much practical as they are purely decorative. In this case, the car receives, firstly, a unique individual look, secondly, it acquires a sporty and aggressive character, and, thirdly, its owner enjoys all this. This is if we talk about the aesthetic side of this issue. There is also a practical one.
The lip is a good protection for the car's bumper while it is driving on uneven roads, taking on all possible damage from stones or speed bumps.
After all, if a car has an expensive and exclusive bumper, then its damage and subsequent repairs can cost a hefty sum. The lip on the bumper is also useful for drivers who try to park as close to the curb as possible. It will reliably protect the bumper from collision with an obstacle.
The lip is usually made of light and durable materials such as plastic or fiberglass. A universal rubber lip for the bumper is also offered for sale, which can be easily installed on any car model without much difficulty. We will consider the possibility of making a lip yourself, where the main materials are polystyrene foam or polyurethane foam, which is accessible to everyone.
INTERESTING FACTS
•Plastics, polymers and related materials are relatively new. The first experiments with them were carried out in the middle of the 19th century, and active use began in the 1870s.
•The big problem with polymers is their subsequent processing or disposal. Once in the soil, plastic products decompose within 100–400 years. Even initially recyclable plastics often completely lose this valuable quality. For example, applying primer and enamel oxidizes the polymer layer. And cleaning the decor before recycling is not an easy job.
•Plastic bumpers with paint defects end up in the camera in the second round. It is not at all necessary that the new enamel will be the same color as the first. If you scratch a new white car and see a layer of golden metallic on the part, don’t blame the dealer. Double painting technology is accepted by both the manufacturer and the equipment manufacturer.
•The compositions for a bumper to be painted and for a part that remains black are quite different. The first must reliably hold the applied layers, the second must resist scratches, reagents, and ultraviolet radiation, that is, have a much stronger coating. For a plastic manufacturer, the composition for a budget part will be more expensive, but due to additional work, a bumper in body color will ultimately outstrip its opponent in cost.
•Hard and soft plastics in interior trim are often characterized as “cheap” and “expensive.” These definitions are correct. In the first case, the entire part comes out of the mold, in the second - only its frame, the base. Next, it is covered with pliable polyurethane foam, on top of which a decorative film with shagreen is laid. An intermediate option is a “soft look” coating, soft in appearance, but not to the touch: slightly higher quality materials are applied to simple technology.
•Painting parts in bulk is an ideal option for elements exposed to external influences. Wheel caps are made using this technology, but not all manufacturers use this practical solution in the interior. Therefore, do not be surprised when some household trifle leaves a black scar on the silver strip of the front panel.
•The eternal black bumpers of the Lada-Samara are remembered with kind words by thousands of motorists. This masterpiece was created contrary to logic: glass-filled polyurethane foam is expensive to produce and unsuitable for recycling. That is why there will be no analogues to it.
We make it ourselves
If you have previously had to deal with epoxy glue and the technology for its use, then making your own front bumper lip will not be difficult for you.
For ease of use, I recommend removing the bumper from the car. This will allow you to perform all necessary operations efficiently and comfortably. The lip is made from ordinary polyurethane foam or polystyrene foam, followed by gluing with fiberglass in several layers (usually 2–3 layers). To securely attach the lips to the bumper, I recommend carefully sanding the places on the bumper where they will be attached to each other.
If polystyrene foam is used, its individual sheets can be fastened using “liquid nails”. And in the case of using polyurethane foam, you just need to stock up on the required number of cans.
After creating the main blank from the above materials, we pick up a sketch of our product, a sharp knife (scalpel, razor or something else sharp and cutting) and proceed, like sculptors, to cutting off all that is unnecessary. This process is quite painstaking and requires patience and attention. But sooner or later it will be completed, and then it will be possible to begin gluing the blank with fiberglass.
If polyurethane foam was used, then pasting can be done directly on it. If polystyrene foam is used, it must first be covered with technical plasticine or putty, since epoxy glue has a negative effect on it.
Preparation of the base and sketch
Making the part yourself begins with dismantling the bumper. It will serve as the basis for something new. You can make this part without a template, however, such an operation requires experience. Using the old original bumper will make it easier to shape, guess with symmetry and not miss important details that relate to fastening.
The removed bumper is covered with masking tape from the inside in several layers. This will facilitate easy separation of the hardened foam from the template. It is also quite convenient to use masking tape to mark future bumper parts. After pasting, foam is applied in an even layer. A spray foam gun will be indispensable for this. At this stage, care should be taken not to apply too much material, since a thick layer of unnecessary foam will take quite a long time to dry.
Once everything is ready and the foam has hardened, you can proceed to the next stage. It usually takes at least 24 hours for the foam to harden. It all depends on the thickness of the layer and the ambient temperature.
Similar articles
How to remove the front bumper on a VAZ 2107
Some tips
- When making lips yourself, I recommend preparing epoxy glue in small portions, as it can quickly lose its viscosity.
- It is most convenient to apply epoxy glue with a brush; a spatula is less suitable for it. And don't forget to wear rubber gloves.
- The rubber lip on the bumper is not always securely attached with tape and can fall off while driving. I recommend additionally securing it with self-tapping screws. This is a universal and reliable method of fastening.
- When purchasing a universal lip, pay attention to the quality of the material. The rubber must be sufficiently hard and elastic. And when deformed, return to its original shape.
Contact method of replication versus injection
Once the matrix is ready, you can begin to replicate the bumpers, for example, by manual contact molding. To do this, the matrix is treated with CAR WAX, Blue Wax 333-MR, and gelcoat is applied on top of it using a spray bottle or brush. “This layer provides the fiberglass bumper with excellent water resistance,” says Vasily Nagnibeda. – Then a layer of a mixture of polyester resin and hardener is applied with a roller or brush. Then fiberglass, carbon or glass mat is laid, and again a finishing layer of a mixture of resin and aerosil or aluminum powder is applied. All that remains is to remove the bumper blank from the matrix and let it dry.”
Compared to vacuum infusion, the contact molding method is inferior in quality and labor costs, however, it does not require special equipment.
And with careful work, it can give good results, although it produces a lot of waste. As for injection, also called vacuum infusion, you will need a special vacuum pump, such as Vacmobiles. Such equipment costs about 260 thousand rubles, but with its help you can create high-quality bumpers of varying complexity and with virtually no waste.
Video “How to attach a lip to a car bumper”
The recording shows how to install a lip on the front bumper of a foreign car “Honda Airwave”.
When repainting, the workpiece is carefully sanded and uneven surfaces are filled with putty. When polishing, degrease the working surfaces. A primer is applied to the polished bumper. After it dries, they paint it using a spray gun.
When pasting, the working surface is washed, sanded and degreased. Carefully cover the body kit, making sure there are no air bubbles or folds. In some cases, for a tighter fit of the material being glued, a hair dryer is used.
With the help of metal elements and a welding machine, they create a power bumper - a kenguryatnik. Additional fog lights are mounted on it. This body element will allow the car to be used in off-road conditions and gives the car an aggressive design. The kenguryatnik can also be bought ready-made.
Fiberglass overlay
When the shape of the future product is perfected, you can begin to apply the base material - fiberglass. This material, combined with resin, hardens, and the product is quite hard and durable.
After the preparatory work, resin is applied to the workpiece. The first layer of pre-cut fiberglass is laid on top of the resin. The fiberglass is smoothed with a rubber or plastic scraper
At this stage it is important to ensure an even fit of the fiberglass. The formation of air bubbles and wrinkles should be avoided as much as possible.
After applying the first layer, the procedure is repeated 4-5 times. When all layers of fiberglass have been applied, the product must again be given time to dry and harden. After the resin has hardened, all that remains is to remove the foam, modify the bumper with putty (if necessary) and carefully sand everything. The finished bumper is primed and painted like a regular body part.
Nowadays, car stores offer a considerable variety of all kinds of spoilers. However, often those that you like in appearance are partially not suitable in size. Or those that fit perfectly fall somewhat short in terms of characteristics.