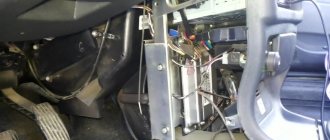
I encountered such a problem, the car began to drink antifreeze, at first a little at a time, then more, I sinned at everything, and until I switched the stove to the “winter” mode, and bam the windows began to sweat, becoming covered with a greasy coating, well, it became clear the stove... Eh, I didn’t want to paste over the engine compartment, well, apparently fate) well, I still had to overcome my laziness) I won’t describe how everything is removed because there are a lot of these instructions)
Today I took everything apart, bought an original heater radiator, Priora has its own, so to speak)
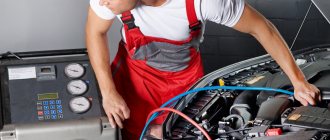
Heating in a car is not a whim, but one of the functions that ensures a comfortable and safe ride. If frost formed on the glass reduces visibility, then it won’t be long before you end up in an emergency.
As always, in our country, the frosty season comes unexpectedly. If on your next trip, when you press the heating button instead of warm air, cold air blows from the air duct, then the moment has come when you need to clean the heater radiator.
To make this process efficient, it would be useful to understand how the car’s heating system works and what methods and means can be used to clean it.
Heating system
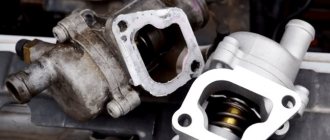
The stove and bypass valve, integrated into the cooling system of the machine, are the main heating elements. The heater radiator is heated due to the high temperature of the engine coolant, which also enters the heat exchanger.
So if the pump is in order, the thermostat is working, the heater fan is not burned out, the air ducts are not clogged, the antifreeze level is normal and there is no air lock in the cooling system, then the cause of poor heating is contamination of the heater radiator.
This happens because all the dirt traveling through the system ends up in the heater radiator, gradually clogging its cells. Over time, this leads to a decrease in the temperature of the air entering the vehicle interior.
There are two ways to clean the heat exchanger: flushing the stove radiator without removing it from the car, and the same procedure, completely dismantling it.
Cleaning the stove
To clean the stove on a VAZ-2110, you need to prepare some tools and available materials. This list includes:
- a pair of hoses;
- clamps;
- FUM tape;
- compressor;
- vacuum cleaner;
- pump;
- container for collecting liquid;
- products that are used to clean radiators (acid, anti-scale, etc.).
When everything is prepared and at hand, you can begin to wash the stove. If you follow the plan outlined below, even a novice motorist will not have any problems.
- We release the hoses that extend from the stove and dismantle all elements that may interfere with the work process. All fasteners must be set aside and care must be taken that they do not fall apart. This will make it easier to assemble the car.
- The hoses that we have freed must be expanded with additional hoses. These could be watering or plumbing hoses, parts from a washing machine. In a word, you can use everything that is convenient for you to work with. It is necessary to take care of the tightness of the connections. For this you will need clamps and FUM tape. If the seal is insufficient, any careless movement can lead to contamination of the interior.
- Prepare a container to collect liquid. The lower hose must be lowered down, and the upper hose must be raised above the heater level, or even better, above the instrument panel. To completely empty the stove of liquid, you can use a compressor or a regular vacuum cleaner. When there is no liquid left in the heating system, you can start flushing.
- Raise the lower hose up and pour cleaning fluid into the stove. Plain water or boiling water, various acids (acetic, hydrochloric and others), antiscale, “Silit”, and other cleaning solutions can be used. To soak dirt and scale from the inside, you need to leave the cleaning agent inside the stove for a while. If a potent agent is used, then 15 minutes will be enough. But weaker substances can be left even overnight. When using acids, be prepared for a violent reaction with the formation of foam. Depending on the degree of contamination and aggressiveness of the substance used, the flushing procedure may have to be repeated several times until liquid flows out of the radiator with the same color as before filling.
- Now you need to rinse the stove radiator using water pressure. It is ideal to use a Karcher sink, but if you don’t have one, a regular hose with high water pressure will also work. At this stage it is necessary to use a compressor or pump. The radiator must be flushed on both sides. If you have a deep-well pump, it can also be used for these purposes.
Let's start the washing process
To begin with, by lifting the hood, we find two hoses that provide supply and drainage of fluid to the stove. Then:
- in the radiator fins. Having disconnected these hoses, we extend them, securing the joints with clamps and wrapping them with fum tape for tightness.
- Turning on the compressor, blow out the old antifreeze from the heat exchanger.
- Fill the radiator with diluted citric acid or another selected cleaning liquid, give it time, up to half an hour, to dissolve dirt and deposits. In more advanced cases, this time can be increased to several hours. Some people advise that before pouring, for greater effect, heat the solution to the operating temperature of the antifreeze, and in the case of using Coca-Cola, generally boil it.
- After the selected period of time, drain the liquid into a prepared container.
- This procedure must be repeated until no clear liquid comes out of the drain hose.
- By connecting the pump to one of the hoses, rinse the stove under pressure with clean water.
- By connecting the hoses back and adding antifreeze, you need to eliminate air in the system.
Washing the oven in a VAZ 2110 car
VAZ 2110 stove problem
To carry out the work you will need to acquire:
- two hoses;
- clamps and FUM tapes;
- compressor;
- vacuum cleaner;
- pump;
- a container for draining liquid;
- acid, anti-scale agent, special radiator cleaning agents, etc.
VAZ 2110 problem with the stove
Similar actions must be performed following clear instructions:
- You need to find two hoses coming from the stove and release them. After this, you need to carefully remove all parts that may interfere. When performing actions, it is important to remember the sequence. Fasteners are laid to one side.
- After releasing the ends of the hoses, they are extended using watering hoses; for example, you can take elements from a washing machine or other household appliances. To ensure better tightness, the joint is securely secured with a clamp and FUM tape. In the worst case, you can accidentally damage the interior.
VAZ 2110 problems with the stove
- The hose located in the lower part goes down, while the upper one rises above the heater level. If possible, it is advisable to raise it above the interior panel. The remaining water is blown out using a compressor or vacuum cleaner.
- Cleaning liquid is poured into the stove. For these purposes, you can use ordinary water, boiling water, hydrochloric, acetic or other acid. Anti-scale agent, Silit in undiluted form, or other cleaning solutions are also suitable.
Note. If finances allow, you can purchase special cleaning products suitable for the stove radiator. Dirt and scale do not soak right away; you need to wait a little. If you intend to use highly corrosive compounds, the solution should be kept for no more than 15 minutes. Of course, you can leave it overnight, but only if you use non-abrasive products.
- The aged liquid is carefully drained through a second hose. If acid is poured in, you need to prepare for foaming and, in fact, a violent reaction. It is recommended to repeat the cleaning procedure until a transparent composition flows out of the heating radiator.
VAZ 2110 stove problems
- Now the stove radiator is washed with water. To ensure the required pressure, the hose is connected to the home water supply system (for example, to a regular tap). At this stage of work you also need to use a pump or compressor. The radiator can be washed from both sides, with water poured alternately on each side.
- To flush the stove radiator, you can use a deep-well pump. It is connected to one hose, then immersed in water (it can be collected in a bucket).
Note. To get the best effect, it is recommended to add acid or some kind of detergent to the water. After the preparatory work, the equipment is turned on and water begins to flow through the radiator. Such manipulations are also carried out with the second hose.
Flushing the radiator using the traditional method
If the heater is not delivering the required amount of heat into the car, it's time to clean the radiator. In order to properly flush the radiator, you need to prepare a special chemical solution. If this element of the stove has already been removed and is located outside the passenger compartment, it is much easier to clean. The washing solution is essentially a low concentration acid.
It is usually prepared on the basis of sulfuric, orthophosphoric, hydrochloric or other acid. An alternative method is to flush the stove radiator using whey. Despite the fact that this is a popular method, it is highly effective.
Note! The solution is prepared in the following ratio: 1 part whey to 10 parts water. This relationship also applies to acids.
The stove is filled with a pre-prepared solution and left in this state for a couple of hours, and everything will depend on the degree of contamination. After this, the liquid with the resulting deposits is drained, and the radiator itself is washed with soda ash solution. At the end of flushing, you need to use distilled water. If you do not want to disassemble the floor of the car to remove the heating radiator, you can flush the entire cooling system. To do this, it is important to follow the sequence of actions:
- the hood rises;
- remove the plug from the expansion tank;
- the required volume of the prepared solution is poured into the system;
- the engine starts, it should run for about 15 minutes;
- the engine is turned off and the coolant is drained;
- water is poured in;
- the engine starts, it should run for a couple of minutes;
- the water is drained;
- antifreeze is added.
Today, the chemical industry produces many ready-made compounds for cleaning the cooling system of accumulated pollution. It is recommended to use only those compounds that are sold in auto stores.
Note! Some experts in their practice use the carbonated drink Sprite to clean stove radiators. The choice always remains with the car owner, the main thing is that the method is effective.
In fact, cleaning and rinsing the stove yourself is not so difficult; the main thing is to follow the instructions and pay attention to tips and recommendations. To better understand the process, you can watch the video. It wouldn’t hurt to also study photos of how to do it yourself. If you follow the instructions, everything will work out, and you won’t have to pay a high price to the car wash workers for it.
Washing with dismantling
Complete dismantling of the heat exchanger is a troublesome and time-consuming task, but this method makes it possible to clean it not only from the inside, but also from the outside. This method is also better because it can be diagnosed in case of leaks, which can be eliminated by argon welding.
If you still decide to dismantle it, then to gain access to the stove you will have to unscrew the dashboard.
This disassembly is similar to what is required to remove the evaporator when cleaning the air conditioner.
After removing the torpedo you need to:
- Disconnect the pipes leading to the heating unit. In some brands of cars, the heating unit contains an evaporator of the air conditioning system, which means that in order to dismantle the stove, these pipes will also have to be disconnected.
- Carefully unscrew the heating unit and remove it from the interior.
Flushing the stove radiator in this way is made several times easier, because it can be done at home, under hot running water. And even if the chemical ingredients do not help, you can solder the heat exchanger and clean it manually using a brush or similar improvised means in the form of a drill with a long drill bit.
Removing the radiator
- We drain the coolant from the heating system by unscrewing the plug on the drain hole and the cap on the expansion tank. Prepare a container in advance to collect the liquid that will be drained.
- To eliminate the possibility of a short circuit, be sure to remove the negative terminal on the battery.
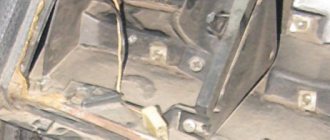
- We remove the frill, and to do this you will need to unscrew the screw, which is located under the brake cylinder. In addition, the frill is screwed on with four screws and is also held in place by two clamps. In addition, it will be necessary to unscrew a couple of left screws and only after this will it be possible to dismantle the frill along with the wind cover.
- We find the coolant level sensor, remove the terminal and the hose through which air enters the cabin from the expansion tank.
- We remove the windshield wipers, which are attached to four screws, and also remove the hose from the windshield washer.
- Access to the stove radiator is blocked only by the fan housing, filter and other elements of the heating system. All we have to do is disconnect the existing hoses and we can start flushing the radiator.
Useful tips
After cleaning the heat exchanger, do not be lazy to replace the underwater hoses and install new clamps. After all, it will be very disappointing when, after a few days, the cabin becomes cold again, and the culprit is a small hole in the hose or a loose clamp that leads to air getting into the heater radiator.
Periodically clear the air ducts of leaves and dirt that could reduce the heating efficiency.
Use high-quality coolant to prevent re-contamination of the heater with impurities found in low-quality antifreeze.
Periodically turn on the fan at maximum speed to blow through the outer fins of the radiator.
One of the reasons for poor heater performance is the heater radiator. During the operation of the car, it begins to leak and is no longer able to transfer the required amount of heat to the interior. Depending on the year of manufacture and configuration of the Lada Priora, the process of removing the stove (radiator) can vary greatly.
Main faults
The following malfunctions are most typical for a car heater:
- There is not enough heat from the stove, and during the test it is discovered that the antifreeze inexplicably disappears. It’s good if it turns out that the whole reason is weakened or destroyed hose fastenings, or they themselves are worn out, cracked, and begin to leak antifreeze. Usually such “foci” are marked by traces of leakage and stains. It is not at all difficult to remove a leaky hose or clamp and replace it with a new one. It is much worse if the heater radiator leaks. Removing it on a VAZ 2110 will require significant effort;
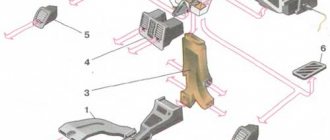
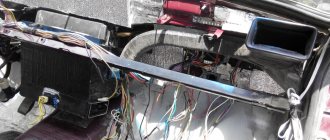
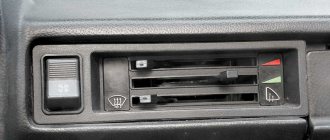
In the photo - Control parts and air ducts of the VAZ 2110 stove
Heater damper motor gearbox VAZ 2110
How to remove the heater radiator on a Priora without air conditioning
Since the beginning of production, AvtoVAZ has installed a heater from the “ten” on the Priora (catalog number: 21110-8101012). The disadvantage of this design was that the heater radiator is removed towards the vacuum brake booster, which allows this to be done. As a result, the heater assembly has to be dismantled.
The procedure is as follows:
- Remove the wipers.
- Remove the frill (wind flap).
- Remove the soundproofing of the engine shield.
- Disconnect a bunch of connectors with wires.
- Unscrew the heater mountings.
- Divide the heater into two parts (left and right).
- Remove the right side of the heater (in the direction of travel).
- Move the left side to the side to gain access to the heater radiator.
- Drain the antifreeze.
- Replace the heater radiator.
The whole procedure took several hours. This is shown in more detail in the video:
There is another way to replace it. To gain access to the heater radiator, instead of the heater housing, it is necessary to remove the vacuum brake booster along with the brake pedal. This allows access to the left side of the heater (in the direction of travel) and to the radiator itself.
Add a comment Cancel reply
You must be logged in to post a comment.
How to remove the heater radiator VAZ 2110 model ? The stove doesn’t heat well, I want to prepare for winter, to do this I want to remove the stove on my 10 and clean and flush the radiator . Please tell me how to get to it and remove it? I read that on 2110 released after September 23, 2003 there are slight differences.
- The VAZ 2110 stove stopped working - 5 answers
- The stove sometimes heats up, sometimes it doesn’t, VAZ 2110 – 5 answers
- The stove in the VAZ 2110 does not work - 5 answers
- The VAZ 110 heater fan is not working well - 5 answers
- The oven only blows hot air VAZ 2110 – 3 answers
As a rule, the instructions provide for dismantling and replacing the radiator by pulling out the stove and first halving it. And once you start the procedure, you will see that it will be difficult to get it out of there. But there is another method that does not require such a procedure. This is what I recommend to them, much faster.
And so to get to it you need to free up space, so you will need to remove the following elements:
wipers, frill, short part of Shumka from the hood, expansion tank. It is also natural to drain the antifreeze (everyone has their own methods, the procedure is not complicated in principle).
Replacing the heater radiator on a Priora with air conditioning
After some time, the manufacturer began to equip its cars with air conditioning (climate control), for example, HALLA or Panasonic (article: 21703-8101012). The design of the new Priora heater from a maintenance point of view turned out to be much more convenient. Now, to replace the stove, you do not need to dismantle the frill, windshield wipers, heater or vacuum brake booster.
It is only necessary to: remove the sound insulation of the engine shield, remove the engine air filter hose and the seal in the area of the heater radiator hoses. All! Drain the antifreeze and remove the radiator towards you, towards the engine.
Video instructions are attached:
Thus, replacing the radiator of a Priora stove depends not only on the type of heater, but also on the chosen method of replacing it. How did you remove the heater radiator on your car? Which method suits you best? Let us remind you that solutions to other problems with the stove can be found in this article.
Problem solving
Now let's talk about how to solve emerging issues, troubleshoot problems and return the heater to normal operation.
Each breakdown requires separate consideration.
Broken motor
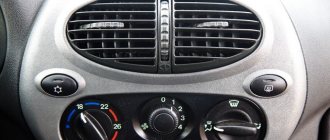
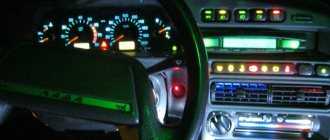
Temperature not regulated
If the temperature of the air flows cannot be adjusted, the problem is hidden in the control unit or damper, or the temperature sensor on the ceiling inside the cabin does not work.
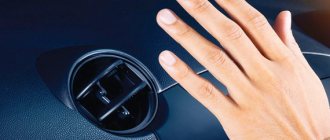
To check, turn the regulator all the way to the right and place your hand under the air flow. If warm air flows only when the regulator is in the maximum heating position, change the sensor. If that doesn't help, change the regulator. If heat is received in other positions of the regulator, the sensor should not be blamed.
Be sure to check that the damper is not stuck. It can be accessed through the engine compartment. If replacement is necessary, replace the standard plastic damper with an aluminum product. It is more durable.
Blowing cold
If the heater on your VAZ 2110 starts blowing cold air, you need to look for the reasons. The cause of the failure lies in the gear motor. A similar situation occurs in 9 out of 10 cases, so it is unlikely that you will have to look for alternative culprits.
Air flows with a broken damper
The gearmotor needs to be replaced. This is done as follows:
- Wipers are removed;
- The frill is dismantled;
- Unscrew the three screws that hold the gearmotor;
- The wiring is disconnected;
- A new one is installed in place of the failed device. Ask your assistant to switch the position modes of the regulator, and at this moment you will mount the gearmotor;
- The frill and wipers are returned to their place. Work is done.
But there is 1 case out of 10 that will force you to change the heater due to wear and tear of the old one. As the practice of VAZ 2110 owners shows, the heater from 2112 is best suited for replacement. Moreover, you can choose between two stove options - 2112-01 or 2112-02. The first one does not have an air filter, while the second option has one.
The windows fog up, the feet are not heated
It is not uncommon for VAZ models to have a problem when air flows normally from the stove, but it does not heat the feet and does not flow onto the windows.
Modification of air ducts
The issue can be resolved by upgrading your air ducts and getting rid of existing gaps in the cabin and warm air intake channels. This is a rather complicated procedure, the implementation of which will allow you to forget for a very long time about the problem with the stove, which does not warm your feet and does not blow on the side windows.
It would not be superfluous to install a pre-start heater. Due to it, the interior warms up faster.
Coolant leaks
The stove may not heat up due to the fact that the level of coolant, that is, coolant, decreases. Do not rush to add antifreeze to the tank. First, be sure to check for signs of leakage in the pipes and connections.
Problems with the stove on a VAZ 2110
If your radiator is leaking, the news is not good for you. You will have to dismantle it and, most likely, replace it with a new one.
Rinsing with Fanta, Schweppes or Sprite.
This method is also recommended by experienced car owners.
It is important not to confuse sodas, since Fanta, Schweppes and Sprite contain citric acid, and, for example, Coca-Cola contains orthophosphoric acid, which can damage the metal surface. You need to purchase 6-8 liters of soda, ideally without bright colors, and then flush the cooling system. After completing the procedure, make sure that as much liquid as possible has been drained. Then you need to rinse the parts twice with water and add antifreeze. Simplicity: 3
Cost: 2 Time spent: 5 Quality: 3 Result: recommended for moderate contamination.
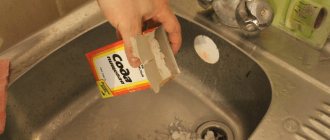
Cleaning with citric acid.
One of the cheapest and most accessible methods of descaling. The rinsing solution is easy to make yourself. It is necessary to dissolve 200 g of acid in warm distilled water. Sometimes it is recommended to add a little vinegar. The resulting liquid must be heated. After this, you will need to drain the old antifreeze and add flushing fluid. Next, we take a break and use the car as usual. After 3-4 days, drain the liquid, which should remove all dirt and scale particles. After that, fill in the antifreeze and the work is finished.
Simplicity: 5
Cost: 5 Time spent: 3 Quality: 5 Summary: recommended for moderate contamination.
Cleaning with hydrochloric acid solution
Another dangerous method that is not recommended without similar practical experience.
In addition, hydrochloric acid is quite difficult to obtain. Compliance with safety precautions, as in the case of using sulfuric acid, is simply mandatory. When using acid to get rid of heavy contaminants, you need to fill the cooling system with a 2% acid solution. You will need no more than 50 ml per 1 liter of water. After flushing the heating system, you need to carefully rinse it with water several times. Never use this method if the cooling system consists of parts susceptible to corrosion.
Simplicity: 1
Cost: 3 Time spent: 4 Quality: 5 Result: recommended in case of high levels of contamination.
Washing with sulfuric acid
Dismantling in this case is mandatory to avoid damage to the rubber and plastic parts of the cooling system. In today's conditions, this is a rather exotic method, the feasibility of which is highly doubtful. Before starting the procedure, you must follow all safety regulations. It is imperative to protect your eyes with special glasses and the skin of your hands with rubber gloves. It would be a good idea to throw a special robe over your clothes. In addition, use a household respirator that will protect your respiratory tract from toxic fumes. Also use special tongs or grips to prevent direct contact with the solution. In addition, you will need a hydrometer to measure the concentration of the wash liquid. Please note that rinsing requires a 15% acid solution. Therefore, the hydrometer should show a density of 1.1 grams per 1 cubic centimeter. To obtain the solution you also need distilled water and battery electrolyte. It is important to remember that you should never pour water into acid.
On the contrary, you need to carefully add the acid to the water. Old-style radiators made of copper can be washed in a similar way. Parts made of aluminum and zinc, on the contrary, will become unusable.
Simplicity: 1
Cost: 3 Time spent: 4 Quality: 5 Result: recommended in case of high levels of contamination.