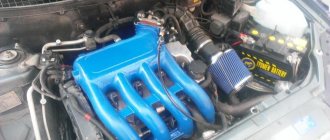
The intake manifold, or as it is popularly called the receiver, is a device that ensures a uniform flow of purified air into the cylinder head. The Priora receiver is subject to tuning and modifications, which we will talk about in this article.
In addition, the receiver accumulates air and smoothes out its vibrations, thereby ensuring smooth engine operation due to a uniform (without drops) supply of air masses. When the unit operates correctly, a highly saturated air-fuel mixture is supplied, and lower fuel consumption is achieved when the engine is running.
How to remove the receiver on a Priora
Tools that may come in handy: - 10mm socket; - key 13; - screwdriver.
To remove the intake manifold you will need:
- Due to the fact that in the next steps of the instructions there will be manipulations with electrical wiring, it is necessary to remove the negative terminal of the battery.
- The next step is to remove the plastic screen (cover) from the engine housing. This is done so that it does not interfere with your work.
- After which, it is necessary to remove power from the four ignition coils and dismantle them. To do this, pull out the contact chips. Take a 10mm socket (or a wrench of the same size) and unscrew one fastening bolt on each coil. Simply pull the coils upwards using the necessary force. Now they can be removed. There is no need to remove the spark plugs themselves; they will not interfere with removal. On the other hand, it is advisable to take advantage of the situation and check their condition (gap and spark quality).
- Our next task is to dismantle the throttle assembly. The receiver cannot be removed without removing it. To remove the throttle and avoid excess antifreeze leaking out of the cooling system pipes, you need to prepare first (unscrew the cap of the expansion tank with coolant). To remove the throttle, it is necessary to disconnect all the pipes connected to it, including those responsible for the air supply (corrugation) and cooling. In order to remove the assembly itself, you need to unscrew the two fastening nuts with a wrench or a 13mm socket. Now the assembly together with the sealing strip can be removed, and at the same time inspected and, if necessary, cleaned.
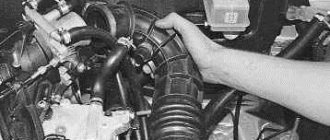
- At this point, locate and remove the crankcase ventilation hose. To do this, loosen the tightened clamp using a flat-head screwdriver and pull it towards you.
- The next step is to dismantle the dipstick structure to check the oil level. It is attached to one screw, which must be unscrewed.
- Now the most important thing is to remove the Priora 16 valve receiver. Doing this is not as difficult as it seems. First of all, we need to unscrew the nuts from the three connecting bolts at the junction of the block and the manifold. It is most convenient to work from a repair pit or using a lift, having previously dismantled the underbody protection of the car. After that, you just have to unscrew two additional nuts.
- It's time to move into the engine compartment and unscrew the two special mounting bolts that are located on the right and left of the receiver housing.
- After which the receiver can be carefully removed.
- Depending on the type and configuration of components in your engine, you may need to unscrew, rotate or remove any component that prevents the receiver from being removed (for example, power steering or a generator).
How to change pistons to plug-in or Avtramat pistons with your own hands?
Thus, we approached the issue of replacing pistons on a VAZ Priora car with our own hands.
Prepare a set of wrenches in advance:
- In the event that the replacement of elements is carried out on a car with high mileage, using an internal meter you will have to measure the distances from the upper edge of the cylinder in the transverse and longitudinal direction of the engine. In this case, you need to deviate from the top edge by 3, 10, 60 and 112 mm, respectively, you should end up with four values. This way you can determine how worn the cylinders are. If the wear is small and amounts to 0.05 mm, then this distance can be compensated for by installing elements with a slightly larger diameter. However, if the wear is 0.15 mm or more, then your cylinders will need boring. To do this, we recommend combining this process with the installation of plug-in elements. Immediately before disassembly, the motor should be cleaned. Use wrenches to unscrew the screws that secure the right engine support, as well as the front support and generator bracket. All brackets are dismantled.
- Then you should disconnect the pipeline, the block head, the flywheel, and the filter element. The pump supply pipe to the cylinder head is also disconnected. Now you will need a workbench or a suitable stand.
- Next, the oil pan, oil pump and oil receiver are dismantled. The screws securing the rear crankshaft oil seal are also unscrewed using a wrench. The holder itself can be dismantled by prying it with a screwdriver into the grooves on the body.
- Then you should unscrew all the bolts of the connecting rod caps one by one, and the connecting rods themselves with the pistons should be dismantled.
- After this, the piston rings are removed. The ring itself is removed from its installation location using the same screwdriver. Here, pay attention to the condition of the rings - if they are worn out, then it is better to change them.
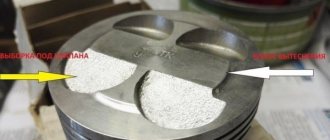
- Using a mandrel, the piston pin is pushed out, after which the piston itself can be removed. After replacement, all assembly steps are carried out in the reverse order. Make sure that the mark on the bottom of the element is directed in the same direction as the arrows on the connecting rod are pointing.
Pros and cons
The new power drive initially has a number of advantages:
- torque is increased, not only in the high speed range, but also at the bottom;
- oil pump performance has been doubled;
- camshafts are lighter, valve cross-section is increased;
- The displacement and engine power have changed significantly - 1.8 liters and 122 liters. pp., respectively;
- a phase distributor appeared on the intake camshaft;
- the intake and exhaust tracts have been improved, Euro-5 standards have been met;
- it is possible to finalize it to the Euro-6 protocol, planned for 2020.
Phase distributor
Exhaust tract
To replace the timing belt, it is necessary to remove half of the equipment under the hood. We come across defective valves from the German manufacturer Mahle, whose production facilities are actually located in China. Hence the increased oil consumption to 3 l/1000 km, then the cylinder head is replaced, which is very expensive (overhaul instead of maintenance).
Oil pump GMB
The use of high-quality parts from foreign manufacturers is not as clear as the designers intended:
- at any time after the European Union imposes sanctions against the Russian Federation, supplies may stop unilaterally;
- domestic industry is not yet able to provide such manufacturing precision;
- the engines will be equipped with a ShPG, low-quality timing belts and rollers, the service life will immediately decrease by half, that is, to 70 - 80 thousand kilometers.
Automatic tensioner
AvtoVAZ remains practically the only manufacturer in the world that, in principle, cannot provide the necessary precision in the manufacture of parts, which is why selective assembly is used on the assembly line, which indicates not advanced, but extremely poor technologies. It is easier for designers to “force the machine” to distinguish between the accuracy class markings of connecting rods and crankshaft main journals and bearings than to strictly adhere to one accuracy class, as in the entire civilized world.
Crankshaft 21179
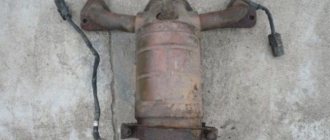
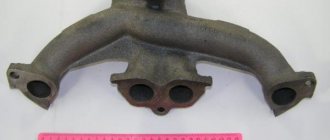
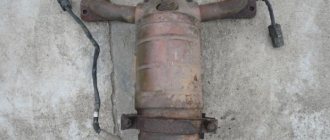
What is a “spider” for Priora and what is it for?
Tuning the exhaust system of the Lada Priora includes replacing the exhaust manifold with a similar sports version, which is called the “spider”. The main difference between the original manifold and the spider is that the latter has a larger diameter and the same length of outlet pipes, which facilitates the rapid release of exhaust gases from the cylinders to the exhaust pipe.
This spider design prevents exhaust gases from flowing back into the combustion chamber, which increases engine power and performance. In addition, the manifold performs the function of purging the combustion chamber and filling it with a combustible mixture due to the pressure that is created when exhaust gases are released.
To tune the Priora exhaust system, a ready-made kit for installing a direct-flow Stinger exhaust with additional components that are perfectly attached to each other is often used. As a rule, the tuning kit includes the following parts:
- new muffler with nozzle;
- spider;
- resonator Stinger Sport with a pipe diameter of 51mm.
The need to install a “spider” on Priora arises when:
- long vehicle acceleration time;
- low engine power;
- failure of the old exhaust system, where installing a spider on a Priora is considered as an alternative to the old one.
On the tuning parts market there are many modifications of “spiders” made by different manufacturers. Some models are produced without oxygen sensors, which requires reflashing the electronic engine control unit.
There are spiders with long and short pipes, which are indicated by the corresponding numbers 4-2-1 and 4-1. These designations reflect the shape of the spider pipes, that is, 4 pipes merge into 2, and then into 1, in the second option, respectively, 4 pipes are immediately combined into one, which significantly reduces the length.
The most popular among car enthusiasts has become the long spider 4-2-1, which, unlike the short one, shows good results in a wide speed range. A short spider 4-1 is better suited for forced engines operating at 6-10 thousand rpm.
Test No. 1
For maximum accuracy, measurements were taken on one day. First on a standard receiver, then it was replaced with a 21179 receiver, and again for tests. The test results are presented in the graph (black - receiver 21126; red - receiver 21179):
Neither Cycle Filling (CN) nor Mass Air Flow (MAF) have changed much. The central cycle has only shifted a little to the top (4500-7000 rpm), and this is logical, because compared to the standard receiver, the channels of the 21179 receiver are slightly shorter (460 mg/c at 4600 rpm and 5200 rpm, respectively ). The owner believes that the low end (XX-2500 rpm) and midrange (2500-4500 rpm) remained the same, both in terms of graph and feel. But at the top the car rides more confidently.
Comparative characteristics
So that you can understand which group of pistons is better, consider the comparative characteristics of all three manufacturers with photos:
- Let's start with STI products. Forged STI pistons are produced in Togliatti and they are made by hot pressing. As reviews from consumers who have already installed STI show, these forged pistons largely reduce the efficiency of the engine. This is due to the fact that STI parts have a lower compression ratio and a larger combustion chamber. It should also be noted that the alloy of STI pistons contains less silicon, as a result of which the strength of the components at high temperatures will be lower.
In addition, as a result of the reduced nickel content in the alloy, the service life of the element can be significantly reduced. With all this, STI plugless pistons are more expensive than STK and Avtramata.
Avtramat cast pistons are produced in Kharkov, Ukraine. In the production of pistons, an alloy identical to the original parts on Priora is used. However, unlike the latter, Ukrainian-made products can have deep countersinks, and this is an undoubted advantage of the Avtramat compared to standard pistons. In this case, we are talking about safety in the event of a timing belt break. As for the compression ratio, in the case of the Avtramat it has not changed.
Which receiver is better for Priora?
There is no clear answer to this question. Each situation is individual. However, some comparisons can be made between receivers made of plastic and aluminum.
Advantages of aluminum products:
- higher strength and wear resistance;
- increased engine power due to design features and a larger volume of supplied air;
- Some models are easier to install and therefore easier to remove.
In addition, the shape of the collector itself plays an important role in ensuring increased power, which should not contain sharp corners and transitions. The most important difference between plastic and metal is the strength and durability of the latter. Therefore, we can recommend installing metal types of intake manifolds for Lada Priora cars.
Video “Replacing elements with plug-inless ones”
You can learn more about this process from the video.
Operations performed when replacing the intake manifold sealing rings on a VAZ 2170 2171 2172 Lada Priora
To seal the joint between the flanges of the cylinder head and the intake manifold, as well as between the flanges of the throttle assembly and the intake manifold, O-rings are installed in the grooves of the intake manifold pipes. If the tightness of these rings is broken, the engine runs unevenly (“troit”).
Tools required when replacing the intake manifold o-rings on a VAZ 2170 2171 2172 Lada Priora
You will need: screwdrivers with a flat and Phillips blade, wire cutters or a knife, keys “10”, “13”.
Disadvantages of engine 21179
The first 1.8 21179 engines rolled off the assembly line in 2016. Already after 3 years of use, the disadvantages of the “volumetric” motor are known.
The main drawback, according to the owners based on reviews, is the low engine life. What is the reason for this?
- To supply the phase shifter with engine oil, manufacturers drilled additional channels in the cylinder block, thereby calling into question the possibility of boring blocks to unprecedented repair sizes. For comparison, motorsports drivers bore “prioro” blocks 21126 from 82 mm to 84 mm, while civilian engines bore them to 83 mm. Having bored the engine block to dimensions of 83 mm per cylinder, the likelihood of opening the oil channel becomes high.
- Increased load on the crankshaft journal. Compared to the 21126 or 21129 engine, the crankshaft journal was reduced in diameter. Due to the higher piston stroke than on 1.6 engines, we get additional load on the crankshaft.
- The inserts are a calculation error by the engineers. significantly reduce the resource of the internal combustion engine.
- More complex engine maintenance. To change the timing belt, you need special tools, removing the valve cover, etc.
- Oil burn - The connecting rod and piston group from the factory may not be installed in the correct size. (A frequent problem at AvtoVAZ, I encountered it personally). The way out of this situation is to replace the pistons under warranty (the manufacturer assures that the oil consumption will drop as the engine runs in).
- Another nuance is the use of solid oil scraper rings. The use of these rings under load leads to oil consumption. In other matters, like any 16kL VAZ engine, due to the use of these oil scraper rings, oil is consumed at high speeds.
- Knocking of hydraulic compensators - oil starvation, check the oil level
- The cut-off is 6200 rpm - a little not enough for a comfortable volume; you have to switch at the moment the car is directly ahead of you
Engine oil
5W-30 5W-40 10W-40 15W40
Standard oils for VAZ engines. The replacement period is at least once every 10 thousand km. (advice for the benefit of the motor). When asked which oil is best to fill, there are endless battles, tests and correspondence on forums. People evaluate carbon deposits and other parameters that are incomprehensible to “distant” car enthusiasts
The author adheres to his opinion on this matter: it doesn’t matter what kind of oil, the main thing is that it is original from the factory, and not spilled from a barrel in a neighboring garage. Believe me, in practice, finding original oil is not so easy.
Removing the intake pipe
...and remove the hose from the cylinder head cover pipe.
Using a Phillips screwdriver, unscrew the self-tapping screw securing the guide tube of the oil level indicator to the intake pipe...
...and lift up the tube with the oil level indicator.
...and move the wiring harness to the side.
Places for attaching the intake manifold to the cylinder head
(for clarity, the intake pipeline and the fuel rail with injectors have been removed): 1 - studs; 2 - holes for bolts
We move the intake pipe forward (along the direction of the car) and lift it up, bringing it out from under the wiring harness of the engine control system.
Source: wiki.zr.ru
Reasons for replacing the Lada Priora receiver
There are a considerable number of varieties of intake manifolds, for example, made from various types of metals or composite materials. However, the Priora receiver is made entirely of plastic. This material prevents excessive heating of the manifold due to a hot car engine.
Thus, the air flow characteristics are improved, which has a positive effect on the proportions and quality of the air-fuel mixture. However, plastic also has a main, negative side - fragility. As a result, numerous breakdowns occur both due to the fault of the car owner and due to low temperatures at which the plastic loses its strength coefficient.
The most common damage can be caused by: - road traffic accidents (even minor ones); — accidental impacts during any repair work in the engine compartment; — other reasons;
If the receiver on your car has through holes or any other leaks, then it must be repaired (if possible) or replaced. If a part is faulty, air loss will occur, resulting in improper engine operation.
Priora fuel system
Forced fuel injection, which has already become a classic in the automotive industry, is used on Lada Priora cars. Fuel system composition:
• gas tank; • pump and filter located in the tank; • fuel line; • pressure regulator; • fuel rail; • four nozzles; • throttle valve; • intake manifold; • electronic engine control system.
The work is based on the fact that when the ignition is turned on, the electric fuel pump starts working, which builds up pressure in the rail. Further, when the engine is cranked by the starter, the electronic control unit opens and closes the injectors, the air-fuel mixture enters the combustion chambers, according to the operating diagram.
After fuel enters the combustion chamber, a spark is formed between the electrodes of the spark plugs. The fuel ignites and the engine starts. The injectors are electromagnetic valves, and the control unit is responsible for their operation. He is also responsible for the quality of the mixture, the ratio of air and gasoline. Sometimes problems arise and you have to disassemble the fuel system for repairs.
Main technical characteristics of VAZ engines: 21124,21126,21129,21179 and their comparison
Boring a VAZ-21179 leads to sad results. There are no repair pistons, and an attempt to line the block, due to additional drilling done between the cylinders, for better cooling of the block, is not possible.
Comparison of technical characteristics of VAZ engines: 21124,21126,21129,21179
| Motor name | VAZ-21124 | VAZ-21126 | VAZ-21129 | VAZ-21179 |
| piston stroke | 75.6 | 75.6 | 75.6 | 84 |
| compression ratio | 10.3 | 11 | 10.5 | 10.3 |
| cylinder diameter | 82 | 82 | 82 | 82 |
| number of valves | 16 | 16 | 16 | 16 |
| torque | 131N.m. at 3700rpm | 145N.m. at 4000rpm | 148/4200 | 170/3700 |
| Petrol | 95 | 95 | 92 | 92 |
| Euro | 3 | 4 | 5 | 5 |
| Consumption | 8.9l | 8 | 6.9l | 7.2l |
| Power | 89hp | 98hp | 106hp | 120hp |
| Controller | JANUARY 7.2 | M 7.9.7 or JAN 7.2. | M86 VAZ-21129 Vesta, manual transmission Euro 5 | M86 VAZ-21179 Vesta, AMT |
| Candles | AU17DFMRV | A17DFMRV | BCPR6ES NGK | Q20PR-U11 Denso |
Comparison of engine 21179 with base 21126
The VAZ 21124 engine, unlike 21222, 21126, 21129 and 21179, does not bend the valve; for this purpose there are holes on the bottom of the piston. It can be used with standard shafts or sports ones with moderate lift,
Starting with engine 21126, the piston was reduced, thinner rings were installed, and the connecting rod was lightened. The 21126 engine is already equipped with a new automatic timing belt tensioning mechanism with rollers of a new design.
Many car owners with this engine had their timing belt break and valves and connecting rods bent at very low mileage, due to poor quality pumps assembled at TZA. Pumps or rollers jammed, which led the car owner to significant expenses (from 30 to 50 thousand rubles). At the same time, the belt could easily cover its 150-200 thousand km.
A special two-layer metal cylinder head gasket with a thickness of 0.45 mm was also installed.
At 21179, we increased the working volume to 200 “cubes” and installed a phase shifter at the inlet. Thus, the base 21126 was increased from 98 to 120 horses. Naturally, it was necessary to somehow reduce the thermal load. To do this, it was necessary to make additional cooling channels in the cylinder head, which AvtoVAZ did an excellent job with. 21179 has a new cylinder head with increased fluid flow. But to reduce the temperature in the cylinder block, they did it in a simpler way. The block had the usual oblique drilling between the cylinders. Is the question still open? Will the gasket between the cylinders often burn out due to additional holes?
This practice has already been used on ZMZ engines. When from a 406 engine with 98 hp. made 405,135 hp. We also machined a jumper into the block. The result was disastrous. The cylinder head gasket burned out very often and many drivers began to seal these jumpers with cold welding. So, West drivers from 21179, get ready and stock up on cold welding (just kidding).
Subsequently, ZMZ completely changed the cylinder block and the new engines 405 and 409 already came without a jumper between the cylinders. The plant admitted its mistakes, but more than one thousand gazelle drivers have experienced these factory mistakes. AvtoVAZ cannot yet replace the old cylinder block from 21126 with a new one developed by the designers, due to the too high costs of changing the production cycle. I think in the future they will be forced to replace the unit.
At 21179, the crankshaft was lightened by 40%. Now its stroke will not be 75.6 as it was on 21129, but 84, so the pistons and connecting rods are no longer interchangeable with 21126.
The oil channel plugs on the crankshaft were removed and a neck-to-neck lubrication system was used.
The main bearings do not have a full groove for oil passage, but have a variable profile.
The intake manifold and valve covers are completely plastic.
A rubber gasket was used in the crankshaft damper to dampen torsional vibrations.
There is a new flywheel for the clutch with a diameter of 215 mm, not 220, as was previously the case.
The pump produced by TZA was completely replaced by an imported supplier, apparently Korean.
Europeans make all their engines through one place, and Russian managers, thanks to peripheral capitalism, are good at adopting this experience. When some talkers say that the Russians cannot do anything, this is pure lies and propaganda. We still have great specialists in the automotive industry, but they are caught in the grip of the current economic situation, where it is practically impossible to apply their knowledge and projects. What the USSR did in 1939, the Germans were able to repeat only in the 90s. An example is the V-2 diesel engine with 4 valves per cylinder with two camshafts, which was installed on the T-34 and could even run on sunflower oil. Those designers who then developed an engine that was an order of magnitude superior in its performance to the German engines on the Tiger and Panther tanks need to erect a monument.
Source
Determining whether the engine is sucking in air
Before you start removing more than half the engine parts to get to the manifold, you should check other parts of the air system. And after that, carry out a complete tuning of the car. First of all, you need to inspect all the hoses and gaskets located on the cylinder block.
The most common method of finding air leaks is to spray the hoses with plain water; if there is a hole in one of them, the engine speed will decrease when water enters.
Detailed instructions for removing the intake manifold on a new Priora
It is necessary to remove parts from a cooled engine. It will take about an hour, provided that you have at least a little understanding of the injection system. The following sequence of actions must be followed:
- First of all, you need to remove the throttle. There is no need to completely remove it, just move the assembly connecting it to the manifold to the side. You also need to remove the throttle valve to thoroughly clean everything;
- disconnect the drive throttle cable from the manifold;
- disconnect the connectors from each other to remove the wires from the ignition coils;
- on the camshaft, disconnect the sensor wires;
- disconnect all canister wires;
- disconnect the brake booster vacuum hose going to the manifold;
- then unscrew the clamp and remove the ventilation pipe;
- Unscrew the self-tapping screw of the oil level indicator guide tube;
- remove the dipstick with the guide tube;
- using sockets and a ten-size wrench, unscrew the nuts and bolts securing the exhaust module and coils from cylinders 1-2-3;
- remove the coils;
- then you need to unscrew the collector fasteners;
- slide it forward and remove the manifold.
Malfunctions, causes, elimination
Since the 21126 engine is a 16-valve front-wheel drive design with an overhead camshaft position, it is prone to characteristic breakdowns:
| No startup when crankshaft rotates | 1) ignition coils are faulty 2) failure of electronic control 3) DPKV breakdown 4)fuel system malfunction | 1) Repair or replacement 2) flashing or replacing controllers 3) replacing the crankshaft position sensor 4) replacing the pressure regulator, cleaning the fuel module, injectors and ramp |
| The engine won't start | 1) cold 2) warmed up | 1) recharging the battery, cleaning the power system, replacing the coolant temperature sensor, replacing injectors, repairing the fuel management system 2) in addition to the above, replacing the air filter |
| The speed is floating XX | 1) vacuum hose connections 2) cylinder head gasket 3) clogged air filter | 1) replacing or tightening clamps 2)use a new gasket 3) cleaning or replacing the cartridge |
| Misfire in XX mode | 1)low compression 2) injector failure 3) failure of the ignition coils 4) faulty spark plugs | 1) replacing rings; valve stem seals2) installation of new injectors 3)repair or replacement 4) gap adjustment or replacement |
If you follow the requirements of the operating instructions and maintenance regulations, these troubles can be avoided.
Diagnostics
To check your car for leaks, you can use the ELM327 scanner, you can read how to do this here. This scanner is capable of diagnosing your car and indicating whether it has this malfunction. But, checking with a scanner will not always be a reference, since the leak may be insignificant and the ECU simply may not notice it.
It is best to check the suction using the old proven method, or rather several, which are given below.
First way
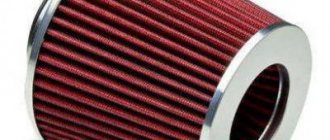
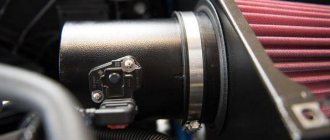
It is necessary to unscrew the mass air flow sensor from the air filter housing. It is secured with two 10mm key bolts. We take out the mass air flow sensor and start the engine.
With the internal combustion engine running, we close the sensor hole with our hand or a bag, the car should stall and the intake corrugation should shrink. A vacuum is created in the engine, which, in the absence of air leaks, will persist for a long time and the corrugation will remain compressed.
Compressed corrugation due to vacuum
If the corrugation on your car instantly expands or does not shrink at all, then this indicates the presence of suction.
Second way
To diagnose using this method, you will need a pump or compressor.
Here, just like in the first case, you need to unscrew the mass air flow sensor from the body and insert the bag between it. Then screw it back, thereby blocking air access to the engine.
On the receiver we find a fitting with a plug. We remove the plug and connect the pump there, pump up pressure into the receiver and listen to where the hissing will come from. To more accurately determine the location of the leak, you can use a soap solution with a spray bottle. We spray the areas of possible leakage with this solution and look for the appearance of bubbles.
Video on methods 1 and 2
Third way
This method is widely used at service stations. The search for suction is carried out using a smoke generator. This method is similar to the second, but instead of air, smoke is pumped into the receiver. If the engine has a choke, then smoke will flow out of this place.
Lada Priora Station wagon with Turbinka › Logbook › Changing the receiver on the Stinger
Finally got around to replacing the standard plastic receiver with a receiver from Stinger. I wanted to not just install a receiver, but take measurements and compare the results. Installation:
Removing the standard receiver went fairly smoothly. I had to remove the generator, but I did this procedure last time and already installed the bottom bolt more conveniently, back to front.
Next, I tried on the new receiver, it didn’t want to stand on the heels, it rested against the generator bracket, so I had to work with an angle grinder.
The Stingera receiver was not equipped with studs for attaching the throttle, but it was not possible to take them from the standard receiver; there was only one stud on it, and the second one was a bolt.
I had to make a stud from a suitable bolt.
I cut the HBO fittings into the free spaces. This time closer to the cylinders, as I was advised.
When I started to pull the receiver into place, I discovered that the outer bolts were too long, they did not attract the edges, their washers rotated freely. I placed additional washers and groovers under them. When I started installing the generator, I discovered that it rested on one of the receiver's horns. There was no desire to remove the receiver again, so I left it like that, the generator is now attached only to the bottom bolt and tightened with a drive belt.
The next problem arose with the air filter housing; with the standard bellows it moved too far back, where there was no room for it at all. I managed to push it upside down and connect it through an old, cut corrugation from the nine.
I couldn't get the oil dipstick into place even by bending the tube. I temporarily plugged the hole with a plug, and in the future I’m going to put a short 8kL probe there. Checking the oil level will now be very inconvenient.
Comparison of results:
I took measurements of the Mass Air Flow and Cyclic Filling on the standard receiver and then on the Stingere. I decided to take not individual peak values, but average values in ranges of 500 rpm, I think this will be more accurate. The measurements were taken on different days, the weather was almost the same, but the position of the air filter housing and its air intake became different, I think this will introduce errors in the measurements.
As you can see, there is an effect from the receiver, but only in the upper range, after 5000 rpm. At medium speeds, it turned out to be a failure. I feel satisfied, the car has become much faster at the top, the traction has become more uniform throughout the entire range (no catch in the middle and no dip at the end).
PS:
Next, I want to do the same measurement at throttle 52, otherwise someone says that it is necessary to install it, someone says that it is of no use. PPS:
I warn you right away that there are no questions about absolute digital values; we are only interested in relative results. But comparing numbers measured on different machines, at different times, with different mass air flow sensors is not correct.
source
How to replace the intake manifold on a VAZ 2170-VAZ 2172?
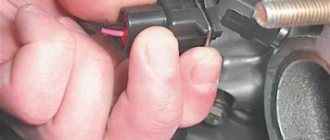
Removal: 1) It is attached with just some bolts and nuts, but some parts prevent you from getting to it, that’s why it doesn’t take as long to remove it as all the parts are removed that prevent its removal, first, turn off the power to the car’s on-board network since you will have to work with electronics, to do this, take a wrench and use it to remove the negative terminal from the battery, after which the on-board network will be de-energized (For more details on how to do this, if you have not yet understood, read the article: “Replacing the battery”, namely the first read the paragraph in it), as soon as the current stops supplying to all electrical equipment, remove the four ignition modules from the car engine (For clarity, all modules are indicated in the photo below with arrows, if you do not yet know how to remove them, then in this case, read the article: “Replacing spark plugs ignition on a VAZ”, be sure to read the second paragraph in this article and the note to this paragraph).
2) Let's move on, now remove the throttle assembly (it is also popularly called a throttle valve, but this is the wrong name) from the car and between this assembly, by the way, there will be the same gasket that is recommended to be replaced with a new one during any disassembly, but you should pay special attention for now do not pay attention to this gasket and read the article further, almost at the very end we will explain in detail how all these sealing gaskets are removed and in what cases they need to be replaced with new ones, and for more details on how to remove the throttle assembly, read the article: “Replacing the throttle assembly by car".
3) Then disconnect the crankcase ventilation supply hose from the pipe that is poured onto the cylinder head covers, to do this, take a screwdriver in your hands and use it to slightly loosen the hose clamp (see photo 1) and then disconnect the hose, followed by the guide with the probe which you are checking the oil level, you will need to remove it, the guide itself is attached to just one screw by unscrewing it (see photo 2) you can remove both it and the dipstick itself completely from the car (see photo 3), and then use wrenches to unscrew the two side nuts that secure the intake manifold to the cylinder head (see photo 4).
4) After unscrewing the side nuts, using a wrench or a socket wrench (Depending on what you have), unscrew the three central nuts and the two outermost nuts (see photo 1) and immediately after that remove the manifold from the car engine .
Installation: A new intake system manifold on a car is installed in the reverse order of its removal, but only you should know some aspects of its installation, firstly, it is possible that you did not remove it for replacement, but in order to get to other parts, for example, so on the removed the manifold has sealing gaskets, we mentioned them a little earlier, they can be removed quite easily, but if you don’t have new ones, then we don’t recommend disturbing the old ones, otherwise you’ll tear them, it’s recommended to always replace these gaskets with new ones, but if that’s not possible, then don’t remove them just visually inspect them, if cracks or traces of defects are found on them, then replace these gaskets with new ones (Where are all five gaskets located and how to remove them, see photos 1, 2 and 3), in addition, when installing the manifold back, take a lot of newspapers and crumple them up and put them in all four holes, which are indicated by arrows in photo 4 (But just make sure that they don’t fall inside), then take a brush that won’t scratch the metal too much and use it to clean the edges of the seats of those same sealing gaskets , it’s just that over time, pieces of gaskets stick to these edges, which is unacceptable, and therefore the edges must be clean and free of roughness that a brush with a metal part can cause, so do not use brushes with a metal rag.
How to remove and install the receiver
This work is quite accessible to a novice car enthusiast. Read the instructions, prepare the tools and go ahead with the removal and installation. And you need to prepare the following set:
- Driver and extension for heads.
- Heads No. 13, 10.
- Screwdrivers.
- Pliers (just in case).
And you can start working. According to the established tradition of normal locksmiths, the first thing to do is disconnect the battery terminal. And only then start disassembling. The first step is to disconnect all sensors and ignition modules. And move the wire harnesses away from them so as not to damage them. Using a screwdriver, unscrew the clamps on the rubber adapter from the mass air flow sensor to the throttle and remove the adapter sleeve from the damper assembly. Unscrew the two nuts 13 securing the throttle assembly with the Priora receiver.
Using a 10 mm socket, unscrew the bolts securing the ignition modules. Remove them. Unscrew the 2 10mm nuts holding the Priora receiver to the head. Now let's move on to the front. You need to start with the oil dipstick connection. It is screwed with a self-tapping bolt to the receiver. After this, pull the dipstick cover up and put it away. It's time to unscrew the main mounting bolts of the device. There are 5 of them. More precisely, these are 2 13 nuts and 2 bolts. It's quite difficult to unscrew them. Especially if the car is equipped with air conditioning. You will have to use a cardan for the head. But when they are all unscrewed, all that remains is to push the receiver towards you and remove it.
Receiver installation
There's nothing complicated here. Just proceed in the reverse order when installing. The main thing is to check the condition of the rubber O-rings before installation. They are installed directly into the body of the part, around the outlet holes in the head. And on the connection for installing the throttle valve.
Tuning option
Here you need to be very careful. Before choosing a receiver, for example, for the “sports” version, you should definitely consult with a specialist about the firmware and other modifications to the motor.
Useful video on installing a “sports” receiver on a Priora
Removing the fuel rail
You will need : relieve pressure in the fuel system, remove the engine air filter, prepare a Phillips and flat-head screwdriver, a 22mm open-end wrench, a 17mm wrench, pliers, a 10mm socket, a 13mm socket and a 5mm hex socket. .
Procedure:
- Disconnect the connector from the injector wires and remove it from the bracket.
- Unscrew the screw securing the pressure plate of the fuel supply tube to the ramp using a Phillips screwdriver.
- Unscrew the fitting of the fuel supply tube to the ramp using a 17 wrench, holding the tip of the ramp tube with a 22 wrench. Otherwise, the ramp may be broken.
- Remove the fuel supply tube from the tip of the ramp tube, and remove the rubber sealing ring.
- Loosen the crankcase ventilation hose clamp using a Phillips screwdriver. Remove the hose from the cylinder head cover.
- Unscrew the self-tapping screw securing the guide tube using a Phillips screwdriver.
- Remove the tube with the oil level indicator facing up.
- Remove the brake booster hose from the intake manifold by using pliers to loosen the clamp.
Disconnect the end of the throttle valve drive cable from the drive sector. Move the throttle body away from the intake manifold (see replacing the throttle body). Disconnect the blocks with wires from the ignition coils (from cylinders 1, 2 and 3), and move the wire harness to the side (see replacing spark plugs).
- Unscrew the two nuts from the upper fastening of the intake manifold using a 10 mm socket.
- Then two bolts and three nuts for the lower fastening using a 13mm socket.
- Disconnect the block with wires from the phase sensor. Remove the ignition coils from cylinders 1, 2 and 3. Cover the holes for the ignition coils with a rag.
- Push the intake manifold towards you and lift it up, bringing it out from under the wiring harness.
- Unscrew the two screws securing the fuel rail to the cylinder head using a 5mm hexagon.
- Remove all four injectors from the cylinder head holes by pulling the ramp along the axes of the injectors. Remove the ramp with injectors and wiring harness.
- Fuel rail assembly with injectors and wiring harness.
Birth pangs
The VAZ-21179 engine did not appear out of nowhere. The entire previous history of its emergence is a series of active design work and periods of oblivion. It all started in the early 2000s with plans to create a new model at VAZ, belonging to class “C” - the “Silhouette” project. A heavier car required a more powerful engine.
The existing 16-valve 1.6-liter engines were not suitable for this purpose. It should be said that in the line of VAZ engines there was a power unit with a volume of 1.8 liters. We are talking about unit 2130, which was installed on all-wheel drive vehicles: the five-door Niva and the Nadezhda minivan.
However, it was designed exclusively for “tractor” traction and had a power of only 85 horsepower. Therefore, they began to develop a new engine for the Silhouette project. Then management plans changed, and the developments were archived.
In 2008, they returned to the previous idea again, but they decided not to attempt a completely new unit, but to limit themselves to a deep modernization of the old 1.6-liter due to a lack of funding. One of the planned innovative solutions was the use of a variable valve timing system.
Since VAZ engineers had no experience in this area, it was decided to enter into a contract with the English concern Ricardo, which has the necessary competencies, to carry out calculation and research work. Also, at one time, thanks to cooperation with Porsche, a rather successful engine for the V8 was created, which became the prototype for all subsequent front-wheel drive models.
Work was stopped several times, then resumed again, as VAZ, like the entire Russian economy, was going through difficult times. And suddenly, completely unexpectedly, in March 2016, a new VAZ engine with the index 21179 was put into mass production.
History of origin
Motor 21179 was already in the minds of the engineer much earlier than you can imagine. Even at the end of the USSR, developers began to think about the Lada C project and its power units. Even then, engineers “knew” this motor by its features and power characteristics. But the difficult economic situation of that time and the collapse of the USSR forced the engineers to completely forget the Lada-Ts project.
And now, after a long time, when Boo Anderson comes to the post of general manager of AvtoVAZ, the project is raised and developed again.
The main task was to create an engine with good low-end torque, which AvtoVAZ lacked for a confident, comfortable ride. “Tractor” 8-cl engines have long since become obsolete, but the new 16-cl engines had a more “sporty” character. The situation was corrected by the then 21127 engine, now 21129, which is installed on Vesta, Xray, and other AvtoVAZ models. Due to the intake receiver with variable geometry installed on it, the torque from the bottom began much earlier, unlike the Prioromotor (21126), and its shelf was much further, right up to the cutoff. But with the start of production of a sedan with a larger mass - the Vesta, and the Xray hatchback - the need for low-end engines reappeared.
The engine was run in and tested for a long time. As a result, during the testing process it turned out that the rings were already stuck at 4t.km., as a result, the heat zone was increased and the problem disappeared.
Nissan HR16DE engine with 110 hp power. It copes well with its task on front-wheel drive. But if you have all-wheel drive, it will strain, get hot, eat a lot and not drive.
Another factor in the creation of the 21179 motor is economics and politics. Because the Nissan engine, although it is assembled here, still belongs to Nissan. And in the event of an unfavorable economic situation, an increase in exchange rates, the cost of its production and sale may simply be unprofitable.
Start of production of motor 21179
Back in 2014, there were rumors about the possible production of a 1.8 liter engine with phase shifters. And yet it became a reality. Previously, OPP and its subsidiary Super-Auto were already engaged in the construction and installation of a 1.8 liter engine with index 21128, which was installed in Priora Sport. But that engine did not have a special resource.
GC
- Throttle valve - without mechanical drive.
- Additional oil channels are made in the cylinder head for the phase regulator. Lightweight valves are from Mahle.
- The catcollector is supplied by the Russian company Ecoalliance. The diameter of the input channels has been increased to 39 mm. The oxygen sensor bears the Bosch emblem.
- The crankshaft has an increased crank radius.
- The working volume of the cylinders has increased due to the larger piston stroke.
- A reliable high-performance water pump is purchased from the Korean company GMB.
- For the first time, a VAZ engine has an imported GMB oil pump with increased performance.
- A new automatic timing belt tensioner was used - with two rollers, from the German company INA.
- Lightweight connecting rod and piston group - manufactured by Federal Mogul.
- The fuel rail is from Continental. The injectors have increased productivity, the spray pattern is optimized for the working process of the new engine.
The 1.8 liter engine is not very different in appearance from the current VAZ sixteen-valve engines. But this is a new motor, and of our own design. Main parameters:
- working volume - 1774 cm³
- power - 122 hp
- torque - 170 Nm at 3750 rpm.
The new motor is designed for Vesta, XRAY and Largus models. There is an additional area on the cylinder block for applying the serial number. It is clearly visible when the power unit is installed longitudinally in the engine compartment. Got the hint? There is no official information yet, but it is easy to guess that we are talking about Niva. The cylinder block is unified with that used on the current 1.6-liter VAZ-21126, -21127 and -21129 engines. Same height and same diameter of the cylinders. The differences are in the additional channels of the lubrication system, which ensure the operation of the phase regulator, and additional channels of the cooling system.
Removing Priora fuel injectors
- Disconnect the block with wires from the injector by pressing the spring clip.
- Remove the bracket by prying it off with a screwdriver.
- Remove the injector from the fuel rail, overcoming the resistance of the sealing ring.
- Remove the injector O-rings using a flat-head screwdriver.
Before installing the injectors, it is necessary to replace the O-rings. Then apply a thin layer of engine oil to the O-rings. Assembling and installing the fuel rail with injectors is performed in the reverse order.
What kind of engines will be under the hood of the Lada Vesta and technical characteristics of the units
The power line of five-door domestic cars consists of four-cylinder light-fuel internal combustion engines with a volume of 1.6 and 1.8 liters.
Motor VAZ-21127
Finding out what engine is in the Lada Vesta is easy. For example, the unit under the symbol VAZ-21127 is already familiar to our motorists:
- Power – 106 hp.
- Optimal power speed is 5,800 rpm.
- Torque – 148 Nm.
- Maximum torque speed – 4,200 rpm.
The former “Prior” engine was modernized, a controlled air intake system appeared. Its essence lies in a new receiver, where there are controlled dampers that are responsible for its volume when the engine speed changes. The elasticity of its operation is ensured by the fact that at low speeds air enters it through a long channel, and at high speeds through a short channel.
Car owners operating this unit pay attention to the fact that the timing belt requires special attention and timely replacement. To be fair, it is worth noting that there are no problems with floating speed due to the installation of temperature and air pressure sensors instead of the air mass flow controller
Motor VAZ-21179
To begin with, it must be said that the new VAZ development is a modernization of the above-described engine with index 21127. The project itself was worked out in detail a long time ago, but the concern’s management did not support it at the first stage. Nevertheless, its mass production started in 2016.
In terms of power and technical characteristics, the new Lada Vesta engines exceed their basic version:
- Performance – 122 hp.
- Torque – 170 Nm at 3750 rpm.
- Average fuel consumption is 6.8 liters per 100 km.
- Compression ratio – 10.3.
Only at first glance there is nothing interesting in the new product. Even a novice tuner who has just installed a 4-2-1 spider or a window closer thinks so. Therefore, it is worth focusing on the main stages of modernization.
Conclusion
- Receiver 21179 showed itself better than 21126, as an alternative to the standard one - this is an excellent option.
- Receiver 21179 is not a sports receiver as it is presented in tests.
- The appropriate price for the 21179 receiver is 3,500 rubles (now it is sold for 5,000 rubles).
- With the receiver 21179 the response to pressing the gas pedal has become clearer. When you lightly press the gas pedal, the traction has become better (you can feel the acceleration, there is no need to press the pedal harder as before), the top has become brighter.
Where can I buy?
Receiver 1.8 and other accessories at the lowest prices are presented in our online store.
Let us remind you that we previously talked about inexpensive tuning of the VAZ 21179 engine, which allows you to increase power by 13%.
Keywords: Lada Vesta engine | lada xray engine | Lada Largus engine | Lada Granta engine | Lada Kalina engine | Lada Priora engine | universal article
Share on social networks:
Found an error? Select it and press Ctrl+Enter..
Design nuances
The 21179 engine bears little resemblance to the basic version 21127, as both the design and appearance have changed:
- phasing of intake valves within ±30 degrees;
- hollow camshafts with cams using powder metallurgy;
- vortex air supply into the combustion chamber;
- cylinder cooling system (jacket);
- improved configuration and cylinder head gasket volumes;
- ShPG Federal Mogul;
- Korean pump;
- inclined drilling of oil channels in the crankshaft journals;
- polymer cylinder head cover and solid aluminum pan;
- flywheel for clutch 215 mm, which is recommended by the manufacturer.
motor gaskets
from Federal Mogul
Receivers 16V
This section contains sports intake receivers for VAZ cars, which are equipped with 16-valve engines. The sixteen-valve engine is the most common engine for tuning VAZ cars as it has greater potential for modifications. Accordingly, our online store of tuning spare parts offers you the maximum selection of receivers for 16-valve cars from various manufacturers.
Sports and tuning 16v receivers in this section differ in the production method (welded, cast). Cast aluminum receivers allow you to obtain a more optimal shape for better filling of the cylinders, so they can safely be classified as “sport”. Such receivers include the LADASPORT cast receiver. But the price of such a sports receiver is quite high due to the complex manufacturing technology.
Receivers for tuning VAZ are made of steel, their design and shape also allows you to get good cylinder filling rates (StingerSport channel on YouTube) The price of steel tuning receivers is much lower than the prices of aluminum ones, and besides, steel receivers are made for different types of throttle valves: for throttle VAZ with a maximum bore diameter of 56 mm, and for a GAZ throttle with a bore diameter of 60 mm