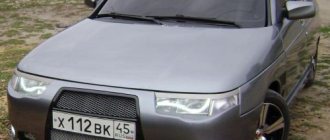
Many VAZ 2114 owners consider tuning their car to be the most pressing topic for themselves. Tuning of the dashboard (dashboard) is carried out with the aim of functional modernization and improving its appearance, which is one of the important points in tuning domestically produced cars.
Transformation of the interior by covering the dashboard and interior of a VAZ 2114
Nowadays there are a huge number of different tuning options. Car owners perform minor restyling of the exterior, light tuning of the interior and improvement of the appearance of the car. But others don’t stop there and move on, “sharpening” almost all of the machine’s systems. It should be said that any model of the Samara family responds well to improvements. Tuning the VAZ 2114 dashboard is considered an important modification.
Instrument panel design
Sidebar: Important: When carrying out complex work to modernize the instrument panel, you should take into account the features of its design. The main thing is to properly dismantle, select the necessary parts and put everything back together. It is better to think through all actions related to improving the instrument panel in advance. Only by drawing up a clear plan can you eliminate the possibility of errors and difficult moments.
It should be taken into account that the VAZ 2114 tuning instrument panel consists of several main elements, after dismantling which you can get to the instruments to change them. The above elements can be called basic. Some are connected using screws, nuts and bolts, others using plugs.
When carrying out installation work, it is recommended to mark all elements so that there is no confusion.
Remote trunk control
The presence of an electric drive for the luggage compartment will significantly increase the ease of use of the vehicle. Often the need to open the trunk occurs while the engine is running. For example, the driver can put things in the trunk while the engine is warming up. There are three technological options for implementing the task under consideration:
- Introduction of trunk from tens. An electric door lock drive must also be present.
- A suitable electric drive kit can be installed in the luggage compartment lid.
- The electric drive can be connected to the factory door lock.
Considering the method you choose, do not forget to consider the use of lock control buttons and alarm keys. As a result of the work done, the time savings will be amazing.
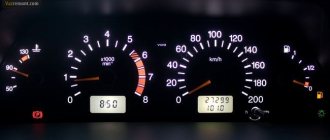
Changing the backlight and color of the speedometer needle
When considering how to change the instrument panel of a VAZ 2114 tuning, many consider visual modifications first, among which we note the backlight. Modern cars from the foreign automobile industry have a complex lighting system that creates a rather unusual effect. The domestic car has a simple design and ineffective instrument panel lighting. There are quite a few options for changing, if you don’t have imagination, then you can use one of the tuning methods given on the Internet.
In this case, the work, as in other situations, begins with dismantling. To do this, completely remove the shield and dismantle the protective glass. It should be noted that such work should be done carefully, since all the parts are quite fragile. Changing the backlight is quite simple:
1. The original lamp is green, you can set it to red, for example. 2. Dismantling the lamp is quite simple.
The final stage of the work can be called putting the entire structure back together. Another modification can be called a change in the color of the speedometer needle and other indicators. When creating the car in question, the dashboard was poorly thought out: the backlight is green, the indicators are yellow, the buttons are also green. When driving for a long time at night, such illumination fades, and it becomes quite difficult to notice the speedometer needle.
You can change the situation by installing red LEDs, which will create the necessary contrast in the car’s lighting. To do this, they are attached under the arrow, a special heat shrink is put on top, after which the power wires are connected to the heater backlight. When using heat shrink, the light will not be scattered, but only the arrow will be illuminated. This change looks quite attractive; the readability of instruments is significantly improved.
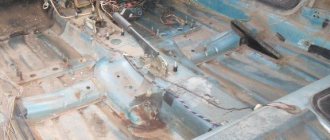
Withdrawal procedure
- Remove the negative cable from the battery.
- Unscrew the left trim of the instrument panel console.
- Remove the cover. To do this, you need to remove the lower protrusion from the bracket.
- Unscrew the right panel of the instrument panel console.
- Disconnect the wires from the cigarette lighter.
- Disconnect the wires from the cigarette lighter light bulb.
- We push from the inside and take out a niche for small items.
- Unscrew the 2 screws and push the diagnostic connector block inside.
- Remove the heater fan switch handle.
- Using a narrow screwdriver, remove the handle from the lever.
- Unscrew the 2 screws above the instrument panel.
- Unscrew the two screws under the instrument panel.
- Remove the plug and unscrew the screw of the upper fastening of the lining.
- Unscrew the 2 screws of the lower fastening of the lining.
- We move the cover to the side.
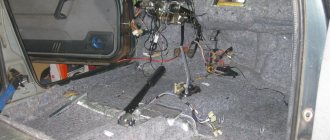
- Mark the order in which the blocks are connected to the switches.
- Disconnect the wires from the switches.
- Remove the instrument panel.
- Unscrew the bolts securing the steering column and lower it down.
- Unscrew the 2 screws securing the panel to the bracket.
- Unscrew the 2 screws securing the bracket to the right cross member.
- Unscrew the 2 screws of the lower bracket fastening.
- We move the bracket to the side.
- Unscrew and remove the light guide from the instrument panel.
- We unscrew the 4 screws securing the stove control unit and recess it inside.
- Remove the lamp socket for the heater fan switch handle.
- Press the right lock and remove the air duct from the panel.
- Pull out and remove the headlight hydraulic adjustment handle.
- Remove the instrument lighting control knob
- Remove the decorative insert of the instrument panel.
- Unscrew the light guide.
- Unscrew the nut securing the hydraulic corrector and recess it inside the panel.
- Unscrew the nut securing the instrument lighting control.
- We take out the hydraulic corrector illumination lamp.
- Disconnect the wires from the instrument lighting control.
- Disconnect the wires from the immobilizer sensor.
- Disconnect the wires from the immobilizer unit.
- Disconnect the wires from the glove compartment light bulb.
- Disconnect the wires from the socket of the portable lamp.
- Unscrew the 2 screws of the top panel fastening
- Unscrew the 2 screws on the bottom fastening of the panel.
- Unscrew the self-tapping screw securing the panel to the left cross member.
- Remove the instrument panel.
- Installation of the instrument panel on the VAZ 2114 is carried out in the reverse order.
6 Pingbacks
- How to remove and install the heater radiator on a VAZ 2114 | Repair 2114
- What to do if the heater fan does not work on a VAZ 2114 | Repair 2114
- How to remove and install the heater on a VAZ 2114 | Repair 2114
- How to remove and install the electronic control unit of a VAZ 2114 - Repair 2114
- How to remove and install a heater on a VAZ 2114
- How to remove and install the electronic control unit of a VAZ 2114
Categories
How to remove and install the headlight unit on a VAZ 2113, 14, 15.
How to remove and install the front turn signal on a VAZ 13, 14, 15.
How to remove and install the brake light switch on a VAZ 13, 14, 15
How to remove and install the reverse light switch.
Replacing switches on the instrument panel of a VAZ 13-15.
https://bumper.guru/klassicheskie-modeli-vaz/tyuning/panel-priborov-vaz-2114-tyuning.htmlhttps://remont2114.club/kak-snyat-i-ustanovit-panel-priborov-vaz-2114/ https://fb.ru/article/470222/tyuning-torpedyi-vaz—svoimi-rukamihttps://expertvaz.ru/2114/torpeda-zamena-modifikatsiya.htmlhttps://remont2114.club/kak-snyat-i- ustanovit-panel-priborov-vaz-2114/
Installation of ready-made instrument panels
The VAZ 2114 tuning instrument panel can be replaced with ready-made versions, of which there are quite a lot on sale. The main thing is to choose the most suitable model, not only in design, but also in construction.
Let's consider several options for ready-made instrument panels that can be used on the car in question:
- AMC is a panel that is supplied to order. Please note that when ordering, you can specify the design features of this instrument panel. This model has an oil indicator, which the original model does not have. The appearance of the oil indicator is due to the fact that many drivers asked for the inclusion of this element in the instrument panel. The design is represented by a combination of colored jackal and chrome cladding.
- PRO-SPORT – the instrument panel of this model is made in the form of an overlay. This model attracts attention with its unusual design. It is possible to purchase a version with a light and dark backing, which can be called a plus of the model in question. The design has its own backlight, which can be adjusted in brightness, but there is only one color - blue. The scale is glued after installing the insert.
- AMS-2 is a rather unusual model, since the tachometer became the central device. The scale is white, made in a sporty look. Buy diploma prices https://diplomer.com.ua/ceny.html on the Diplomer website The white scale is most suitable for reading information. The design has its own LED backlight, which allows for quick reading of information at night. Please note that installing this dashboard yourself is quite difficult. This is due to the need to rework the standard shield.
- STREET STORM – the main feature of this model is the variety of colors. Moreover, all the elements of the dashboard are arranged in a classic order, which can be called an advantage of this model. Another design feature can be called backlighting: in the daytime it is quite light, has red symbols, at night you can change the level of illumination of the elements and color.
- “North Wind” is another sporty version that has a complex lighting system. This design option is very popular, as it creates a rather beautiful effect at night.
Almost all of the above linings can be installed independently without any problems. The only thing that can cause significant difficulties is connecting the backlight.
Ways to tune a torpedo
You can decorate the dashboard of your vase using the following methods:
- leather covering;
- painting;
- installation of overlays;
- combination of materials.
Before tuning the device yourself, read the rules and the car passport. You cannot cover it with fur or cover it with ordinary fabric; only automotive paint should be used. This is because ordinary materials will decompose and release toxic substances under the influence of a car heater.
Installing a Europanel on a VAZ 2114
Another way in which you can change the instrument panel of a VAZ 2114 tuning is to install a Europanel.
The old version of the panel was not thought out:
- The steering wheel has no adjustments, and at the same time it covers most of the instruments on the dashboard.
- The dashboard is reflected on the windshield at night, which also creates quite a lot of difficulties.
- The quality of the coating leaves much to be desired. In just a few years, the appearance of the panel is completely lost.
- The plastic used does not stand up to criticism: creaking, knocking, rumble - and all this comes from the front panel.
- After some time, many owners are faced with the problem that the glove compartment begins to open on its own.
- In winter it is very cold in the car, the ventilation does not allow you to adjust the most correct air distribution.
All of the above problems occur when installing an old panel. Some problems, for example, sound insulation and maintaining optimal temperature in winter, can only be solved with significant modifications to the car. However, some of the above problems can be solved by installing a Europanel.
When making the Europanel, higher quality plastic is used and the assembly is better. This point determines that after installation the panel does not cause so many complaints. The ventilation has also been redesigned, which is important. However, you don’t need to count on an impressive result from the rework:
1. Domestic assembly will be evident even in the smallest details. 2. The control levers used to adjust the position of the airflow grille are quite tight and do not reach the edge of the slot. 3. The problems with the glove compartment have also not been resolved - after a while it will also begin to open. 4. If you do not take care of the plastic, then after a while its appearance will also deteriorate. To care for plastic, you can use special sprays.
However, the Europanel significantly outperforms its predecessor. An example is the numerous drawers that are located in the panel - this is what many were missing.
Overlays
The torpedo on the VAZ 2114 can be transformed if you install special covers on it.
They are everywhere. Their main advantage is the ability to change the color of the backlight. But they need to be installed correctly so that the devices are illuminated evenly.
Also, do not use excessively dark filters: the factory light bulbs will shine through them too poorly.
In addition, overlays are also placed on the dashboard. They absorb noise better, scratch less, and also have a shelf for small items.
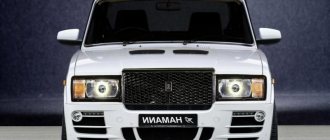
Professional car modification
Recently, tuning of the VAZ 2114 instrument panel is quite often carried out in specialized workshops. Skilled craftsmen can match the dashboard of another car to the one in question, which will make it truly unique. It will be quite difficult to do this on your own, since you will have to change the shape and dimensions of the panel itself, connect the wiring, change the position of the main elements of the front panel, and so on.
The cost of the service is quite high, but connoisseurs of real comfort and the VAZ 2114 will appreciate the work of real professionals in this matter. The work, as a rule, is carried out not only efficiently, but also quickly enough. Therefore, you will not have to wait long for the car.
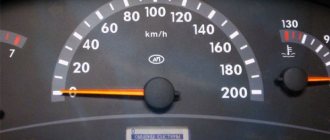
In conclusion, we note that when changing the dashboard yourself, you should always pay attention to the correct connection of all instruments and controls. Mistakes made can lead to, for example, the speedometer indicating the wrong speed. This should not be allowed to ensure traffic safety.
Replacing the steering wheel
The safest is the steering wheel that is installed on a domestic car by the manufacturer. Attaching a new steering wheel is considered an excellent option for tuning a VAZ-2114 torpedo with your own hands. However, it should be remembered that installation of a non-certified product entails changes in the rotation force. This directly affects the car's handling, especially in critical situations.
Therefore, in our opinion, the optimal action in this case would be to install a factory steering wheel with a new braid. The trim can be made of materials that provide better hand contact with the surface of the steering wheel. For example, genuine leather is perfect for this. This “steering wheel” looks stylish and fits better in the hands due to the increased thickness of the rim.
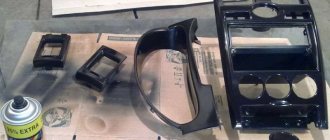
Liquid vinyl treatment
Liquid vinyl is a modern product that is successfully used for painting automotive parts. A thin layer of this coating decorates and protects many suitable surfaces. This is a high-tech product of excellent quality. Treatment with liquid vinyl will increase the panel's resistance to sunlight, ice, frost and other harmful substances. The beauty of this stuff is that it comes off easily after prolonged use. And this circumstance does not reduce his strength qualities.
Painting with liquid vinyl is a simple and understandable procedure for everyone. The finished part will be matte and clean. Liquid vinyl is usually sold in cans. Before use, you need to shake it, preferably for at least a minute. The paint and solvent must mix perfectly. Do not touch the liquid vinyl until it is completely dry. Otherwise there will be divorces.
The process takes place in several stages. Entry level - collector. They try to make it translucent. This allows the paint to adhere to subsequent layers. The first layer will dry for about 30 minutes, this time must be maintained. The number of layers applied is up to you. The more there are, the stronger the coating will be. The recommended quantity is five. Distance from container to torpedo: 7 - 9 centimeters. If you did not disassemble the dash and glue the unpainted parts, remove the tape and protective material immediately after painting while the vinyl cures. Vinyl drying time is 3.5 hours. All this time it is necessary to protect the drying surface from dust and other bodies.
YouTube Premium
Do you want to save this video?
- Complain
Report a video?
Liked?
Did not like?
That same feeling when the dashboard in your Lada looks different