No amount of tuning can save your car if the body leaves much to be desired. You will sell a VAZ-2110 with a good engine for pennies if the body is in poor condition. Who needs a car, for example, with a rotten bottom? How far does he travel? There is definitely no positive answer here.
You can repair the underbody of a VAZ-2110 with your own hands if you have some experience in such work. Most likely, you cannot do without welding, because all parts should be secured as firmly as possible. Now repairing even a rotten bottom is a solvable problem, especially in auto repair shops.
Repair of VAZ 2110
Unlike other similar projects that mostly copy material from printed instruction manuals, this site contains only original material.
All instructions are given clearly from personal experience, using a so-called experimental car that was purchased specifically for these purposes.
Removing the instrument panel on VAZ 2110, 2111 and 2112 cars is not an easy task. But at the same time, it is possible to carry out this repair with your own hands, having at hand...
Removing the floor tunnel on VAZ 2110 cars may be necessary in the following cases: replacing this part; removing the instrument panel; replacing the floor carpet; body repair; underbody repair; In order to remove the upper part…
So, a long time ago I bought a very useful tool for my garage and all the cars that I use, but I still didn’t have enough time to write about it...
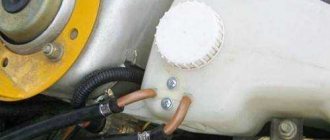
Many models of the tenth family, such as VAZ 2110, 2111 and 2112, often have problems with the cooling system. One of these problems is poor engine warming up, as well as a slight operating...
Of course, each reader of this blog must understand and accept the fact that the following post and video review will be presented for informational purposes only. Moreover, this experiment on...
Basic body repair — Lada 2110, 1.5 l., 1998 on DRIVE2
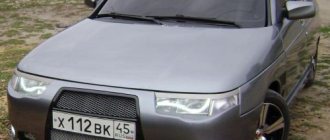
Here in the photo you can see a little externally that the torn off spar has moved, the wing has bent, the hood is on its side.
And here's a little sneak peek from the inside, as you can see. The rupture occurred at the site of the previous repair. there were metal tears under the cup, the transverse spar moved upward.
Torn spar
The renovation process has begun and this means that there is a lot of interesting things ahead.
In the first two days we were able to disassemble almost the entire front, remove the engine, dismantle the TV, and wash that part of the engine compartment that could be washed.
1st day
1st day
Time flies by. It’s good that for now you have all the necessary tools at hand.
Day 2 of our auto construction.
Now that the third day of our auto construction has come to an end, we can tell you a little about what was done today. Today we were able to dismantle one of the damaged elements. We've disassembled the interior except for the instrument panel for now.
To be honest, my eyes are afraid, oh so afraid, but my hands still have nowhere to retreat behind the pile of iron.
Slowly but surely
While sorting out the interior, I involuntarily remembered one wonderful cartoon. Vazik reminds me of this miracle of technology. What do you think I saw when I pulled back the carpet? That's right, nothing)) I saw my brother's leg standing outside))
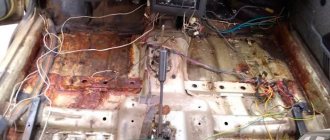
VAZ 2110 without anti-corrosion coating
06/05/13 Work continues. We purchased the necessary body parts (Sills, internal sills, sill enhancers, fender assembly with boom and cup, and front panel, also known as a TV in common parlance). We dismantled the interior and finally removed the dashboard and carpet with insulation. To be honest, I expected the worst. We secured the doorway with a pipe, and began cutting off the old thresholds. then we started raising the car higher. While making a podium for the car, I was sawing a corner and the grinder was simply torn out of my hands, I didn’t even understand how. In general, the disk touched my finger, the scratch was unpleasant. Since it was almost night, we decided to end it for today.
Preparatory work before restoration
Before installing new frames on the bottom or welding body parts, you need to make preparations and partially disassemble the car:
remove the seats; remove carpet; dismantle the old sound insulation; put aside electrical wiring in those places where repairs will be carried out.
Preparatory actions involve several sequential operations:
- dismantling seats and interior trim;
- removal of moldings (if installed);
- dismantling of air ducts;
- removal of noise and emissions insulation materials;
- Removing wiring elements.
In the case of the proposed replacement of the bottom of the VAZ 2112, it will be necessary to remove the central tunnel with the dashboard. This will make it easier to access the engine compartment.
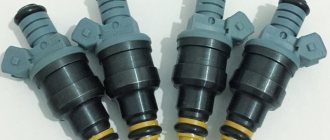
How does the controller monitor the operation of the injector?
When determining the specific position and opening time of the injector design, the specific volume of fuel entering the valves of the VAZ-2110 cylinder is determined. At the same time, thanks to special sensors installed on the motor, the on-board computer records specific values and transmits them to the controller.
Subsequently, the controller, based on the information coming from the on-board computer, makes a decision on the position and duration of opening of the injector damper. If the controller malfunctions, the injectors will not be adjusted correctly, and the engine may stall while driving.
Tip: when starting the engine, the injector controller operates in asynchronous mode until the engine reaches a certain number of revolutions. That is why, after replacing the silent blocks of the front control arms on a VAZ-2110, you should warm up the car for 10-15 minutes.
Radiator frame
This body part of the “tens” is called a TV. The element is replaced in the event of a strong front impact, when the “original” part is easier to replace than to repair.
As a rule, in an accident during a frontal impact, the upper frame and the beam, which serves as a reinforcement for the bumper, are most deformed. But the TV is changing completely in any case.
Body parts for VAZ 2110
According to experts, replacing a TV on a “ten” is much easier than on a “nine” or other models released by AvtoVAZ earlier. This is explained by the simplicity of the design of the “Desyatovskaya” radiator frame.
Note. In some cases, you can find the upper frame and lower beam separately for sale.
The TV is mounted to the body using welding points. They are located in 4 places - the radiator frame is attached in the places where it connects to the wing reinforcements (“booms”) and to the side members. To dismantle the TV, it will be enough to drill out the points in these places and then cut them off with a sharp chisel.
Advice. In the process of removing the TV, it is possible to dismantle the radiator itself, only in this case you must remember to disconnect the radiator pipes.
After the new radiator frame is put in place, the welding areas will need to be thoroughly cleaned with an emery wheel and puttied. In places where the frame touches the body, sealant must be applied.
Tools and materials for car underbody repair
Before you begin restoring the body in the traditional way (using welding), you need to prepare everything you need, the tools you will need are:
- welding machine;
- Bulgarian;
- electric drill with drills;
- screwdrivers;
- hammer.
To remove old noise insulation, you may need a chisel; you can remove noise faster and more efficiently using a hammer drill. To clean metal, you need sandpaper of various grain sizes; to increase productivity, it is recommended to use a sanding machine. It is also impossible to do without materials when repairing the bottom; a lot here depends on the volume of restoration work. Most often you have to use:
- patches (pieces of new iron) or ready-made spare parts, for example, floor members, panels, threshold reinforcements, etc.;
- priming;
- rust converter;
- anti-corrosion and sound-proofing materials (you can use Movil, Tektil, bitumen mastic, Dinitrol, Prim Antishum, etc.).
Since the brake and fuel pipes under the bottom often rust thoroughly, stick and do not come off, in many cases they also require replacement.
Self-repair of the underbody of a VAZ-2110 car
The car body is subject to corrosion over the years, and it begins to rust especially quickly if you do not take care of it and do not apply an anti-corrosion coating. How quickly body parts begin to rust also largely depends on the quality of the iron, factory processing; over time, the car requires repairs to the underbody, sills, side members, wheel arches, and so on.
Rusted sills and a rotten bottom are a fairly common problem on VAZ-2110 cars, and since such work in a car service center is quite expensive, many car owners try to repair the car with their own hands. You can patch holes in the body and bring the car back to normal by yourself using various methods; there are non-welding methods, but basically all car owners try to make repairs using welding.
- When preparing iron for patches, it is necessary to take into account its thickness - metal that is too thin will be fragile, and a thick sheet is poorly welded and is more difficult to process.
- Although electric welding is cheaper to use, it is better to weld metal using a semi-automatic machine - it is easier to use, and the weld is smoother and more accurate.
- When cutting pieces of metal and installing patches, the part being installed must fit exactly in size.
- When replacing the bottom, the weld seam cannot be continuous, since it has high rigidity, and insufficient elasticity negatively affects the strength of the body.
And if you undertake to repair the body with your own hands, you should be patient, carefully, slowly, carry out all the necessary operations, sparing no time and effort on processing the metal and cleaning it from rust. Poor quality preparation and weak anti-corrosion treatment leads to the rapid appearance of corrosion, which negatively affects the service life of body parts.
Why does rust appear? Preventive measures
The first line of VAZ-2110 sedans was released in 1995. The problem with these cars was the paint peeling off near the windshield. At the next stage, the rust spread to other body elements. Given the scale of the problem, AvtoVAZ changed its paint application technology. Despite the innovative approach to painting, the problem of rust could not be eliminated. The table shows the main causes of corrosion, as well as current preventive measures.
When applying anti-corrosion substances to the surface of the body, the sills and cavities of the side members must be treated especially carefully.
Lada 2110 Repair and Maintenance Manual (1 PDF)
We have 1 Lada 2110 manuals. In the table below you can see 0 2110 Repair Manuals, 0 2110 User Manuals and 1 Miscellaneous Lada 2110 downloads.
Our most popular manual Lada - 2110 - Workshop - 1998 - 1998.pdf (Dutch) This (like all our manuals) is available for free download in PDF format.
How to download Lada 2110 Repair Manual (for any year)
These 2110 manuals were provided by our users, so we cannot guarantee completeness. We have checked the years that the manuals cover and we have Lada 2110 repair manuals for subsequent years; and 1998
Go through 1 different PDF shown below, such as this one. You will then be shown the first 10 pages of that particular document, then you can scroll down and click 'show full PDF'
.Then you can click download your absolutely free instruction manual, forever!
What topics does Lada 2110 Service/Repair Manual cover do?
In total, this is more than 8 pages of content dedicated to your Lada 2110
.Here is not a complete list of what is covered;
- Lada 2110
service manual for road repair - Lada 2110
instructions for servicing weekly checks - Lada 2110
Repair manual for lubricants, fluids and tire pressure - Lada 2110
service PDF covering routine maintenance and repairs - Details Lada 2110
Engine and related service systems (for repairs and overhauls) (PDF) - Lada 2110
Data transfer Technical service manual PDF - Lada 2110
Brakes and suspension PDF - Lada 2110
Electrical diagrams
Looking for a free Lada 2110 Haynes / Lada 2110 Chilton Manuals?
We get a lot of people coming to the site looking for a free Lada 2110
Haynes Guide. There are two things you need to know;
firstly, it is illegal,
and secondly - there are much better ways to maintain and understand your
Lada 2110 Engine than
the Haynes manual. That's essentially what we're here for - to give you an alternative to Haynes and Chilton, online and completely free.
Engine repair
And to be precise, engine repair, since completely different solutions were installed on the top ten over time. These were both carburetor engines, related to eight and nine engines, and injection-type engines. Timely maintenance of the installed engine and maintenance made it possible to show even such a figure as 500 thousand mileage on the speedometer. Even under ideal conditions, this figure is almost a record. For comparison, the Ford Focus feels bad already at 50 thousand mileage, thereby requiring immediate service. Ten may not even need this, however, of course, it is better to take care of the fuel system, including the injection system.
What is the thickness of the metal on VAZ cars?
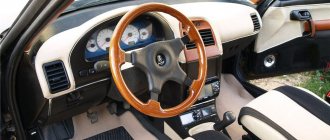
Passive safety
Passive safety (the property of reducing the severity of an accident) is ensured by: high strength of the body, which prevents its deformation in accidents; seat belts; adjustable head restraints that prevent injury to a person’s neck from a rear impact; safety steering wheel; safety glasses; wide doors, creating the possibility of exiting the car that has suffered an accident; fire-resistant materials.
In passive safety, attention is paid to car windows, including the windshield. During an impact, the windshield must remain solid, for which special technology is used in its manufacture
Side windows also have special requirements - they must break, but not leave fragments with sharp edges that can cause significant harm to health.
The car body must be designed so that in the event of an accident its structure remains intact. In case of an accident, the pedals should not go into the cabin, and the same with the steering wheel, so as not to injure the driver’s chest. After a collision, doors should open easily, door locks should not jam so that victims can be reached. Even if the car is completely destroyed, the power structure must remain intact; the passive safety of the car depends on this.
When creating a new car, passive safety is laid down not only for passengers and the driver, but also for pedestrians. When hitting the latter, the car should not seriously injure them, but rather reduce the consequences of the collision. For this purpose, “kanguryatniks” and powerful steel pipes in front of the car are prohibited. The hood of the car is made with special pyrotrons, which lift it when it hits a pedestrian. The car bumper is also made from special materials that would not injure pedestrians.
Active safety
Active body safety (the ability to prevent accidents) is ensured by: good visibility in all weather conditions; protecting the driver's eyes from glare from sunlight and headlights; good visibility of control instruments, comfortable fit, good thermal insulation of the body; creating an appropriate microclimate inside the cabin.
Active safety includes all kinds of electronic assistants that make driving easier. These include the ABS system, which prevents wheels from locking on slippery roads; exchange rate stability system, which prevents the car from skidding; auto braking systems, as well as EBD, BAS systems and many others.
What is the thickness of the body?
Previously, on cars manufactured during the Soviet period, the thickness was impressive, for example, the thickness of the bottom of the Gaz-21 was as much as 2 mm. On modern cars, the standard body thickness is from 0.6 to 0.8 mm, and the bottom thickness is 0.9 mm. This is due to the modern trend of reducing vehicle weight through the use of high-strength steel and other lightweight and durable materials in the body structure.
Thus, business and middle-class cars use aluminum, which is significantly lighter than steel. On sports class cars, magnesium is used in the body structure, which, despite its light weight, has greater strength than steel. Its only drawback is its much higher cost.
factory thickness of metal VAZ 2101
Comments 6
Thank you. Very useful. Where can I get similar information on other models (2104/05/07, 2106)? And other cars (both IZh and Moskvich 2140 are of interest)?
Golf 2 has a roof made of 1.5 mm Not long ago I cut one into scrap metal
Bodies and what they are like
ATTENTION! A completely simple way to reduce fuel consumption has been found! Don't believe me? An auto mechanic with 15 years of experience also didn’t believe it until he tried it. And now he saves 35,000 rubles a year on gasoline! Read more"
As you know, the body on the “ten” is load-bearing and repeats the basic design of any modern passenger car. Today it is customary to talk about several types of bodywork. The frame and supporting body are considered the main ones.
The difference between frame and load-bearing
All the main components of the car are located on the frame; it serves as a support and is itself fixed to the wheels of the car by means of suspensions. If you pay attention to trucks, then the frame can be seen with the naked eye, and thus you can draw appropriate conclusions about its structure. In “passenger cars” there is no frame, or it would be more accurate to say that on some passenger cars the frame-body assortment forms a single whole, called the body.
Frameless bodies, which include the metal frame of the VAZ 2110, are made in such a way as to withstand the mass of numerous heavy components. For this purpose, the body floor is well reinforced, and most of the overall parts are made of materials with a lightweight base.
On frameless bodies, the role of the frame is performed by the spars. They can be said to be responsible for the massiveness of the entire body structure. From time to time, these components are subjected to unplanned and shock loads that change very quickly in different directions. This operating scenario cannot have a positive effect, and over time, the welding points break, the bolts become loose, and the solidity of the entire body structure weakens.
The car body also feels the load from a running engine. It vibrates strongly, although the engine itself and the cylinders are designed to absorb some of the vibrations. To minimize the effects of vibrations on the body, manufacturers use special cushions or dampers, as well as washers made of dense rubber.
Note. The effect of these pads can be clearly determined by monitoring the operating unit with the hood open. The engine “growls” and shakes, but the body doesn’t care.
The most important task of a frameless car body is to transport luggage and passengers. At the same time, the machine must also provide major protection. The number of people transported and the weight of the permissible load are determined by the designers responsible for the layout and other parameters of the body.
If you imagine the frame of a “car” in the form of its components, then its main parts are three main zones, implying the trunk, the passenger compartment and the front. The finished look of the solidity of the frame is given by its hinged parts or “plumage”, which includes various panels.
Body types of the “tenth” family
The difference in body types, again, is associated with what one or another model is intended for. The car may be intended for off-road travel, and then it will be designed as a crossover or a full-fledged all-terrain vehicle, or it may be intended only for city driving.
Note. The body of the VAZ 2110 is a typical sedan. Models associated with the “ten” already have other body types: 2111 – station wagon, 2112 – 5-door hatchback, 21123 – coupe or 3-door hatchback.
It will be useful to know that over the entire production period of the 2110 model, VAZ creates many variations of this sedan. In particular, the Consul limousine, with an even longer wheelbase, deserves attention.
The design of the sedan began immediately after the VAZ 2108 became obsolete, when the plant decided to replace the project. But the release of the “ten” was not yet imminent. The fact is that the designers made many revolutionary improvements that significantly increased the cost of the project. Due to the economic crisis that reigned in the country at that time, the project was moved forward several years, and only in 1995 mass production of the “ten” began.
The sedan is the classic and most popular body style of modern cars. The interior includes 2 rows of seats and usually accommodates 4-5 people including the driver. The luggage compartment in sedans is properly separated from the interior.
For many, to this day, the question of the merits of the VAZ 2110 car is somewhat controversial. It is clear that it cannot compare with foreign cars, but the presence of “ten” running on the roads of our country speaks volumes.
Dimensions and how much it weighs
The body length of the “ten” sedan is 4265 mm, which is only slightly less than the “universal” dimensions. This length looks the most organic not only among the models of the “tenth” family, but also in VAZ as a whole.
We also note that the length of the “ten” is 6 cm longer than the length of the only “Samarov” sedan - VAZ 21099. The same goes for other parameters:
- The longitudinal distance between the wheel axles is 3.2 s longer;
- Body height is 1.8 cm higher;
- Ground clearance is 5 cm higher.
But both gauges are the same for “99” and “tens”. In addition, both models have similar gearboxes and engines. But still, in general, the technical characteristics of the “tens” and “99” are different. The “Ten” is able to achieve better speed and demonstrate enviable maneuverability on the road compared to the “99”, precisely due to the body design, made with modernizations and significant improvements. In particular, these are smooth body lines and completely modernized control systems.
Due to the greater length, which experts called “ideally sufficient,” the trunk of the VAZ 2110 sedan becomes very spacious. Its usual layout is 415 liters, which is already the envy of competitors.
The large volume of the luggage compartment allows you to transport by car not only the essentials, including a spare wheel and tools, but also many additional things. If you remove the rear seats, turning the rear of the cabin into an additional trunk, you can transport up to 1270 liters of cargo.
The wheelbase of the “ten” is 2492 mm, which is also very good. If we add to this the length of the trunk - 944 mm, then on a long journey, if you have a sleeping mattress, you can make a quite comfortable bed.
VAZ's new sedan is wider, taller and longer, but also heavier than the standard family of cars (1020 kg). This was to be expected, because the designers sought to increase the interior space, thereby increasing the comfort of people sitting in the cabin.
Replacing the entire bottom
In case of significant damage, the bottom is often replaced entirely; replacement in this case is more profitable than repair:
- purchasing one large integral part ends up being cheaper than purchasing all the spare parts separately;
- the overall amount of work involved in replacing the bottom is less than repairing it;
- no need to waste time thoroughly cleaning the metal from rust or removing old sound insulation;
- You can completely replace the bottom quite simply, without welding, by drilling out the rivets and then installing new fasteners.
If you are going to use an automatic welding machine, when replacing the body floor, you must remove the fuel tank; failure to comply with safety precautions can lead to a fire or even an explosion. And although the work of replacing a one-piece body element at first glance seems quite simple, there are some nuances here - on the new factory bottom there are no studs, a bracket for the handbrake cable, or other fasteners that will need to be rearranged from the old floor.
Hood
VAZ 2110 body parts
Like other parts of the VAZ 2110 body, the hood can be dismantled for the purpose of replacement or repair. In this case, work must be performed with the help of an assistant:
- The location of the washers located on the hinges of the body part is marked with some sharp object or chalk. This is done for the convenience of reinstalling the body element;
- The hood is opened, then the safety hook is removed from the element using a 10 key. It is held in place by 2 bolts;
Replacing the hood with a new carbon one
- Rubber plugs are also removed from the hood;
- The caps suffer the same fate (there should be 17 of them);
- The nuts securing the hood on both hinges are unscrewed.
Advice. Under the nuts there are spring type washers. When turning them away, you need to be very careful. In this case, an assistant will be needed to keep the part from moving to the side.
- The hood is removed from the studs;
- The new hood is installed in place of the old one. It is imperative that the fastening nuts are tightened and the hood is adjusted to the correct position.
Note. The correct position of the hood means that the front edge of the car should be flush with the front of the radiator.
- The fastening nuts are tightened.
A new or repaired hood on the “ten” can be soundproofed or upgraded in various ways.
Replacement of thresholds VAZ 2110, 2111, 2112
By examining the condition of the thresholds and bottom of the VAZ 2110, you can easily determine the age of the car. It should be recognized that the factory anti-corrosion treatment is not of very good quality and without proper care, after 7-10 years, through holes may appear on the thresholds as a result of corrosion. In this article, we will analyze the process of replacing VAZ 2110 thresholds, list the tools and materials for the work, and also talk about why thresholds rust and how to extend their life when there is no severe corrosion yet.
The threshold consists of three parts:
- External lining.
- Amplifier inside.
- Connector.
Thresholds can corrode in different ways, but generally, if there are through holes, you will need to purchase the entire three-piece threshold kit.
Prevention measures
As you know, why repair a very rotten bottom if something like this can be postponed. To do this, it is necessary to follow preventive measures. Of course, if the cause of corrosion is age, then no amount of prevention will help. However, there are factors that should be taken into account in order to minimize the risk of damage to the bottom:
- avoid accidents and drive a car following all traffic rules;
- give your car for repair only to a trusted specialist who is able to do the job efficiently;
- wash away accumulated snow in winter;
- avoid rooms with high levels of humidity in the air;
- try to drive on good roads;
- Eliminate the possibility of moisture getting into the interior, because otherwise it will not be possible to avoid rotting of the bottom right from the inside of the cabin.
It is equally important to treat the bottom with special anti-corrosion agents - they will also help your body serve for several more years without repair. When preventive measures have not been taken and rust has already appeared on the bottom, it’s time to start repairs.
Repair process
VAZ 2110 rear right fender
- Raise the car on a jack.
- Press out the wing.
- You need to level the surface using a heavy tool (this could be a hammer). Take a nozzle with a sharp flat end and apply it to the other side of the dent.
After this, hit the flat surface of the nozzle with a hammer. A slight leveling will be noticeable.
The outside needs to be straightened with a flat object.
Note: it is better to straighten using an iron tool, since aluminum will not work. All actions must be performed quickly.
However, you should not hit too hard. This can cause the metal to stretch, causing the wing to expand slightly.
The edges need to be knocked out very carefully, along one line.
Complete rear fender replacement
VAZ 2110 right rear fender
In some cases, it is necessary to completely replace the rear fender. For example, if it is damaged to such an extent that there is no point in even trying to repair it.
Usually it is changed if:
- It was significantly deformed upon impact.
- It has small tears.
- Penetrating corrosion is observed.
VAZ 2110 rear right wing
Replacing a wing is a rather labor-intensive process, but it can be done at home by following the instructions:
- You need to completely empty the trunk, remove the bumper, headlights (see Replacing headlights on a VAZ 2110: we do it ourselves), the fuel tank, and also the trunk mat.
- Remove the rear fender.
Note: You can use a thin chisel for this. Using careful movements, you need to slightly squeeze out the rear wing, but try not to damage the car body.
- It is necessary to drill points at the junction of the wing with the transverse rear window frame. Now you can remove the rear wing.
- Carefully remove any strips of metal that remain on the wing. Nippers and a chisel will help with this. The edges need to be straightened and sanded.
Rear right wing of VAZ 2110
- If there is dirt under the wing, it needs to be removed. This surface must be thoroughly degreased.
- Attach the new wing by welding.
VAZ 2110 rear wing replacement
,rear
panels. Painting will be done later. Sorry for the long video.
Anticorrosive treatment stages
Preparation before treatment with anticorrosive VAZ 2110 can be divided into several stages:
1. Wash.
Before you start washing the bottom, you need to remove the wheel arch liners, if any. The best option is to place the machine on a lift to gain full access. It is better to rinse the treatment areas three times to get rid of large pieces of dirt. Apply detergent and then wash it all off. It is advisable to wash the bottom with hot water.
2. Drying.
In order to begin applying the protective composition, the bottom needs to be dry. It is best to dry it with compressed air, which will save a lot of time.
3. Cleaning from rust.
If there are areas covered with rust on the bottom, they need to be cleaned down to bare metal. If desired, anti-corrosion primer can be applied to the rust-free area. This will give better protection.
Installation
We install the front fender and all the removed parts on the car in reverse order.
Helpful advice. After installing the front wing (before installing the fender liner), treat the wing, especially the rear part, with an anti-corrosion coating.
On most front-wheel drive cars of the VAZ family, the front fenders are attached to the body not by welding, but by bolts, and this also applies to our VAZ 2110-2112 cars. So, if replacement is necessary, everything is done quite simply and without unnecessary problems. To do this, you just need to have at hand the minimum tool that will be given below:
- Flathead and Phillips screwdrivers
- Screwdriver shortened
- Head for 8
- Ratchet with extension
After that, using a long screwdriver, unscrew the end screws securing the fender liner, and using a short screwdriver, unscrew the internal screws in the arch. Then remove the fender liner.
Next, open the hood of the car and unscrew the 4 bolts securing the front fender from above, as shown in the photo below more clearly:
Another bolt is located in the front part of the wing, but it becomes accessible only after removing the bumper or moving its edge to the side:
So, two more bolts are located on the inside of the wing:
The last place where you still need to disconnect this body part is the lower rear part, which is located at the very beginning of the threshold:
When all this has been dealt with, it is necessary to carefully remove the wing from the VAZ 2110-2112 without any extra effort, since nothing else prevents its dismantling.
If replacement is necessary, we send the new wing for painting and ultimately install everything in the reverse order. The price of a new such part produced by VAZ is about 1,400 rubles.
Doors
Body parts for VAZ 2110
It is also recommended to dismantle them and replace them together with an assistant. If electrical equipment is fixed on them, the wires must be removed. You also need to remember that in case of replacement, it is recommended to transfer all removable parts from the old door to the new one.
Here's how to dismantle doors on a VAZ 2110:
- The door opens;
- The 2 bolts that connect the door to the A-pillar are removed;
VAZ 2110 body parts
- The bolts securing the upper and lower hinges are turned out;
- The new door is installed in the reverse order.
Advice. Before fully fixing the hinge bolts, you need to slam the door and adjust it so as to even out the gaps in the openings along the entire border. Then you will need to open the door like a jewel and tighten the fasteners all the way. It is recommended to check everything again. If something goes wrong, the door lock is already adjusted.
Do-it-yourself VAZ 2110 car repair
Owners of domestic cars prefer to do without service stations. Repairing VAZ 2110 cars with your own hands allows you to save a significant part of your budget.
VAZ-2110 is a small class car made in Russia. Production began at the VAZ plant in 1995. In 2007, the last car, model 2110, rolled off the assembly line.
Initially, the VAZ 2110 was produced only as a sedan with four doors. The car was equipped with front-wheel drive and an electronic engine control system. For the first time, an on-board computer was installed on a Russian car model.
Modifications
Three modifications were created on the platform of the VAZ-2110 sedan:
- VAZ 2111 - station wagon modification;
- VAZ 2112 - hatchback modification;
- VAZ 21123 is a modification in the body of a three-door coupe.
The modifications differed in bodies and power units. The rest of the details were common.
Engines
On the domestic market, the model could be purchased with one of three engine options:
- 1.5-liter 8-valve engine, 69 hp. Model 2110 base carburetor powertrain;
- 1.5-liter 8-valve engine, 79 hp. Accelerates to hundreds in 14 seconds;
1.5-liter 16-valve engine, 94 hp. The most powerful version of the power unit. Acceleration to 100 km/h takes 12.5 seconds.
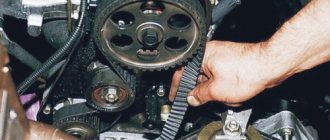
8-valve engines have valve protection - they do not bend if the timing belt breaks. There is no such protection on a 16-valve power unit.
All VAZ engines require timely maintenance. Failure to meet replacement deadlines may result in major repairs.
During operation, the intake manifold fails. Repairing a problem yourself requires a lot of time and effort. Repairs at a service station will cost twice as much. If you have no experience in such work on your own, it is better to turn to specialists.
Salon
Stove parts have a limited service life. A broken stove cannot be repaired; it must be replaced with new parts.
Low quality plastic finishing. It constantly makes a squeaking sound.
Chassis
After 50,000 km, knocking noises appear from the suspension - the ball joints need to be replaced. Bearings fail on both sides.
https://youtube.com/watch?v=tvdIkPaxG64
How to extend the life of the bottom?
These tips are suitable for those who have already repaired the floor on the “ten”, and those who still have a living copy. So, the first rule is frequent washing.
Typically, car owners pay attention to the upper part of the body. But you also need to wash its hidden cavities
This is especially true for those who live in large cities and operate their cars in winter. The stuck salt will not go away until it is removed with a powerful stream of water.
The next rule is regular treatment of the bottom. Over time, the old anticorrosive agent is washed out and peels off. Once a year you need to check its condition and, if necessary, renew the layer. If pockets of corrosion have already appeared on the surface (but not through), we treat them with a converter, and then with a thick layer of mastic. As for the thresholds, they have drainage holes. There is no point in treating them externally with anti-corrosion agent - the water is inside. Therefore, in dry and warm weather, we take a can of Movil and pour it through a thin tube (it usually comes included) inside. After a year, this procedure should be repeated. This is the only way to ensure complete protection against rust for the bottom and sills. If the problem occurs in winter, you can apply a temporary measure - clean the rusty surface and apply anti-corrosive agent locally to the area. And with warming, treat the entire perimeter.Tens body care and repairs
The overall body of the “ten” looks more reliable, durable and resistant to corrosion. All-metal and partially galvanized, it comes off the assembly line already treated with anticorrosive, ready for harsh operating conditions.
On the other hand, we must pay tribute to our car owners, who are accustomed to finishing everything with their own hands. In particular, while remaining adherents of the domestic automobile industry, they turn a blind eye to the differences and shortcomings of technology in comparative terms and take additional care of the body so that it serves for many years without problems. Russian car owners almost always add special protection to the standard anti-corrosion treatment.
Preventative work specifically involves tinting the bottom of the car, treating sills and fender liners with Movil.
Note. We can say with confidence that among the “dozens” with high mileage, even today you can find examples that have been so well cared for by the owner that they look like new.
People's love for the “ten” is also symbolized by the succinct names given to the car by amateurs. “Matryoshka”, “pregnant antelope”, “chubby” - all these nicknames, albeit with some degree of irony, speak of love for the car. If at first the unique, new design of the VAZ model raised questions, then over time the angular shapes of the “bow” and “stern” became familiar.
Here are the preventive works that are usually carried out on the body of the “tens” throughout the entire operational period:
- Caring for paintwork;
- Lubrication of metal components of the body;
- Cleaning of technical holes;
- Periodic anti-corrosion protection of the body as a whole and treatment of hidden areas;
- Noise insulation;
- Sealing.
To protect the original paintwork of the body, you must be able to select the appropriate polishes and follow the rules for their application. In addition, the VAZ 2110 must first be washed when the car is new, only with cold water, and for treating paintwork, use polishes that do not contain abrasives.
Caring for the paintwork of a car with a 3-5 year mileage implies a different scenario:
- Use products for weathered surfaces (they contain a certain amount of abrasive).
Accordingly, for a body older than 5 years:
- Use products specifically designed for aged surfaces.
It is also recommended to polish the body in small areas by hand using clean flannel. This is done to prevent the polish from drying out during application.
Polishes PMA-1 and PMA-2 have proven themselves well.
More good tips on the body in general:
- Do not store the car under rubber covers;
- Do not place rubber objects on painted surfaces (they will leave stains that are almost impossible to remove);
- Protect the paintwork from contact with alkalis, brake fluid and other chemicals that can destroy the coating.
It is recommended to lubricate rubbing parts and body elements from time to time in order to increase the durability of the metal frame. So, this should be done at least every 15 thousand km of the car or once a year.
Here's how and where to do it:
- Apply engine oil to door hinges;
- Apply CV joint grease-4 or Molikot to the limiters;
- Lubricate door locks with FIOL-1;
- Apply VTV-1 aerosol lubricant to the lock cylinders;
- Use the same product to lubricate the hinges and springs of the fuel tank hatch;
- Lubricate the hood lock with FIOL-1;
- Use the same tool to lock the trunk lid.
Anticorrosive treatment also needs to be given great attention. Hollow parts of the body and parts located in the lower part are most susceptible to the negative effects of rye (they are constantly exposed to moisture and dirt due to their close location to the road surface).
It has proven itself well for protecting the metal components of the body from corrosion. As for the treatment period, it is recommended to carry it out every year.
Due to the complexity of the work, it is recommended to treat hidden body cavities with anticorrosive agents at a service station. If the garage has the appropriate tools and equipment, then the process is as follows:
- The car is placed on a jack;
- The casing and all components that interfere with access to hidden cavities are removed;
- The holes are washed until clean water flows out;
- The surfaces are thoroughly dried, and all areas where the anticorrosive is applied are blown with compressed air.
The table below shows hidden cavities and how to apply anticorrosive.
How to remove the wing
First, let's find out how to remove the wing from a VAZ 2110 car. Let's get started:
First of all, you will need to remove the side turn signal, but first disconnect the battery;
Note. Removing the bumper involves removing a special fastening on the right side of the VAZ 2110 car.
We take out the side turn signal, moving it to the front of the car and removing it from the special hole;
Note. The turn signal housing should also be removed and the lamp socket with the lamp should be moved towards the front.
- We find the bolt at the bottom that secures the buffer on the right side;
- We loosen the nuts that secure the crankcase protection with the bumper of the VAZ 2110 (there should be 5 of them);
- Remove the radiator trim;
- Loosen the front buffer bolts.
Note. The front buffer bolts (there are two of them) are loosened in order to easily move the buffer in the desired direction, thereby gaining access to the nut that secures the front wing mount.
- Unscrew this bolt;
- Then pull out the headlight from this side of the car;
- After this, grab the wheel arch liner and remove it;
- Now you need to unscrew the screws that secure the wing to the body (we are talking about the upper fastenings, which are turned out with a 10 key);
- We do the same with other screws that secure the wing to the body.
Note. During the work, you need to use not only one key, but also a screwdriver with a wide blade, as well as a second key with the same number.
The wing can be easily removed once there is nothing to hold it in place.
As for installing a new or repaired wing, the whole process is similar to removal. All stages of work should be done in reverse order.
Note. During installation, the wing should be carefully adjusted to other parts of the body
This is very important and requires special care
When installing a new wing, it is also important to observe the following points:
- Install, as stated, in the reverse order of removal;
- Clean surfaces on the car body;
- Install new insulating gaskets between the body and the upper part of the fender, as well as between the A-pillar and the rear part of the fender.
Note. If such gaskets are not available and finding them is a problem, it is recommended to use mastic, which fits perfectly on the surface of the body and seals the cracks.
- The wing must be aligned due to the enlarged holes, doing this in accordance with the gaps and protrusions of the remaining body panels of the VAZ 2110;
- Be sure to coat the wing with an anti-corrosion compound after installation.
Front fender replacement
A complete step-by-step replacement of the right wing on a VAZ 2110 involves performing the following actions:
- We arm ourselves with the necessary keys (10, 13);
- The front facing linings are dismantled;
- The front fender liners are also removed;
- It will now be necessary to disconnect the side fastenings of the buffer trim;
- The side turn signal on the right side is dismantled;
- Now you need to get to the bolt that secures the headlight trim and unscrew it;
- We also remove the turn signal apron;
- We find the bolts securing the right fender to the body;
- We turn them inside out.
Note. There should be four bolts securing the wing to the body. This is the front bolt, the bolt that secures the fender to the sill and two bolts that secure the fender to the strut.
- Now you need to unscrew the bolt located on the engine compartment side (it secures the wing to the cooling radiator frame);
- Then we unscrew the three bolts that secure the wing to the mudguard;
- The time has come to free the wing from the factory mastic.
Note. The front fender should be removed from the factory mastic very carefully so as not to deform the thin sheet.
Installation proceeds in the reverse order of removal. In order for the process of replacing the right front wing of a VAZ 2110 to go without errors, it is recommended to watch high-quality video or photo materials. It will also be useful to use other step-by-step instructions during the work process, listen to the advice of professionals, etc.
When working with your own hands, it is important to remember that the main thing is desire and patience, and the rest will follow. Self-replacement and repair will help the owner of a modern vehicle save a lot of money, because the price of work at a service station is not low and there is no certainty that only professionals work there
Vehicle interior
The owner will need to repair the underbody not only under the vehicle, but also inside. Therefore, it is necessary to decant the interior. The work will take quite a lot of time, since it involves dismantling chairs, floor coverings, and tunnel lining. In addition, you will need to remove sound insulation and air ducts.
It is recommended to collect all wires running throughout the cabin into bundles. Since a huge number of fasteners will appear during the dismantling process, it is recommended to prepare special containers for them, for example, small boxes. Don't rely on your memory. Otherwise, additional problems may arise related to the assembly of the interior.
In addition, before carrying out work, it is advisable for motorists to watch the video of repairing the underbody of a VAZ 2110 with their own hands , and use different sources. This will allow you to form a general picture of the repair work, avoid common mistakes and save time.
In some cases, for example, when completely replacing the bottom, dismantling the dashboard and center console is required.
Welding work
After disassembling a VAZ-2110 car, you can fully assess the condition of the body and draw up an action plan. Sometimes work requires a minimum of time. We are talking about situations where replacement of certain elements is not required. The owner of a dozen simply needs to remove the corrosion with brushes and sandpaper, and then install patches.
Most often, through holes are formed in the bottom of the car. In such a situation, it is advisable to completely change the body elements.
Repair work without replacing elements will lead to a violation of the geometry and loss of rigidity. The top ten uses several body elements, in particular, spar and sill extensions, cross members, support platforms, panels and connectors. Next, consider the sequence of welding work:
- To dismantle the damaged element, you must use a drill or angle grinder. That is, the part is drilled or cut off;
- During the process of cutting out damaged elements, you need to monitor the pipelines. In a VAZ car, elements of the fuel and brake systems pass directly under the bottom. Dismantling pipelines takes a long time and requires considerable effort. Therefore, most often they are cut off, and then, after dozens of bottom repairs, new elements are installed;
- If there are through holes in the floor panels, it is recommended to purchase an assembled structure. If such a situation occurs, complete dismantling of the exhaust system is required;
- if the thresholds are being replaced, then the procedure must be performed one by one, observing the geometry of the body;
- if you need to remove both the floor and the thresholds, then the thresholds are dealt with first;
- When replacing individual elements, it is necessary to make markings. All interchangeable parts must be the same size.
Basic welding does not involve applying a continuous seam. The step should be about 4.5 cm. Please note that it will not be possible to complete the work without the involvement of an assistant. After completing the welding work, the surface of the body must be treated with a special compound.
When performing welding work, several nuances should be taken into account. Firstly, the metal must be of appropriate thickness. Thickened sheets are poorly welded. Welding seams should not be continuous, as they are highly rigid. The car body must be strong, and therefore elastic.
Processing the bottom of the VAZ-2110
After updating the car body, it must be treated, thereby providing protection from rust, salts, acids, gravel and other elements present on the road surface. To do this you need:
- clean the metal surface. The challenge is to achieve shine;
- welding seams are treated with a special mastic;
- all metal elements must be primed;
- then paint is applied to the surface;
- the outer surface of the bottom is lubricated with mastic and a special substance to protect it from gravel.
Before performing the above work, the metal surface must be washed and dried. It is also recommended to apply acetone, White Spirit and other substances designed to remove grease to metal surfaces.
At the final stage, it is necessary to prepare sheet sound insulation. If bitumen noise is used, then heating is carried out using an industrial hair dryer. After completing the repair work on the underbody of the VAZ-2110, the work is nearing completion. But there is a rather difficult stage ahead of the installation of interior elements. It should be noted that with a competent approach during the dismantling process, assembly is carried out without problems. To save time and effort, it is advisable to label all boxes with fasteners. You can also record the sequence of work.
VAZ 2110 body frame repair
download photo to mobile phone
section 8
Fig.8-1. Details of the body frame of the VAZ 2110 1 - radiator frame lining; 2 — radiator frame; 3 — upper cross member of the radiator frame; 4 — right front wing; 5 — front panel; 6 — hood hinge; 7 — hood; 8 — right front door; 9 — wind window pillar; 10 — interior panel of the front door; 11 — inner panel of the rear door; 12 — right rear door; 13 — frame of the roof hatch; 14 — left side; 15 — roof panel; 16 — rear suspension spring support; 17 — trunk lid; 18 — inner panel of the trunk lid; 19 — side window frame; 20 — rear bumper; 21 — rear pillar; 22 — left rear door; 23 — rear wheel arch; 24 - middle floor; 25 — spare wheel niche; 26 — central pillar; 27 — left front door; 28 — front pillar; 29 — front floor; 30 — left front fender; 31 — front suspension spring support; 32 — bracket; 33 — front spar; 34 — bracket for towing eye; 35 — front panel; 36 — front bumper
| Fig.8-3. Main sections of the body (top view) |
Fig.8-4.
The main reference dimensions of the attachment points of components and assemblies of the VAZ 2110 car X, Y, Z - base lines; 1 — upper radiator mount; 2 — front suspension cross members to the radiator frame; 3 — front suspension arms; 4 — right support of the power unit; 5 — left support of the power unit; 6 — base points; 7 — upper suspension rod of the power unit; 8 — base holes; 9 — rear suspension of the power unit; 10 — gear shift lever; 11 — brake regulator; 12 — rear suspension arms; 13 — upper mounting points of the rear suspension struts; 14 - basic holes Repair of deformed surfaces of VAZ 2110 body parts Repair of damaged VAZ 2110 body parts is carried out by drawing, straightening, straightening with metal shrinkage, cutting out areas that cannot be repaired, making repair inserts from rejected body parts or sheet metal, giving them the shape of the part being restored .
Removing and installing the front wing from a VAZ 2110 To remove the wing from a VAZ 2110, remove the socket with the turn signal lamp. Remove the self-tapping screws securing the wing to the body: four screws 2 (Fig. 8-5) along the upper flange, one screw 1 each at the front bottom and rear bottom, two screws 3 fastening to the front pillar (under the wing). If it is impossible to unscrew the front screw, first unscrew the two screws securing the corresponding side of the bumper to the body and to access the specified fender mounting screw, slightly lift the bumper and move it slightly to the side.
After replacing the fender, apply an anti-corrosion coating to the inner surface of the fender. Fig.8-5. Removing the front fender 1,2,3 - front fender mounting screws
Hidden body cavities and their processing
| Cavity name | Injection point | Composition injection direction | Additional instructions |
| Hood pockets | In the openings of the interior upholstery | Over the entire inner surface | Open the hood |
| Door pockets | In the panel openings under the upholstery | Along the inner surface of the bottom | Remove the upholstery |
| Cavities between wheel arches and rear fenders | From the trunk | Over the entire inner surface | Open the trunk |
| Rear floor rails | Below the body, in the trunk and under the rear seat | Forward and backward | Open the trunk, lift the seat cushion |
| Middle floor cross member | Below the body and under the rear seat | Right and left | Raise the seat cushion |
| Front floor cross member | From the interior and from below the body | Right and left | Remove the floor mats |
| Door thresholds | From the interior, from the front and rear ends of the threshold | Forward and backward | Remove the floor mats |
| Front side members | From the interior and from below the body | Forward and backward | Hang up the car |
| Bulkhead shield reinforcement cavities | From the interior and engine compartment | Right and left | Open the hood, remove the floor mats |
| Floor Threshold Connector Cavities | Bottom of the body | Over the entire inner surface | Hang up the car |
| Rear lower cross member | Behind the car | Right and left | Remove the rear bumper |
Body care work is usually limited to this. You can get more detailed information on the VAZ 2110 body from other articles on our website or through photo materials and diagrams.
Forget about fines from cameras! An absolutely legal new product - Traffic Police Camera Jammer, hides your license plates from the cameras that are installed in all cities. More details at the link.
- Absolutely legal (Article 12.2);
- Hides from photo and video recording;
- Suitable for all cars;
- Works through the cigarette lighter connector;
- Does not cause interference to radios and cell phones.
The body of any car is subject to corrosion. Those cars whose owners do not use anti-corrosion coating rust faster. But the quality of the iron is also important.
When evaluating a VAZ-2110 car, the age is most easily determined by the body. To do this, just look under the bottom and sills. It is known that most car parts can be replaced with your own hands. If necessary, a new engine can be installed. If the body is completely rusted, then repairing the car loses its meaning.
No car owner will invest money in a car whose body cannot be restored. Even if the power unit and other components of the vehicle are in perfect condition, the car practically depreciates in value.
Repair of the VAZ-2110 underbody without welding
With any body repair, first of all, it is necessary to carry out an external inspection of the hardware, identify and note for yourself which areas are in poor condition and need repair or replacement. The condition of the bottom metal is determined in different ways:
- using a hammer and a core - if you think that there is rust in a certain area, you need to lightly hit the metal, check if there is rotten iron under the anti-corrosion coating;
- try to jack up the car on each side - if the thrust pads are rotten, this will be noticeable when you try to jack up the car;
- press in different places on the floor of the car - weak, rotten iron will bend under your feet;
- try to move the front seats back and forth in the cabin - problematic movement of the seats also often indicates the poor condition of the metal.
Any repair of sills and underbody using a non-welding method is not professional, and craftsmen consider it only a temporary measure to properly restore the condition of the body; a welding machine is indispensable. When repairing the bottom without welding, patches and new body elements are not welded, but installed on rivets or self-tapping screws (bolts), preparation and all other work is carried out in the same way as during traditional body repair using a welding machine.
Anti-corrosion treatment
We start processing the car from the bottom. The bottom is processed by applying mastic that does not dry out. Anticorrosive coating can be applied with a brush or under pressure. After application, the composition strengthens over time and does not give corrosion a chance to eat away at the metal.
The bottom of the “ten” after treatment with mastic
Next comes the processing of thresholds. On the outside, the thresholds are also treated with mastic, and on the inside with a liquid composition for hidden cavities, in order to protect the thresholds from rust as much as possible.
When carrying out work to protect the bottom, it is also necessary to treat the gas tank, which is also covered with rubber-bitumen mastic.
There are two ways to process wheel arches:
- Apply rubber bitumen mastic and install wheel arch liners.
- Apply liquid fender liners.
Liquid fender liners are very convenient to apply, but the mastic has noise-insulating properties. Therefore, after applying it, the cabin becomes quieter. Rubber fender liners do not have this property, but they perfectly protect the metal of the arches from rust.
The doors and hidden cavities of the body are processed last. A liquid composition is applied, namely Movil. It is produced in the form of an aerosol, which allows you to easily reach hard-to-reach places.
Before applying the anticorrosive agent, carefully study the instructions for use, since each protective composition is individual and can be applied in different ways and under different conditions.
Replacement of car underbody elements
Most often, when replacing individual parts of the bottom or installing patches, welding is used; a semi-automatic welding machine is best suited for such repairs. If an entire separate part is being changed, for example a cross member, you can drill out the rivets and dismantle the element without welding.
When the bottom and sills are changed at the same time, the latter are removed from the car first, and when replacing sills it is important to control the geometry of the body. When replacing floor panels, the bottom parts are always mounted from below, then welded or riveted
When there are many holes and pockets of corrosion in the floor of the body, it is better to replace the entire bottom, especially since it is relatively inexpensive when assembled for the “Ten”.
Bumpers
VAZ 2110 bumpers
These VAZ 2110 body elements are dismantled not only for the purpose of replacement or repair, but more often for the purpose of modernization and tuning:
- The negative terminal is removed from the battery;
- The radiator grille is dismantled.
Advice. Using a 10mm wrench, it will be easier to unscrew the 2 screws holding the grille on top.
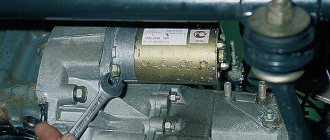
- Now you need to loosen the fasteners protecting the power unit. A 10mm socket wrench will be useful here;
- Using a shaped screwdriver, unscrew the screws that secure the fender liner on the top and bottom sides;
- Using a 8mm socket, remove the bolts securing the bumper to the brackets;
- Use a 10mm socket to remove the bolts connecting the bumper to the front panel;
- The front bumper can be easily removed if you move it forward a little.
The rear bumper is removed in almost the same way as the front.