Signs of a malfunctioning Lada Granta cooling fan
The temperature needle, without stopping, moves towards the red zone, of course, this happens for other reasons, but today we are looking at the cooling fan.
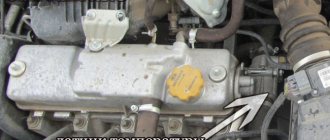
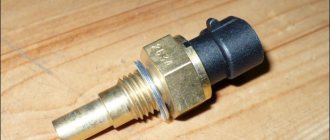
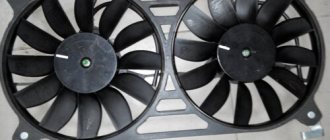
If a sign of an overheating car appears, you need to stop driving and try to find out the cause of this problem. The cooling fan on Grant turns on after the temperature sensor, which is located near the thermostat, gives a signal.
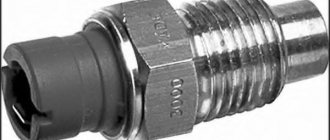
The sensor works very simply; when the temperature reaches 101 degrees, the contacts close and the fan turns on.
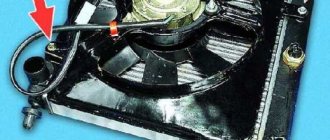
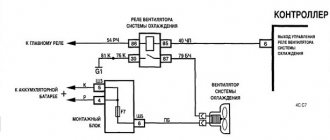
The cooling fan motor can be checked by shorting the wire contacts at the cooling sensor connector. The ignition must be turned on. If the fan starts working, then the cooling motor is working and you need to look in other places.
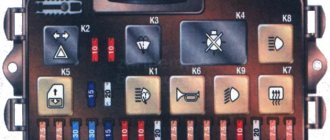
The next thing to check is relay K1 and fuse F1 (15A).
You can check by installing a working relay and fuse. And if necessary, replace with new ones. You need to take a closer look at the fan relay, since the contacts and legs of this element often oxidize. Which leads to cooling fan failure. Well, that's all, we looked at the main reasons why the cooling fan does not work on a Lada Granta car.
Source
Replacement
If you have the skills to handle simple tools, then replacing a damaged device with a new sensor will not be difficult. Before starting work, you need to make sure that the engine is cold, the car is located on a level surface on the handbrake and with the negative terminal removed from the battery. After this proceed as follows:
- Remove the contact chip with the cable from the head of the DTOZh connector.
- Drain part (about ½ liter) of the coolant into a suitable container by unscrewing the bolt at the bottom of the engine block.
- Use an open-end wrench to “19” to unscrew the old meter.
- Install a new sensor and insert the contact chip into the DTOZH connector.
- Antifreeze is added to the expansion tank to the required level.
- The terminal is returned to its place on the battery.
If the cooling fan does not work
1. Make sure that the fan blades rotate without difficulty (nothing is in the way).
2. Check fuses and relays (see mounting block for Lada XRAY, Vesta, Largus, Granta, Kalina, Priora, Lada 4×4).
3. Check the operation of the thermostat (on a warmed-up car, the lower radiator pipe should be hot) and the engine cooling system as a whole (the problem may be in the expansion tank cap).
4. Disconnect the engine cooling fan connector (clean the contacts) and connect it directly to the battery (if the fan turns on, the reason is in the power circuit, if it doesn’t turn on, there is a malfunction in the electric motor).
6. Open circuit. First of all, you should clean the contacts in the connectors. If this does not help, check the wiring (see electrical diagrams for Lada XRAY, Vesta, Largus, Granta, Kalina, Priora, Niva 4×4).
7. The problem is with the ECU firmware. In some cases, flashing the ECU unit helps solve the problem of turning on the fan.
Main reasons
why the cooling system fan did not turn on (survey among LADA car owners):
- faulty DTOZH (42%);
- wiring break (10%);
- fuse blown (8%);
- fan motor malfunction (6%);
- another reason (34%).
Diagnostics with Opendiag mobile
The above method of checking the meter today can already be considered “old-fashioned”. In order not to bother with boiling water or specifically go to a service station to diagnose the electrical equipment of a Lada Granta, you only need to have an Android smartphone with the downloaded Opendiag mobile program and an ELM327 Bluetooth 1.5 diagnostic adapter.
ELM327 Bluetooth 1.5 adapter:
Diagnosis is carried out as follows.
- The adapter is inserted into the diagnostic connector of the Lada Granta and the ignition is turned on.
- In the phone settings, select Bluetooth mode. The name of the adapted device - OBDII - should appear on the display.
- Enter the standard password - 1234.
- Exit the Bluetooth menu and enter the Opendiag mobile program.
- After the “Connect” command, error codes will appear on the screen.
- If errors RO 116-118 are visible on the display, then the DTOZH itself is faulty.
Interface of the Opendiag mobile program on Android:
If the cooling fan runs constantly
- A break in the coolant temperature sensor or its circuits.
- Faulty cooling fan relay.
- The ECU is faulty.
Have you ever encountered a situation where the engine cooling fan did not work? In the comments we leave questions about this car malfunction, as well as our solutions and recommendations for this problem.
By the way, did you know that the engine cooling system of Lada Granta and Kalina 2 differs from the system that was used on previous generation LADA cars.
Share on social networks:
Found an error? Select it and press Ctrl+Enter..
Source
Purpose
The process of ignition of the fuel mixture in the cylinders of the internal combustion engine is accompanied by an increase in temperature to 20000C. If you do not maintain operating temperature conditions, the cylinder block with all its parts will simply collapse. The purpose of the engine cooling system is precisely to maintain the thermal operating conditions of the engine at a safe level.
The Grant engine temperature sensor is a meter that tells the ECU about the degree of heating of the antifreeze. The electronic unit, in turn, analyzing data from all sensors, including DTOZH, brings all internal combustion engine systems to a balanced optimal operating mode.
Tips for motorists
Such a malfunction, especially in the summer, can create many problems for the driver. Due to overheating of the coolant, the power unit of the machine can be damaged. To continue further movement, it is necessary to wait for some time for it to cool down, which leads to long delays, delays and other complications. In many cases, malfunctions can be fixed on your own; here are some useful tips for this.
Signs of trouble
The main indicator of the occurrence of such a problem is the steady movement of the temperature indicator arrow to the right into the red sector zone. This can happen for many reasons, but today we will consider only one, when the cooling system fan does not turn on. If this symptom appears, you should stop driving and try to find out why the fan is not rotating.
This device is turned on after the temperature sensor, which is installed in the area of the thermostat, is triggered (a thick tube from the main radiator also fits there). The principle of its operation is that when the coolant temperature reaches 101 degrees, its contacts close and supply voltage is supplied to the fan motor. You can check the electric motor quite simply; to do this, with the ignition on, you should close the wire contacts on the connector of this sensor. If the blades begin to rotate, the motor is working properly.
What else do they pay attention to?
In addition to the sensor, the operation of the fan motors is controlled by the electromagnetic relay K1. Its power circuit is protected by fuse F1, which is rated at 15 Amps. They can be found in the mounting block, in its lower part. The serviceability of the fuses can be checked with a car tester or replaced with known good ones. The relay can also be checked by installing another one, but in this case the contacts of the temperature sensor must be closed, in which case the blades will rotate when the ignition is turned on.
When is it advisable to repair it yourself and in the service?
If your car has problems with the electric fan of the cooling system, you can fix the problem in the sequence described above. Almost any repair can be done by yourself. Since the main problems come down to faulty sensors, replacing them will not be difficult. It is enough to dismantle the faulty part and install a new one in its place. If the problem lies in bad contacts, then they can be cleaned or, as a last resort, the connectors can be replaced. If you are not confident in your abilities, then in order to avoid new problems it is better to contact the service.
Diagnostics of the Lada Granta engine cooling system
Tools:
Parts and consumables:
- Coolant
- Screw clamps
- Reinforced adhesive tape
When operating a car, you can assess the technical condition of the cooling system by looking at the engine overheating warning lamp and the fluid level in the expansion tank.
1. Check the coolant level in the expansion tank.
The level should be 25-30 mm above the MIN mark on the expansion tank body. If the fluid level is at or below the MIN mark, add coolant to the reservoir as described here (for 8-valve engines) or here (for 16-valve engines).
If you have to regularly add coolant, you should check the tightness (see point 2) of the cooling system.
The coolant level should be checked on a cold engine. A slight increase or decrease in the coolant level during heating and cooling of the engine is not a malfunction. This is due to the thermal change in the volume of the liquid.
2. Check the tightness of the hoses and connections of the cooling system. Inspect the engine compartment and pay attention to the condition and tightness:
- expansion tank hoses;
- radiator steam exhaust hose;
- radiator supply hose;
- radiator outlet hose;
- connecting hoses to the thermostat housing.
You can try to eliminate coolant leakage from under the hoses by replacing the spring clamps with screw clamps. Do not overtighten the clamps, as they may cut the hoses.
You can temporarily repair a broken cooling system hose using adhesive tape (silver reinforced adhesive tape is especially suitable).
3. Check the integrity of the engine cooling system components.
- Expansion tank housing;
- Engine radiator;
- Heater radiator;
- Thermostat housing;
- Connections between the coolant pump (pump) and the cylinder block.
- Check for fluid leakage from the pump drain hole (located at the bottom of the pump), indicating wear of the oil seal.
4. Check the thermostat. Start the cold engine. Control the temperature and circulation of the coolant in the small and large circles by touch, by changing the temperature of the hoses and pipes of the cooling system (in the photo the air filter has been removed for clarity).
If the engine cooling system is working properly, then when the coolant temperature is less than 90°C, the thermostat valve should be closed and the coolant should circulate in a small circle. As a result, the lower radiator hose and the radiator itself will be noticeably cooler than the thermostat housing, through which hot coolant circulates.
When the coolant temperature reaches about 90°C, the thermostat valve will open and a gradually increasing flow of hot liquid will begin to flow into the radiator. In this case, first the radiator and then its lower hose will begin to heat up.
5. Check the radiator fan of the engine cooling system. Leave the engine running until the engine radiator fan operates. When the coolant temperature rises to a certain value, the electric fan should turn on, and when the temperature drops, it should automatically turn off. If the electric fan does not turn on in time and the liquid boils, it is necessary to check the serviceability of the fan electric motor or the serviceability of the engine control system.
The article is missing:
- Photos of parts and consumables
Replacing coolant in the SOD
The antifreeze level in the tank is checked only after the engine has cooled down. You cannot add coolant to the maximum mark - during operation the liquid heats up and increases in volume, after topping up the valve cover is screwed on tightly.
It is necessary to constantly monitor the level of antifreeze; a sharp decrease in its volume can cause a malfunction of the cooling system, which should be eliminated immediately. Every motorist can add antifreeze to the expansion tank:
- The car must be on a flat surface, all work is carried out with the engine cooled down.
- Unscrew the cap of the expansion tank.
- Check the condition of the antifreeze; there should be no oil film or other contaminants on it. If the color of the coolant is dark or rusty, the ODS needs to be flushed.
- If the fluid level is below the minimum level, all connections should be inspected for leaks. If they are missing, add antifreeze between the two marks and tighten the valve cover tightly.
The procedure is simple and can be performed by anyone without seeking help from a car service center. The price of the work does not exceed 100-200 rubles, depending on the region.
Preparing for replacement
According to the regulations, the coolant is replaced after reaching 75 thousand km or after 5 years of operation. In other cases, the procedure is carried out when antifreeze is contaminated or leaks. Lada Granta engines use ethylene glycol-based coolant without the addition of borates, silicates and other synthetic additives. To change the entire coolant, you will need to purchase at least 8 liters of fluid. It is not necessary to use the antifreeze used at the factory for this. As an alternative, you can take products from the brands Sintek, Felix, G-ENERGY.
How to drain coolant
First of all, the engine must cool down. Then, by unscrewing the cap of the expansion tank, relieve pressure in the system. The engine protection is removed. A suitable container is placed under the radiator drain plug, and the valve cover is screwed on - this way the antifreeze will drain more slowly and will not flood everything around. Then the drain plug is unscrewed and the coolant is drained into the container. This way, not all the liquid comes out - you also need to drain it from the water jacket.
On an engine with 8 valves, the container is placed below the ignition module under the front part of the BC. Using a 13 mm wrench, unscrew the drain nut on the block and wait until the antifreeze drains from the jacket. Then tighten the nut.
On an engine with 16 valves, due to design features, the starter prevents the fluid from draining from the jacket. For this reason, you must first remove it and only then unscrew the drain nut. If this is not done, the coolant will flood the starter, and this will lead to the failure of the starter. The drain nuts use tapered threads so no O-ring is required.
Replacing the coolant and removing the air lock
After removing all the old coolant, there are a few steps left to perform:
- pour new antifreeze into the expansion tank to an average level between the maximum and minimum marks, do not tighten the cap;
- start the engine and press without applying significant force on all pipes, thereby expelling excess air from the system;
- The liquid level in the tank will drop, top up again to the middle mark and screw on the cap.
If the pipe approaching the radiator from below begins to heat up after heating to operating temperature, then everything is in order - the cooling system on the Lada Grant is operating normally. You should wait until the temperature rises higher and the radiator cooling fan comes on. After it turns off, you can turn off the engine.
When the engine has cooled down, check the coolant level in the expansion tank - if necessary, add to the required level. Next, the reliability of all connections and the absence of leaks is checked again. Now you can install the engine protection in its place. This completes the replacement of antifreeze in the Lada Granta cooling system.
Any car owner can replace the coolant. The car service center will ask for about 1,000 rubles for this operation and will give a guarantee on the quality of their work. If you have free time and desire, then by following the detailed step-by-step instructions, you can easily do everything yourself.
The cooling system of the Lada Granta does not have many weak points and is considered relatively reliable.
Reasons for fan failure
Here we indicate the most likely places in the cooling circuit, which you should take a closer look at if the cooling fan does not turn on.
- Thermostat. When the specified product fails, the fan also begins to make itself known through malfunctions and incorrect activation. To diagnose the thermostat, you will need to touch the outlet pipe (located at the bottom) of the LADA Kalina radiator on a warm engine. If this hose is warmed up, then the unit is normal; when it is cold, we determine that the thermostat is faulty. Since a part can break down quite often, it is recommended to carry a spare part with you. Replacement is not a difficult operation. To perform this, you will need to first drain the liquid from the circuit.
- Fuse and switching relay. These elements of the electrical circuit are also capable of frequent failure. Using the diagram of the location of the fuse links, we find the required fuse in the mounting block, remove it and check for burnout of the working “hair”. The block with these elements is located inside the cabin under the dashboard. To protect the fan circuit, an insert with a maximum current of 50 A is used. The fuse number is “3”.
How to fix breakdowns
Repair of ODS elements is not considered as part of troubleshooting. In most cases, replacement of failed parts is necessary.
Replacing the thermostat
Lada Granta is available with two types of engines: one of them is 8-valve, the other is 16-valve. The location of the thermostat on these power plants is somewhat different, which means that replacement is carried out with certain differences.
To replace the thermostat on an eight-valve engine, you will need a small set of tools: socket wrenches, screwdrivers, a Torex wrench and a container for draining the coolant.
The replacement procedure is simple; to do this, you need to follow a number of steps:
- Place the car on a level surface and use a jack to raise the front end.
- After unscrewing the bolts securing the engine protection, remove it.
- Place a suitable container under the plug to drain the coolant from the radiator.
- Unscrew the cap from the expansion tank neck.
- Unscrew the drain plug and wait until the liquid drains.
- Loosen the thermostat pipe clamp from the rear and disconnect the hose.
- Loosen the clamp on the front thermostat pipe and disconnect it.
- The ground wire is secured with a nut on the thermostat stud - unscrew it and disconnect the wire.
- Unscrew both nuts that secure the thermostat to the studs and remove it.
- Remove the O-ring and, unscrewing the three nuts, remove the thermostat cover.
- Press and rotate the locking plate to remove the cover.
- Remove the spring with the valve mechanism.
Installing a new thermostat is carried out in the reverse order. If the hoses will not be changed, then to prevent possible leakage of antifreeze, it is recommended to lubricate them from the inside with a small amount of sealant before installation.
After installing the thermostat, all pipes are tightened with new clamps, and coolant is poured into the expansion tank.
Then you need to start the engine and check the operation of the cooling system, if necessary, remove the air lock. To replace the thermostat on a 16-valve engine, the same set of tools is used, steps for an 8-valve engine are repeated from 1 to 6, then the process is as follows:
- Disconnect all pipes through which coolant is supplied to the thermostat by loosening the clamps.
- Unscrew the fastening bolts and remove the thermostat cover from the seat.
- Remove the sealing ring, turn the fixing plate by pressing and remove the spring with the valve mechanism.
Installation of a new thermostat is carried out in the reverse order. All hoses are connected, antifreeze is poured into the system, the engine is started, and if necessary, the air lock is removed, after which antifreeze is added to the tank to the mark between the minimum and maximum. There are many fakes and low-quality parts on the car parts market, so it is advisable to check the thermostat before installation. To do this, you need to heat water in a container to a temperature close to boiling and place a thermostat there; if the valve begins to open slightly, it means the device is working.
Replacing the thermostat can be done with your own hands in a regular garage. There are no difficulties, but you will have to spend money on a new part, pipes, if changed, and coolant. To save time, you can contact any car service center, where within 20-30 minutes the technicians will change the thermostat for 200-300 rubles.
Replacing the coolant pump
To replace the pump on a Grant you will need a set of sockets, wrenches and screwdrivers. Many car owners combine pump replacement with timing belt replacement. At the initial stage, the process is identical for both procedures:
- Disconnect the negative terminal from the battery.
- Using a 17 mm wrench, rotate the camshaft pulley by the fastening nut until the mark on the pulley matches the mark on the rear casing cover. So the piston in the first cylinder will be at top dead center.
- The nut securing the timing belt tensioner roller is unscrewed and the tension is weakened.
- Drain the coolant through the drain hole on the radiator.
- Unscrew the bolts securing the pump to the cylinder block and remove it together with the sealing gasket.
- The new pump must be installed with the number facing up, and it is recommended to replace the sealing gasket.
Engine overheating, checking the cooling system of Lada Granta VAZ 2190
| Overheating of the Lada Granta VAZ 2190 engine When the engine is running, a working cooling system maintains optimal temperature conditions. Malfunctions in the engine cooling system can lead to engine overheating. If you miss this moment, unpleasant consequences may arise: a breakdown of the cylinder head gasket, warping of the cylinder head and, as a result, complex engine repairs. On the instrument panel there is a warning light 7 (see Fig. 1.8) for engine overheating. If the engine of a Lada Granta VAZ 2190 overheats, the light turns red. |
Design and principle of operation
The temperature meter on Grant is a thermal variable resistor. The thermocouple, enclosed in a bronze case with a threaded tip, reduces the resistance of the electrical circuit when heated. This allows the ECU to determine the coolant temperature.
DTOZH device:
If you look at the sensor in cross-section, you can see two contact petals located at the top and bottom of a thermistor made of a special metal alloy, which changes its resistance depending on the degree of heating. It closes both contacts. One is supplied with power from the on-board network. The current, having passed through a resistor with a changed characteristic, exits through the second contact and enters the ECU microprocessor through the wire.
The following parameters of internal combustion engine operation depend on the DTOZH:
- temperature indicator readings on the instrument panel;
- timely activation of the internal combustion engine forced cooling fan;
- enrichment of the fuel mixture;
- engine idle speed.
How to replace a fan in Kalina?
The replacement process, if the cooling fan does not turn on, is quite a troublesome task, which is influenced by the tightness of free space for manipulation. So let's get started.
- 1. Here it is necessary to avoid the need to remove the radiator, which involves draining the fluid and takes more time.
- 2. Dismantle the housing of the filter element of the air intake system.
- 3. Remove the front grille.
- 4. Unscrew the fasteners of both head lighting devices.
- 5. We use a “10” head, through which we unscrew the fasteners of the upper front panel.
- 6. Now you need to disconnect the connectors that serve to connect the electrical fan module with the on-board network. We take the wires to the side to avoid interference.
- 7. The fan frame is secured with 4 bolts that need to be unscrewed.
- 8. We remove the fan with extreme care so as not to damage the nearby components of the engine compartment.
Installing the device involves performing manipulations using the reverse algorithm.
The main reasons for sensor malfunctions
So, for what reasons on Kalinas and Prioras, and on all VAZs in principle, the controller may not work:
- The first reason is the thermostat not working. This problem is one of the most difficult; when it occurs, the fan will not work correctly. To make sure that the thermostat is working, you will need to touch the lower hose - if it is cold, then the device has really failed. In general, for Kalina, thermostat failure is a fairly common occurrence.
- If the thermostat is working, then it is necessary to diagnose the safety elements. You should also check the condition of the circuits themselves; use a multimeter to do this. The fuse diagram should be indicated on the back of the unit cover. In the case of Kalina, the unit is located under the dashboard, you are interested in fuse element 3, its capacity is 50 amperes. If the fuse is working, then you need to diagnose the fan relay, it is marked with the number 1. If these elements are working, you will have to remove the fan control unit - to do this, move the air duct and, using a 10-mm wrench, unscrew its fastening. There should be two relays on the block, they should be checked.
- It would also be a good idea to climb into the engine compartment and ring the contacts of the fan itself. The problem may be a break, broken wiring, oxidation of contacts, or a burnt-out winding inside the device. Problems with wires and contacts are solved without problems - bad wiring is replaced, and contacts are cleaned. But if the problem lies in the winding, then the device will have to be completely changed.
- The problem may also lie directly in the sensor itself. To start the ventilating unit, you will need to reset the terminals from the device. Diagnosis of the controller is carried out by dismantling the thermostat and placing it in a container with hot water - the thermostat should open at this moment.
- Another reason, which happens quite rarely, is a break in the circuit. This problem can be diagnosed using a multimeter - broken wires must be replaced (the author of the video about diagnosing the regulator with your own hands is Dmitry Maznitsyn).
If the cooling fan does not work
1. Make sure that the fan blades rotate without difficulty (nothing is in the way).
2. Check fuses and relays (see mounting block for Lada XRAY, Vesta, Largus, Granta, Kalina, Priora, Lada 4×4).
3. Check the operation of the thermostat (on a warmed-up car, the lower radiator pipe should be hot) and the engine cooling system as a whole (the problem may be in the expansion tank cap).
4. Disconnect the engine cooling fan connector (clean the contacts) and connect it directly to the battery (if the fan turns on, the reason is in the power circuit, if it doesn’t turn on, there is a malfunction in the electric motor).
5. Check the coolant temperature sensor (DTOZH).
6. Open circuit. First of all, you should clean the contacts in the connectors. If this does not help, check the wiring (see electrical diagrams for Lada XRAY, Vesta, Largus, Granta, Kalina, Priora, Niva 4×4).
7. The problem is with the ECU firmware. In some cases, flashing the ECU unit helps solve the problem of turning on the fan.
Expert answer
On the VAZ-2115 that you had, the ECU (electronic engine control unit) most likely no longer worked correctly. By resetting it, you were essentially removing the terminal from the battery. Try doing the same now. Disconnect the battery terminal for a couple of minutes, then look at the situation.
If this does not help, then the problem is already in the technical part.
- First, check the connector on the thermostat; it may be poorly secured, and the data coming from the temperature sensor is not correct. This happens when routine maintenance is carried out, for example TO-1, TO-2. Most likely, when replacing the air filter, a bad contact occurred.
- Remove the temperature sensor and check its operation. Operating resistance 70 Ohm + 2% at 130 °C, and 100700 Ohm ± 2% at -40 °C.
Coolant temperature sensor
If possible, take a known-good sensor “for testing.”
Temperature sensor location
If this does not help, then you need to look at the wiring at the moment of kinks.
What to do if the engine fan does not turn off?
If the cooling fan turns on as it should when the temperature threshold is exceeded, but does not turn off, then the fan relay is most likely stuck (broken).
- It is necessary to remove the fan relay from the fuse box, fan relay number K1.
- Examine it. Clean from dust and other contaminants.
- Shake it and try to insert it back.
- If this does not help, then replace the relay with a new one.
Source
Table of operation of the cooling fan on the Lada Granta depending on temperature and ECU types
In order to find out at what coolant temperature the fan on your car turns on, just look at the table below and find your type of ECU and car.
The following two tabs change content below.
Renault car expert
I own a Renault Megane 2, before that there were Citroens and Peugeots. I work in the service area of a dealership, so I know the car inside and out. You can always contact me for advice.
| Cable throttle system | 8-valve internal combustion engines | 16 valve internal combustion engines | 8-valve internal combustion engines | 16 valve internal combustion engines |
| January 7.2 software A\I201CO56\57\58 T=101 degrees | B101CR01 T=103 degrees | B173CR03 T=101(1) degrees T=105(2) degrees | А\I303CD04\CE05\CF06 Т=101(1) degrees Т=105(2) degrees | A\I373CA01\02 T=101(1) degrees T=105(2) degrees |
| Bosch 797 software B1C02Q05 T=103 degrees | В102СR06 T=103 degrees | B174CR03 T=101(1) degrees T=105(2) degrees | ||
| Bosch 797+ T=103 degrees | B104CR02 T=101(1) degrees T=105(2) degrees | B11KSS01\B13KSS02 T=101(1) degrees T=105(2) degrees |
Cooling fan diagnostics
In order to diagnose the performance of your fan, you just need to disconnect the connector from the thermostat sensor. In this case, the sensor must work forcibly.
Changing values
You can change the factory switching settings through the system of almost any on-board computer ( STATE or MULTITRONICS ), the recommended values should not be lower than 95-97 degrees.
Why do you need to adjust the fan temperature?
In addition to the not-so-thought-out fan response system to temperature changes, we also get a noisy electric motor that will drown out the music, and in addition the incorrect behavior of the coolant temperature control sensor. We looked into how the temperature sensor works and how it drives the electric fan on 16-valve Priora and VAZ 2110 engines not long ago.
Standard temperature sensor VAZ 2110
Moreover, the firmware of the electronic engine control unit also does not always work correctly, so diagnosticians persistently invite those who are dissatisfied with the operation of the fan to re-flash it. And yet the biggest problem with turning on the fan is that it does not have several operating modes, but throws everything out at once. Naturally, this leads to a sharp drop in voltage in the on-board network, and if it is heavily loaded with additional equipment, then this does not lead to anything good. That is, the fan on VAZ 21126 engines has a number of problems:
there are no additional operating modes, the motor always works at full strength;
excessive fan performance is good in traffic jams and in hellish heat, but not in normal engine operating modes;
the electric motor makes a lot of noise and nothing can be done about it;
the on-board network can be heavily overloaded with current at the moment the electric motor starts;
in many cases, the starting temperature of the fan does not correspond to the operating conditions and many would like to shift the lower temperature threshold another 5-7 degrees lower to avoid engine overheating.
Based on this, many people think about how to adjust the temperature at which the fan turns on.
Why is the cooling fan constantly running?
If the engine fan runs constantly, there may be 7 reasons for this.
- Failure of the coolant temperature sensor or damage to its wiring . If incorrect information is sent from the sensor to the ECU (high or low signal, its absence, short circuit), then errors are generated in the ECU, as a result of which the control unit puts the engine into emergency mode, in which the fan “threshes” constantly to prevent overheating engine. You can tell that this is the problem by the difficulty of starting the engine when it is not yet warmed up.
- Shorting the wires to ground . Often the fan runs constantly if its negative wire is frayed. Depending on the engine design, this may be in different places. If the design of the engine provides for two DTOZH, then if the “minus” of the first sensor breaks, the fan will “thresh” when the ignition is on. If the insulation of the wires of the second DTOZH is damaged, the fan runs constantly when the engine is running.
- Faulty fan relay . For most cars, the fan power supply consists of “plus” from the relay and “minus” from the ECU according to the temperature from the DTOZH. “Plus” is supplied constantly, and “minus” is supplied when the antifreeze operating temperature is reached.
- "Glitches" of the electronic control unit . In turn, incorrect operation of the ECU can be caused by a failure in its software (for example, after flashing) or when moisture gets inside its housing. The moisture could be banal antifreeze that got into the ECU (relevant for Chevrolet Cruze cars, when antifreeze gets into the ECU through a torn throttle valve heating tube, it is located near the ECU).
- Dirty radiator . This applies to both the main radiator and the air conditioner radiator. In this case, the fan often runs constantly when the air conditioner is on.
- Freon pressure sensor in the air conditioner . If it fails and if there is a refrigerant leak, the system “sees” that the radiator is overheating and tries to cool it using a constantly turned on fan. Some car enthusiasts have a cooling fan that constantly runs when the air conditioner is turned on. In fact, this should not be the case, since this indicates either a clogged (dirty) radiator or a problem with the freon pressure sensor (freon leak).
- Low efficiency of the cooling system . Failures may be associated with a low coolant level, a coolant leak, a faulty thermostat, a pump failure, or a depressurized radiator cap or expansion tank. With this problem, the fan may not work constantly, but for a long time or turn on frequently.
Source
Where is the sensor located and how does it work?
Fan switching sensors are located on the cooling system elements. The installation point is located in the path of the fluid flow supplied from the engine jacket to the radiator. This is due to the fact that the liquid in this line will have the highest temperature.
Possible installation locations:
- thermostat housing outside the valve;
- cylinder head;
- lower radiator hose;
- side of the radiator.
On some vehicles, the sensor is combined with a coolant thermometer. The fans are turned on by the control unit based on temperature data. In this case, there is an additional sensor on the radiator that is used to operate the climate control or air conditioning. Triggering of any of the devices turns on both fans (on the engine and air conditioner radiators). A similar solution is found on Japanese cars.
On cars, two fan switching sensors can be used, located at the inlet and outlet of the radiator pipes. This scheme allows you to maintain the temperature in a narrow range.
Varieties
On cars, the following types of sensors are used to turn on the fan:
- bimetallic;
- waxy;
- thermistor;
- a sensor that operates on a circuit break or short circuit.
The first two types of sensors have an electromechanical operating circuit and can be of two varieties:
- single-speed, equipped with a single contact group that controls the fan in one temperature range;
- two-speed, equipped with a pair of contact groups configured to operate at different temperature ranges.
Regardless of the type, the sensors are a metal housing equipped with a thread. The body material used is non-ferrous metals based on copper (bronze or brass), which provide increased thermal conductivity. There is a hex key on the body that is used for installing the part. The wiring connector is located on the top of the sensor.
Bimetallic sensor
A bimetallic sensor contains a metal plate. In normal condition the contacts are open. As the plate heats up, it deforms and closes the circuit, supplying a control signal to the impeller motor turn-on relay. There are sensors that activate the fan motor directly without a relay. When the liquid cools, the plate returns to its original shape and the current supply to the motor stops.
Wax sensor
Sensors were produced for which wax or ceresite (or another substance with a significant coefficient of thermal expansion) was used as a working substance. As it warmed up, it expanded and shifted the metal membrane associated with the contacts. As it cooled, the volume of the wax decreased, and under the action of the spring the contacts opened.
Thermistor sensor
The thermistor sensor works on the principle of changing the resistance of a resistor installed in the fluid flow. The temperature change is recorded by an electronic unit, which recalculates the temperature value in accordance with the schedule.
Sensors that operate on open circuit or short circuit
Devices that turn on the fan when the circuit breaks are often found on Japanese-made cars. You can check the sensor type by removing the plug. When the block is removed from the tensile sensor, the fan will turn on.
At what temperature does the fan switch trigger?
The temperature range of the sensor response depends on the type of engine power supply. On carburetor cars, devices with a switching range of 82-110 ºС are used. The activation temperature is stamped on the body of the part. On cars of the same model, there may be sensors calibrated for different temperatures.
According to the standard, sensors are divided into four groups according to operating temperature:
Russian cars use sensors of the first three groups. The engines of foreign cars are designed for more severe temperature conditions, so devices of the fourth category are often found on them.
When you start using distributed injection systems, the temperature at which the fan turns on is determined by the settings of the engine control unit. The sensor simply transmits temperature information to the control unit, which decides to turn on the fan according to the programmed program.
On injection machines, you can program temperature thresholds at which the fan switch on sensor will work. This should be done carefully, since it is easy to disrupt the temperature regime and damage the engine.
