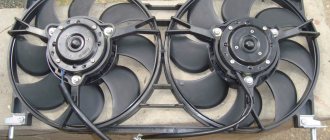
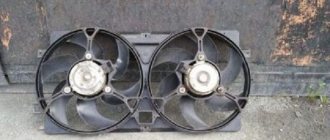
Forced activation of cooling fans on Niva Chevrolet
Replacing the Niva fan relay. Details. Checking the VAZ NIVA relay
Forced activation of cooling fans on Niva Chevrolet
All VAZ Sensors Location. All VAZ NIVA drivers need to know this. DPS, DMRV, DPKV, DPRV, IAC
Why do the NIVA VAZ radiator cooling fans not turn on? All the reasons. Search and elimination 1st
Replacing and diagnosing the fan switch sensor
Niva Chevrolet. Fans, MOSFETs and temperature - Let's connect! (1)
Niva Chevrolet fan operation from sensors and buttons
how to check the sensor is on fan (entire circuit)
Ideal inclusion and operation of VAZ NIVA fans. Cooling fan start temperature
Good day, Dayvovites and readers of my blog!
Last week, one evening, while returning home, I noticed the dashboard - the temperature arrow was creeping up. Well, I think Carlson will turn on now, but that was not the case. the temperature continued to creep up) fortunately I noticed already approaching the house. I parked the car and decided to figure it out, but the very next day, because... It was already dark and the rain was drizzling. The next morning I arrived at work (from work to home the engine warms up to maximum operating temperature) and immediately decided to check what was going on. At first, the fault was with the male-female terminals that go to the fans, because the latches - tabs - were torn off on both. I checked - they fit tightly. Well, I think I need to check using the VAG cable (I was just lying around at work), I connect it - turn on OpenDiag - select fan relay 1 - turn it on. The click of the relay - and this is the error
Without hesitation, I look for a diagram on the Internet where which relay is responsible for which fan
and I’m going to remove the relay and look at the fuses (fortunately, I hadn’t assembled the interior at that time and I got it without a glove compartment without any problems). The fuses are intact. To test the relay at work, I assembled a small “stand” from a 12V battery from a UPS, a pair of wires and a multimeter.
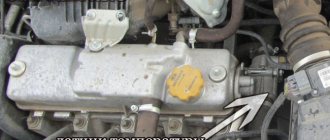
The relay is also ok. I go to the ShNiva forum and read that if all the relays are intact, then 100% of the DTOZH is acting up (the one that is two-contact - screwed into the pipe coming out of the thermostat). I go to the store and buy this sensor, well known to everyone)
I screw it into place, warm up the car and voila - Carlson is working)
Now a question about the male-female terminals for the fans. Has anyone seen these on sale, otherwise they often fly off without latches.
Engine operating temperature
Section presenter Alexey73
What does the temperature gauge show on the dashboard?
On 21213, the normal temperature gauge reading is 90 + 1-2 needle thicknesses. If it is more, then you need to look at the antifreeze level in the radiator (not in the expansion tank!), the ignition, the thermostat, and flush the radiator inside and out. If the temperature only rises in traffic jams, then perhaps the pump cannot cope at low speeds. Try raising the revs using the choke. If it helps, then the problem is the performance of the pump: either there is a large gap between the impeller and the pump body, or a pump is installed with a “classic” impeller. It is better to install a pump with seven blades and a large diameter, since the performance of such a pump is higher (see the section Pump. Pumps from different manufacturers).
: The temperature arrow is 1-1.5mm to the right of 90. That is, the temperature is slightly increased.
+++Don’t worry - this is how it should be on the new model panels. I, too, fooled myself for a long time with this “bug feature” until I measured the voltage on the thermistor in the unit with a tester and finally calmed down
I checked the temperature sensor like this: I lowered the sensor and thermometer into a pan of boiling water and recorded the resistance-temperature relationship. I warmed up the engine, measured the resistance, compared it with the table, and determined the temperature by the resistance.
How to lower your temperature
As a temporary measure, you can use a heater to lower the engine temperature. We turn it on full, if the temperature remains elevated, turn on the fan. The fact is that the circuit that turns on the heater radiator bypasses the thermostat. Having cooled in the heater radiator, the antifreeze is mixed with the antifreeze leaving the thermostat, and the temperature of the antifreeze at the engine inlet decreases. It’s better to drive in the heat than to end up spending a lot of money repairing an overheated engine.
Increasing engine speed can help (for example, by choke if in traffic jams, or drive in a lower gear at higher speeds). At the same time, the pumping of antifreeze is accelerated and heat removal from the engine is improved.
In case of elevated temperatures, it is better to drive in fourth gear, keeping the speed in the region of 3000-3500, since at these speeds the efficiency is maximum, and the pump copes better with pumping antifreeze than at low speeds.
If the temperature gauge creeps into the red zone, you cannot immediately turn off the engine. It is better to stop and let the engine run for a while without load. Otherwise, local antifreeze may boil in the engine, steam cannot remove heat, vapor locks form, and local overheating occurs. The consequence of this may be warping of the cylinder head and breakdown of the cylinder head gasket.
The main causes of overheating are (arranged roughly in order of probability): lack of antifreeze (check in the radiator), air locks (especially after filling with antifreeze), thermostat malfunction, loose alternator belt (which also turns the pump), incorrectly set ignition, contamination of the radiator outside and /or from the inside, a thick layer of dirt on the engine, insufficient pump performance (especially if installed with a small, “classic” impeller).
Chemistry
There are more than two dozen cooling system flushes, maybe more, but I’m talking about what I use myself and not only in cars of the Niva family.
In this case, the product of the company. I've probably done about 50-70 cooling system flushes myself with this product at this point. Why did I like him? According to two indicators. The first is humane pricing and the opportunity to work directly with a Russian manufacturer. The second is its chemical characteristics. If no special explanation is needed for the first point, then I will dwell separately on the second. Cooling flushing or engine flushing can be “soft” or “nuclear”. This is my definition, and it does not appear in the literature)))) As I said above, “nuclear” washing can clean everything to a shine, but clog both radiators, “soft” - may be less effective, but more humane in relation to the whole system.
A little from the piggy bank of the “old school of motorists.” For a long time I used citric acid to flush the system. It works not bad, but compared to the same laurel it is less effective. On the “motorists” forum there are masters who recommend and use concentrates for cleaning kettles and washing machines. And they even talk about a good result. But for some reason it seems to me that scale in a kettle and a chemical film from antifreeze are not the same thing.
Classification of cooling systems
How do Chevrolet Niva cooling fans work and through which fuses and relays are they connected?
Cooling systems are liquid and air; the latter are practically never found in modern cars. Liquid ones, in turn, are of open and closed type. Open ones communicate with the environment through a steam exhaust tube, and closed ones are isolated from the environment, so the pressure and boiling point of the liquid in them is higher (up to 110-120 degrees). Liquid systems also differ in the method of circulation: Forced. The liquid is driven by a pump located on the engine. Thermosyphon. Here, the circulation of liquid is caused by the difference in density of the liquid heated by the parts and the liquid cooled in the radiator. Combined. Cylinder blocks are cooled according to the thermophilic principle, and the hottest parts are cooled by force.
Removing and replacing the fan resistor
Before starting work, you must go to the inspection hole and remove the terminal from the battery. For repairs you will need 10-13 wrenches, a screwdriver and a new resistor. The part is installed in the beam below the radiator. The removal procedure is as follows:
- Unscrew the fastening bolts and remove the crankcase protection along with the mudguard.
- Remove the protective strip of the resistor and unscrew the part.
Assembly is performed in reverse order.
How do fans work on a Chevrolet Niva?
Fan relay
Dimensions of Niva Chevrolet. Chevrolet Niva dimensions, dimensions, volumes, Chevrolet Niva 4x4 ground clearance, trunk
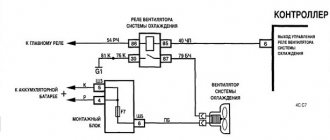
The additional block contains not only fuses. There are also three electromagnetic relays that control the operation of the electric motors of the cooling system. Their control circuits are powered from the ignition switch and on-board controller outputs, and the power current comes from the battery through fuses.
The relay operates as follows:
- Voltage is applied to the control terminals.
- Current passes through the inductor, resulting in an electromagnetic field.
- The steel contacts attract and close.
- The current passing through the relay drives the electric motor.
As soon as the control voltage disappears, the contacts open under the influence of the spring and the fan stops.
You can check the functionality of the relay in three ways:
- Replace the relay with a known working one and test the operation of the system.
- With the engine off and the ignition on, disconnect the temperature sensor connector. You should hear the relay click.
- Dismantle and test the output contacts with a multimeter, applying voltage to the terminals of the induction coil.
Circuit breakers
The electrical circuits of Niva Chevrolet cars produced before and after 2009 are different. In both cases, 50-amp fuses protecting the electric fan power circuits are located in an additional unit. It is located behind the glove box on the passenger side of the cabin. The figure shows where the fan fuses are located.
Also interesting: Niva pickup: technical specifications and tuning for model 2329
If the permissible current is exceeded, the insert melts and the circuit opens. Therefore, fuses are the first thing to check if the electric cooling fan does not work. The performance of a part can be assessed visually or using an ohmmeter (multimeter). To do this, you will first have to remove the fuse from the socket.
Cooling system malfunctions Niva Chevrolet
Radiator cooling fan
The cooling system of the VAZ Niva is quite effective and has undergone virtually no changes since its creation. It includes the following units and elements:
- Mechanical water pump (pump). Installed in the cylinder block on the front side, its impeller is immersed in coolant circulating through the water jacket of the VAZ-2121 engine. Driven by belt drive.
- Mechanical thermostatic element (thermostat). It is located on the right side of the block in the direction of travel. From it the pipes go to the water jacket and radiator.
- Cooling radiator with 2 plastic tanks on the sides. Located at the front of the car.
- Fan with air diffuser. Attached to the inside of the radiator.
- Expansion plastic tank with a lid equipped with valves. Connected by a pipe to the radiator.
- Interior heater heat exchanger equipped with a tap.
There are 2 more differences in the cooling design of engines with a carburetor and an injector:
- on cars with direct fuel injection, 2 electric fans are installed on the radiator instead of 1 mechanical;
- The heating pipes for the lower part of the carburetor in model 21214 provide heating for the throttle body.
And also interesting: Chevrolet Niva error codes with decoding In VAZ-2131 Chevrolet Niva cars, the cooling system is generally similar to a regular Niva with an injector. The VAZ-2131 heater radiator is not equipped with a tap, which is why antifreeze flows through it all year round.
The main difference is a fundamentally new thermostat design.
First of all, the breakdown can be determined by the engine temperature. Significant overheating or hypothermia can be caused by many factors
First of all, you should pay attention to the temperature threshold at which the fan on the radiator turns on. If the thermostat fails, there will be a significant difference in the temperature of the engine and radiator
It is also necessary to check the belt that drives the pump.
The system may depressurize due to damage to the expansion tank or the valve in its cover. This will lead to a decrease in pressure in the system, the antifreeze will boil at a lower temperature, but not enough to turn on the radiator fan.
Attention! Antifreeze can only be added when the engine is turned off and cooled down, as hot antifreeze can splash out, causing severe burns. This also increases the risk of poisoning by vapors that are formed as a result of boiling antifreeze.
If the thermostat sticks in the open position, it is possible that the engine will become overcooled when driving at high speed. This also leads to serious problems in winter: the engine cannot warm up to the required temperature, the ECU increases fuel consumption for warming up, and a large amount of carbon deposits forms on the cylinder walls. This also helps to reduce the viscosity of the oil and reduces the service life of the catalyst.
Also interesting: Chevrolet Niva Engine, Characteristics and Tuning
How does the Niva fan connection diagram described above work?
When the engine temperature reaches the low temperature sensor response threshold, the relay to which it is connected will operate. In this case, the current from the fuse through the relay contacts will flow to the positive brush of the first fan. Then passing through the armature winding to the negative brush and through the contacts of the additional relay to the second fan motor. At the electric motor collectors there will be ½ of the on-board network voltage. This will lead to a reduction in speed by half, and accordingly the noise will decrease.
If the engine temperature reaches the response threshold of the second sensor or the temperature at which the ECU fans turn on, the additional relay coils and the second fan relay will receive power. The movable contact of the additional relay will switch the wire from the fan motor to vehicle ground, at the same time the second fan relay will close. This will cause the fans to be switched in parallel.
“If you notice an error in the text, please highlight this place with the mouse and press CTRL+ENTER”
The VAZ-21214 engine cooling system is designed for off-road driving, that is, to operate for a long time at low speed and high revs. This causes the engine to become very hot. Therefore, the Nivas are equipped with a cooling radiator slightly larger than on the classics and two cooling fans.
Symptoms of the problem and consequences
The main signs of a malfunctioning thermostat in a car are abnormal coolant temperatures when the engine is running. It may be too high when the radiator fan is working correctly and there is a sufficient amount of antifreeze itself, or too low when the engine is warm. A concomitant sign of the last symptom is a sharp jump in coolant temperature when the engine stops.
Valve malfunction can also be monitored by the behavior of the temperature sensor when the machine is moving. When the speed increases, it shows values below normal, and when it decreases, on the contrary, higher.
A thermostat failure on a Niva reduces the service life of the motor and its final operating life, accelerating the wear of mechanisms due to constant overheating.
Description of the Niva fan circuit.
In the factory circuit, the fans are connected in parallel to each other, and switching on is carried out automatically through two relays. Automatic activation depends on the engine type. On a carburetor engine, activation is carried out by a sensor mounted on the radiator. The temperature in this case depends on the response temperature of the sensor indicated on the housing. On an injection engine, the fans are turned on by the engine control unit when the temperature recorded in the control program is reached.
Design of the Niva Chevrolet cooling system.
Yes, the engine will reach operating temperature more slowly than planned by the designers. As practice shows, a delay of a few minutes is not critical, and a whole expansion tank is the reward for such a decision. In this case, there are no material costs - the plug is pierced or not screwed in completely.
In the second option, the original expansion tank is replaced.
The most popular replacement is with analogues from the European concern VW. Shape and size do not matter for Russian Kulibins. The main thing is that it is durable and does not crack. Material investments when replacing along with materials - approximately RUR. A partial solution to the issue can be achieved by replacing only the tank cap, designed for lower pressure.
This option turns out to be average in cost, but the most difficult to find options. Since this year, the car manufacturer has also solved the problem by starting to produce expansion tanks made of more reliable and high-quality material.
But it is precisely the water pump that is the weak link of the Chevrolet Niva engine cooling system. There are cases when this part literally turns into a consumable and is changed as often as filters.
There may be reasons for pump failure. Most often this is a small resource and poor quality assembly. To increase cooling efficiency, the plates are stamped with a notch.
Cooling system for Chevrolet Niva since 2009.
The tubes are connected to the tanks through a rubber gasket. The liquid enters the radiator through the upper pipe and is discharged through the lower.
There is a coolant drain plug at the bottom of the left reservoir. On a vehicle without air conditioning, the upper and lower guide housings are located in front of the radiator, and on a vehicle with air conditioning, the air conditioning condenser is located in front of the radiator.
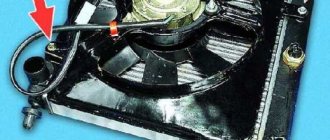
The electric fans are located behind the radiator in a casing.
As the coolant temperature rises, at the command of the controller, first the right electric fan with a low rotation speed is turned on through an additional resistor, and then both electric fans are turned on at a high frequency.
A pulley hub is pressed onto the front end of the roller, and a plastic impeller is pressed onto the rear end.
Axial and radial play in the pump bearing is not allowed. If the bearing or pump self-pressing oil seal fails, the pump cover assembly with the roller and impeller should be replaced.
The redistribution of liquid flows is controlled by a thermostat with a solid heat-sensitive element. The thermostat is located above the coolant pump, on the right side of the engine. On a cold engine, the main thermostat valve closes the pipe leading to the radiator, and the liquid, bypassing the radiator, circulates only in a small circle - through the bypass pipe of the thermostat, liquid from the outlet pipe of the cooling jacket enters the pump.
Regardless of the state of the thermostat, the position of its valves, fluid always circulates through the heater radiator and the throttle assembly heating unit.
The main elements of the system and what are the benefits of silicone pipes
The details of the system are presented in the diagram above, these include:
- air cooling radiator (art. 2123-1301012);
- casing with fans (art. 2123-1300025-01);
- temperature sensor (art. 2101-3808600-02 and 2112-3851010);
- water pump (art. 2123-1307010);
- thermostat (art. 2123-1306010);
- pump (art. 21230-1307011-82).
All elements of the cooling system are connected to each other through various hoses and pipes, which in most cases are made of rubber or polymers with similar properties.
As a reasonable alternative to rubber hoses, car enthusiasts increasingly prefer silicone analogues, which are significantly more expensive. The main reason for this is that silicone does not “tan” in the cold and does not crack. This allows you to avoid coolant leaking out of the system, which significantly affects the efficiency of its operation. Completeness of the Chevrolet Niva cooling system pipes:
- Upper radiator hose - 1 piece;
- Lower radiator hose - 1 piece;
- Thermostat and water pump pipe 1 piece;
- Heater radiator supply hose;
- Heater radiator outlet hose.
The strength of the silicone itself largely depends on the thickness of the tube walls, as well as the presence of special reinforcement. Parts made from this material, made specifically for cooling systems, are often characterized by double reinforcement, which makes their design much stronger and more durable.
If you believe the reviews of the Shniva owners themselves, then all the additional costs of replacing rubber cooling pipes with silicone ones are completely justified. This is especially true if the car is operated in harsh northern conditions.
It should also be noted that in most cases the connections are clamped with spring clamps and only in rare cases are screw clamps used. Another undoubted advantage of silicone is the fact that it resists the effects of gasoline well without changing its physical properties.
The circulation of antifreeze or antifreeze in the Chevy Niva cooling system occurs in two circles - small and large. In the first case, the liquid moves bypassing the radiator, since it does not need additional cooling and the outside air temperature is sufficient for it to effectively absorb heat from the engine. The tolerance for the heating level of the liquid in this case is about 78 degrees Celsius.
The standard pressure level is 1-1.2 atmospheres, and when the liquid is heated, its excess is “bleeded off” through a special valve. It is located on the expansion tank, which can be further adjusted.
If heating occurs above 80 degrees, liquid circulation begins in a large circle, involving the radiator in cooling. The direction of liquid movement in one of the circles is regulated by a thermostat, which reacts to an increase in the temperature of the liquid in the system, opening and closing if necessary. In this case, circulation is provided by a water pump, which is driven by the crankshaft through a special V-ribbed belt.
Also interesting: Relays and fuses for Lada 4×4 (VAZ 21214, 21314) » Lada.Online
Cooling of the cylinder head and block occurs due to a special “jacket” with coolant, which picks up heat and then enters the radiator, where its temperature decreases. To ensure complete tightness of the system and prevent fluid leakage, a gasket and seal are provided. The first ensures tightness on the side of the cylinder block, and the second prevents leakage at the point where the shaft enters the pump housing.
When the liquid circulates in a large circle, it is cooled by the radiator honeycombs, which are blown by the air flow. In most cases, this is quite enough to provide the necessary heat transfer. However, in the hot season or in traffic jams at low speeds, the temperature of the antifreeze increases significantly, until the liquid completely boils.
In this case, the heating is regulated by forcibly turning on the fans, which are attached to the radiator housing from the outside. The factory design provides for the presence of two such elements at once, which are activated independently of each other. The first is when the liquid is heated to 98 degrees, the second - to 102.
The efficiency of the fans is guaranteed only if the temperature sensor inside the radiator is working properly, the readings of which serve as the reason for starting the active air cooling system. In this case, the normal operating temperature of the liquid is considered to be from 80 to 95 degrees.
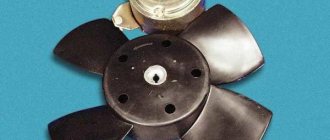
The designers of the Chevrolet Niva used a dual fan unit in the cooling system. This slightly complicated the connection diagram, but sharply increased the efficiency of radiator airflow. The fans are driven by 12-volt DC synchronous motors with a permanent magnet inductor. Electric motors have a closed, non-demountable design and do not require maintenance.
The power of each electric motor is 110 W. The fan assembly draws 18 amps.
The fans are turned on one by one using an electromagnetic relay controlled by the on-board computer. When the coolant heats up above 99 degrees, the electric fan located closer to the engine air intake starts. The switch-on temperature of the second impeller is 101 degrees. The fan connection diagram is shown below.
The fan power system includes three relays and a resistor, which, if necessary, provides a reduced rotation speed of the first motor. Power is supplied from the battery through fuses that save the wiring and battery in the event of a short circuit. Control signals come from pins 29 and 68 of the motor controller.
Consecutive switching on and off of engines reduces the load on the on-board electrical network. In most cases, it is possible to normalize the temperature only with the help of the first fan. This is especially useful when driving at night, when headlights and side lights put a lot of stress on the generator.
The ability to force fans on can be useful when driving off-road or in city traffic jams. However, the designers of the Chevrolet Niva did not provide the car with this function. It can be implemented independently or at a service station. It is necessary to connect backup relays parallel to the switching contacts and power them from a button installed in the car interior.
It is useful to equip the Chevrolet Niva with a switch that forcibly turns off the fan motors. This will protect their blades when fording water obstacles.
How to check
There are two methods for checking the functionality of the regulator, depending on whether a thermostat is installed in the car or not. If the unit is already connected to the engine and while warming up, the upper pipe going to the radiator immediately becomes hot, the exchange device is not working properly. The same applies to the case when the engine is warmed up, but the “large circle” line remains cold.
Another test method is used when the thermostat is disconnected from the vehicle systems. If low pressure air is supplied through the inlet pipe, it should not come out of the top of the thermostat. Only at the bottom. A violation of the current current directly indicates a faulty unit.
Methods for connecting fans.
There are two ways to reduce fan motor speed. The first is to connect an additional resistance of sufficient power in series with each fan motor. The second way is to connect Niva fans in series. The disadvantage in the first case is the search for resistance, which will also heat up. In the second case, a minimum of alterations are required. It is enough to pull out the negative wire from the connector of the first fan, and the positive wire from the second connector. After this, connect the free terminals on the motors with a wire of the appropriate cross-section. But in this case, in order to turn on the fans at high speeds, you will need to redo everything back.
If you want the fans to be able to operate at low and high speeds depending on the heating of the engine, then you will need to install an additional relay that will switch the fans from serial to parallel connection. This relay can be controlled manually or automatically. You can also combine both control methods. The design of the Niva fan connection diagram can be different, depending on the type of engine and your preferences.
When switching manually, you need to install a switch; a key is best suited, and for automatic control, an additional switching sensor with a response temperature lower than the main one.
Operating principle of the heat exchange system
Heat is removed only through the heater radiator, thereby heating the air in the cabin when the engine is not warmed up. After the coolant temperature has reached 78 degrees, the thermostat begins to open, using a large circle. When the parameter value is 90 degrees, thermal equilibrium occurs. If the heat exchange between the radiator and the environment is insufficient, the liquid continues to heat up. The corresponding signal from the temperature sensor is sent to the ECU, from where the control pulse is transmitted to the fan controller. The simultaneous operation of two fans does not exceed normal limits, especially under load, but serves as a signal to check the coolant level and the tightness of all connections.
If you need information about repairing or replacing any system component, this is your place.
The main task of the Niva Chevrolet cooling system is to effectively regulate the engine temperature.
Taking into account that the car is positioned as an SUV and is subject to heavy loads, a closed-type system with forced circulation is used.
Its main difference is that due to the increased pressure, the boiling point rises to about 120 degrees Celsius.
Fan relay
The additional block contains not only fuses. There are also three electromagnetic relays that control the operation of the electric motors of the cooling system. Their control circuits are powered from the ignition switch and on-board controller outputs, and the power current comes from the battery through fuses.
The relay operates as follows:
- Voltage is applied to the control terminals.
- Current passes through the inductor, resulting in an electromagnetic field.
- The steel contacts attract and close.
- The current passing through the relay drives the electric motor.
As soon as the control voltage disappears, the contacts open under the influence of the spring and the fan stops.
You can check the functionality of the relay in three ways:
- Replace the relay with a known working one and test the operation of the system.
- With the engine off and the ignition on, disconnect the temperature sensor connector. You should hear the relay click.
- Dismantle and test the output contacts with a multimeter, applying voltage to the terminals of the induction coil.
Possible malfunctions and their causes
Most often we are talking about fluid loss during operation, but there are other third-party factors.
1.Both fans do not work. The electric motors may fail, the temperature sensor may malfunction, or the power wires coming from the battery or ignition switch may be broken.
2. The second fan does not work. Causes: sensor malfunction, fuse or electromagnetic relay failure. It is also possible that the power cable may be broken.
Also interesting: Connecting PTF via relay and button
3. The left fan does not turn on. Causes: faulty power resistor or temperature sensor, blown fuse or relay. It is also possible that the power cable may be broken.
4. Only two fans turn on at a time. This happens when an additional resistor in the circuit of the first electric motor breaks.
5. The fan does not turn off. Typically, the fan runs constantly when the relay is broken or the coolant temperature sensor is faulty.
Repair of fans, sensor, relays, fuses and additional resistor is not provided. If these parts break, they should be replaced with new ones.
Heater diagram
The most common reason for its failure is: Warm air does not enter the lower part of the cabin Before starting repairs of the stove, you should check the temperature of the coolant. Perhaps the problem is not in the interior heater, but in the cooling system.
With the help of damper position regulators, warm air is directed to different parts of the cabin. First, the dampers should be adjusted. To supply hot air to your feet, follow these steps: The engine warms up until the warm air can be felt with your hand. Consequently, it is almost impossible to open the tap without breaking it.
stove Niva Chevrolet
https://youtube.com/watch?v=UNMCm8ypDbI
To get to it, you need to dismantle the dashboard in the cabin on the passenger side. The stove tap is mounted in a special niche in the engine compartment. If the tap has been replaced, then it is better to install new pipes along with it, because during operation they have probably lost their elasticity.
Collective farm tuning of the Niva Chevrolet stove: In some cases, the correct switching method does not work and then you have to modify the heater in order to achieve its full functionality. The main problem with dampers and ducts is leakage.
We will improve the cracks and eliminate leaks in the stove. Remove the heater control unit by disconnecting all wires and cables from it. If there is a radio, remove that too. Disconnect the transmission tunnel lining.
You don’t have to remove it completely, but only lift it by unscrewing two screws on the driver’s and passenger’s sides. Remove the steering wheel, steering column trim and unscrew the screws securing the front panel. When removing the dashboard, mark all the wires to make it easier to reattach them in their places in the future.
Without removing the entire front panel, when dismantling the heater unit, some elements of the air conditioner and the stove itself can be damaged. Remove the front panel frame attached to the body with screws. The heater housing cannot be removed without dismantling the front panel frame. Behind the frame you will find the heater unit casing, connected to the intermediate housing of the heater or to the evaporator section on a car with air conditioning.
Chevrolet Niva 2012, 80 l. With. — self-repair
Installation of a new unit is carried out in reverse order. The most common purpose of such tuning is to improve the air supply to the driver's and front passenger's footwells. To do this, install additional air ducts and adjust the shape of the damper drive strip
For such modification you will need: You must work with the plastic of the heater housing very carefully, as it is quite fragile
The steps are performed in the following order: Select tubes suitable for the role of additional air ducts. You can use plumbing pipes as additional air ducts. Remove the side trims on the center console on both sides.
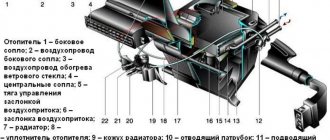
Air flows in the cabin are distributed by air ducts, which are located under the instrument panel and under the floor tunnel lining, and under the floor upholstery to supply air to the feet of the rear passengers.
To control the distribution of air flows, use the distribution regulator handle on the center console of the instrument panel, as well as the regulators and guides of the central and side deflectors on the instrument panel.
To heat the interior, move the temperature control knob to the hot red zone. In this case, the outside air is directed using a damper through the heater radiator, which is integrated with the engine cooling system.
Remove the screws of the tie rod brackets. Disconnect the rods from the heater damper levers. Unscrew the screw of the bracket securing the recirculation flap drive rod and remove the lever bracket and disconnect the wiring harness block from the heater electric fan switch.
Heater diagram First of all, we want to orient you that the Niva already has a liquid-type heater installed, which allows you not only to supply warm air into the car interior, but also to cool the running engine, preventing it from overheating. It's no secret that overheating the engine entails extremely undesirable consequences.
An electromagnetic clutch is built into the compressor pulley, which engages and disengages the compressor shaft from the pulley according to signals from the engine control system controller. Refrigerant vapor from the compressor under high pressure enters the condenser located in front of the radiator of the engine cooling system. Passing through the honeycombs of the condenser, the refrigerant is cooled by the counter flow of air and with the help of fans of the cooling system.
Serial connection of fans.
Let's look at the diagram Connecting Niva fans in a serial connection. To connect the fans in series we need an additional relay. A universal five-pin relay of type 98.3777 is suitable, which is best placed next to the fans. Terminals 85 and 86 of this relay are the terminals of the electromagnet coil. Pin 30 is a moving contact, and pins 87 and 87A are fixed contacts. From the chip connected to one of the fans, we remove the negative wire; it is usually black. We connect this wire to pin 87A of the relay, and connect the free space with a wire to pin 30. Pin 87 is connected to the positive wire of the second fan. Now, when the relay is closed, the fans will be connected in series, and when disabled, in parallel. From the socket of the standard fan switching relay, above which the switching was carried out, we remove the wire from the electromagnet coil coming from the engine control unit or switching sensor and connect it to pin 85 of the added relay. Pin 86 is connected to the ground of the car. The freed output of the standard relay must be connected to an additional power sensor or key.
On carburetor cars, you can use two switching sensors with different response temperatures. For example, for low speeds with a switching temperature of 78 - 82, and for full speeds 90 - 95. You can install an additional sensor in the upper pipe. For injection engines it is somewhat simpler; if there is space on the radiator, then place the sensor there. If there is no space, you can make an insert into the upper pipe and place it there.
Stages of replacing Chevrolet Niva coolant
When switching from antifreeze to antifreeze, it is necessary to flush the cooling system. This is done so that the new liquid does not lose its properties when mixed. Also, due to the different chemical composition, a precipitate or flakes may form. Therefore, the correct procedure between draining and filling should include a flushing step.
This model is quite popular, so many people know it under other names:
Chevrolet Niva; Chevy Niva; Shniva; VAZ-21236.
We will consider the instructions for replacing the coolant using the example of a 1.7-liter gasoline engine. But there is one nuance: cars after the 2022 restyling have electronic control of the gas pedal.
Accordingly, there are no pipes for heating the throttle valve. Therefore, we will consider bleeding air on this modification. You can also familiarize yourself with the nuances of replacement on a regular Niva 4x4, the replacement on which we also described.
Coolant drain
To drain the antifreeze, you need to place the car on a flat surface, open the cap of the expansion tank and wait a little until the temperature drops below 60°C. For further convenience, remove the decorative plastic protection on top of the engine.
Further in the instructions we are recommended to turn the temperature regulator to maximum. But it is useless to do this. Since the temperature control in the Chevrolet Niva occurs by moving the air damper. And not by blocking the radiator as in old VAZs.
After the machine has cooled down a little, we begin the draining process itself:
- If you stand in front of the car, at the bottom right, there is a plastic valve on the radiator that closes the drain hole. We unscrew it to drain the antifreeze from the radiator (Fig. 1). When unscrewing, be careful not to lose the rubber O-ring.
In this way, we completely drained the old fluid, but in any case, a small part still remains in the system, distributed among the engine channels. Therefore, in order for the replacement to be high-quality, we proceed to flushing the system.
Flushing the cooling system
If the Chevrolet Niva cooling system is not clogged, but is simply undergoing a scheduled replacement, then we use ordinary distilled water for flushing. To do this, close the drain holes and pour distilled water into the expansion tank.
Then close the tank cap and start the engine. We warm it up until the thermostat opens to flush both circuits. Next, turn it off, wait for it to cool and drain the water. To achieve a good result, it is recommended to do this procedure 2-3 times.
If the car system is heavily contaminated, it is recommended to wash it with special chemical solutions. For these purposes, washes from well-known brands, such as LAVR or Hi Gear, are suitable. Recommendations, as well as instructions, are usually printed on the back of the container with the composition.
Filling without air pockets
To properly fill new antifreeze into a Chevrolet Niva, you need to perform a number of steps. After all, it depends on whether an air lock forms in the system or not. We will close the drain holes in stages, so for now we will leave them open:
- We begin to pour antifreeze into the expansion tank, as soon as it flows through the drain hole in the radiator, we put the wing plug in place.
- We continue the flood until it starts flowing from the hole in the block. After which we close it too. The drain bolt on the block must be clamped with a slight force, approximately 25-30 N•m, if you have a torque wrench.
- Now we need to bleed the air from the top of the radiator. To do this, we find a special plug, the location of which is shown in the photo (Fig. 3). We unscrew it a little, continue to pour antifreeze into the tank, as soon as it flows, screw the cap back into place.
The system is completely filled with new antifreeze, now all that remains is to start the engine, wait until it warms up completely, and check the level. Some people advise starting the car with the reservoir open and closing it after 5 minutes to get rid of air pockets as much as possible. But when replacing according to these instructions, they should not be there.
Operating principle
The Niva's cooling circuit operates under pressure, since in normal mode it does not communicate with the atmosphere. The coolant is antifreeze with a freezing point of -40 °C. It is a solution of water with ethylene glycol, the amount to fill the system is 10.7 liters. It also boils at an elevated temperature, +110 °C.
The key element in the operation of the system is the thermostatic valve, which distributes fluid flows depending on the heating of the engine. Inside the thermostat there is a damper controlled by a temperature-sensitive element. When heated, it moves the damper, opening another path for the flow. In general, the scheme works according to the following algorithm:
- When the engine is not warmed up to operating temperature (90 ° C), antifreeze, stimulated by the pump, circulates through a small cooling circuit: engine, thermostat, interior heater radiator.
- When the power unit heats up, the thermostat damper begins to open slightly, allowing part of the liquid to flow into the large circuit into which the main radiator enters. The movement of the damper begins at a temperature of about 80 °C, and when it reaches 92-94 °C it is completely open. Almost all the antifreeze now moves in a large circle, cooling in the main radiator.
- The small circulation ring does not close, because the stove must also function. But much less liquid flows there due to the small diameters of the pipes. The carburetor or throttle valve heating is connected to the same line.
- On the Niva VAZ-2121, the fan is installed on the axis of the water pump and constantly drives air onto the cylinder block. In the VAZ-21214 and 2131 models, 2 electric fans are turned on alternately or together, obeying the command of the controller, which is guided by the readings of the temperature sensor. The switching threshold is approximately 100 °C.
- The excess volume of antifreeze that occurs during heating goes through the hose into the expansion tank. At the same time, the pressure in the system increases, which makes it even more difficult for the liquid to boil. When cooling, the reverse process occurs: antifreeze returns to the system.
Device
Most often, closed cooling systems with a forced operating principle are used in automobile internal combustion engines. The Chevrolet Niva cooling system diagram includes a cylinder cooling jacket, a pump, a radiator, a thermostat, a fan, hoses, pipes, an expansion tank and a heater radiator.
The coolant (hereinafter referred to as coolant), which is located in the cooling jacket, is heated by the heat of the cylinder and enters the radiator. There her temperature drops and the coolant returns to the shirt. The pump provides forced circulation, and the radiator provides intensive cooling. The thermostat controls the degree of cooling by automatically turning the fan on or off.
Tips for motorists
The favorable thermal regime of the Chevrolet Niva SUV engine is supported by a cooling system, in which two serviceable fans play a significant role, providing the required air flow through the radiator core. If the fans fail, the cooling system cannot cope with removing excess heat from the engine, and it begins to overheat. Due to the fact that the number of fans on the Chevrolet Niva has been doubled, the electrical circuit for turning them on has become more complex than on conventional passenger cars.
When to replace a Chevrolet Niva radiator
Replacing the cooling system or its individual components is usually required due to wear or mechanical damage. Among the most common complaints when contacting a service station, the following points stand out.
- Using low-quality antifreeze or pouring water into the system. The main property of coolants is the protection of metal parts from corrosion and rust formation. When water is used in a radiator, strong carbon deposits or oxides form inside the lines, which can clog thin tubes. In case of mild damage, repair is limited to sealing one part of the system.
- Mechanical damage. The main radiator is located at the front of the car and is covered with a thin grille. Due to poor protection when traveling off-road or on country roads, the element can be damaged by a stray stone or foreign objects entering the radiator grille. At the same time, a small force is enough to cause serious damage - the thinnest plates are easily crushed, which leads to loss of heat transfer and overheating of the system.
- Natural wear and tear. During active use, the radiator is subject to constant temperature changes, which affects the condition of the metals. Additionally, the presence of increased pressure inside the lines after starting the machine is harmful. Such vibrations lead to cracking of tubes, fasteners or cooling plates.
The above cases apply not only to the main radiator; problems also arise with the elements of the stove and air conditioner.
General information
The main task of the Chevrolet Niva engine cooling system is to maintain optimal thermal conditions, since both excessively high and too low temperatures do not have the best effect on the operation of the engine. Elevated temperatures lead to burnout of the lubricant, as well as disruption of the gaps between engine parts - this leads to rapid wear, seizing and jamming. At low temperatures, the lubricant becomes too viscous, which increases friction. In addition, wear of parts also increases, since the combustible mixture condenses and washes away the lubricant from the cylinder walls.
Engine flushing
To flush the engine, you must remove the thermostat. Temporarily replace the thermostat cover.
With the upper and lower hoses disconnected from the radiator, insert the hose into the upper radiator hose. Run a stream of clean water through the engine and continue flushing until clean water comes out of the lower radiator hose.
After flushing is complete, reinstall the thermostat and connect the hoses.
Before attempting to charge the cooling system, ensure that all hoses and clamps are in good condition and that the clamps are tight. Please note that to prevent corrosion of engine components, antifreeze should be used all year round.
Release the clamp and move the heater supply hose relative to the pipe on the bulkhead so much that the air outlet hole at the top of the hose is no longer located on the surface of the pipe. Do not disconnect the hose completely.
Remove the screws and disconnect the expansion tank from its support in the engine compartment. Lift it approximately 100 mm above the engine compartment and secure it there with a block of wood or a piece of wire.
Remove the expansion tank filler cap and fill the system with coolant. Fill slowly to prevent air pockets from forming.
If the coolant is being changed, start the charge with a couple of liters of water, then add the proper amount of antifreeze and finish with water.
Continue refilling until coolant begins to flow out of the air bleeder hole in the heater hose. After this, return the hose to its place and tighten the clamp securely.
When the fluid level in the expansion tank begins to rise, compress the lower and upper radiator hoses to facilitate the displacement of air accumulated in the system. Once all the air has been removed, add coolant to the MAX mark. Install the cap on the expansion tank. After this, secure the expansion tank in its original place.
Start the engine and allow it to idle at high speed for approximately three minutes. After this, allow the engine to run at normal idle until the lower hose becomes hot.
Check for leaks, especially around disturbed components. Check the coolant level in the expansion tank and, if necessary, bring it up to normal. Keep in mind that the system must be allowed to cool before the expansion tank reaches an accurate level. If you want to remove the expansion tank cap while the engine is warm, cover the cap with a thick cloth and unscrew the cap slowly to gradually release pressure in the system (a hissing sound is usually heard). Wait until the pressure in the system is completely released, then continue turning the cap until it is completely removed. Never remove the cover when the engine is hot.
Warning! VW requires the use of CIS (red) antifreeze. DO NOT mix it with any other brand of antifreeze as it may cause serious engine damage. If the coolant in the expansion tank is brown, the cooling system may have been filled with coolant containing the wrong brand of antifreeze. If you are unsure of the brand of antifreeze you are using or suspect mixing has occurred, the best course of action is to drain, flush, and then refill the cooling system.
If you are using a coolant other than that recommended by VW, the antifreeze should be changed at the prescribed intervals. This is necessary not only to preserve the properties of the antifreeze, but also to prevent corrosion that may occur due to the gradual decrease in the effectiveness of the corrosion inhibitor.
Before adding coolant, the cooling system should be completely drained, it is advisable to flush it and check the condition and reliability of all hoses.
After refilling antifreeze, attach a tag to the expansion tank indicating the brand and concentration of antifreeze used, as well as the date of refilling. For any subsequent refilling, use antifreeze of the same brand and in the same concentration.
Do not use engine cooling antifreeze in the windshield/tailgate/headlight washer system as it may damage the vehicle's paint.
Replacement procedure
After choosing the type of coolant, we will consider how to change antifreeze in a Chevrolet Niva.
Required Tools
First you need to find an inspection ditch or lift to access the car from below.
Now you need to prepare the following tools:
- wrench 10;
- pliers;
- flat screwdriver;
- funnel for filling a new cooler;
- container for draining old fluid (volume of at least 8 liters);
- distilled water (if required).
Next, let's look at how to drain antifreeze with your own hands:
- Turn off the engine and wait until the system cools down completely.
- Open the hood, find the expansion tank and remove the cap from it. The lid should be unscrewed gradually, as hot air may accumulate under it.
- Find the drain hole and place a container over it.
- Remove the drain plug and wait a while for the old fluid to drain out of the tank.
For a more visual representation of the process, we recommend watching the video:
Filling with new coolant
Now let's study the instructions on how to fill:
1. Carefully read the instructions for the cooler - the fact is that in some cases antifreeze is sold as a concentrate, so sometimes it needs to be diluted with distilled water according to the instructions (usually a ratio of 1 to 1 or 2 to 3 is used).
2
Insert a funnel into the hole and pour antifreeze into the system (note that the liquid should not exceed the MAX mark)
3. While filling, periodically press the radiator tube - this will avoid the appearance of air locks in the system.
4. Close the tank and start the engine.
5
Turn on the interior heater fan and pay attention to the air temperature - if the air is very cold, then a blockage has formed in the system. To eliminate this defect, remove the cap on the radiator and run the engine for 5-10 minutes, then turn off the engine and close the cap
6. Get into the car and drive 10-20 kilometers, and then check the coolant level and, if necessary, add antifreeze to the maximum according to the standard algorithm (sometimes after refueling, some of the antifreeze evaporates for natural reasons).
