Replacing the alternator belt with air conditioning on a Priora, part 2
A new belt with markings suitable for the 126th engine.
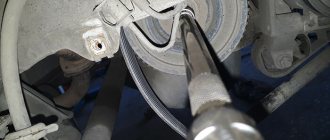
When installing a belt with a tension roller, I encountered the following difficulties. My first thought was that I bought a short belt, it’s all bullshit. I loosen the top bolt of the generator with two 13mm wrenches. I hook it with a 60 cm long pipe and move the “gen” towards the roller (someone may not need this manipulation). In this position I fix the generator by tightening the bolt. After this simple procedure, we managed to put the video in its place. But the bolt could not even be tightened. After thinking a little, I came up with a small device like a crane...
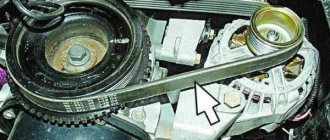
The meaning is this: slightly raised and leveled the position of the bolt. By the way, do not forget about how the belt lays on the pulleys and roller; the belt should not go beyond the edge of the pulley or roller. In the end, everything started spinning and fell into place as it should. We do not tighten the bolt all the way right away, because... We still need to adjust the belt tension. We take an open-end wrench 17 and a belt tension adjustment key
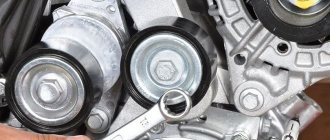
Use the tension key to tighten the belt counterclockwise. Holding the key in the desired position, carefully tighten the bolt to 17. Done. We start the engine. There are no extraneous sounds, which means everything was done correctly.
Source
Replacing the generator tension roller
It worked for exactly a year and 10 thousand mileage, and began to make noise and whistle. Perhaps the reason for this was the belt tightening, I adjusted it according to “feelings”. I thought about first disassembling the roller and filling it with lubricant, as many do when driving, but I decided to buy a new one. This time I took AT 1056-012B
I adjusted the tension using the frequency analysis method. I found the technique in the logbook: www.drive2.ru/l/471004669011820971/
I armed myself with a program from Google play, “sound spectrum analyzer” (link: play.google.com/store/app…hanik.splspectrumanalyzer), an old phone headset, bent pliers and a 17 key. I tuned it to a frequency of 135-139 Hz. After setting up, I started the car with all consumers turned on, and there was silence, but for how long)))))
If anyone needs data on frequencies (the post is old, so there is no 127 motor, but the design in the area of the generator belt has not changed from 126, if I’m wrong, correct it in the comments):
By car make, regardless of engine Lada Kalina with air conditioning 190/240/260 Hz Lada Kalina without air conditioning 120/140/160 Hz Lada Priora 120/140/160 Hz
By engine, regardless of the car brand 11194: with air conditioning 190/240/260 Hz 11194: without air conditioning 120/140/160 Hz 21126: 120/140/160 Hz
Source
Replacing the belt and tension roller of the generator drive on a Priora
In the summer, the whistling of the belt disappeared, although three months ago in winter and spring it was annoying with its squealing. The opportune moment came and I did not wait for a new howl of the alternator belt.
Purchased: Alternator belt
from tens with air conditioner Balakovo 570 rub.
Tensioner roller
Vologda 650 rub.
I disassembled the original roller, the lubricant is solid and not all around, the balls are dry. When rotated quickly, it makes a hum and there is a decent amount of play.
Replacing the belt turned out to be a hectic task; my friend Sanek changed the belt.
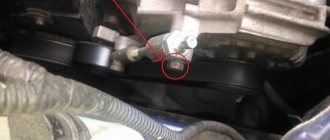
Briefly it looks like this: The belt needs to be threaded through the engine mount. To do this, unscrew the Trox bolts in the photo.
Using a pry bar, we lift the engine and insert a strap between the support and the body.
There was also the problem of inserting the belt onto the pulley. It's like the belt is a few mm off. smaller than the old one. Maybe I should have looked for an original belt from Priora if one exists in nature. Well, something like this, we still have to change the power steering hose and power steering fluid. See you again on the bortovik;)
ALTERNATOR BELT TENSION ROLLER FOR VEHICLES WITH STEERING OR AIR CONDITIONING
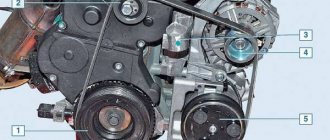
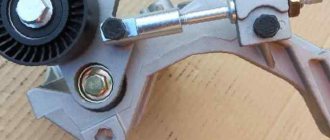
The Priora, equipped with various options, has an alternator belt more than a meter long. It passes through four reference points. Three of them are pulleys. The first is the engine drive pulley and the second is the generator and power steering pump or air conditioning compressor. The fourth point is the tension roller itself. This simple mechanism is made in the form of a regular rolling bearing, with an eccentric base. That is, when turning it around its axis, thanks to the hole for the bolt, located not in the center of the bearing, but offset to the edge, the protruding part can tighten or loosen the drive belt of all additional Priora mechanisms.
How to adjust the generator roller on a Priora with your own hands
The generator belt tensioner roller is a small but very important part of the machine. If it fails, the operation of attachments and electrics is at risk. But you can diagnose, lubricate and even change a spare part yourself; it does not require much effort or serious knowledge in the automotive industry.
On Lada Prioras with air conditioning and power steering, as well as those equipped with power steering (electric or hydraulic power steering), the alternator belt is additionally maintained in an optimally tensioned state by a special roller. The Priora generator belt tension roller is an important part that ensures the operation of the attachment.
Replacement
Required Tools
We will prepare everything necessary for the repair:
- Lubricant WD-40.
- Keys to 19, 17.
- Two copies of the key for 13.
- Head for 10 and 17.
- Jack.
- Special key for tensioning.
- Lever arm.
The alternator belt on a modified Priora with air conditioning and power steering runs around the engine mount. The designers decided to carry out such a modification for the Priora 16 due to the fact that the power steering pulley is installed low. Hence there are additional steps that you need to be aware of.
Step-by-step instruction
- First of all, we need to wet the bolts that hold the bracket and motor mounts. Wait 10-15 minutes for the lubricant to spread over the surface;
The replacement is complete, all that remains is to adjust the alternator belt with power steering and air conditioning. The new consumables on the Priora will have to be tightened several times until you get the required tension. If the component whistles or there is a hum coming from under the hood, then it is necessary to carry out repeated adjustments until these defects are eliminated.
Replacing the drive belt with the air conditioner installed
Communities Lada Priora Lada Priora Club Blog voltage on mass air flow sensor
As already mentioned, the main difficulty lies in the location of the drive of the Priora’s additional mechanisms. The fact that it goes around the engine mount in a closed quadrangle creates serious problems during replacement. Of course, removing the rubberized strap is no problem. But installing a new one in this place is a rather complicated process.
Tools and accessories
In this case, much more tools and devices will be needed for replacement. It is best to have a full set of professional auto mechanic tools on hand. On a Priora with air conditioning or hydraulic power steering, the tension of the generator drive and other mechanisms is carried out by displacing a special eccentric roller - the tensioner roller. A special key is also required to adjust it. When replacing the belt, you will have to lift the entire engine so that it comes out of the front mounting stud of the engine mount. Therefore, it is necessary either to have a professional car mechanic jack on hand, or to work in a room equipped with special hoists for removing the motor or, in extreme cases, with a hydraulic or electric lift.
Description and location
The generator's job is to provide power to the vehicle's electrical equipment. Like other components in a car, the generator is powered by the engine; to ensure constant rotation of the rotor, pulleys are installed on the generator shaft and the crankshaft of the power plant. A belt is pulled between them. After starting the engine, the crankshaft begins to rotate, and the movement is transmitted through the belt to the rotor.
On the latest Priora models, this element operates the air conditioning and power steering. This material discusses the replacement and tensioning of the belt in a new model car, where additional equipment is installed.
The belt is a consumable item that requires replacement after 45-60 thousand kilometers . The size of the standard belt on a Priora with air conditioning is 1125 mm.
Tensioning the alternator belt: a guide for car enthusiasts
The distinctive features of the Priora from previous modifications of the manufacturer are noticeable immediately, literally as soon as we open the hood. Here the new owner of the Lada will have to learn a lot again. This seemingly not very complicated procedure, which allows you to tighten the alternator belt in a Priora car to the required limit, will require considerable effort.
The peculiarity of new car models is that the ability to choose a car equipped with optional equipment is already present as standard. So in the “base” “Priora” can already be equipped with power steering or air conditioning.
Naturally, driving the car becomes even more convenient, but the recompense for comfort in this model is a more complex design of the generator belt drive. After all, the belt itself on a Priora car, which has air conditioning or power steering, is significantly longer, has a more complex trajectory, is serviced and replaced according to completely different rules.
Which alternator belt to choose?
Today there are a huge number of companies and manufacturers on the market that produce components for cars. And as for belts, the most popular brands are:
- GATES
- BRT - Balakovo belts
- Luzar
- Andycar
The first two manufacturers can be called the highest quality of what is sold in the store, and it is they who are installed to a greater extent on the assembly line. But as for the quality of what is actually bought in a store, the difference is very big. Factory components can go two, three or even five times longer than the same “original” from the shop.
Tensioning the timing belt on a Priora: user instructions
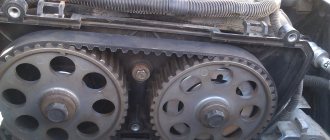
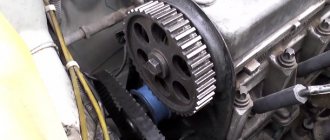
In addition to the alternator belt in a Priora car, another important component is the timing belt. For this reason, many car enthusiasts are wondering how to tighten the timing belt on a Priora? It is not difficult to carry out this procedure; it is enough to prepare a tool: a “5” hexagon, a “17” and “15” head.
Before tightening the Priora timing belt, you should:
— unscrew the two screws securing the cover;
— remove the bottom cover covering the timing drive;
— insert the tips of the pliers into the grooves of the outer race of the tension roller in order to remove the locking rings.
- tighten the belt by turning the tension roller directly with pliers, counterclockwise.
— these actions are performed until the cutout of the outer race is aligned with the rectangular protrusion of its inner sleeve;
— after the above steps, the roller mounting bolt is tightened with a wrench;
— we check that the marks on the camshafts and crankshaft are aligned, as well as the cutout matches the mark on the tension roller. If the marks do not match, you should repeat the operation to tension the timing belt.
From the above it follows that tightening the alternator belt is as simple as tightening the handbrake on a Priora. An experienced driver will be able to do this quickly and without unnecessary movements. Care and the correct sequence of actions when tensioning the alternator belt will preserve its functionality for a long time of operation, and your car will always remain a PRIORITY.
Replacing the alternator belt of a Lada Priora with air conditioning and power steering
Replacing the alternator belt of a Lada Priora with air conditioning
A recent inspection revealed defects in the alternator belt. The decision to replace was not long in coming. At 99, the belt was changed within 1 minute. I spent about 1 hour here.
Unscrew the two bolts securing the right engine mount. Here was the first ambush, the bolts were star-shaped, I had to buy an E10 head.
We place a stop under the hole in the standard protection, where the drain plug is, and lower the jack, hanging the engine. Under the hole formed between the right engine mount and the bracket, remove the old belt. First unscrew the tension roller with a 17 key.
OLD BELT, TRACES OF DEFECTS AND BELT SIZE VISIBLE
Here I would like to dwell in more detail. About the belt size. How to choose? In markets and shops, 90% said take 6rk1125, the remaining 10% 6rk1115. And one good person said the following and I advise you too
1. Look at the old belt, maybe the size is the same. 2. Take 2 belts, with the condition of returning one of them.
In my case, the first option worked. I purchased a German 6rk1115 belt
Just a note: according to the manual you had to buy 6rk1125.
We install the new belt in the reverse order, assemble the units, simultaneously check the tension roller for defects, and, if necessary, change it.
Adjusting the belt tension
I forgot that I gave the key for such rollers to the owner of 99. I used a circlip remover to tighten it.
When properly tensioned, the belt should not flex more than 8 mm.
In fact, I expected big problems, but everything went like clockwork
Replacing the alternator belt on a Priora with Panasonic air conditioning
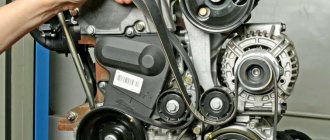
I will try to tell you in more detail about this rather simple process, as it seems at first glance, and for which some services are trying to rip off more money, they say, you need to remove the pillow, and all that. I carried out the replacement on the ground without a lift, and the car does not have crankcase protection, which, of course, will have to be removed when replacing. We will need a belt (I will also write about them in more detail.) two jacks, preferably one, a rolling one or just a hydraulic one (since there is no special place to turn the usual handle under the car), a ratchet, a head for 17, a ratchet extension for 15, and a cardan , as well as a wrench for tensioning the roller and a screwdriver for unscrewing the boot (it depends on which screws are screwed on). We remove the wheel.
Remove the tension roller.
This view opens up to us
We roll the jack under the crankcase and push it a little. You don't need to lift it too much just yet.
Then we completely unscrew the nut number 17. There is absolutely no need to unscrew the mounting of the airbag to the body, as many people do, the metal there is thin, the thread can only be tightened once.
It will look like this
Next we unscrew the pillow bolt by 15. It is quite long, but there is no need to unscrew it all the way. About half, maybe a little more
For clarity, I took this photo for those who don’t know, it can be very useful. Between the pillow and the bracket there is an intricate nut that fits into the groove of the bracket, thereby we can easily unscrew the bolt from the bottom of the pillow.
Now the manipulations with the jacks begin. We lift the car body in order to get the distance to push the belt through the cushion.
But you shouldn’t get carried away as you might break the guitar. since the body goes to the top, and the engine remains below. We pick it up and look at the guitar: as soon as it becomes a pity, that means that’s enough. For convenience, you can look at the bottom one - they bend the same way.
We insert a belt into the gap that appears between the pillow and the bracket, lift the engine a little and pull it out from below.
We push the new one behind the cushion, lower the engine a little and push it into its place.
Raise the car and lower the engine slightly. You can do both, you can do one thing or the other, the main thing is to look at the guitar. We put the bracket back on this nut and make sure it fits into the grooves of the bracket
Next, tighten the pillow bolt all the way. If the bracket is not placed on the cushion, most likely the bolt will spin, and holding that nut is extremely inconvenient and a second person will be needed. Also, make sure that the pillow remains standing as it was, so that it does not turn. I don’t know what effect this will have, but I’m in favor of leaving it as it was.
Once we tighten the bottom bolt to 15, carefully lower the engine onto this bolt so that it looks like in the photo, and tighten the nut to 17 until it melts.
We put the belt with the roller in place. we pull. install the boot and wheel. The result should look like this.
Here it is not yet stretched.
It took me about 30 minutes to replace the belt and take pictures along the way. I spent another 30 minutes tightening it and checking the charging with and without load. In general, nothing complicated. Once you change it, it will be easier later. I seem to have described all the nuances.
And now about belts from personal experience: I installed a Contitech belt. This belt length is perfect for a Priora with Panasonic air conditioning. I haven’t encountered any problems with other air conditioning systems, so I can’t say anything. but you can also put 6pk1120, it’s a little shorter. I also read that they stuff in 6pk1115, but there you already need to move the generator towards the engine. and it will be possible to tighten it, but it will be more difficult. This is one of the easy options. 25 and 20 I set the belt for myself. fit without problems. I didn’t see much point in making the belt shorter. Well, that seems to be all.
How to replace and tension the alternator belt on Lada Priora
The Lada Priora car is very popular. This is another proof that Russian cars can be of high quality. They actually boast good comfort, handling, and attractive appearance. The differences between the new model and previously released cars are primarily hidden in the engine compartment. Here everything is located completely differently. Therefore, even experienced craftsmen do not always know how to replace the alternator belt on a Priora, as well as how to tension it.
The new Priors are equipped with a large number of systems and are also available with an impressive list of additional equipment. Read more about the new generation Lada Priora 2022 in our article.
Although the installation of air conditioning and power steering on the Priora had a positive effect on comfort, as a result of such changes, access to the generator became quite difficult. The alternator belt of a Priora with power steering or air conditioning is longer than the regular version of the car, so we will consider the procedure for replacing the alternator belt for two modifications.
As a rule, the need to tension the generator belt arises due to its wear during use, as well as a decrease in the quality of adhesion of the belt surface to the planes of the generator rollers and pulleys.
If the alternator belt on your beloved Lada Priora begins to whistle, you will have to start tightening it. You can tighten the alternator belt on the Priora using a 19mm wrench, as well as a special wrench for the pulley. He is shown in the photo below.
The belt tension is performed as follows:
If the procedure is performed correctly in the basic version of the model, in the longest section between the pulleys the belt should bend by about 10 mm. In the case of a version equipped with air conditioning or power steering, you need to tighten the belt a little more. As a rule, this procedure is trusted to specialists.
According to official data, the belt should be replaced every 60 thousand kilometers traveled. If the car is used very rarely, the alternator belt on the Lada Priora needs to be changed every two years, and in this case it does not depend on the mileage.
Before replacing the belt, you must place the vehicle in an inspection pit. Next comes the preparation of the following tool:
First you need to loosen the nut using a 13mm wrench (see photo).
Next, you need to unscrew the bolt intended for adjustment, using a 10mm wrench (more details in the photo below).
Next, we move the generator itself in the direction of the power unit. Unscrew the front right wheel and remove it. Then we perform similar actions with the fender liner. Only then can you remove the old alternator belt and replace it.
After installing the new belt, you must perform all steps in reverse order. Do not forget to correctly adjust the tension of the alternator belt on the Priora. If the belt is too loose, the battery may not charge fully, and if the belt is too tight, it will cause the alternator bearings to fail too quickly.
Since the power steering pulley in this modification of the model is installed at a low height, the designers decided to run the generator belt around the support of the car’s power unit. This means that in such a machine, replacing the alternator belt can only be carried out under appropriate conditions.
Next, we will look at the procedure for replacing the alternator belt on a Priora with air conditioning. First you need to prepare the following tool:
New Lada: Updated Lada Priora: what's new? - KOLESA.ru - automobile magazine First, we use WD40 to wet the bolts securing the engine mount and bracket.
After about 10-15 minutes, you need to unscrew the bracket nut, after which we lift the front right wheel using a jack. Then you need to place something suitable under the motor and remove the wheel.
Next, you need to slightly lower the car, unscrew the tension roller, bend the belt and unscrew the bolts that secure the airbag.
After this, you need to lower the car so that the engine begins to hang out. The cushion should be moved towards the engine, which is enough to remove the alternator belt and install a new one.
At the final stage, you need to jack up the car to lower the engine. During the procedure, it is necessary to control the position of the pillow, as well as the generator belt, which we replaced. Then do not forget to tighten the pillow bolts, as well as the nut that secures the bracket.
As you can see, those who want to change the alternator belt on a Priora will have to work a little, but the reward will be the correct operation of all car systems.
(1 votes, rating: 5.00 out of 5)
Replacing the generator belt tensioner pulley: Priora, Lacetti, Kalina, Logan
Problems with the generator can lead to more serious problems. If electric current is not generated by the car, if it runs on one battery, then battery failure is also inevitable. If there is insufficient production of on-board current, as indicated by the corresponding light on the instrument panel, first of all, it is necessary to check the tension of the alternator belt.
- Other VAZ models
- Nuances of the procedure on foreign cars
- How much or where is it cheaper?
In addition, in many cars, the belt drive we are talking about, which, by the way, is driven by a timing pulley, often connects other critical components. These units are also called attachments. In particular, the belt can drive a pump that pumps antifreeze. So loosening the belt can lead to more than just power problems!
It is regulated by a special roller, which is located on the tensioner bracket. If this wheel rotates noisily, sticks, or releases grease from the cuff, the defective alternator belt tensioner roller needs to be replaced. Why does this small critical element fail and how to change it? Let's first consider the example of Kalina.
The reasons for part failures are simple.
- Wear due to end of life.
- Violation of the integrity of the cuff.
- Manufacturing defects.
To replace the belt tensioner roller of the Kalinovsky generator, we will need the following tools:
- set of wrenches;
- screwdriver.
In principle, the procedure for replacing the tensioner belt roller of the Kalina generator is easy to learn from a video on the Internet. But we will also provide fairly clear instructions.
- Find the hexagon of the adjusting pin above the pulleys and place a 8mm wrench on it.
- Having loosened the locknut with a 19mm wrench, we rotate the pin clockwise, so our treasured part will move away from the belt.
- Use a screwdriver to remove the roller cover.
- Unscrew the roller mounting bolt with a size 17 wrench.
- We remove the roller assembly with bolt, bushing and washer.
- With the new part, we assemble everything in the reverse order.
From these instructions it is easy to understand that replacing the generator belt tensioner pulley in Kalina is a fairly simple process.
Other VAZ models
However, for other modern VAZ cars with front-wheel drive, the procedure follows a similar scenario. For example, the technology for replacing the generator belt tensioner roller on a Priora is almost no different from that described. But the Priora does not have an adjustment pin. In principle, the roller can be unscrewed immediately. However, if it turns out that the belt is leaky, you will have to suffer.
Also find out why hydraulic lifters knock when hot and why valves knock when the engine is cold.
To replace the belt together with our part from the Priora, you need to hang the engine and unscrew the engine support cushion, as it interferes with removing the leaky V-belt drive.
As for the other AVTOVAZ model, the Lada Granta, initially it did not have a mechanism for tensioning the generator belt; due to the strong constriction of the belt drive, the electric motor bearing suffered. But the car was in the lead on the hot list of the cheapest cars in the world. Therefore, the owners were offered to independently replace the generator bracket with the same one from Kalina with minor modifications.
Consequently, replacing the generator tensioner belt roller for the Lada Granta is identical to a similar operation on the Kalina, provided that the Granta engine is equipped with a V-belt drive tensioning mechanism.
Nuances of the procedure on foreign cars
Well, with VAZs everything is clear, their maintainability is often pleasing, but in some popular foreign cars you need to disassemble half the car to get to any component. The situation is similar, for example, with a Chevrolet family car. To replace the generator belt tensioner roller on a Chevrolet Lacetti you will have to work hard. Although the reasons for the part failure are the same.
First, let's indicate what is required from the tool:
There are many stages to go through, we will list them.
- Remove the interfering air filter housing.
- Remove the exhaust manifold thermal shield.
- We disconnect the power steering pump from the mounts and move it to the side on the hoses.
- Using a 15mm wrench, we install our broken part into the mounting position.
- We unscrew it.
- We install the new one in the reverse order.
Here you can put an end to the repair.
Another popular foreign car, unfortunately, also causes difficulties in carrying out the described operation. More specifically, let's look at the procedure for replacing the alternator belt tensioner pulley in a Renault Logan car.
To implement the technology we will need:
- set of wrenches;
- screwdriver.
Repairs must be made from below the car, for example, from the inspection hole. Let's describe the process step by step.
- Remove the mudguard of the engine compartment on the right.
- We throw a 13mm wrench onto the bolt of our broken wheel, but don’t flatter yourself – we won’t unscrew it just yet. Turning the key clockwise, move the tensioner bracket until the two holes align - in the body and on the bracket. This will lock the roller and relax the belt.
- Now we unscrew the bolt of the broken part we need.
- We install a new spare part and assemble the mechanism in reverse.
How to determine the need for replacement or adjustment
The condition and tension of the belt must be checked at least once a quarter.
This will allow you to quickly detect weak tension or damage to the belt. A whistle that appears when starting the engine and accelerating the car indicates weak belt tension. Rapid battery discharge (as well as weak charging current) may also indicate a loose alternator belt. The service life of a high-quality alternator belt is 40–60 thousand kilometers or 2 years. After this, the belt must be replaced, even if it looks normal. If cracks or breaks appear on the belt, it must be replaced, regardless of mileage. To determine the condition of the belt, it is necessary to carry out diagnostics.
Sn9shimo
The belt should not rotate more than 90°. Otherwise, the belt tension needs to be adjusted. To tighten the belt, turn the tension roller counterclockwise, and to loosen it, turn it clockwise. To do this, insert a special key into the holes of the tension roller in the form of two rods with a diameter of 4 mm, welded to the base of the key (the distance between the rods is 18 mm). You can use the key for the old-style timing belt tension roller, installed on all front-wheel drive VAZ cars. If you do not have a special key, you can insert two pins (screws) with a diameter of 4 mm into the holes of the tension roller. Using the screwdriver shaft located between the pins, turn the roller.
Does it whistle and skid? Diagnosing the alternator belt
As long as the belt works normally and adequately, we do not notice it. The generator operates in normal mode and provides reliable power supply to the on-board electrical network and recharges the battery .
This is evidenced by stable ammeter readings and quiet engine operation. However, one fine day the belt makes itself known with a high-pitched squeal or lack of charging current to the battery. This will be indicated by the ammeter on the instrument panel and the battery charging indicator lamp.
Alternator drive belt
Open the hood and see if the belt is in place at all. Some unfortunate drivers' belts break while on the road, and it is quite difficult to find a replacement.
On the VAZ-2114, the engine is located transversely, so the alternator belt is located on the opposite side of the gearbox, to the right in the direction of travel. If the belt is in place, it is enough to tighten it and the operation of the on-board electrical system will stabilize.
To do this, you will need only two keys from the standard set of tools - 10 and 13, but it is more convenient to use heads with a ratchet. And preferably a lever! Everything is ready, you can start working.
How to tighten the alternator belt on a VAZ-2114
The procedure for tightening and adjusting the belt will take about five minutes, but it is important to know a few subtleties that will save you from problems on the road in the future.
The first subtlety is that over-tightening the belt is just as dangerous as under-tightening it. You can ruin the generator bearings, and replacing them will cost five times more than the most expensive belt. In addition, to replace the bearings you will have to completely disassemble the generator or change it altogether. Tightening the belt is unacceptable!
The procedure for tightening a belt is simple and even a child can handle it if you follow a simple algorithm and do not break a certain sequence:
Generator drive diagram: 1 - mounting bracket to the engine block; 2 — connection of the generator with the bracket; 3 — tension screw; 4 — generator set pulley; 5 - axial screw; 5 - drive belt; 6 — generator pulley on the crankshaft.
Loosen the lower generator mounting bolt
Loosen the top nut securing the generator
Tighten the generator belt
Checking the belt tension after tightening
When is it necessary to tighten?
Actually, the reasons why the belt needs to be tightened are simple - the generator does not produce enough current to operate all consumers on board and cannot charge the battery. The primary sign of weak belt tension will be a whistling sound from under the hood. Nevertheless, the belt can whistle when water gets in, sometimes when the pulleys become oily, and even less often when the generator bearings fail. If the belt cannot be tensioned or the adjustment rail does not allow the generator to be moved further, the belt must be replaced.
Subtlety two. Rubber tends to crack, and even taking into account the reinforced structure of the drive belt, it will not last long with cracks.
The most common mistake is storing a spare belt under the hood, in one of the niches. Due to constant high temperature, even the best and new belt can become unusable in just a couple of months if it lies as a dead weight under the hood. New or spare belts should be stored either in the garage or in the trunk.
Symptoms of malfunction and their elimination
You can determine whether a replacement is needed or whether you can simply tighten the power steering belt with air conditioning on the Priora 16 valves only after inspecting this component. To do this, just open the hood and examine the belt; it is located next to the right front wheel. There are signs that indicate it's time to check the alternator belt: something whistling and squeaking from under the hood.
The reasons may be the following:
- Antifreeze, oil or other working fluids have come into contact with the generator pulley or belt.
- The belt is worn out - you can tell by its appearance.
- The tension has dropped - in this case, the component must be tightened.
- The bearing in the generator is worn out.
When the belt whistles in a Priora with 16 valves, it’s time to carry out diagnostics. If there are cracks, tears or other serious damage on its surface, then replacement is required. If the generator component with hydraulic booster and air conditioning looks normal, you should check its tension; the optimal level of deflection is 6-8 mm - you need to press the component in the middle between the generator and the pulleys.
