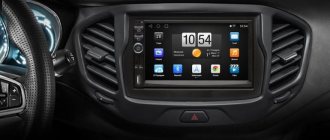
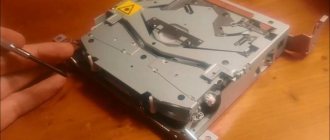
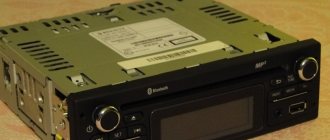
The production of cars in our country has undergone changes compared to the early 2000s. When purchasing a Lada Vesta music car, two types of standard radio are installed: push-button and with a touch screen. The very basic configuration does not include any music headset; you can install any one at the customer’s request. In the new Lada Vesta models, the multimedia system corresponds to modern technologies.
- Preparing car music
- Touch panel of the Vesta multimedia system
- Provided operating modes
- Lada Vesta radio
- Radio menu
- Checklist: main characteristics of the standard radio
- Problems and solutions - first-hand
- Setting up the Lada Vesta radio
- Control from the multifunction steering wheel
- If you want a subwoofer
- Pros and cons of mmc multimedia
Basic functions and capabilities of the head unit
- Playing music files, radio;
- the ability to connect third-party accessories to play songs via AUX, SD card, other file drives, USB;
- displaying the current time and date on the display, both in active and inactive states;
- Hands Free option allows you to talk on the phone without being distracted from the controls;
- ability to connect third-party gadgets, functional equipment: rear view camera, tablet, navigation system.
Budget versions of MMC do not have a display, so interested car enthusiasts additionally purchase accessories for listening to music. The MMC is located in the center of the torpedo, harmoniously integrated into the overall design.
↑ Bluetooth and Handsfree
Thanks to such a convenient function as Bluetooth, the standard tape recorder can operate in telephone mode, which allows the driver to answer calls without being distracted by a mobile phone. If you press the key with the green handset, the phone mode turns on and finds nearby phones with Bluetooth functionality.
Next, a password is displayed on the radio screen, which you must enter on your mobile phone. And in order for this mode to be disabled, just press the button with the red tube.
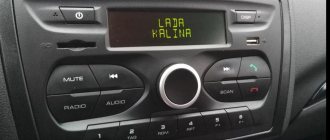
OEM radio controls
In the left corner there is a function key for activating/deactivating the radio. To the right there is a built-in microphone for conversations via Hands Free, and there is also a reset button to factory settings.
To the right is a monochrome display that displays basic information about tracks and radio frequencies.
Below is a slot for a storage card. It is mainly used for inserting a card and flashing the module, but if necessary, it can be used to read music tracks.
Below the perimeter there are preset buttons:
- MUTE – mute sound;
- Key to accept and reject calls (red and green);
- SCAN - multifunctional key for surfing the navigation menu;
- RADIO and AUDIO for switching playback modes from storage media;
- In the center of the structure there is a washer - a regulator for selecting functions, listing, changing the volume;
- At the very bottom there is a block with mechanical keys (6 in total) for quickly jumping to saved radio stations.
Related link:
Suspension device of Lada Vesta.
MMS modes
The multimedia complex involves the use of the following modes:
- "Radio". Allows you to receive and play radio signals, search for radio stations with an automatic memorization function for up to 8 positions. Displays the current radio station on the screen.
- "Audio". Intuitive audio player that plays audio files through 6 speakers. There is an equalizer with the ability to select presets or customize it yourself. Audio files can be played via Bluetooth from an external device, but in this case information about the file being played is not displayed on the screen. Supported formats: MP3 up to 320 kbps, WMA up to 320 kbps, WAV up to 24 bits and FLAC.
- "Video". To view videos, you will need a converter. Video files must meet the following requirements:
- AVI with a frame rate of up to 30 frames per second and a resolution of no more than 720x536;
- MP4 with a resolution of no more than 1920x1080, frame rate up to 30;
- MOV with support for standard codecs;
- MKV with support for standard codecs, frame rate up to 30 and resolution 1920x1080.
- "Photo". For viewing photos, the radio screen in the car is not the best option. But if necessary, you can view images in most formats.
- "Telephone". Used for hands-free phone calls via speakerphone. You first need to synchronize your smartphone with the system and download the phone book.
- "Navigation". Movement according to maps and according to the guidance of the navigation program "CityGID 7". Allows you to install third-party cards. Disadvantages include the lack of image rotation, the inability to download maps online, the lack of construction of alternative routes, it does not show traffic jams over long distances, and there is no satellite view.
Additionally, it is possible to use the “Rear View Camera” mode. When you engage reverse, it is activated automatically with a slight decrease in the radio volume. For the convenience of reverse parking, markings appear on the screen allowing you to see the distance to the obstacle. The green dotted line corresponds to a distance of 4 and a half meters from the rear bumper. The yellow line is one and a half meters, and the red line is 30-40 cm.
You can configure the screen, radio, telephony, rear view camera, video player, audio player, photo viewing mode, navigator. In this regard, multimedia on the Lada Vesta is much more attractive than a conventional radio.
Lada Vesta head unit: price, articles
It often happens that the standard radio tape recorder breaks down and is unstable. When choosing and buying a new one, the owner has difficulty, since he does not know the catalog article.
| Name / catalog article | Price in rubles |
| Original MMS from LADA8450007949 | 33000 |
| Original MMS from ITELMA8450007949 | 14000 |
| Chinese models (AD-UNI707) | From 13000 |
| *prices are as of 04/04/2019 | |
Both modifications of the radio presented are absolutely identical, the difference in price is due to the manufacturer and trade markup.
Direct time setting
The time is set according to this scheme.
You need to enter edit mode. To do this, press and hold the up arrow for about three seconds. At this time, only the numbers “0.0 km” in the second row to the left of the display will start flashing on the screen. In edit mode, press the same arrow once. The clock indicator will flash on the screen, for example “08:35”.
You will need to press and hold the top button again for a few seconds to begin changing the time display.
Only the first digit “0” of “08:35” will begin to pulsate. Now, using the arrows, you can change the readings of tens, of which we only have two. To switch to hour units, press and hold the up button again for a few seconds and the 8 will begin to pulse. Using the joystick we set the numbers we need from “0” to “9”.
Replacing the original radio
Many car enthusiasts “for various reasons. Purchasing and installing a new one is not difficult, the main thing is to choose the brand and manufacturer of the gadget.
There are many brands on sale, including Chinese ones. Choice from the cheapest to the most expensive, depending on the budget of the car owner:
- Multimedia center DVM 2117 iQ with Navitel software, price 32 – 34 thousand rubles;
- Chinese version of MMC for Lada Vesta (AD-UNI707) priced from 13,000 rubles.
There is already an article on the website about how to install an MMC radio on a Lada Vesta; in short, it looks like this:
- Remove the plastic frame.
- Remove four screws.
- Remove the standard MMC.
- Connect the blocks with wires.
- Fix the new radio (type 2-DIMM).
What wheels were installed on different bodies and configurations?
If the driver presses several options at once, or during a sudden temperature change, the radio may freeze. In this case, you will have to first press RESET and then reboot the radio. If even after this the radio does not start working, you will have to contact a service center.
The radio is removed only for repairs or subsequent dismantling. Before doing this, you need to disconnect the wire terminals from the car battery.
First you need to remove the central trim. In this case, the console is held on by clamps and can be easily snapped off. Disconnect the wires from the emergency lights and remove the plastic cover.
Next, the screws and air ducts are turned out, for which a screwdriver and a T20 nozzle are used. Using the same tools, the screws are unscrewed and the radio is removed from the socket. At the last stage, all that remains is to pull the tape recorder towards you and disconnect the connectors with wires.
It's time to look at the two main configurations of the Lada Vesta Cross and understand what the main differences in wheels and tires are.
Lada Vesta Cross 2022 with an engine capacity of 1.6 liters:
- the diameter of the central hole is 60.1 mm;
- type of fastener - bolts;
- the tightening torque is in the range of 89 – 121 Nm;
- Mounting dimensions M12 x 1.5.
| Disk | Sverlovka | Tires | Pressure, in atm |
| 6.5Jx17 ET43 | 4×100 | 205/50R17 | 2.2 |
| 6.5Jx17 ET43 | 4×100 | 205/50ZR17 | 2.2 |
| 7Jx17 ET45 | 4×100 | 215/45ZR17 | 2.3 |
| 7Jx17 ET40 | 4×100 | 215/40ZR18 | 2.3 |
| Disk | Sverlovka | Tire | Pressure, in atm |
| 6.5Jx17 ET43 | 4×100 | 205/50R17 | 2,3 |
| 6.5Jx17 ET43 | 4×100 | 205/50ZR17 | 2,3 |
| 7Jx17 ET45 | 4×100 | 215/45ZR17 | 2,3 |
| 7Jx17 ET40 | 4×100 | 215/40ZR18 | 2,3 |
Inexpensive and very popular are models with small wheels in size R15. Despite their attractive appearance, such wheels are not inferior in quality and differ only in their dynamic characteristics. These models can be purchased from official Lada representatives for a fairly reasonable price.
Also, when driving on such wheels with such discs, the driver will notice that the smoothness and comfort of the ride significantly exceeds the large dimensions. The disadvantage of disks of this size is their appearance. Since in the stamped steel version they do not look attractive.
Alloy wheels on the Lada Vesta Cross cost one and a half, and sometimes twice as much as stamped steel ones. But this is due to the fact that such discs are lighter due to the presence of aluminum alloys in them. When driving on such discs, you can notice increased maneuverability and controllability of the car, since the overall weight can drop quite significantly. When installing alloy wheels with a large radius, you should understand that the level of comfort will decrease, but in return the dynamic characteristics will increase.
If the Lada Vesta Cross was purchased for a family, then it is worth completely switching to R15 wheels, because this will greatly increase the overall comfort of travel. Another factor to consider is the engine power. After all, the weight of the discs directly affects the acceleration and braking of the car.
Procedure:
- Copy the installation file (with the extension cab) to the SD card.
- Insert the SD card into the MMC.
- Exit to desktop.
- Go to “My Computer” -{amp}gt; SD card.
- Start installing the application by double clicking on the cab file.
Connecting an audio device MMC Lada Vesta
If you plan to connect a factory radio, then you should not have any problems or difficulties.
Related link:
Replacing the ignition coil on a Lada Vesta. Recommendations for selection and prevention
Key points that require attention and double-checking:
- ISO 1: Power cables.
- ISO 2: wiring for two (four) speakers, connecting a subwoofer to the MMC.
- USB 3: output to digital storage devices.
- "Antenna 4": to connect an antenna.
VW Tiguan Sport & Style equipment » Volkswagen Tiguan Club. New Volkswagen Tiguan 2011, 2012
Petrol engine: (fuel consumption in l/100 km / CO2 emissions in g/km): 1.4 l /110 kW (150 l/s), 4MOTION TSI, 6-speed manual gearbox (Euro 4)(8.4 /199)
Diesel engine: (fuel consumption in l/100 km / CO2 emissions in g/km): 2.0 l /103 kW (140 l/s), 4MOTION TDI CR, 6-speed manual gearbox and 6-speed automatic gearbox ( Euro 5)** (7.2 – 7.5 /189 -199)
The following provides information on external equipment, functional and internal equipment.
External equipment
- 4 doors
- 12-year warranty against perforation corrosion (partial galvanization of the body)
18° module Chrome roof rails Exterior mirrors in body color Green thermal insulating tinting Halogen headlights with clear glass False radiator grille with chrome slats and windows with chrome trim Alloy wheels 7J X 17, tires 235/55 R17, Los Angeles design Wheel arch covers black with embossing Light absorption of rear windows 65% Bumpers (upper part in body color) Spoilers in black Tire-Mobility-Set Door handles in body color
Functional equipment
- Tire pressure display
- Display of service intervals
- Adjustable blue illumination of the instrument cluster
- Comfort turn signal system
- Climatic
- Permissible roof load 100 kg (with roof rails), otherwise 75 kg
- Electrically adjustable and heated exterior mirrors
- Electric windows front and rear
- Electric parking brake with AutoHold function
- Luggage compartment lighting and 12V socket in luggage compartment
- Heated rear window, rear window wiper (intermittent mode)
- Adjusting the steering column height and reach
- Luggage compartment cover
- Cruise control
- Interior lighting front and rear, 2 navigation lights front (delayed switch-off)
- Shield on the loading edge (plastic)
- Multifunction display “Plus”
- Cosmetic mirrors in visors
- Turning on the parking light
- Radio cassette player RCD 210 with 4 speakers
- Front wipers with 4 intermittent modes (depending on speed)
- Electromechanical power steering (coaxial drive)
- Warning signal for headlights not turned off, parking lamp
- Indication of the level of windshield washer fluid in the reservoir
- Central locking with radio control, 2 folding radio keys
Internal equipment
- 3-spoke steering wheel (plastic)
- Pockets and folding tables on the backs of the front seats
- Eyeglass case with lid
- Sliding rear seat
- Glove box (lockable) with handle holder (illuminated)
Interior mirror with manual dimming Folding front passenger seat Small overhead console (open) with storage compartment and open drawer on the instrument panel Small leather package Center console with folding armrest, adjustable in height Non-smoking package, i.e. front insert with power outlet (12V) and 2 points Storage compartments under the front seats Height-adjustable sports seats with lumbar support Visible fabric with Alcantara applications Front door pockets with integrated 1.5L bottle holders Door handles and surrounds metallic ventilation deflectors (stainless steel look)
Safety
- 3 rear folding headrests
- 3rd brake light
- 3-point automatic seat belts on all 5 seats
- 6 strong eyelets for securing luggage in the luggage compartment
- 2 tone beep
- Electronic immobilizer (4th generation)
- ESP system with trailer stabilization function
- Full-size driver and front passenger airbags, 1-stage, can be deactivated on the front passenger side
- Head airbag (Sideguard)
- Driver and front passenger side airbags
- Pedestrian protection
- Seat belt monitoring/warning signal for driver and front passenger
- Front seat belt pretensioners
- Monitoring of burnt-out lamps (in the instrument cluster)
- Manual headlight leveling
- Reflectors in the doors
- Disc brakes front and rear, internally ventilated front
- Side turn signal repeaters are integrated into the exterior mirrors
- Attaching Isofix child seats to the rear seats (2 outer)
GPS navigation connection diagram
There is no need to additionally purchase a GPS antenna for the Lada Vesta, since it is already included in the standard package by default (cat. article 8450008475).
This decision on the globalization of satellite communications was made by the Government of the Russian Federation in 2014. On the Lada Vesta “Lux” modification, data is supplied to the MMC via the CAN bus. After installing the radio, you need to connect the cable to the mini-ISO connector according to the diagram (to C17 - CANL, to C20 - CANH). Now the standard CityGID program finds satellites.
Additional functions
The display also displays other Lada Vesta parameters, which make driving the car much easier not only for beginners, but also for experienced drivers. For example, parking sensor data provides easy parking by generating light and sound signals. On-board computers are supplied to the entire line of Lada vesta sw cross, station wagon and other luxury models.” The operation of standard electronic devices is ideally complemented by additional equipment installed at gas stations or manually. For example, the standard cruise control of the Lada Vesta interacts successfully with the additional control on board. Modern cross-border models have advanced functions: integrated with a satellite navigation system, equipped with Internet access and a TV.
Connecting a rear view camera
Lada Vesta MMC diagram:
To activate the camera, we use the standard connectors (green connector). Mini-ISO MMC:
- C7 – nutrition;
- C8—CAM─;
- C9 - CAM+.
If you followed the step-by-step instructions, the image from the camera will be displayed on the display.
Touch panel of the Vesta multimedia system
This technology combines many options and has an mms screen of almost 18 cm diagonally. Matches with vehicle panel. Multimedia in Lada Vesta includes all the parameters of standard equipment. Such panels are used in foreign cars and VAZ models. The display is designed on a resistive basis. The mms screen does not pay attention to changes in temperature in the cabin. Switching options in mms, updating and controlling is carried out even in severe frost without removing gloves.
MMC malfunctions and methods for their elimination
Obviously, the standard radio is one of the first developments of the AvtoVAZ concern; there are defects and shortcomings. For example, the display does not load the “LADA” logo:
- We remove the digital storage medium from the connector.
- Disconnect the power terminal from the battery for 10 seconds.
- On the laptop, format the SD card in FAT 32 format, create an empty file “explorer.txt” in the root directory.
- We connect the battery terminals and restart the audio system.
If this method does not help, then problems with the software code of the electronic control unit are obvious. You need to reflash your digital gadget.
Related link:
Features of replacing the windshield on Lada Vesta
The second, no less common malfunction is “cannot find satellites.”
The solution to the problem is quite simple:
- Remove the power terminals from the battery.
- Reset the device to factory settings.
- We restart the gadget again.
Note to the driver!
To reset to factory settings, you must hold the “Power” button for 15 seconds.
How to properly install speakers in doors
The door card is attached to self-tapping screws and 4 “hedgehogs”. To install the speaker system correctly, you will need to remove the door trim. When doing this, you need to be careful not to accidentally damage the plastic. The use of screwdrivers or other metal products of suitable shape is unacceptable. For these purposes, a regular plastic bank card is used. To remove the plugs on the doors, you need to pry them off by one edge. The power window buttons are removed in the same way.
This is how the casing on the left side is dismantled. Removing the door cards on the right is slightly different. There is no need to remove the window lifter buttons - you just need to remove the opening handle cover. Underneath there are two mounting screws. The plugs are removed with a plastic card. Next, the process of removing the door card repeats the manipulations with the left door.
No major modifications are required to install the front speakers. These places have already been prepared in advance; all that remains is to remove the insulating material at the fastening sites and cut out the gaskets. If standard speakers are used, the gaskets are made of felt.
The size of the seat in Vesta's doors is designed for 12-inch speakers. Since the mounting is carried out using three self-tapping screws, installing 16-inch speakers requires that you need to install special spacers for the Lada Vesta speakers. Their size depends on the size of the speaker system. No special adjustments are needed. The main thing is to avoid possible contact with the metal of the doors - there should be a gap of at least 10 mm between it and the speaker magnet. Installation of speakers in the rear doors is carried out according to the same scheme.
Reviews
| № | Positive |
| 1. | Sergey Ivanovich , 44 years old (otzovik.com): I use the standard radio, the quality is good, the functionality is sufficient. |
| 2. | Fedor Stepanovich , 40 years old (www.zr.ru): my comrades are all agitating me to install a 2-DIMM stereo system. I haven’t decided yet, because the price is steep, but the offer is good. |
| 3. | Vitaly , 22 years old (autobann.su): the quality of the standard MMC is not great, but it will last for several years, and then I’ll buy an imported one. |
| 4. | Daniil , 33 years old (lada-vesta.net): The factory stereo system is not bad, functional, no complaints. |
| 5. | Vitaly Semenovich , 43 years old (otzovik.com): for me, sound quality is not important, so MMS suits me, no comments. |
| 6. | Stepanovich , 44 years old (www.zr.ru): Three years have passed since the purchase of the car, all components are working properly, the condition is as if from the factory. |
| 7. | Vasilyevich , 20 years old (autobann.su): my positive review of domestic transport and assembly. A worthy car, a rival to many European brands. |
| 8. | Tolik , 43 years old (lada-vesta.net): I’m not a music lover, for me the quality and purity of sound are not particularly important. The phone is always on in the car. |
| 9. | Stepan Nikolaevich , 39 years old (otzovik.com): it has been working properly for two years, no special comments. |
| 10. | Konstantin , 43 years old (www.zr.ru): I’m happy with the purchase of the car, the interior is quiet, the acoustics are good. |
| 11. | Anton , 35 years old (autobann.su): after three years of operation, I can’t say anything bad about the MMC. |
| Negative | |
| 12. | Dmitry Viktorovich , 44 years old (www.zr.ru): constant problems with the firmware, glitches periodically. |
| 13. | Sasha , 37 years old (otzovik.com): in six months I’ve already been to a service station twice, with an electrician, changing relays and switches. |
| 14. | Nikolai Vasilyevich , 46 years old (autobann.su): replace the standard radio with an imported one, the sooner the better. |
Related link:
Cruise control on a Lada Vesta car
Parameters of the standard on-board computer - description of functions
The Lada Vesta BC performs various functions: it displays this data on the screen. The standard settings of the Lada 2180 computer reflect the indication of parameters on the monitor: • the total value of the vehicle's mileage in kilometers; • vehicle mileage per trip (km); • total travel time, including hours/minutes; • Digital clock; • average speed along the route (km/h); • faster gear shifting; • transmission number; • on-board network voltage indicators (volts); • current fuel consumption (l/100 km); • fuel consumption per trip (l/100 km); • residual fuel in kilometers (km); • speed limit indicator; • cruise control speed indicator; • external temperature. The Lada Vesta instrument cluster has an on-board computer integrated with a number of useful functions that are not found in the BCs of other competing cars. For example, you can find out the voltage of the on-board network or the speed limiter.
Firmware MMS Lada Vesta
Not all owners are suitable for the functions of the standard radio. To change some characteristics, the multimedia system of the Lada Vesta is reflashed. With the help of special software, drivers strive to expand and improve the functionality of the MMS so that they can:
- watch video while the car is moving;
- change menu design;
- display information from the on-board computer;
- expand the number of playable video formats;
- change the navigation system.
To flash the firmware, you can come to a car repair shop, order a set of programs from the developer and update the system manually or download installation files from the Internet. The last method is the cheapest, but there is a risk of downloading broken files. An attempt to read them will lead to incorrect operation or damage to the radio.
Step-by-step instructions for self-flashing from SD media:
- Write the software installation files to the media in unzipped form.
- Insert the SD media into the device and turn it on.
- Press “i” on the screen.
- In the window that opens, you need to activate four dots located in the corners of the rectangle with information. The top left corner is pressed first and then clockwise. Another menu will open.
- Sequentially press the Software, SW Upgrade, Upgrade buttons.
- Select Update OS.
The flashing scheme is given in general form; it may differ for different software developers. During the update, do not turn off the car or otherwise disconnect the radio from power. During the software rewrite process, the device will automatically reboot several times.
Working with multimedia
After turning on and loading the Lada Vesta complex, the main menu is displayed on its screen, with indicators of activated functions and other information.
Main menu of the multimedia complex Vesta.3
In addition, it is possible to go to an additional menu with the same list of options.
Additional multimedia menu.
The radio has an automatic search function for radio stations and automated storage of detected ones. A list of found stations can be displayed on the screen. In addition, multimedia has the ability to search for stations on a specific topic.
Activated radio mode window.
Listening to audio files in Lada Vesta is carried out from different media. When the player is activated, the name of the file, album and other parameters are displayed on the screen. It is possible to interactively select repeat listening and set a random playback order.
Menu for selecting audio files.
Viewing video files is carried out by turning on the “Video” button, then connecting a USB drive or CD card, but with the obligatory condition that there are no audio files on them.
Activated video viewing mode in Lada Vesta.
When you press the “Photo” button, the system will enter the snapshot and image viewing mode. In this case, the connected media (CD or USB) should not contain any audio or video files. Scrolling through images is carried out using the corresponding keys displayed on the screen.
Despite the importance of a car's performance, interior comfort is also highly valued today. Multimedia Lada Vesta is exactly what a modern driver needs
AvtoVAZ has succeeded in the area of technical equipment in recent years. Now their products look decent on the market. Young people are not ashamed to admit that they want to buy a LADA Vesta. Let's discuss the multimedia system and its compliance with the level of the 21st century.
Genesis G80 Sport (2018-2019) price and specifications, photos and review
In June 2016, at the international auto show taking place in the South Korean city of Busan, the official premiere of not only the premium Genesis G80 sedan took place, but also its “heated” modification with the “Sport” prefix, which received sporty design touches and a turbocharged engine in the engine compartment. In its homeland, the “Korean” went on sale in October of this year, and in the foreseeable future it will begin to develop other world markets (in Russia, most likely, the car will appear in 2017).
From the outside, it is not difficult to identify the Genesis G80 Sport against the standard version - it stands out with aggressive bumpers in the style of body kits from Mercedes-AMG, a radiator grille with a large mesh, a rear diffuser with a pair of double-barreled exhaust systems and larger wheel rims of a unique design. Thanks to such modifications, the sedan began to sparkle with new colors - without losing its solidity, it became noticeably sportier.
In terms of overall dimensions, the “warmed up” model is no different from its “basic brother”: length – 4990 mm, wheelbase – 3010 mm, width and height – 1890 mm and 1480 mm, respectively.
Inside, the Genesis G80 Sport generally replicates the decoration of a regular sedan - modern and presentable design, extremely expensive materials, meticulous ergonomics and the highest level of comfort for all riders.
You can recognize the “warmed-up” model by its sports steering wheel and front seats, seats clad in two-tone leather with perforations, and the use of suede and carbon fiber trim.
The standard trunk of the car has a volume of 493 liters.
Specifications. Hidden in the engine compartment of the “sporty” Genesis G80 is a 3.3-liter V6 T-GDI gasoline engine with two turbochargers and direct fuel injection, generating a herd of 370 “stallions” at 6000 rpm and 510 Nm of maximum thrust at 1300-4500 rpm /minute.
In the “staff”, an 8-speed automatic transmission and a rear-wheel drive transmission interact with the engine, and optionally the proprietary HTRAC All-Wheel-Drive all-wheel drive technology with a multi-plate clutch drives the front wheels, which has “normal” and “sport” operating modes, is offered.
Structurally, the Genesis G80 Sport is not significantly different from the base model - a rear-wheel drive platform, double-wishbone front and multi-link rear suspension, a monocoque body with a decent amount of high-strength steel, electric power steering with variable characteristics and ventilated “pancakes” of the brake system “all around.” In the “base” The sedan has an adaptive chassis with electronically controlled shock absorbers, which is tuned for exciting driving, and reinforced brakes.
