Nowadays you can simply buy a car radio that already has Bluetooth built in. In this case, you overpay for all other parts of the car radio that are not related to the Bluetooth module. It is worth considering that on the Internet prices for such radios start from 3,500 rubles, it is not a fact that you will get away with this money, since some cars do not provide for the replacement of the car radio. In addition, if you are not able to change the radio yourself, you will have to pay for a replacement. However, you will get fairly high-quality Bluetooth with a good interface. Therefore, the result of installing Bluetooth in a VAZ Priora will be achieved. It is worth noting that this option is much cheaper than installing Bluetooth at a dealer. This is not the easiest option for installing Bluetooth in a VAZ Priora, so read on.
Price: from 4000 rub.
Dealer Bluetooth Installation
Many cars with rich trim levels include a Bluetooth module in the radio. It’s just that on poorer trim levels it is turned off or absent. Many dealers offer services to enable Bluetooth in factory radios. This is the most expensive solution. Since dealers always “break” prices. Of course, you can find regular services in which the price for installing equipment will be slightly lower, but no one will give a guarantee of work. Among the advantages of this option, we note the good sound quality via Bluetooth, and the fact that externally everything in the car will remain as before. Therefore, your VAZ Priora will receive the desired bluetooth without any changes in the interior.
Price: from 8000 rub.
Buying Bluetooth AUX
Bluetooth Aux is a device for connecting to an existing radio, which, using the aux input, will teach the radio to receive a signal via Bluetooth. This is the most budget-friendly and hassle-free way to solve the problem of installing Bluetooth in a VAZ Priora. In addition, the device also includes a speakerphone. So it is ideal for solving our problem. The Bluetooth aux also has buttons for controlling the phone, namely for switching songs and answering calls. You can attach it to any part of the car or sew it into the panel if desired. So you don’t have to buy or install anything else, the only thing you need is a cigarette lighter and an aux output. About 60% of radios have an aux output, and for another 30% you can get it by purchasing a cable for your car at the store. Therefore, this solution option is the most successful, in our opinion, for installing Bluetooth in the VAZ Priora.
Price: 1999 rub.
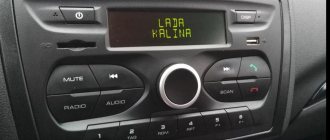
Alternative radio menu (MMC) LADA Granta
- The previously used NK has been fixed - unnecessary lines have been removed from the registry, due to which Bluetooth and radio did not work correctly in the standard shell.
- Added a comfortable on-screen keyboard and calling it from certain programs.
- Added the ability to configure a 3G modem and make a connection directly from the menu, bypassing the desktop and Explorer.
- Added Opera browser with auto-connection to the web.
- Added the ability to configure the GPS receiver.
Next, how to replace the standard firmware with the modified one.
All about Bluetooth and MMS EnjoY Pro
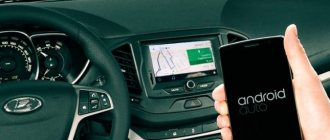
The EnjoY Pro multimedia system (MMS) is installed on the Lada Vesta, XRAY and Granta family of cars. To use the system's capabilities to the fullest, connect it to the Internet and also connect your phone via Bluetooth. We tell you how to connect via Bluetooth, and what difficulties there may be in this process.
Bluetooth connectivity allows you to use your phone wirelessly without being distracted from the road, and also listen to music from your smartphone.
MMC EnjoY Pro supports Bluetooth version 4.2 (A2DP, HFP).
Firmware for radio Kalina 2/Granta
You will need an SD card up to 4GB formatted in FAT. Next time you can use a card in exFAT format.
| The creator is not responsible for all your actions. In addition, flashing the MMC leads to loss of warranty. |
Procedure: 1. Copy the firmware to an SD card (up to 4GB in FAT). 2. Copy files from the “FirmWare” folder to the root of the memory card. 3. Remove the flash drive from the USB port. 4. Insert the SD card into the radio. 5. Reboot the GU by long (about 15 seconds) pressing the power button (for LADA Kalina 2) or the volume button (for LADA Granta). 6. A flashing will occur (4 status bars will run through) and the radio will reboot itself into the desktop.
Without rebooting the radio, click on the “Recalibrate” button and calibrate the screen. At the end, during the countdown, click on the screen. 8. Reboot the radio with the memory card inserted. The new menu will load.
If, after flashing the radio, the download freezes at the “Lada” logo, then most likely there is a problem with the SD card. Try to format the memory card to other file systems (FAT32/exFAT/FAT) and flash it again. You can also try using other SD cards, 4GB or 2GB in size.
How to return to the standard menu of the Kalina 2/Granta radio:
- Click on the “Media” icon in another menu.
- Reboot the radio and remove the SD card first.
Nothing changes in the standard shell, everything remains the same.
Problems connecting your phone to your car stereo
- The radio does not “see” the smartphone when connected via AUX. A headphone icon appears in the corner of the phone screen for a second and then disappears; sound is reproduced only through the speakers of portable equipment; music sounds both from the phone and from the radio speakers. In order to solve this problem you need to: download special applications, like SoundAbout, which make it possible to choose the “direction” of sound to the cable or headphones. You can also buy a 3.5 mm Jack double. One of its sockets connects to a smartphone, the second to an audio device. True, this will reduce the volume.
- The smartphone does not “see” the radio via Bluetooth. Bluetooth is turned on on both devices, but the phone cannot find the audio device. Most likely the problem is in the settings. One of the devices may be using an outdated Bluetooth protocol. In order to solve this problem you need to: Check the protocols. Explore the settings. Be sure to turn on the “Available to everyone” option. In some cases, updating the head unit firmware helps. An exotic option that can be used by owners of some JWC radios is to remove the terminal from the battery for 30 minutes, then connect it again.
- No USB contact . When connected via a USB port, nothing happens, or the smartphone is charging, but the radio does not “see” it. The problem is almost always a damaged cable or broken port. It is also possible that you have not enabled the Data Transfer function on your smartphone. Try a different cable. If everything is fine with it, go to the USB settings on your phone and check if the connection is allowed.
vote
Article rating
Alternative menu for Kalina 2 radio
- The previously used NK has been fixed - unnecessary lines have been removed from the registry, due to which Bluetooth and radio did not work correctly in the standard shell.
- Added a comfortable on-screen keyboard and calling it from certain programs.
- Ability to configure a 3G modem. You can make a connection directly from the menu, bypassing the desktop and explorer.
- Added the ability to use the web using the Opera browser.
- Added the ability to configure the GPS receiver.
- Other functions depend on the version of the alternative menu.
How to update the radio firmware to ver.38 (23.0.2.38)
The standard (or as they say “stock”) firmware of the Kalina2/Granta radio can be versions ver.32 or ver.35. To update it to ver.38 you will need firmware files (Chain.bin, chain.lst, NK.bin and TINYNK.bin). There is currently no radio firmware for LADA Granta ver.38, there is only a hybrid of firmware ver.34 and ver.38, but it is only for installation from the altmenu. I offer you one of the options for flashing the radio firmware to the latest version, using the assembly from TarLink from the 4pda.ru forum (link to the topic at the bottom of the article):
Features of the assembly with the altmenu:
- The build is based on version 23.02.38.
- Has built-in Russian localization.
- Launching the altmenu without rebooting from the standard menu (by long pressing “Settings”).
- Built-in driver for GPS receiver BU-353s4.
- Initialize sound and time without the participation of the MMC.exe process.
- Display of engine temperature and remaining fuel (provided the CAN bus is entered into the MMC).
- Screen and sound settings.
- There is a radio.
- Support for radio buttons.
Firmware: Unpack the contents of the archive to the root of the SD card: Next, proceed as described above. This assembly can work without an SD card, or you can delete the Install and Firmware_v38 folders. The Navigation folder must be present on SD or USB. it was created for navigation programs, for example, for Navitel you need to put Navitel in this folder.
How to pair your phone and MMS
Depending on the phone model, the connection can be initiated:
- on the MMS side or on the phone side
- only on the phone side
To connect your smartphone via Bluetooth
:
- On the navigation bar, tap , then in the Connectivity section, tap Bluetooth .
- Turn on Bluetooth on your smartphone and search for available devices.
- Select your car's name from the list of found devices.
- Click the Connect button.
When asking for permission to synchronize data, confirm the permission; this is necessary for Bluetooth to work with full functionality.
The system remembers the devices that have been connected over the entire time. But it can only support connection from one smartphone at a time, for example, play music or show a list of contacts.
Priora head unit: solving the problem of selection and installation
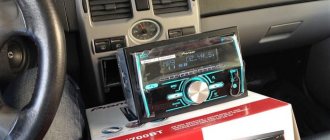
The standard tape recorder on the luxury Priora This is a very good device with extensive functionality, the only drawback of which is the not very high power of the built-in amplifier. There are not many sound settings, but the receiver is not designed for musicians with refined ears; it is more suitable for the average user. For those who want more “sound” in their car, radio , and we will tell you how to install it below.
Using the radio to make phone calls
The instructions from the Priora radio also contain information that the device supports the Bluetooth function and can be used for a wireless headset or playing tracks from Bluetooth devices. To do this, press one or the other key with the phone icon, and the device name (or Disconnect) will appear on the display. First you need to turn on Bluetooth on your mobile phone and search. If everything is in order, the “hands free” message will appear on the phone and you can connect (the PIN code is “0000”). Then a beep and Bluetooth icon will appear.
As the manual says: if you need to accept a call, you need to press the left button with the phone icon, and to interrupt the connection, press the right button. You can dial a number after switching to Bluetooth mode. After this, use the numeric keypad to type the name of the mobile phone, after which you need to call the subscriber with the left button with the phone icon. Ending a conversation, as well as disconnecting, is done by pressing the right button with the phone icon (short or long, respectively). A PIN code for the phone (instead of four zeros) can be set by pressing the Scan button in Bluetooth mode, entering a new code and pressing confirmation (button “8”).
In Bluetooth mode, for some phone models, you can transfer address book data from the phone to the radio. To do this, press AF/PS, view the address book via PTY, select the desired number by rotating the encoder knob. In addition, you can delete one number via AF or all numbers via TA. Therefore, you need to be careful when using Bluetooth.
As we can see, the standard radio on the Priora actually has a variety of functionality, so it is. but many drivers don’t like it, which is why they change it. In the “standard” configuration (as opposed to the “luxury”) there is no radio, but the car has all the necessary preparation to install any receiver, including the “Pioneer”.
Formulation of the problem
Let's start with the fact that Bluetooth is convenient. I didn’t have bluetooth in the car before, and it was very inconvenient, especially when my phone had a charger and an aux cable plugged in and I still needed to answer the call, I had to disconnect all the wires from the phone and only then answer. Therefore, it seems to me that bluetooth in a car will make life much easier for any driver. And although phones have not yet learned to charge via Bluetooth, listening to music and talking on the phone in the car will definitely become more convenient. In addition, to be completely honest, you have the right to talk on the phone in the car only through a special device - bluetooth (as it is written in the traffic rules, if anyone doesn’t know). Thus, bluetooth is a necessary thing. And we are faced with the task of installing this thing in the VAZ Priora. Naturally, I would like it to be inconspicuous and with good quality of sound and information transmission. And you need the phone, for example, to be on charge, and switching songs and answering calls without touching the phone. Thus, we decided on the task. So, why do you need Bluetooth in the VAZ Priora?
- 1. Listening to music
- 2. Answering phone calls
- 3. Reducing the number of wires to the phone.
Read also: Com na zil 131
Main characteristics and functions of the radio on the Priora car
To prove the acceptable quality of the Priora radio, let's consider its main characteristics. The car radio operates on FM and AM frequencies, with the former being perceived in the range from 65 to 108 MHz, having stereo separation of more than 30 dB and sensitivity at a noise/30 dB ratio of 12 decibels. The AM band operates at frequencies of 522-1620 kHz, with an intermediate frequency of 450 kHz and a sensitivity of less than 43 dB.
The closest buttons to the driver of the Lada Priora on the radio are the buttons located on the left side:
- turning on/off the receiver;
- instant mute (Mute);
- selection of operating mode (Mode);
- selection of frequency range (Band);
- scanning frequency range / tracks / sequential tuning on a station (Scan). In scan mode, the receiver will pick up all stations in the selected range and play for a few seconds. By pressing again you can select the corresponding station;
- start/pause playback or select a radio station (1);
- scanning tracks or selecting a radio station stored in memory as number 2 (2\Int);
- to select a station recorded at number 3 or to play tracks repeatedly (3\RPT);
- to select a radio station recorded under number “4”, or to play music in random order (4/RDM);
- button “5” makes it possible to either go to the radio station stored in memory at number five, or go to the next folder when playing an MP3 disc (F/5);
- button “6” makes it possible to either go to the radio station stored in memory at number six, or go to the next folder when playing an MP3 disc (F-/6).
Driver's seat
Review. head unit from Priora
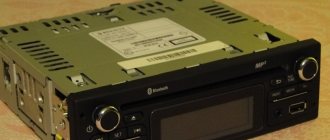
In the center of the radio panel in the Lada Priora there is an SD card loading window (at the top), a disk loading window, a liquid crystal display, cell phone control buttons, a slot for the built-in microphone, a hole from the “Reset” button (activated by a sharp thin object when an error is displayed, not All buttons work to initialize the system). At the bottom there is an encoder knob, control buttons, and a menu selection confirmation button.
Closer to the passenger located in the front seat of the Lada Priora, on the radio panel there are such functions as:
- disc eject button (top);
- enabling the automatic search function for alternative frequencies (AF). This option allows you to find the best broadcast for a specific channel;
- automatic tuning to stations, scanning of stored stations, searching for a folder or a specific track (using the AS/PS search method);
- Search for thematic radio stations using the RDS (PTY) function. For example, you can select stations that broadcast only rock, pop, weather, finance, etc.;
- enable the feature for the messaging service (TA);
- button for displaying additional data (Info);
- selecting equalizer mode (EQ)
- selecting a radio station stored in memory under numbers 7, 8, 9, 0 (buttons 7-0).
- The standard radio on the Priora has the ability to use buttons “1” to “0” to dial a phone number.
The choice of tape recorder mode is carried out through the “Mod” button, in the menu of which you can select a radio receiver, memory card, disk, USB or information from the navigator using a brute force method. The recorder will play navigation signals (if a navigator is connected) while playing the currently selected main function (eg radio) in muted mode.
Basic functions of the radio in Priora
Finding a suitable radio station is done manually or automatically. The search is carried out in the FM and VHF wave bands. You can remember the station you like and go to it by pressing buttons 2-6. Settings data is displayed on a small screen, the backlight of which is designed to match the lighting of the main instruments and sensors of the front panel.
The standard Priora radio is attractive because it allows you to easily adjust the equalizer. To do this, press the EQ button and begin selecting the appropriate sound type. It is possible to connect discs with MP3 audio files. Therefore, the driver and passengers of the car can listen not only to popular stations, but also include their own collections of interesting tracks.
The functionality of individual buttons differs when playing music from a radio station and from a media device. For example, using buttons 2-6, you can not only select a station stored in memory, but also switch to the next folder on the media, select playing tracks in a circle, or switch to playing in a mixed order.
All data on the operating mode, file name and other data will be displayed on the small screen of the radio. This allows you to select optimal system operation settings.
The standard Priora radio is equipped not only with a CD drive, but also with a USB output. This feature allows you to use it to play tracks from both regular flash drives and portable devices.
The uniqueness of the domestic car audio system is the ability to connect both mobile phones and portable hard drives. An external hard drive with a capacity of no more than 120 GB will be easily read by the standard audio system.
Choosing the sound in the car
Owners of Lada Priora can choose one or another sound timbre for their interior by pressing the EQ key and then selecting the style “classic”, “rock”, “pop”, “vocal”, etc. To more accurately adjust the parameters, you need to briefly press “ 8", then select the mode using keys 4-5 and 5-6 - the desired value. Here you can select “Fade” - balancing the front and rear speakers, “Balance” - harmonizing the side speakers, “Bass” - low frequencies, “Treble” - high frequencies. A review of the manual indicates that improved sound quality can be achieved by using the "Loud On" mode. In addition, in the same “section” you can set stereo or mono mode, enter sound signals for pressing keys (Beep On / Of), etc.
What is the password for bluetooth on Priora?
Good day everyone! What is his bluetooth password? And how do you even connect to it?
0000 and the phone will connect itself
0 0 Answer rating: 0
0000 should be the same for everyone, turn on bluetooth on your phone, find your car’s bluetooth, enter the password and everything works
0 0 Answer rating: 0
I'll tell you how it is for me:
Use the “mode” button to select the “i” mode
You press the end button, your button is on the far right
On your phone in the settings, go to bluetooth, connect to your car (mine is called handsfree) and wait for a signal in the form of three short sounds
PRIORA™ post pinned
Please tell me how to connect to bluetooth? It does not turn on via the call button, the bluetooth icon blinks a couple of times and goes out. Is it possible to reset the settings somehow? If you search through your phone, it doesn’t even see the bluetooth phone.
Reset settings, stick a needle there and it will reboot
Ibrahim, he can’t find the phone at all, the bluetooth icon in the phone blinks a couple of times and goes out.
The password is 0000, it should be found, bluetooth is always on
Timur Bulia
In the menu Where the adjustment of low and high frequencies is Bluetooth, it should be ON. You search on your phone and connect. Next, where you switch the flash drive, radio, CD, turn on hands free, the connection should light up, then press the handset to accept the call. Voila
Timur Bulia
Next I’ll tell you about BlueTooth. It's a useful thing, I'll tell you. =) only one thing is annoying, if you are not alone in the car and you receive an incoming call, the contents of which you would like to keep to yourself, then you have to reset it, because all passengers will be able to listen to the interlocutor, because it broadcasts through all the car speakers =)
By the way, you just need to connect the phone to the device once and then it will connect itself, unless of course the Bluetooth mode is activated on the phone. So, let's call.
By the way, using Bluetooth, you can listen to music from your phone =)
That's probably all, although it would be necessary to show two tulips for the exit, located in the same glove compartment. =)
So, let's draw some conclusions.
Among the advantages, it is worth noting the following:
- fits quite well into the interior of the car.
— no need to carry the socket with you. — good ergonomics, you don’t need to reach for it to control it, your hand can easily find all the buttons. — The LCD display displays information clearly, without distortion, everything is perfectly visible in any lighting. — price, with this audio system + 4 speakers and antenna the car becomes more expensive by 6,000 rubles. (declared by AvtoVAZ) Of the minuses:
- frequent freezing when listening to a flash drive, on which there is a lot of different information.
— an incomprehensible antenna: in the city the reception is worse than outside the city. =) - very limited functionality, small number of settings. — after a conversation via Bluetooth, when listening to USB, for example, not often, but still, the radio starts playing. =( - for building a good car audio, IMHO, it’s still not suitable. Even though people wrote on the forums that they connect amplifiers and subs. Something like this. If you have any questions, don’t be shy...
People! Does anyone know how to turn on bluetooth on the standard radio of the Lada Priora?)
Similar articles
9 comments on “Does anyone know how to turn on bluetooth on the standard radio of Lada Priora”
It works all the time, if you listen from your phone, just search, turn on I found an HS-C5810, turn on the song and it plays.
Very simple, Find a new device on your phone and enter the code 0000 to connect...
Nowadays, almost all electronic devices include a Bluetooth module, with which they can communicate not only with each other, but also with external media, such as speakers, car radios, headsets and much more. Naturally, leading automakers, although not all, could not help but include Bluetooth support in their cars. Nowadays, almost all new cars support Bluetooth connectivity. And if you can’t talk on the speakerphone in all cars, then almost all cars support playing music via Bluetooth from external media.
How to remove the standard radio on a Priora (luxury) car?
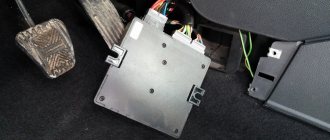
Removing the standard radio begins with selecting the accompanying tool - these can be removable keys or plates from frame wipers in the amount of two pieces. They need to be inserted into the slots under the Scan and TA buttons at a slight angle until a characteristic click is heard. Then you need to move the keys slightly apart and pull out the device. If you use plates, you first need to move them slightly apart, and then, on the contrary, bring them towards the center and pull them towards you.
When installing the radio on the Priora, you need to disconnect the negative terminal from the battery. After this, the plastic pocket-plug on the hole for this device is removed. On its reverse side there are two connectors - a gray one for power connections, and a brown one for the front and rear speakers. If the connectors of the tape recorder and the car match (according to ISO), then you just need to connect through an adapter or according to the diagram, after which the box with the tape recorder is inserted back into the panel, and the “Reset” key is pressed.
Installation of the radio is carried out according to the diagram
Also, to form the entire audio system, you need to install speakers. For the rear ones, remove the mesh covers (with a screwdriver) and connect the contacts through adapters. After that, metal eyes are placed in the holes, secured with self-tapping screws, and the speakers are installed in place, and decorative covers are put on. For the front ones, you need to unscrew the self-tapping screw in the niche of the handle from the door, remove the rubber mat in the niche from the closing handle, unscrew two self-tapping screws, release the latches and remove the power window control panel. Then you need to remove the cap from the pin on the lock lock together with the decorative rim, remove the trim, connect the speakers to their mounting positions, and put the front doors back together.
How to enable Bluetooth on the 6000CD Ford Focus 2 radio
On European versions of the second Focus, the Bluetooth module was installed selectively. For those versions that were assembled in Russia, radio was installed without a Bluetooth module, although there is a button with a phone image on all versions. On most of our Focuses, this button performs a banal mute function; it simply mutes the sound of the radio. In those versions (mainly European and American assemblies) in which the module is integrated into the 6000CD radio, the procedure for turning on Bluetooth is as follows:
- Turn on the device.
- Click on the exit button to the menu.
- Click on the right arrow once.
- After this, press the menu selection button 6 times. The display should show VT on or VT off.
- Use the arrow to set the value to On and confirm with the menu selection button.
Bluetooth will turn on and the external device should recognize the radio as Ford Audio. When connecting for the first time, the device may ask you to enter a PIN code, after which the radio can be used as a Bluetooth hands-free device.
Bluetooth installation
Installing Bluetooth aux will require absolutely no effort from you. Of all the proposed methods for installing Bluetooth in a car, this is the simplest. All you need to do is plug the aux input into the corresponding aux input in the car, and the power cable into the cigarette lighter or usb, whichever is more convenient for you. The device will automatically turn on and you can connect to it using Bluetooth from any phone. By the way, after the first connection, the phone itself will automatically pick up Bluetooth aux. Thus, by the time you get into the car, your phone is already connected to the audio system.
Design and functions
The 6000CD head unit of early models was produced in a rectangular housing. In connection with the adjustment of the interior design of Ford cars, the configuration of the front panel has changed, which began to have rounded edges and edges. To protect equipment from theft, a security digital code is used, which is transferred to the owner along with a set of documentation. It is possible to install a radio control module for rear passengers, as well as a steering column joystick.
- built-in clock and calendar;
- separate adjustment of high and low frequencies;
- 3-band radio receiver with memory of radio frequencies;
- it is possible to receive RDS traffic information with broadcast messages through loudspeakers;
- CD player;
- possibility of rooted scrolling of a composition;
- repeat a track and play songs in random order;
- standard decoder of compressed MP3 music recordings;
- displaying tags on the display;
- compatibility with equipment via AUX (not for all radios).
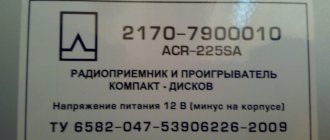
LADA Priora/Lada Priora: Standard audio device (radio tape recorder)
Due to numerous requests, I hasten to tell you about the standard Priora tape recorder Yes, yes, you heard right, such a thing exists
I’ll say right away that this 1Din device with a false panel has the following characteristics: reads CD/MP3, is equipped with USB, two-channel output, has built-in BlueTooth and is equipped with an LCD display
By the way, one of the advantages of this device is that it fits well into the overall interior of the car.
First, let's go over the quick buttons: ST - stereo/mono switching. BAND - switching bands. AF—turn on/off the mode for receiving alternative frequencies when receiving RDS stations. TA—turn on the traffic information standby mode. PTY—select the program type when receiving RDS stations. SCN - scanning during playback. RPT - repeat song/disc (folder) SHF - shuffle =) MODE - switch modes. AS/PS - auto scanning and memorization of memorized stations, selection of tracks. SCAN - scanning stations. DISP - options for displaying information on the display. EQ—switch equalizer presets.
Design and functions
The 6000CD head unit of early models was produced in a rectangular housing. In connection with the adjustment of the interior design of Ford cars, the configuration of the front panel has changed, which began to have rounded edges and edges. To protect equipment from theft, a security digital code is used, which is transferred to the owner along with a set of documentation. It is possible to install a radio control module for rear passengers, as well as a steering column joystick.
- built-in clock and calendar;
- separate adjustment of high and low frequencies;
- 3-band radio receiver with memory of radio frequencies;
- it is possible to receive RDS traffic information with broadcast messages through loudspeakers;
- CD player;
- possibility of rooted scrolling of a composition;
- repeat a track and play songs in random order;
- standard decoder of compressed MP3 music recordings;
- displaying tags on the display;
- compatibility with equipment via AUX (not for all radios).
Connecting your phone via Bluetooth to the multimedia system
As you know, Russian engineers installed a modern multimedia system with a touch monitor in the new Kalina.
It is worth noting that in addition to the functions of displaying video and playing music, it allows you to connect the driver’s cell phone via Bluetooth wireless technology. So, what actions do you need to take to connect your phone to Bluetooth on the new Kalina 2? 1) First, in your mobile phone’s Bluetooth settings, check the box above the “Visibility to everyone” option. After that, turn on wireless technology. Once the connection is activated, you can proceed to the next steps.
What to do if Bluetooth is not installed or does not work
In most cases, with our Focuses you have to purchase a Bluetooth module and install it yourself. The device connects without any problems, and after installation the radio can be used as a speakerphone; it will read all possible audio and image formats.
One of such devices is produced by YATOUR, model YTM06-FRD1. The photo of the device is attached above and, as you can see, it has one USB port, an AUX input, a memory card slot, and in addition, the device has 8 GB of internal memory. Music can be controlled using buttons on the steering wheel; the device is fully compatible with the standard FORD radio.
The kit includes a cable with 12-pin connectors for connecting to the radio, a jack-to-jack cable for connecting external devices (player, computer, tablet), and in addition, the adapter can play streaming audio using the Bluetooth protocol. The price of the adapter on different sites ranges from 50 to 60 dollars.
Diagnostics
Priora diagnostics can be carried out at any service station. This allows you to identify problems with the engine, namely the culprit of the problem. It will help save money, time and effort to find the cause yourself or at random.
Such engine scanning at a service station is carried out with an expensive and advanced scanner, which is quite expensive. Checking the Priora ECU for errors in a specialized service will cost from 1000 rubles and more.
We integrate bluetooth into the standard FORD radio 6000CD
The purpose of this action is to support speakerphone and MP3 from mobile phones. A related goal is to obtain more or less high-quality sound reproduction, because any consumer solutions such as FM transmitters do not shine with them. But there is no desire to cut thousands of Audio-CDs and store them in the car.
So, we have: – A standard Ford 6000CD gramophone, which can play radio and regular audio CDs, with an AUX button. – A mobile phone/smartphone with Bluetooth, which at the current price of memory cards can easily serve as an MP3 player.
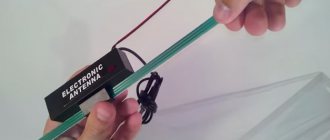
First, we need to choose the Bluetooth that is suitable for our purposes, my choice fell on this model: https://www.dealextreme.com/details.dx/sku.33237 It looks like a real Nokia, the Chinese simply covered up all the labels with Photoshop. Has buttons for picking up the handset, switching tracks, play/pause. On the side are the power and volume buttons. Microphone in housing. Standard headphone output (3.5mm). The set includes quite high-quality headphones; we will need a wire from them. I was sorry to cut them, so I used the wire from the useless headphones that came with the car navigator. You will also need a power cord - cut it off from the charger. She still has American contacts.
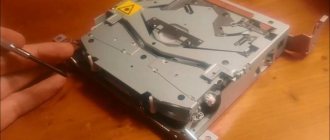
Next, we take out our radio, unscrew the bottom cover and figure out what’s what. I drew the diagram as best I could from memory, without kicking:
The diagram shows a radio with the cover removed, the front part is on the left, the printed circuit board is on the right, the parts are on the back side, only the contacts are looking at us. Next to the radio connector on the board there are characteristic rows of contacts. A vertical row of large contacts, to the right of it is a group of contacts for speakers, etc., below is a separate group of four small contacts, this is our AUX. We take the tester in our hands and check: the lower left one should ring on the case, this is common. To further check, you need to connect back to the connector in the car, turn it over with the board facing you and turn it on. We turn on AUX and poke the probe into the contacts of the left and right channels according to the diagram, clicks are heard from the right and left speakers, check that there is no error. Next, we look for 5V on the board, to which we will connect Bluetooth. The diagram shows a rectangle on top of the board - approximately in this place there is some kind of microcircuit, and it just has 5 Volts. They are located closer to the center of the group of contacts, this is a fairly large track that goes from the center of the board to the microcircuit, in front of the microcircuit from it to the ground there is a ceramic chip capacitor. From this capacitor we will take power for Bluetooth (plus and minus).
I glued the Bluetooth itself to the radio with dichloroethane. It's dead, you can't tear it off.
Drilled holes for the wires. The headphone output was connected accordingly to the AUX contacts, and the power was taken from the above-mentioned capacitor.
Now impressions of use. Nokia E71 with 8GB card available. Conversations are spoken, music is listened to #128578; They hear me more or less normally when speaking, although they say there is a “barrel” effect. The music is played with a bang, it’s convenient to click the tracks directly on the radio. As for energy saving. If connection with the device is lost, Bluetooth automatically turns off after a while. The radio also has a standard function - when the ignition is turned off, it works for an hour and turns off. So there are no problems - you leave the car, everything will go out on its own after a while. So it goes.
Options for installing bluetooth in the VAZ Priora
Replacing a car radio
Nowadays you can simply buy a car radio that already has Bluetooth built in. In this case, you overpay for all other parts of the car radio that are not related to the Bluetooth module. It is worth considering that on the Internet prices for such radios start from 3,500 rubles, it is not a fact that you will get away with this money, since some cars do not provide for the replacement of the car radio. In addition, if you are not able to change the radio yourself, you will have to pay for a replacement. However, you will get fairly high-quality Bluetooth with a good interface. Therefore, the result of installing Bluetooth in a VAZ Priora will be achieved. It is worth noting that this option is much cheaper than installing Bluetooth at a dealer. This is not the easiest option for installing Bluetooth in a VAZ Priora, so read on.
Price: from 4000 rub.
Dealer Bluetooth Installation
Many cars with rich trim levels include a Bluetooth module in the radio. It’s just that on poorer trim levels it is turned off or absent. Many dealers offer services to enable Bluetooth in factory radios. This is the most expensive solution. Since dealers always “break” prices. Of course, you can find regular services in which the price for installing equipment will be slightly lower, but no one will give a guarantee of work. Among the advantages of this option, we note the good sound quality via Bluetooth, and the fact that externally everything in the car will remain as before. Therefore, your VAZ Priora will receive the desired bluetooth without any changes in the interior.
Price: from 8000 rub.
Buying Bluetooth AUX
| Solution option | Description |
Bluetooth Aux is a device for connecting to an existing radio, which, using the aux input, will teach the radio to receive a signal via Bluetooth. This is the most budget-friendly and hassle-free way to solve the problem of installing Bluetooth in a VAZ Priora. In addition, the device also includes a speakerphone. So it is ideal for solving our problem. The Bluetooth aux also has buttons for controlling the phone, namely for switching songs and answering calls. You can attach it to any part of the car or sew it into the panel if desired. So you don’t have to buy or install anything else, the only thing you need is a cigarette lighter and an aux output. About 60% of radios have an aux output, and for another 30% you can get it by purchasing a cable for your car at the store. Therefore, this solution option is the most successful, in our opinion, for installing Bluetooth in the VAZ Priora. Price: 1999 rub. |
Ford 6000 cd manual
Ford passenger cars are equipped with a standard head unit that allows you to listen to radio broadcasts or music recorded on CDs. radio does not allow the connection of external USB or AUX devices. But the design of the equipment provides for independent installation of connectors, allowing you to expand the list of switched devices.
Priora head unit, how to connect bluetooth
Sources:
https://1ladapriora.ru/tyuning/shtatnaya-magnitola.html https://automaster67.ru/FORD/shtatnaya-magnitola-FORD-fokus-2-6000cd-instrukcziya-kak-vklyuchit-blyutuz-video
Connection and pairing
You can connect your phone with the Android operating system to your car audio system in a few steps:
The Bluetooth connection functionality includes the handsfree system, the ability to view images and listen to music from the phone.
How to find the function to turn on Bluetooth and synchronize devices correctly?
Inclusion
To turn on Bluetooth, you can use the tips from the device’s operating instructions or find the option yourself in the radio.
For popular brands of car radios (JVC, Pioneer, Sony, Ford and Priora stock radios), you need to do the following:
Synchronization
The process of synchronizing with a new device on almost all radios is the same, and to complete it, you need to perform several steps: