Owning a car means not only quickly moving from place to place, but also the ability to care for the vehicle. The more time you spend on maintenance, the higher the vehicle's lifespan and its reliability will be. Changing the oil in a timely manner, monitoring the pressure inside the car’s tires, and the ability to quickly replace a broken part – these are the basic skills that a good motorist must possess.
But often even good owners have questions that cannot be answered immediately. One of these questions is: “Which radio is better to put in the Priora instead of the standard one?”
You can answer this question if you know several basic factors:
- Owner's age. It's no secret that young people love to listen to loud, clear music. The radio and amplifier must be powerful enough to satisfy this desire;
- Musical preferences. Each style of music has a unique rhythmic pattern that needs to be emphasized with a good equalizer. The radio should have this function;
- Reliability and reputation of the car music player manufacturer. These parameters determine the feasibility of the purchase - price does not always equal quality.
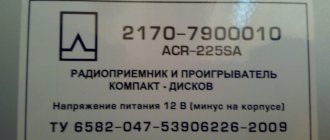
Which radio on the Priora, instead of the standard one, is suitable for installation in the panel connector? The factory radio that the Lada Priora car comes with has one feature: incomparable sizes. The front size is 2 Din and the rear size is 1 Din. This is explained by the presence of a false panel.
Replacing the standard radio on a Priora is possible in two ways:
- Install a new 1 Din radio. But, when choosing this option, you will have to figure out how to fill the resulting void. The solution could be a homemade shelf or something similar. Advice: you need to make a shelf and install it in the dashboard carefully so as not to damage the interior trim.
- Install a 2 Din radio. This option requires cutting the plastic. When choosing a radio with this size, you should carefully trim the plastic inside the car.
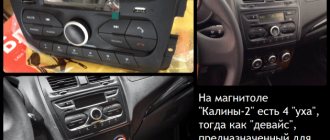
Let's look at a simpler option - the size of a 2 Din radio. It is also suitable if you need to replace the standard radio of the Priora 2 Lux. First of all, you need to remove the factory radio.
This can be done using special hooks that are sold in car stores. After this, insert the new radio into the resulting socket and connect the wires. In order for the radio to be securely fixed, you need to cut off thin strips of plastic on the sides of the connector.
If the work is done carefully, the new radio in Priora 2, instead of the standard one, will become easy, and this will improve the sound quality from the speakers. A reliable fixation will allow you to operate the radio for a long time.
Features of installing a radio on a Lada Priora
As a rule, installing a radio on a Priora involves several types of audio players:
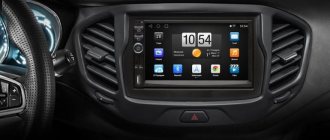
2 DIN media player for LADA Priora
These designations indicate the dimensions of the hole for installing the radio, which correspond to the dimensions 180x50x160 mm for 1 DIN and 180x100x160 mm for 2 DIN. If you want to install a more modern version of a 2 DIN radio, the car owner will have to carry out the procedure of sawing the partitions of the front console of the car in order to widen the hole for the player. In some cases, to adjust the dimensions, it becomes necessary to cut out or purchase an appropriate transition frame for the console, which is much more difficult than installing 1 DIN.
If you nevertheless decide to install a 2 DIN system, then it is best to entrust the installation work to an experienced specialist, otherwise there is a risk of damaging both the console itself and the car interior trim.
It should also be noted that 2 DIN standard radios have an extensive range of functions:
- long service life thanks to shock-resistant housing;
- paired amplifiers increase signal reception several times;
- the ability to switch the frequency of the radio signal by all passengers in the car thanks to the Music Zone system;
- function of built-in radio navigator;
- built-in USB connector allows you to connect external devices to view and play files;
- the presence of a bass amplifier for music for higher quality sound.
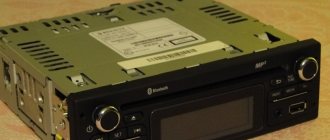
Built-in USB port and amplifier outputs
Do-it-yourself installation of a radio in a Lada Priora
In the first case, we consider the installation of a 1 DIN type audio player, which does not involve changing the shape and parameters of the plastic base of the console. Before installation, turn off the power to the vehicle by disconnecting the negative terminal of the battery.
It is recommended to divide the installation process of a standard audio player into several stages in the following sequence:
- 1. Preparing the hole for installation. To do this, remove the plastic cover covering the niche provided by the manufacturer for installing the audio player;
- 2. Determination of connectors for connection. In the hole for installing the audio player there are several sockets: for power connections in gray and for speakers in brown;
- 3. Connecting the player to car connectors. If the connectors of the audio player and the machine comply with the ISO standard, it is necessary to make the connection according to the diagram or through an adapter;
- 4. Installing the radio in the standard hole. Remove the magnetic frame and install the housing into the standard hole in the car console. When locked correctly, there will be a slight click;
- 5. Activate the player by pressing the “Reset” button.
Installing an audio player of type 2 DIN is more labor-intensive due to the formation of the appropriate hole size in the Priora console. The installation process is similar to the 1 DIN installation system, the connection is made according to the same principle.
Firmware for Lada Priora radio
Modern technologies are rapidly moving forward, also improving car gadgets. Firmware for the standard Lada Priora radio allows car enthusiasts to expand the capabilities of the player by adding additional functions that the standard software does not have. The updated radio interface can be supplemented with a convenient touch keyboard, fresh programs and new versions of players with the ability to play all audio and video formats.
Radio set from Priora 2
The firmware of the VAZ 2170 audio player system is carried out using an SD card with a capacity of at least 4 GB, formatted in the FAT system.
Tips for installing a radio in Lada Priora
In order to avoid unforeseen difficulties during the installation of the radio in the Lada Priora, it is recommended to use the advice of experienced car enthusiasts:
- 1. Before installing the radio, you need to thoroughly study the connection diagram for media devices. If the player's connectors are connected incorrectly, there is a high probability of failure of some vehicle systems;
- 2. There are many models of radios from different manufacturers. Some of them have individual connectors with an additional adapter included for the ISO standard. This fact should be taken into account when choosing an audio device for the Lada Priora, since one of the connection options in this situation would be cutting the wires and directly soldering them to the car’s wiring;
- 3. When directly connecting the standard radio, you can use special terminals;
- 4. The connection diagram for the audio player via ISO will remain the same when replacing the radio with a new one.
Do not twist or wrap electrical tape to connect wires directly. This type of insulation is dangerous when operating a car in winter, since at low temperatures the adhesive-based tape is deformed and destroyed, which will lead to a short-circuit in the car's wires.
The VAZ plant equipped some of the Priora cars produced with a standard head unit; the basic modifications were only prepared for independent installation of equipment. The mounting sockets are designed for standard products; it is possible to install a 2-din radio in a first-generation Priora, but this requires modification of the internal elements of the instrument panel.
Product delivery options
Note! Below are the shipping methods available specifically for this product. Payment options may vary depending on the shipping method. Detailed information can be found on the “Delivery and Payment” page.
Parcel by Russian Post
Available payment methods:
- Cash on delivery (payment upon receipt)
- Using cards Sberbank, VTB, Post Bank, Tinkoff
- Yandex money
- QIWI
- ROBOKASSA
Shipping throughout Russia. Delivery time is from 5 to 12 days.
Parcel by Russian Post 1st class
Available payment methods:
- Cash on delivery (payment upon receipt)
- Using cards Sberbank, VTB, Post Bank, Tinkoff
- Yandex money
- QIWI
- ROBOKASSA
Shipping throughout Russia. Delivery time – from 2 to 5 days. More expensive than regular delivery by Russian Post, approximately 50%. Parcel weight up to 2.5 kg
Express Parcel EMS
Available payment methods:
- Cash on delivery (payment upon receipt)
- Using cards Sberbank, VTB, Post Bank, Tinkoff
- Yandex money
- QIWI
- ROBOKASSA
Shipping throughout Russia. Delivery time – from 3 to 7 days. More expensive than regular delivery by Russian Post, approximately 100%.
Transport companies
Available payment methods:
- Using cards Sberbank, VTB, Post Bank, Tinkoff
- Yandex money
- QIWI
- ROBOKASSA
Delivery is possible to any locality where there is a representative office of the transport company. Delivery time – from 2 to 10 days. Sending large parcels is approximately 50% more profitable than by Russian Post.
Courier delivery in Togliatti
Available payment methods:
- Cash upon receipt
- Using cards Sberbank, VTB, Post Bank, Tinkoff
- Yandex money
- QIWI
- ROBOKASSA
Delivery time from 1 to 12 hours.
Installation on the first generation Priora
To install the car radio in its original location, you need:
- Disconnect the battery from the vehicle's on-board network.
- Remove the 1DIN decorative frame with a box for small items from the center console of the instrument panel. The assembly is held in place by plastic latches located in pairs at the top and bottom of the drawer. Removal is carried out by pulling the part towards you; it is possible to bend the edges with a plastic mounting spatula.
- The rear has mounting points for the factory patch harness equipped with ISO connectors. It is necessary to disconnect the plugs from the box, which is then set aside.
- Connect the pads to the radio and check the operation of the device. Priora cars are supplied from the factory with a constant supply of positive power, independent of the position of the key in the ignition switch. It is necessary to change the wire connection, following the operating instructions for the head unit. The positive signal sent when the ignition is turned on is taken from the rear window heating button.
- Lay the wire leading to the external antenna. The cable runs under the plastic trim of the A-pillars and the roof panel. To reduce the likelihood of noise, the wire is wrapped in fabric insulating tape or foam rubber.
- Reinstall the removed trim elements.
- Connect the antenna power from the ISO connector and check the functionality of the acoustic device in radio receiver mode.
- Place the standard mounting shaft into the hole in the center console. The part is attached using tabs that are pressed out with a screwdriver. During installation, it is necessary to ensure maximum fit density, which will reduce vibrations of the radio when moving.
- Connect the power, speaker and antenna plugs to the connectors on the back of the head unit. Place the radio in the guide shaft until the locking latches engage. Check the tightness of the installation, and then place the decorative frame in place.
Connection diagram
The factory connection diagram does not provide for the supply of positive power through the contact plates of the ignition switch (red cable). To ensure correct operation of the device, it is necessary to remove an additional cable from the circuit, which is energized only when the ignition is turned on. The line must be protected by a fuse rated at least 15 A (for example, a cigarette lighter circuit).
An additional signal, ensuring the safety of the settings when the car is stationary, is supplied using a wire with a yellow insulator. The cable is routed to a circuit connected to the positive terminal of the battery. There is also a ground connection in the power circuit. The power and speaker cables are routed into the instrument panel; to connect the head unit, you will need an ISO standard adapter.
Installation in Lada Priora 2
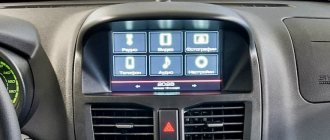
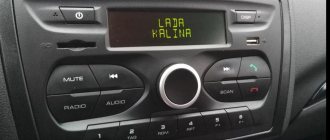
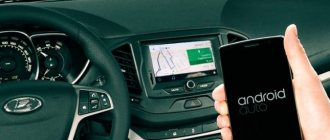
Priora 2 cars are equipped with a standard 1 DIN size radio with a trapezoidal front part. The display is located on the top of the instrument panel, which makes it easier to read information.
Basic configurations were not equipped with a head unit; plastic plugs were installed on the central part of the instrument panel.
The instrument panel has a standard harness for connecting the radio, equipped with an ISO connector consisting of two plugs.
Self-installation of the radio on Priora 2 includes several stages:
- Unscrew a couple of screws located under the removable rubber mat in the niche for small items.
- Remove the decorative leather cover of the gear selector knob, under which there are 3 additional screws for a Phillips screwdriver.
- Remove the lower part of the center console; the gear shift knob remains in its original place.
- Unscrew a pair of screws located under the climate control unit.
- Use a spatula to pry and remove the 2 covers located above the button block and under the standard place for the radio.
- Unscrew the remaining 4 screws and pull the front panel towards you.
- After this, it is necessary to modify the panel or mount the equipment in a standard window and make adjustments.
The radio installed on the Priora must be connected through the ignition switch, which allows you to save settings and guarantees that the equipment is turned off after removing the key. It is necessary to modify the standard plugs by supplying additional power from the buttons in the instrument panel.
How to install the device itself
The radio is installed in the Priora in a standard socket designed for mounting a 1 Din standard holder. The metal shaft is inserted into a rectangular hole, and then secured using metal antennae, which are bent with a screwdriver. Then the owner connects the cables and antenna, and then installs the head unit housing into the shaft until the side spring clamps are activated. Installation work is completed with the installation of a decorative plastic frame and front panel, then the equipment is tested.
Are you a car driver?! Then you can take this simple test and find out. Go to test »
To integrate a 2-Din radio into the Lada Priora, you will need to modify the car's design:
- Remove the battery from the car, and then carefully separate the plastic cover with air channels located in the center of the dashboard. The part is held in place by plastic clips; a mounting spatula is used for removal. Together with the cover, the connecting cables are removed and attached to the back of the cover.
- Disconnect the plugs from the retaining pads (located on the back of the small items drawer), and then connect the media player adapter.
- Connect the adapter to the radio and output an additional power cord (for the red wire).
- Restore power to the vehicle's on-board network and check the correct operation of additional equipment at different positions of the key in the lock.
- Cut a window in the plastic cover that matches the dimensions of the multimedia center body. A hacksaw is used for cutting; the edges are finished using a file.
- Insert a metal clip, which is fixed by bending the triangular antennae.
- Install the trim in its original place, passing the wiring harness through the mounting shaft into the car interior. If the machine does not have an antenna, then it is necessary to mount the device and lay a separate coaxial cable. The cord is routed through the upper part of the cabin under the pillar trims and the headliner. It is not recommended to lay the cable along the floor of the cabin, since passengers will touch the wiring with their feet.
- If the head unit design uses a rear USB connector, the plug can be installed in the glove box or on the surface of the center console.
- Reinstall all the removed parts, and then check the operation of the radio.
If you plan to replace the standard radio in a Priora 2 car (manufactured after 2003), then remove the gearshift lever cover, which will allow you to unscrew the screws securing the trim (additional screws are located in the niche of the cup holder). The central cover is secured with screws located under the radio socket plug, the switch block and the cup holder niche. After removing the standard plastic pocket, it is necessary to secure the player's mounting shaft to the panel frame; the antenna cable is pulled out from the niche under the glove compartment.
