When I picked up the car, they dissuaded me from activating the immobilizer, but after reading the instructions, I realized that this needed to be done.
If anyone has encountered such a problem, here is the activation procedure. I recommend printing it out and taking it with you in the car. I only succeeded the 5th time.
Immobilizer APS-6. Training procedure.
1. Close all car doors. Turn on the ignition with the training key and wait in the on state for at least 6 seconds.
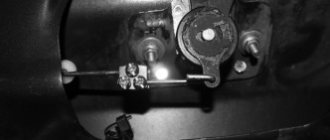
2. Turn off the ignition. The lamp should begin to flash rapidly (5 times per second) while the learning procedure is being carried out correctly. If the lamp stops flashing quickly, it indicates an incorrect operation, an out-of-time interval, or a malfunction. Remove the training key from the ignition switch.
3. While the lamp is flashing (about 6 seconds), you must insert the working key into the lock and turn on the ignition. If everything is done correctly, the buzzer will emit three beeps when the ignition is turned on.
4. Wait with the ignition on (about 6 seconds) until the buzzer emits two more sound signals. If after 6 seconds the buzzer does not produce sound signals and the rapid flashing of the light stops, then you need to turn off the ignition and start the procedure again. If the situation repeats, this means a malfunction or that this working key has already been trained with another immobilizer.
5. Turn off the ignition.
6. If it is necessary to learn the second working key, then you should perform steps C…E again, using the second trained working key to turn on the ignition. If not, continue from point G.
7. While the lamp is flashing (about 6 seconds), you must remove the key from the ignition switch, reinsert the training key into the lock and turn on the ignition. If everything is done correctly, the buzzer will emit three beeps when the ignition is turned on.
8. Wait with the ignition on (about 6 seconds) until the buzzer gives two more sound signals.
9. Turn off the ignition. Do not remove the training key from the ignition switch. Approximately 6 seconds after the ignition is turned off, the buzzer should emit a single beep and the lamp should begin to flash twice as fast. If the buzzer does not emit a sound signal and the rapid blinking of the light stops, then you need to turn off the ignition and start the procedure again. If the situation repeats, this means a malfunction or that this training key does not fit this controller.
10. No later than 6 seconds after the sound signal (while the lamp is flashing quickly), you must turn on the ignition with the same training key. After waiting 2-3 seconds, turn off the ignition. No later than 5 seconds after turning off the ignition, the buzzer should emit three beeps and the light should stop flashing quickly. Do not turn on the ignition for at least another 10 seconds. When working with some controllers, the light stops blinking and the buzzer emits 3 sound signals when the ignition is turned on. In this case, you should still turn off the ignition and wait at least 10 seconds.
At the end of the learning procedure, it may be necessary to resynchronize the immobilizer and controller codes. This means that after the learning procedure is completed, the controller will not allow the engine to start when the ignition is turned on for the first time. To carry out resynchronization, you must turn on the ignition with any trained key (preferably a working one). Wait 6 seconds. If the immobilizer light begins to show an error condition (flashes once per second), then turn off the ignition and wait at least 10 seconds. After this, turn on the ignition again. The light should not flash and the engine should start.
Frequent problems with alarms on Lada Kalina
The Lada Kalina manufacturer provides a standard alarm system that operates on a simplified principle and provides the following functions:
- door locking/unlocking;
- locking all doors when closing the driver's side;
- opening/closing the car by pressing a special button in the cabin;
- turning on the alarm when there is a break-in attempt.
The standard factory system is very reliable, and its functions are often sufficient to protect the machine. But a study of reviews shows that owners of domestic cars often encounter failures in the built-in protection. A common situation is when Kalina does not open with the standard alarm key fob. An equally common problem is when the immobilizer blocks the engine and prevents it from starting due to some built-in faults.
Protection Features
The standard Kalina alarm system is not endowed with any supernatural abilities. It is easy to operate and understandable to most ordinary car owners. She, on command from the key fob, opens and closes the doors in order, puts it under protection and even blocks the trunk. The standard alarm monitors the status of the car's hood lock and carries out the authorized start of its engine.
- Distinctive features of a standard car alarm system include:
- simplicity of its management and accessibility when solving problem situations;
- installation of the standard alarm system of the reliable Lada Kalina, of any modification, was carried out at the manufacturer's car plant. The reliability of such an installation is beyond doubt. Any other installation of this car alarm in makeshift conditions, by “jack of all trades” specialists, threatens with low quality and possible problems when operating the Lada;
- The industrial installation of a standard alarm, in addition to reliability, also has negative aspects. The clone installation of a standard alarm system on most Kalina cars does not present any difficulties for an attacker when searching for it;
- the release of unregistered standard alarms makes it easy for car thieves to take advantage of the Lada Kalina for personal gain;
- installation of any other, more reliable and functional car alarm is possible only in service centers. This is especially true for Lada Kalina cars during the warranty period.
Important: installation of shock sensors is possible only when using models recommended by the car manufacturer.
Recommendations for both cases
First of all, we note that when connecting the relay to the power wiring, you cannot make the control pulse too long. Setting the value for more than a second can burn out the actuators. Here we were talking about programming, and now let's talk about the electrical part. As you know, before installation you need to open the hood and disconnect the negative terminal.
This advice should not be ignored in any case.
As for installation, it will be better if the power wire taps are carried out by an auto electrician. With signal wiring, everything is simpler, but the rules will be the same in each case:
- Do not let the cord touch the insulation to metal parts. If contact occurs, additional protection is used. For example, a heat-resistant tube placed over electrical tape is suitable;
- It is better to connect any power cables using twisting. Each twisting point is carefully isolated.
- The cross-section of wires carrying significant current must be sufficient so that the conductor does not heat up. This is how you can protect yourself from unforeseen consequences.
Two configurations and two schemes
In the “Norma” version, if it has a central locking system, you can use two control wires. Ground is supplied to one of them if the locks need to be opened, and to the second one if the locks need to be closed. The period of connection to ground should take 0.7 seconds, and most alarms have such a setting.
Control cables, threshold harness
If we talk about the “Lux” configuration, the control wires will not help us here. The relay contacts built into the alarm will have to be connected to the breaks in the power cords. Despite all the complexity, there were no complaints about this scheme, and we will consider it right now.
The “luxury” option is the most complex
First you need to make sure that the central locking system in the car is really connected according to the “Lux” scheme. The control button located on the door must be trigger (non-latching). If you have exactly this type of car, you will have to tinker. It will be necessary to extend 4 power cables to the signaling unit. These cords, in turn, must go from the break point of the two standard wires (yellow-white and yellow-black). Find them in the bundle under the threshold.
Wiring harness, driver's threshold
Any alarm system is supplied with two relays, one of which is activated for closing, the second for unlocking the locks. Power cables drawn from the break points are connected to the relay contacts.
Connection diagram, “Lux” option
The part of the yellow-white wire that goes to the actuators is connected to the common contact. Another relay contact (normally closed) is connected to the second half of the cable. They connect to the yellow-black wire in a similar way, but here an opening relay is used, not a locking one. Each of the normally open contacts receives power.
Any power wiring is supplied with power through a fuse.
In our case, the rating “15 Amperes” is used. Immediately before installation, you need to call the pair of wires that are directed to the actuators. The probe should show a value of 1.2 - 1.3 Ohms. And of course, when performing installation work, you first need to remove the negative terminal from the battery. Be careful!
Connection option for “Norma”
Let's say there is a switch in the driver's door, but it has two fixed positions. Then it will be easy to connect the alarm. You will need to make not 4, but 2 taps, and not from the power cords, but from two signal cords. There is no need to make breaks, just make a T-shaped connection. The diagram here looks standard:
Connection diagram, “Normal” option
You can complete the installation without breaking the wires at all.
Harness under the driver's threshold
We wish you success.
In the circuit discussed above, there is no fuse. We connected to the signal wiring, not the power wiring, and theoretically we can not be afraid of any short circuits. Still, it is better to insulate the free terminals on the signaling. The same applies to all connection points.
What are the reasons for the breakdown of the standard Lada Kalina alarm system?
In a variant state, Lada brand vehicles (mainly Lux category) have a standard alarm system that allows you to close the door using buttons and trigger an alarm when the security area is violated. This system cannot be considered effective, because when using a vehicle, the standard signaling system can bring a lot of problems. Do you know what could be one of the causes of these breakdowns?
The problems with standard alarms turn out to be the most typical, mainly the occurrence of false alarms or the key fob cannot open and the doors do not close. Let's consider the main causes of these malfunctions:
- Poor contact in the keys. Open the ignition key and clean the contact and button. Then the key is replaced. There is no need to over-tighten the fastening screw on the key.
- Failure of the electronic printed circuit board, the appearance of small cracks. Changing the key. The screw in the back area of the key should not be fully tightened.
- Poor quality contact of the radio module, which has a printed circuit board track. We strengthen the soldering or replace the key.
- Key codes are being resynchronized. Carry out the manipulation of learning the remote control again.
- Liquid gets on the sensor, which is located under the hood area. We dry it and replace the sensor.
- Poor contact of the doorway limit switch or luggage compartment buttons.
- Failures in the central locking of the vehicle.
Working with the glass unit control unit
Window control unit Kalina Sport
After reading the manual, you should start by connecting the hood and trunk wire ends. The color of these wires is the same - black and white. How can you tell them apart? The wire transmitting the signal to the trunk is always located on the right, the hood wire is located to the left. We connect to the luggage wire. To avoid making mistakes during installation, remember that the trunk wire is the outermost. Then you need to connect the limit switches from the door wires in such a way that the doors then close. To do this you will need 3 1 Ohm diode bulbs.
There is 1 limit switch coming from the doors, while in the BUS there are 3 such door limit switches: 2 for the front doors and 1 for both rear doors. Therefore, the alarm wire must be separated into 3 parts and soldered to each one with one short one. Then solder 1 diode there, and then connect it to the brown-red wire of the front door on the right, to the white-blue wire of the front left, and the white-red wire to the rear. The wiring diagram should be included in the manual.
At the next stage, we connect the LED to the left post, having previously made a hole. For reliability, we secure the part with something on the other side. The antenna must be attached approximately in the same place as the rear view mirror, at a distance of about 5 mm. The shock sensor can be installed on the metal under the mat. If we talk about installing it on plastic, this is not a very good idea, since it can lead to false alarms.
As for autorun, everything is not so complicated. The 1st wire is positive, the 2nd and 3rd are ignition, and the 4th is starter. When the IMMO is activated, you also need to purchase a keyless unit to bypass the standard immobilizer, connect it to the break point of the white wire, which is located near the wall of the stove heating or near the center console. Other wires that you will later need are located there.
How to setup
Setting up the standard Lada Kalina alarm system involves registering the keys in the car's ECU. In other words, familiarize the immobilizer, ECU and remote control key fob with each other. For this purpose, the set of keys contains a special training key with a CHIP embedded in it. It is best if all manipulations related to the activation of the standard alarm system are carried out in a car dealership.
But there are still suspicions that the dishonest seller did not register another key. If you carry out the registration and configuration process yourself, the configuration order will look like this:
- it is necessary to insert the training key, with the insert, into the ignition switch. The starter should not be turned on. If the indicator in the instrument panel turns on but does not blink, the car alarm is not trained. If it doesn’t turn on, it’s already trained. Flashes briefly (20 seconds) – there is a malfunction in the standard alarm system;
- remove the key from the lock - the indicator should flash;
- you should insert a regular key - the buzzer sounds three times and after a while (6 seconds) twice more;
- pull out the regular key and immediately (within 6 seconds) insert the training key. They should turn on the ignition of the Lada Kalina - the buzzer sounds three times and after a while (6 seconds) twice more;
- Turn off the ignition with the key inserted, but do not remove the key itself. The buzzer should sound once. The indicator on the instrument panel should begin to flash quickly. You will have to wait a little (15 seconds);
- Now you can turn on the ignition itself. The buzzer should sound once, then the turn signals should turn on three times and at the same time the buzzer and horn will sound;
- at this time, the standard Lada Kalina alarm system remembers all recorded codes. You can turn off the ignition after 3 affirmative beeps from the buzzer. They must sound after an interval of 5 seconds;
- The standard car alarm system of the Kalina car has been configured and the training key can be removed from the ignition switch.
DIY security system installation
The installation of an alarm system in Kalina is carried out after removing the dashboard and disassembling the steering column to make it easier to install the wires.
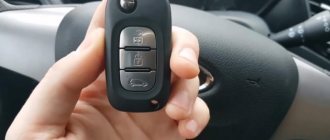
Keychain for standard Kalina alarm system
From the wires located under the dashboard you will need:
- 2 wires transmitting signals to the turn signals;
- wire directing the signal to the hood;
- similar wire for the trunk;
- wires for doors;
- two-phase wires (+/-);
- parking brake wire.
You will also need instructions describing all the steps, which must be studied very carefully. The operations are performed in the following order.
- You need to take the turn signal wires going to the dashboard. Connect 2 wires with blue and black-blue.
- Connect the parking brake wire, which is necessary for automatic engine starting, to the same harness. You should find a blue-brown wire and connect it to the handbrake.
- Next you need to check the operation of the motor. This can be done using a generator, that is, the appearance of voltage during ignition indicates a successful start. Then a connection is made with a brown-white wire, soldered and insulated.
- We move down from the dashboard to the BUS, which lies under the seat at the back, on the left, closer to the bottom of the driver's door. Here you will need only 2 wires responsible for opening and closing the doors. We connect the “minus” of the system to any body bolt.
- connect to the pink-black wire responsible for unlocking the doors.
- We take the white-pink wire responsible for closing the door. You need to be especially careful because in poor lighting it can be confused with black and red, since they are similar. The black and white hood wire is also located here.
Return to contents
What kind of alarm can be installed on Kalina
The 1st generation Lada Kalina was not equipped with a CAN bus, which means that any alarm system that uses analog signals for operation can be installed in it. It is best to give preference to systems with feedback and autostart.
Among the manufacturers, the following can be noted:
- Starline;
- Scher-Khan;
- Pharaoh;
- Sheriff;
- Pandora.
These alarms are characterized by more stable operation, increased reliability and have representative offices in many cities, which simplifies the installation process and technical support during the warranty period.
Collection of “people's councils”
If the central locking is not working properly, but you know that the key fobs are fully functional, you can try the following steps:
- The power supply circuit of the central locking controller is protected by fuse F22. This element can be replaced or simply disabled and then installed back;
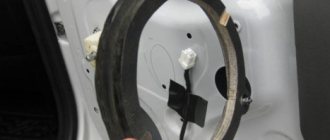
- Let's say no current flows to the actuator of one door. Then find the terminal block by opening the door 90 degrees. In order for the broken contact to be restored, sometimes it is enough to disconnect the mating connector and connect it again;
- Even if the key fob is working, check whether the self-tapping screw is screwed in all the way. It is recommended to loosen the fastening a little, and then everything works reliably.
To follow “tip number 1”, look for the fifth fuse from the top in the mounting block. The rating of this element is 15 Amperes.
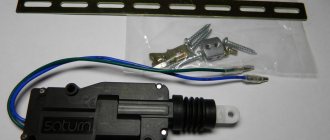
Greetings! I decided to add an entry about connecting the alarm system to the standard central lock of Kalina 2, Grants or Priora. Using the example of the good old Starline A91, without any modules and adapters)) While installing the A91 on my father’s viburnum, a difficulty arose with connecting to the central locking system. But for some reason there is very little information about this on the internet. So, to connect to the central locking system, you need to remove the driver’s door card. Here you need a bundle of wires from the activator. According to the diagram below, 2 and 7 are the power, the motor winding. A 1 and 4 signal from the position sensor. We will need a brown wire.
Now let's look at a typical connection diagram for Starline A91
There are blue and blue-black unlocking signals, and green green-black locking signals. Now, in order for the doors to close, you need to break the brown wire. To open, you need to connect it and apply minus. Therefore, the wires and connector X2 need to be connected as follows
We plant black and red on MASS. We program the simultaneous opening of doors. To do this, press the Open and Close buttons on the standard remote control and turn on the ignition until the signal (about 5 seconds) That's all. Now with this connection, all standard buttons will work. No extras There is no need to install the activator. It is also not correct to connect to wires 2 and 7. In this case, the central locking button on the SUEP will not work. The only problem here is that you will have to pull 2 wires into the door.
Now about the tire falling asleep when the doors open only after the second press of the open button on the key fob. This occurs after approximately 10 minutes of bus inactivity. In order for the doors to open after the first press, a double pulse must be given. To do this, in the programmable functions of Starline A91, select Function No. 1 option 3
On Lada Granta and Kalina cars in the Norma trim level, a central locking control unit is used (on the Luxe trim level, the central locking control unit is used instead). If it malfunctions, it is replaced with a new one. This article tells you where the central locking unit is located, what it is responsible for and how to change it yourself.
Pulse programming
When connecting a central lock, it is not enough to perform all the steps in the correct sequence; you also need to select the required pulse duration for the locks to operate. If it is too large, the actuators will overheat; if it is insufficient, it will not be enough to open and close. In the luxury configuration, all electronics usually “fall asleep” after 15 minutes of inactivity. To awaken it, an additional impulse is needed.
Central locking is a simple device, but it can secure your car from criminals much more effectively than a police cap on the passenger seat. The centralized door lock system is the most convenient way to quickly open and close them. If this security system is supplemented with a good car alarm, this will prevent you from ending up in a situation where your car is stolen or damaged.
Having tried to open the car using the key fob, one fine day you may find that the lock continues to operate and the car does not respond to key presses. In such a situation, it will be possible to unlock one door or even the central locking system by simply unlocking the driver's door lock. Only the security mode is not deactivated. The central locking, in turn, may not respond to commands for two reasons - the battery in the key fob is dead or synchronization is lost. How to solve these problems is discussed further.