After prolonged use, the inserts on the inside of the doors wear out. The driver's door trim suffers the most. The trim is constantly in contact with the owner of the car. To understand how to remove the trim on the door on Kalina, you need to determine in what cases this procedure is carried out and whether it is possible to do it yourself.
Why is the door trim removed?
The technology of disassembling and replacing a decorated panel was first used by VAZ specialists in 2008. The main problem with self-dismantling is the mobility of the door, which is why in this process you will need an assistant who will hold the structure. Removing the Kalina rear door trim is necessary when:
- It is necessary to get to the elements that are inside the door in order to dismantle the window lifters.
- You need to install music speakers that are mounted in door structures.
- The electric window lifts have broken down or the mechanism requires lubrication.
- Glass tinting or replacement is carried out.
- The cladding has lost its appearance due to long-term use of the vehicle. The panels are worn or have scratches.
- The driver wants to change and refresh the interior.
- Body work is carried out: rotten fragments are cut off and then welded.
- Anti-corrosion treatment is carried out.
- Car painting is provided.
- Vibration and sound insulation of the body part is carried out.
Any of these procedures requires removal of the trim. Without disassembling the inner panel, it will not be possible to replace the lining or gain access to the internal mechanisms of the door card.
Do-it-yourself car straightening
If you really want to, you can straighten body parts yourself, but you need to rely on your strength. If there is no appropriate experience, the owner can ruin the appearance of his car, and in the future the car owner will only complicate the work of the craftsmen.
As a rule, at home the driver does not have special equipment, so a jack and a rubber hammer are mainly used for straightening. The easiest way is to straighten small dents yourself, and if the body element is removable (front fender, door, hood), it is still better to remove it.
The easiest way to straighten the front fender yourself is to level the deformable surface; the part must first be removed from the car. After dismantling, the wing should be placed on a flat surface, covered with thick fabric (felt) - a soft base is necessary here to soften impacts. When striking, you should regularly inspect the wing to check how level the metal can be. If, as a result of straightening, the paint flies off, you need to prepare this area for painting - putty, sand, degrease and then prime.
To straighten out dents on the door, the body element should also be dismantled. After dismantling, the door is disassembled and the door trim is removed from it. If the dent is located approximately in the middle of the door trim, the defect can be easily eliminated - the iron can be tapped from the inside. “Garage diseases” are more difficult to cure, and straightening here should still be entrusted to professionals - it is unlikely that you will be able to do the job well on your own, and a thick layer of putty is not a solution, the putty may fall off.
Preparation for dismantling
Our instructions will help you understand how to remove the rear door trim on Kalina and determine the further algorithm of actions. Before this, dismantling is carried out. Required::
- slotted screwdriver;
- awl;
- flat screwdriver;
- sharp knife.
The door of the Lada Kalina Cross and other sedans is held on by plastic fasteners, so dismantling is prohibited at sub-zero temperatures. If there is a need to remove the casing in winter, then this should be done in a heated room to eliminate the risk of breaking the connecting clips. For the front door you will need 8 pieces, and for the rear door 10. Preparing for dismantling step by step:
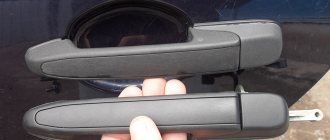
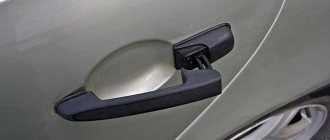
- The handles are removed, the latches, which are designed to lock the door lock, are unscrewed.
- The speakers are unscrewed using a Phillips screwdriver. To do this, you need to unscrew the four bolts and then disconnect the wires.
- The blocker and acoustics are turned off. Sometimes the elements of the music system are attached to a metal frame.
After 5 years of operation, car fastenings become brittle, so it is better to purchase additional parts in advance.
Step-by-step instruction
1. First, unscrew the door lock lock cap from inside the passenger compartment. We twist it to the left as usual.
2. Using a flat-head screwdriver, pry out two plastic plugs. Pick carefully.
3. Using a Phillips screwdriver, unscrew the two screws under the plugs that were removed in the previous step of work.
4. After unscrewing the screws, pull (as when opening a door) the door opening handle and unscrew the screw under it.
5. After unscrewing, remove the door opening handle and the main handle.
6. Unscrew the two screws securing the trim pocket.
7. If you have speakers installed in the doors and they are screwed to the metal frame of the door, you need to unscrew them.
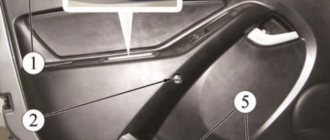
8. Now the casing is held in place only by latches. We start opening the latches from the lower right corner and go up.
You can see everything in the photo below.
9. Move the trim a little to the side and disconnect the wire that goes to the window lift button.
10. All cladding is free, you can carry out the planned work.
The difference on the driver's door is that there is a different handle for closing the door. The only difference in removing the casing is in two screws, which are shown below.
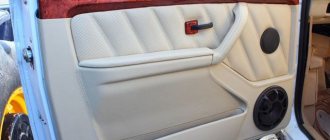
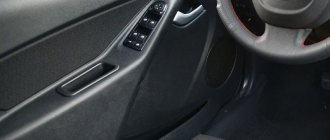
The door trim in any car, including Kalina-2, is a monolithic plastic part called the “card”. To remove the card from the door, you need to lower the side window as far as possible. The design of the upholstery in “Kalina-2 Lux”, as well as “Standard” and “Norma” is different: where there are speakers, there are acoustic pads on the cards. But the upholstery fastening nevertheless does not differ in its design in all trim levels. Let's take a closer look at how to properly dismantle the door card and then install it. Happy reading.
Removal from passenger door
Once the music system is removed, you can begin the main part of the repair. You need to remove the door trim on Kalina in the passenger seat in a certain sequence:
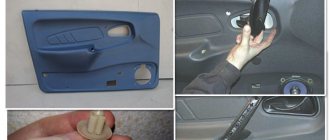
- The decorative panel is removed. To do this, unscrew 8 clips and 2 screws. The inner handle is held on by two self-tapping screws.
- An awl is used to pry up the edge of the plug for removal. There are two of them, so you need to remove both.
- The opening mechanism is pulled back to remove the securing screw. After this, two screws are unscrewed from the inside of the handle. They are located opposite the cavity of the plastic pocket.
- One edge of the panel is pryed off; you can use a screwdriver to do this. When it becomes possible to grab the edge, all that remains is to pull the element towards you.
- The wires from the electric window lifter are disconnected, the block is removed.
Additional recommendations from car enthusiasts
To save money, some car enthusiasts prefer to use metal screws as panel fastening elements. Using a special riveter, a threaded rivet made of hard metal is fixed to the door. A screw is inserted from the side of the casing and, using a regular screwdriver or hexagon, the screw is screwed into the rivet. To make the fastening look more neat, you can use regular plugs.
Fastening the door trim with clips or screws is reliable and repairable. When purchasing new fasteners, you should study the features of fastening the panel of the car model being repaired.
Removing the trim from the driver's door
The algorithm for disassembling the driver's door structure is similar, but there are some subtleties of this process:
- First, the plugs are removed from all fasteners. They are pryed off with a screwdriver.
- The panel plastic will be easier to remove if you first unscrew the fragment for adjusting the mirror structures. Unlike the passenger door, the driver's door has one screw. It is located under the plug.
- The opening mechanism is removed last.
- If your car is equipped with electric mirrors with remote control, then to remove the rear view adjustment panel you need to unscrew the screw located at the bottom.
Overlays are used as decorated elements.
Main functions
Holders, stoppers and restrictive elements installed in the interior guarantee reliable and comfortable use of door leaves. Any door can be opened slightly or left completely open. This prevents possible injuries and ensures complete safety for children.
According to the necessary functions, limiting mechanisms are divided into groups for fixing the position of the doors:
- Locking. The process is ensured by such types as limiters or latches. If you use them, you will no longer be able to open the door from the outside.
- Partial, that is, incomplete opening. Stopping devices stop the movement of the canvas, leaving the opening half-open.
- Full closure. Typically, the role of locking doors in this position is performed by floor mechanisms and door closers.
- Both limiting and holding the door in a certain position (universal devices with magnetic properties are needed).
Removing the rear door trim
The rear door structures are secured with 10 plastic holders and 2 screws. The first fasteners hold the door panel, and the second fasteners hold the handles. Disassembly technique:
- The handle of the mechanical window lifter is being removed. It is important to note that this element is held in place by a plastic half ring. It is carefully pryed up with an awl.
- The plugs on the door handle are removed, then the fasteners are unscrewed.
- The lower far corner of the panel is pulled back, and then the first piston is removed.
- Hold the door card with your hand and remove the remaining clips.
- The covering is changing.
There are differences between Kalina 1st and 2nd generation. In the first case, the opening handle lever is unscrewed, but in the second option this is not required, since it is screwed directly to the door.
How to disassemble the trunk lid on a hatchback and station wagon
To unscrew the fasteners on a station wagon or hatchback, remove the trim and disassemble the luggage compartment lid, you will need a standard set of tools. The rear hatch is held in place by 4 clips, 2 retainers and a metal tab with two brackets. Step-by-step algorithm of actions:
- The connectors for the power window buttons are disconnected.
- To remove the handle, two latches are unscrewed. They must first be unlocked.
- The latches are removed. To do this, the panel is pulled along the entire contour.
- After removing the staples, the trim around the locking mechanism is pulled out.
- The panel is detached from the glass side. This action is performed along the entire perimeter, moving towards the castle.
Theory and preparatory actions
On the front doors in the “Lux” and “Norma” trim levels, the upholstery is equipped with an acoustic trim:
On the front cards in the Luxury there is an overlay with slots
There are no such additions in the “Standard” package:
To protect the door to the maximum, the card was made blind
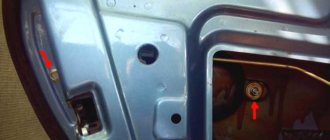
Everything said above also applies to the rear door trim. It has already been said that before dismantling, all windows must be lowered. It will also be necessary to remove the negative terminal installed on the battery:
Negative battery terminal
To perform this action you will need a 10mm wrench.
Be aware that you cannot work with electrical equipment while there is a battery in the on-board network. It’s easier to disconnect the connector with a minus sign, which is what is recommended in practice.