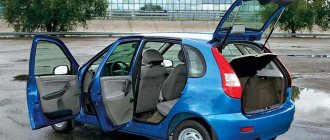
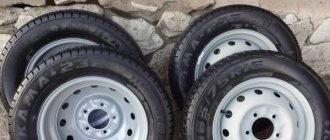
The door trim in any car, including Kalina-2, is a monolithic plastic part called the “card”. To remove the card from the door, you need to lower the side window as far as possible. The design of the upholstery in “Kalina-2 Lux”, as well as “Standard” and “Norma” is different: where there are speakers, there are acoustic pads on the cards. But the upholstery fastening nevertheless does not differ in its design in all trim levels. Let's take a closer look at how to properly dismantle the door card and then install it. Happy reading.
Changing the front door trim
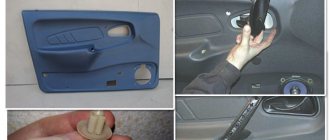
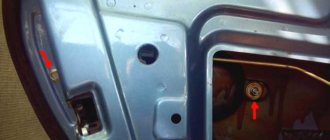
To dismantle the plastic door card, you need to prepare a Phillips and flathead screwdriver, as well as a set of clips that hold the part in place. For the driver's door, the actions will be as follows:
- Unscrew the lock lock handle “1”;
- After removing the plug, completely unscrew screw “2”;
- Unscrew all screws “4” and “5”;
- Using a flathead screwdriver like a wedge, you can dismantle it starting from the bottom corner at the front;
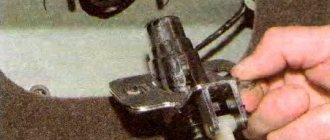
- At the last stage, disconnect the connector of the wires going to the key module.
All the elements named above are indicated in the following figure:
Front left door of Kalina-2
For the right door you need to follow a different sequence:
- Unscrew the lock handle “4”;
- Completely remove the Phillips screws “2” by unscrewing them;
- After removing the door handle trim, unscrew screws “3”. Then handle “1” can be removed completely;
- Dismantle the upholstery in the same way as point “4”, as indicated in the list above.
All that remains is to wish you success. Installation is carried out in reverse order. All designations related to the list are indicated in the photo below.
Front right door of Kalina-2
IF WE WERE CONDUCTING THE RECALL CAMPAIGN
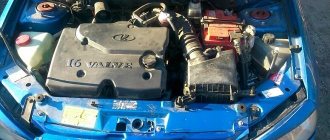
Back in the February issue (pp. 112–114) , when we were able to see “Grant” for the first time, as they say, under a magnifying glass, we talked about the most significant shortcomings. For example, at the entrance to the engine compartment there is a plastic case dangling - protecting the fuel line pipes and adsorber. The lower radiator hose, which rubs against adjacent parts, obviously lacks fastenings. The middle clamps on the engine ventilation pipes do not provide tight connections: after a year of operation, the engine will become covered with an oil coating. And this is only part of the shortcomings. We will certainly tell you about others in the not-too-distant future - expect constant reports on the editorial “Grant”.
Returning to the recall campaign: it is a pity that forces and means were used ineffectively. Perhaps eliminating the shortcomings we have identified would cost the manufacturer more, but in the future it will pay off faster. After all, AVTOVAZ does not currently have enough serious investments in reliability to build a high-quality car.
Preparation for dismantling
To unscrew the fasteners and remove the door trim, you need to prepare a simple set of tools:
- screwdriver with cross slots;
- long flat screwdriver;
- a pointed tool, such as an awl.
Door disassembly tool
Since the door card of the Lada Kalina car is held on by plastic fasteners (otherwise known as clips, pistons), there is a warning regarding the working conditions. It is strictly not recommended to dismantle door trim in the cold, when the plastic becomes brittle and easily destroyed. Hence, there is a risk of breaking all the clips during the process of removing the decorative panel. Therefore, in winter, perform this operation in a heated garage or box.
Top 5 modifications to Lada Kalina
Hi all. This means that it’s been two years since I’ve owned this car, and I seem to be satisfied with it, so I’ve come up with 5 life hacks that will help you when operating this car.
Well, I think that thanks to these life hacks you will also have fun. Therefore, the car, in this case, is mine for the sixth year, 2006, so there were some jambs, so it’s better to remove them right away.
Something is not a jamb, something, well, was made more for improvement. Well, I still want to share with you, maybe this video will be useful to someone. So let's go.
Lifehack No. 1
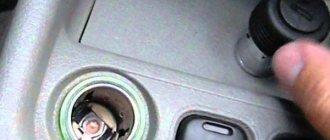
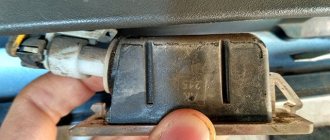
This is Kalina's ECU, in other words, almost everyone who has owned Kalina has probably encountered it; those who haven't, that means they already know about the flaw in the location of the ECU. At first, Kalina’s ECU is located right here under the panel.
And above the ECU there is a stove, so Kalina’s stove tends to leak, but we’ll talk about this later, why and how. When the radiator leaks, the heater usually floods, which means the brains of the ECU.
In other words, the ECU is worth it, I have a Boshev one, it costs about 7 - 8000. It seems like there is at least some, in other words, approximately, in other words, there is at least some other ECU in this area. Here, no matter what your situation is, in other words.
Here's how I solved this problem? In other words, when I immediately bought a car, I got it from there, screwed it on there with these covers and installed it here.
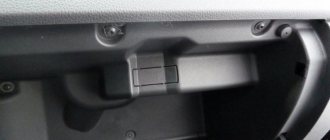
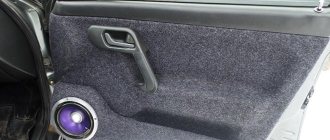
This is how I have it placed here, here I have lighting for the legs, in other words, here, I placed it under the glove compartment, there it doesn’t bother anyone, no one kicks it, as I initially thought, that they will touch it with their feet, no one doesn't hurt, doesn't interfere with anything.
In other words, I secured it with two bolts, 1st, 2nd and that’s it. In other words, that's enough. It stays here perfectly, warm and dry. In other words, this is what I think needs to be created first when purchasing Kalina.
Therefore, if your brains are flooded, it’s a waste of money that’s not needed, so first of all, those who didn’t know yet, definitely do this. It takes almost 20 minutes, and your wallet will be very helpful.
How to disassemble the trunk lid on a hatchback and station wagon
The interior lining of the Kalina rear hatch in hatchback and station wagon bodies is held on by 4 regular clips, 2 special black plastic fasteners (installed after installing the panel) and 2 screws securing the handle. In addition, the panel is hooked onto a metal protrusion by two brackets located in the lock area.
Handle screws
The procedure for removing the upholstery is as follows:
- Unscrew the 2 screws with a Phillips screwdriver and disconnect the handle.
- Place a flathead screwdriver under the glass side of the panel and unlock the lock. Release the remaining latches with your hands, pulling the panel along the contour.
- Remove the trim, lastly releasing the staples near the trunk lock.
The panel is detached from the glass side
Note. You need to start snapping the pistons away from the glass, because you won’t be able to remove the lining from the lock side without damaging the clips. This is prevented by 2 brackets hooked to the metal frame of the hatch.
The mounting brackets for the trunk hatch are located near the lock.
As practice shows, it takes no more than 10 minutes to remove the trim of one door of a Lada Kalina car. The operation is really simple, but if you lack experience, it is better not to rush, so as not to break all the fasteners and scratch the plastic facing panels. The door cards are installed in the reverse order: first, the clips are snapped on, then the handles are installed, and finally the plastic elements are attached. Don't forget to connect the connectors to the power window buttons.
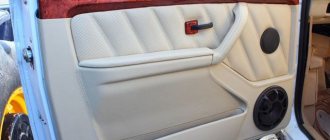
I continued covering the rear door trims in leather and redoing the door cards. Who is interested in the front doors - www.drive2.ru/l/8822380/ As before, the cards were remade from the remaining seat covers. Of course, ideally it would be to use eco-leather, but we can’t find it here, and the price is too high, we have to use existing materials