The four-door VAZ 2110 sedan is the flagship model in the Lada 110 family. The last car rolled off the assembly line in 2007 after a twelve-year production cycle. The door trim of the VAZ 2110 is made of durable, hard plastic, the material is resistant to wear and mechanical damage.
The disadvantage of the door trim is the same type of texture and three types of colors; most drivers prefer to tune the interior and change the trim to a more modern material.
Replacement options
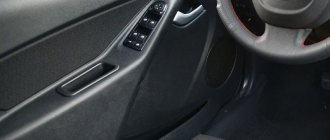
Today you can find VAZ 2110 door cards ready for installation, especially in the Lux or Lux 2 versions; they can be either purely plastic or with fabric inserts.
Door trim VAZ 2110 Lux
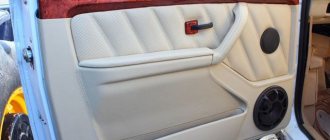
There are also euro panels, which in online stores are most often called “Door trim for VAZ 2110 Lux 2”. The finished cladding probably has only one drawback - its high price.
But there is another, more budget-friendly option - to do the door trim yourself. With the right approach, you will cope with this task, and we will tell you how to do it correctly.
Fastening
The cost of one door trim piston is from 3 rubles. AvtoVAZ produces plastic fasteners in its workshops. Product code 2108-6302015, 21080630201500, width, clip length 1.5 cm.
The mount has a simple shape and holds the door panel trim using a plastic skirt. The manufacturer claims high quality parts, but in practice, when disassembling the door card, two of the six required clips break. When installing Euro sheathing, on average one clip breaks, this is worth taking into account.
Sources
- infokuzov.ru/remont/vaz-2110-obshivka-dverej
- vazweb.ru/desyatka/salon/obshivka-dverey.html
- luxvaz.ru/vaz-2110/228-obshivka-dverey.html
Tools and materials
Before you start upholstering doors with your own hands, you need to stock up on what you can’t do without:
- Fabric or vinyl (another name is faux leather) is best purchased in stores that sell fabrics. Even before you go there, take measurements of your doors so that there is about 5 centimeters of allowance on each side. This is necessary to ensure that the fabric fits perfectly, and most importantly, that it is enough to fill all the protrusions and cavities;
- Glue like Moment or another that has worked well for you. Possibly – Titan, Master, etc.;
- Cutting scissors;
- Stationery type knife;
- Construction hairdryer. If you are unlikely to need it in everyday life, you can often rent it;
- 2 brushes: narrow and wider with normal bristles;
- Antenna cable;
- Upholstery fastening pistons (clips). It is better to take them with a small reserve, since their removal is often accompanied by breakage. Please note that each door has 8 pistons;
- Self-tapping screws. If you are making fabric or vinyl trim, then standard, short screws, the same as the previous ones on the door, will do. But if you are going to install Euro panels with your own hands, then to attach them to the bottom you will need long self-tapping screws;
- You may need new speakers, these should also be purchased in advance. Please note that usually in ready-made Lux 2 panels there are holes for speakers of 16 - 17 cm.
Dismantling
Front doors
Removing door trims is not at all difficult. The only unpleasant thing is that the clips are often damaged.
They can, of course, be repaired, but it’s much easier to stock up on ready-made ones without fooling yourself. There are some peculiarities: if you have euro cards, you need to dismantle the window lift lever (if your VAZ has one).
But we will tell you about the basic algorithm for dismantling door trim with your own hands:
- It is necessary to use a thin screwdriver to press the trim of the manual window lift handle away from the socket, guiding it so that it disengages and remove it. If you have electric windows, then naturally skip this point;
- Remove the socket;
- Using a screwdriver, release the locking mechanism for the inner handle of the armrest and remove it;
- Remove the screws securing this handle;
- Press the inner handle of the lock, turn the armrest handle up and remove it;
- Unscrew the button blocking the door lock;
- Unscrew the screw securing the outside mirror control mechanism and remove it from the lever;
- Remove the triangular trim, removing the pistons for its fastening from the two holes in the door.
Rear doors
Removing the rear door trim of a VAZ with your own hands has some differences.
First you need to unscrew the fastening screws (there are 3 of them) and remove the cover. Using a screwdriver, press the upholstery so that the pistons bounce off.
When doing this, keep the screwdriver close to each piston so as not to tear off the holders. It is also necessary to remove the spacer sleeve from the window lifter shaft.
How to remove and reinstall the front door trim on a VAZ 2110, 2111, 2112
Step-by-step photo and video instructions for removing the trim on the front door on VAZ 2112, 2110, 2111 cars.
It is best to have a couple of pistons for fastening the door trim in stock, because... they can easily break during disassembly.
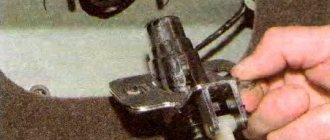
1. Using a thin screwdriver, press the trim of the window handle away from the socket. At this moment, you need to move it so that the protrusion on the cladding snaps away from the socket. After this, you can remove the trim and window handle.
2. After this, you can remove the socket itself.
3. Using the same screwdriver, press the lock of the plug and remove it from the inner handle of the armrest.
4. The inner armrest handle is held on by two screws. You need to unscrew them too.
5. We press the inner handle of the lock and at the same time turn the armrest handle up and remove it while removing the lock handle from the hole in the armrest handle.
6. The lock button is simply unscrewed with a screwdriver.
7. Now you need to unscrew the screw and remove the outside rear view mirror control mechanism from the lever.
8. The triangular overlay is held on by two pistons.
9. If you are removing the rear door, you need to unscrew the 3 screws securing the trim and remove it.
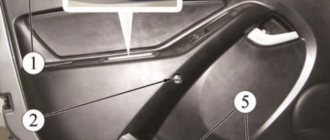
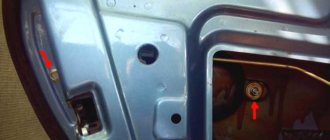
10. The door trim on the VAZ 2110 itself is held on by 8 pistons. The position of the pistons on the front door is indicated in the photo.
11. And on the back door. To remove the upholstery...
12. ... You need to use a screwdriver to press out the upholstery so that the pistons come out of the fastenings. Try to place the screwdriver as close to the pistons as possible - there is a chance that the pistons holders will simply come off.
13. Remove the spacer sleeve from the window lifter shaft.
14. Broken upholstery fastening pins should be replaced. The old piston is simply cut off. The new piston is inserted into the hole with the protrusion and, with light pressure, rotates in the hole until it is completely fixed in the holder.
15. The VAZ 2110 door trim is installed back in the reverse order of removal. Make sure that the end of the lock lock gets into the hole in the trim.
16. Using light blows of your fist on the upholstery, secure the pistons in the door.
17. The edge of the seal must remain outside. If it gets under the upholstery, take it out.
18. In order to remove the front door pocket, you need to unscrew 3 lower and 1 upper screws and it will simply come off. It is also installed back.
Tuning
After finishing removal, clean the cards from dust using a vacuum cleaner, and begin tuning yourself.
First of all, measure and cut the necessary “patterns” for all door cards, taking into account an allowance of 5 or even 7 centimeters for each side.
This is so that during the process of gluing the sheathing material you do not have to install patches or redo everything all over again.
The glue must be applied to the cards with brushes one at a time so that it has time to dry a little, but not dry out. Having coated the doors with glue, we proceed to the cut piece of vinyl or fabric, which we also coat with glue on the back side, and set aside for 10-15 minutes.
After this time, we proceed directly to gluing the upholstery to the door cards. Vinyl stretches well, filling door “cavities”, but for this it needs to be heated with a hair dryer and smoothed over each cavity and bulge with your hands, preferably with gloves. The edges need to be carefully folded inside out and trimmed.
Self-upholstery
Before directly reupholstering, it is recommended to check the condition of the inner door panel, remove pockets of corrosion, check or replace sound insulation, replace rubber seals, so the doors will open better. For VAZ 2110, the service life of door seals is up to 3 years. The process of re-covering a door part yourself step by step:
- Clean the outside of the card. You can sand it with fine-grain emery for better adhesion of glue and leather.
- Attach the door card to the material, cut around the perimeter, leaving at least 7 cm around the edges.
- Treat the outer surface with glue and the inside of the future cladding with glue. Apply glue according to the manufacturer's recommendations. If an adhesive composition is used, then after coating you need to wait up to 10 minutes.
- Place the vinyl on the door card, constantly heating the material with a hairdryer, and level the surface so that the leatherette fills all the curves of the part: the space for the speaker, for the central panel, the recesses for the handles.
- Cut out all the holes that are covered with vinyl in the door card from the center and not reaching the perimeter, carefully wrap it on the wrong side, making sure that the edges of the fold do not exceed 2-3 cm. Trim off the remaining vinyl.
- After gluing the card, trim off the remaining vinyl, leaving at least 3-5 cm on the inside of the card perimeter.
Installation of a ready-made kit
If you decide to buy a ready-made set - VAZ Euro trim panels Lux 2, you will get a more stylish version of the interior.
In addition, such plastic panels improve sound insulation, which is always important for VAZ.
You can also install them yourself.
Door trim VAZ 2110 Lux
We have already talked about how removal is carried out, and now about some of the subtleties of installing Lux 2 upholstery:
- The kit usually includes only the upholstery panels themselves in the amount of 4 pieces. Everything else for them - caps, meshes for the speakers - needs to be purchased.
- Don’t really believe sellers who claim that the Lux 2 upholstery will exactly fit the doors of the VAZ 2110. Don’t be surprised if some of the clips don’t fit, usually 2 of them in the front door, and 1 in the rear.
- Be sure to secure the bottom of the casing with long self-tapping screws.
- If your front doors are not equipped with power windows, you will have to make holes for the handles.
- With conventional window lift handles, a gap will form in the rear doors, which will need to be masked, for example, using a piece of hose. However, it would be better to immediately install electric windows on all doors - it’s convenient, plus the trim panels will fall into place without problems.
Cost of ready-made kits and accessories
The average price of ready-made door trim kits (4 pieces) for VAZ 2110 is as follows:
- Standard door cards - 2400 rubles;
- LUX door upholstery - 3150 rubles;
- Door upholstery LUX 2 - 3300 rubles;
- Plastic podiums for standard upholstery - 300 rubles.
The VAZ 2110 car itself is quite nice. An important advantage of the model is that it interacts well with various tuning methods. This car is literally made to be customized.
Moreover, the improvement should be not only technical and external. Many people do the right thing when they decide to replace their door trim. So the interior looks richer, more interesting, newer, the inside looks no worse than modern foreign cars. The most important thing is that you can do all this yourself. More about this in our article today.
What you can get
Options
There are several options for replacing door trim. Each of them has its own characteristics, advantages and, of course, the final appearance.
- Lux 1 and Lux 2. These are ready-to-install cards designed specifically for the domestic top ten. Depending on the design, these door cards are made entirely of plastic or with inserts made of fairly good quality fabric.
- Europanels. For some reason, in online stores such products are called Lux 2 door trim, although this is actually a little different. Regardless of the name, this trim looks great. But it has a serious drawback - high cost.
- With my own hands. The most budget option for replacing door trim. If you approach this issue competently and consistently, you can easily cope with the task without outside help. Today we will talk about them in more detail.
Required Tools
Any work involving repair or modification of a car begins with the search for the necessary materials and tools.
This list is mandatory; without it, it will be impossible to carry out work on replacing the door trim.
- Fabric or artificial leather, that is, vinyl. Buy them at fabric stores. Don’t forget to make replacements and calculations first to determine the exact amount of upholstery material needed. IMPORTANT! There should be an allowance of 5 centimeters on each side of the door. This significantly affects the total amount of fabric.
- Glue. Choose a proven adhesive that is sure to hold your new upholstery. It could be Moment, Master, Titan or something similar.
- Scissors. They will be used to cut upholstery material.
- Stationery knife. Something will definitely have to be cut off. In this case, a sharp stationery knife cannot be replaced.
- Construction hairdryer. It’s not worth buying it for one event to modify the car. Today this device can be rented.
- Brushes with high-quality bristles. One should be narrow, and the second should be a little wider.
- Antenna cable.
- Mounting clips. With their help you will attach fabric or leather. Be sure to buy extra, as these caps may break during installation. Also keep in mind that there are 8 pistons for each door.
- Self-tapping screws. Their size depends on the selected panels. If these are handmade products, you will need short, standard self-tapping screws. If we are talking about Euro panels, then purchase long screws.
- Speakers. New pre-fabricated panels include holes for speakers. So, in Lux 2 their size is about 17 centimeters. This is an excellent reason to install a new audio system in the cabin.
Soft backing
It is needed to add volume to thin fabric. The substrate smoothes out all bulges, sharp iron corners, and irregularities that appear through the material. Typically, foam rubber with a thickness of 3-6 mm is used, although you can opt for a thicker version. Foam rubber is often equipped with a knitted layer that keeps the thread from passing through the spongy material when stitching.
The dimensions of the soft substrate should be such that it does not protrude beyond the edges or is 1 mm shorter. This will give the edge more edge. Do not wrap the backing over the other side of the insert - this may cause too much bulk at the edges. For upholstery, it is better to use high-density raw materials with closed cells. Whatever material you choose, remember - the denser it is, the longer it will wear out, maintaining its original aesthetic qualities.
Removal
Dismantling work is the beginning of your journey to replacing the door panel trim. It's nice to know that this task is quite simple. This is especially true for the front doors.
We will tell you separately about the nuances of dismantling the front and rear door trims of your VAZ 2110.
Disassembled cards
Front
Let's say right away that the likelihood of damaging the standard clips is very high. But this is not scary, since new products are cheap, and their installation is much simpler than repairing old caps.
If you are installing Euro panels, you will have to remove the lever from the window regulator.
The process is performed according to a certain algorithm:
- Using a thin screwdriver, pry the window handle trim away from the socket. Direct it in such a way that it disengages. Now remove the lining. This item is not relevant for those whose car is equipped with electric windows;
- Remove the socket now;
- Using a screwdriver, press out the latch on the plug for the inner handle of your armrest, and then remove it;
- Remove the handle mounting screws;
- Press the inner handle of the lock and turn the armrest handle up. This way you can remove the element;
- Next, unscrew the button that blocks the door lock;
- Remove the screw that secures the exterior mirror control mechanism. It must be removed from the lever;
- Remove the triangular trim. To do this, the fastening pins are removed from two holes in the door.
Upholstery in all its glory
Rear
The rear trim is removed slightly differently. But this does not make the procedure significantly more complicated.
- Remove the three mounting screws;
- Remove the trim;
- Using a screwdriver, press out the upholstery. This will allow the pistons to pop out;
- Try to keep the screwdriver as close to the piston as possible to avoid breaking the holders;
- Don't forget to also remove the spacer sleeve from the window lift shaft.
Self-upholstery
Now we can begin to create a new look for your interior by independently reupholstering the dismantled door panels.
Preparations are in full swing
Before starting work, be sure to clean the cards, go over them with a vacuum cleaner, and replace the door seals if necessary. This will allow them to close better, without unnecessary noise.
The job of re-upholstering yourself is not difficult. Especially if you already have experience working with fabric or leatherette in or outside the car.
- Measure and cut the pieces from your chosen fabric or vinyl to size.
- An allowance of 5-7 centimeters must be provided for each side. This is necessary in order to avoid the use of patches when covering.
- Gradually apply adhesive to the cards, letting it dry a little. Just be sure to make sure that the glue does not dry completely.
- When you have coated the doors, use the same glue to treat the surfaces of fabric or leatherette, depending on what you choose. Let these elements sit for about 10 minutes so that the glue dries a little, but does not dry out.
- After the specified time has passed, begin gluing elements of the material onto the door cards. Vinyl is good because it stretches well and fills all the differences and depressions in the card structure.
- To ensure that the vinyl stretches and fills all the gaps, preheat the material using a hair dryer.
- Smooth the material by hand, but it is better to wear gloves for this.
- The edges with the allowance are carefully folded to the wrong side, after which they can be trimmed.
- Do the same with all the doors of your VAZ 2110. As you can see, there is nothing complicated here.
- Experienced car owners and fans of comprehensive tuning of domestic cars note that some other interior elements should be covered with the same material in order to achieve an ideal picture of the car’s interior. This could be the glove compartment lid, a triangle near the mirrors, a steering casing, etc.
- When reassembling cards with new skins, use pistons. To install them, you will need to make appropriate holes in the casing. This is where a sharp utility knife comes in handy.
Create an account
Register for an account. It's simple!
Those car owners who like the music to play loudly and have surround sound in their car, contact the Auto Captain car service for help in making door cards for a loud front. High-quality and loud music in the car can be obtained by installing a set of equipment, which will include an amplifier, a monoblock, a three-way speaker system with a set of speakers (midbass, midrange and tweeters), as well as a subwoofer.
We have sufficient experience in installing and configuring speaker systems in cars of different brands and models. We will inspect your car and advise you on how best to perform acoustic design. We will select speakers for installation in car doors, make door cards, arrange the speakers on them in the optimal order, and cover the cards with decorative material. We will draw up an estimate for the upcoming work, which will take into account the cost of materials and labor time. We will sign a work order with you for the entire range of events. After signing the document, we will begin manufacturing high-profile door cards for your car. After upgrading your car's sound system, your music will sound perfect.
- Acura
- Alfa Romeo
- Audi
- Bentley
- BMW
- Cadillac
- Chevrolet
- Chrysler
- Citroen
- Daewoo
- DAF
- Datsun
- Dodge
- Fiat
- Ford
- Geely
- Great Wall
- Hino
- Honda
- Hummer
- Hyundai
- Infiniti
- ISUZU
- Porsche
- Renault
- Saab
- Scania
- SEAT
- Skoda
- Smart
- SsangYong
- Subaru
- Suzuki
- Toyota
- Volkswagen
- Volvo
- GAS
- ZIL
- KamAZ
- UAZ
Schedule: from 8:00 to 22:00
Working with ready-made kits
Do-it-yourself upholstery is good, cheap, and the interior will be a source of pride for you, since you decorated it with your own hands.
But still, not every car owner is well versed in fabrics, knows how to sew, or has mastered all the nuances of a pattern. So the result does not always live up to expectations.
Therefore, we advise you to pay attention to ready-made kits. Factory VAZ Lux 2 panels are in great demand; they create an excellent appearance for the interior.
An important advantage of Lux 2 type kits is the presence of an additional sound insulation effect, which is very important and useful for the VAZ 2110.
It is not necessary to contact specialists, since the installation can be done by yourself.
- The kit often includes only panels - 4 units. But the grids for the speakers, pistons and other elements will have to be purchased separately.
- You should not trust sellers who claim that Lux 2 fits perfectly on the doors of the domestic top ten. Some of the pistons probably won’t want to be installed where they are supposed to be. This is because they slightly do not match the car model.
- Fastening from below must be done using long self-tapping screws.
- If your doors do not have power windows, then you will have to slightly change the configuration of the panels yourself by cutting holes in them for the “oars”.
- The problem of the gap that is formed as a result of installing Euro panels on a model with manual windows can be solved by masking it with some object. Although the best solution is to re-equip the car by installing electric windows.
