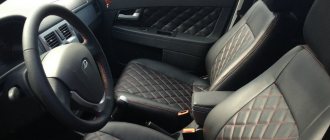
Greetings my subscribers and guests of my logbook
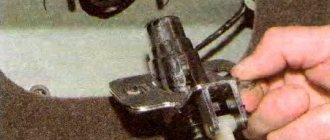
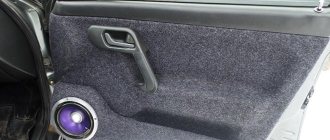
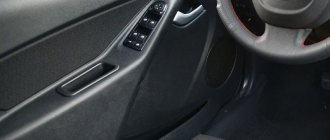
This morning I woke up, and my hands were itching since yesterday, I endured it until the morning. I again took some Madeleine and scissors and went to the car. I removed the center console and began to inspect the whole thing, where the joints of all the parts that are installed on it are. I carefully took everything apart, taped the material, assembled it and moved everything normally. So we move on. Some parts, such as air ducts, had to be removed and installed several times to achieve a result that suited me. After gluing everything became much tighter, I pulled the console with both hands and everything was quiet EXCELLENT what I wanted). I didn’t stop there and glued the remaining material onto the fuse cover, the side panel plugs, the frame on the instrument panel, and glued a small square to the place where the alarm key fob knocks on the steering column casing. I also glued it to the inner velvets, they were still removed when I rolled the glass with film. The glass sits much tighter and doesn’t rattle on bumps, that’s all. We look, we rate, we comment
Removing the standard radio in Grant Lux
The difference between grants of the luxury configuration: the MMS (multimedia system) installed from the factory. This is a 2 din device.
To remove standard acoustic grants:
- take a knife or plastic spatula to dismantle the acoustics and disconnect the decorative trims to the right and left of the radio. It is not necessary to take pictures;
- in the gap between the cover and the panel we find the head unit lock. There are two of them on both sides. Press it out with a screwdriver;
- we take out the GU on ourselves.
Everything is described in detail in the video:
Replacing the standard MMC in Grant
The process - after removing the acoustics, we install a new system.
Difficulties: you may have to finish the fastenings of the new system for VAZ ones. Plus you need the right frame. The factory MMC frame may not fit.
When you buy a new PG for your car, you need to buy a frame for it specifically for Grants. Otherwise there will be holes in the panel.
General questions about body kit 2190
Let's answer a couple of basic questions about Granta bumpers.
Differences between sedan and liftback bumpers
The principle of working with front and rear bumpers on a sedan and a liftback is the same! There are no fundamental differences.
Why you may need to replace the bumper
Possible reason for replacing the body kit on a VAZ 2190:
- Minor (or major) accident;
- Installation of a non-original body kit;
- Installation of additional devices: emergency parking sensors, rear view camera, etc.;
- Curiosity.
There are many options for non-standard body kits for Lada today.
Non-native body kits are made unofficially. This can lead to problems with joints and color mismatches.
Where to find the front bumper amplifier
Unlike pre-restyling Kalinas, Grant comes with a bumper reinforcement from the factory . Many people confuse it with a regular mount. You will gain access to the part only after dismantling the front body kit.
The amplifier on the Lada is rather symbolic, like the factory crankcase protection. But there is no such thing on Kalina.
Video instructions on how to shoot
Here are videos with the work process:
Firmware versions of Lada Granta and Kalina 2 instrument panels
The table was compiled (is in the process of being adjusted) based on reviews from car enthusiasts (please add comments). There is no guarantee that all data is correct!
| Equipment | Firmware version | DTNV* | DTOZH* | What is needed for firmware | Note |
| Granta Standard | 015 | No | No | Changing the display and working with a soldering iron | Old board |
| 029-040 | No | No | Changing the display and working with a soldering iron | Updated board | |
| Granta Norma |
* — DTNV — outside air temperature sensor, DTOZH — coolant temperature sensor.
Download firmware (dumps of instrument panel firmware, links available for site users):
- 2190-50 — To download files you need to log in to the site
- 2192-50 (software 1.9) - To download files you need to log in to the site
- 2190-00-029 — To download files you need to log in to the site
- 219020-060 — To download files you need to log in to the site
- 219020-076 — To download files you need to log in to the site
- 219020-087 — To download files you need to log in to the site
- 219020-090(AT) - To download files you need to log in to the site sent by ARS190475
- 219020-091 — To download files you need to log in to the site
- 219020-096 - To download files you need to log in to the site sent by ARS190475
- 219040-046 — To download files you need to log in to the site
- 219040-047 — To download files you need to log in to the site
- 2190-3801010-50 Software: 6.6 (KP with two displays) - To download files you need to log in to the site sent by ARS190475
- 2190-3801010-50 Software: 7.2 (KP with two displays) - To download files you need to log in to the site sent by ARS190475
- 219220-014 — To download files you need to log in to the site
- 219240-006 - To download files you need to log in to the site sent by ARS190475
- 219240-007 — To download files you need to log in to the site
- 219240-009 — To download files you need to log in to the site
- 219240-012 — To download files you need to log in to the site
- 219240-014 — To download files you need to log in to the site
- 219250-2.5 (KP with two displays) - To download files you need to log in to the site sent by ARS190475
- 219020-092_for_076 — To download files you need to log in to the site
- 219020-092 — To download files you need to log in to the site (author)
- 2190-3801010-50 Software: 7.1 - To download files you need to log in to the site
How to remove the dashboard for sizing
Recently a guy asked how to remove the dashboard for sizing. I want to share my impressions about this process. Suddenly someone wants to do this too. So here it is. I removed the panel last summer. Also for sizing. I did everything alone. I’ll say this: you can remove/install it alone, but it’s very messy. It's easier with two people, but I don't think it's much easier. Don't believe the repair book, it's much more complicated than it says. Too much will have to be removed in addition to the panel itself: the central trim, air duct tubes, gearbox housing, handbrake housing, floor tunnel, passenger airbag (if equipped), A-pillar trims, tidy. There are a lot of different screws and self-tapping screws, during assembly it is easy to get confused as to which ones were screwed in where. If I'm not mistaken, there are 26 screws alone for securing the panel itself! There are two treacherous screws on the left and right right under the windshield, which you can’t unscrew with a regular screwdriver, you can’t get under them. While the panel is being removed, you are left without glass blowing, and in current weather conditions this is fraught with consequences, including an accident due to fogged windows. If you just park the car. In terms of time: removal took 3 hours, installation took 4 kopecks. The steering wheel gets in the way. The left air duct pipe did not want to fall into place, it rested either on the body or on the windshield, it took me a whole hour just to do this. According to the results: the panel became a little more assembled, but after a WEEK it began to crunch again. In addition to this, the airflow on the windshield has become uneven - it blows weaker in the middle than at the edges. I’m generally silent about the numerous scratches on the dashboard and front door trims. You can remove them with an autogen lighter, but still the appearance is no longer marketable. Summarizing all of the above, from the bottom of my heart I HIGHLY DO NOT RECOMMEND doing this. You'll only make it worse. But this is purely my opinion, and then see for yourself. Maybe if you have experience in this matter, it will be easier for you. But I wouldn’t do this again now for any money, there are too many body movements and nuances
Soundproofing panel/dashboard Grants
| Probably all owners of LADA Granta have noticed that the interior of the car begins to fill with crickets over time, and the dashboard is no exception. The reason is poor build quality and materials (cheap plastic). To get rid of crickets for a long time, it is recommended to soundproof the Granta panel, and the advantage of this method is that it does not need to be removed for this. |
There can be many sources of rattling and squeaking in dashboards, let's look at the most common ones:
The radio/radio plug is rattling. Solution: use anti-creak or sealant.
The air duct rattles at the point of contact of the windshield blower nozzle. Solution: use silicone sealant or anti-squeak. The airbag plug creaks. Solution: when installing the plug, coat it with sealant, or use bitoplast (5mm or 10mm). The panel trim creaks. Solution: Remove the dashboard trim and glue the places where it touches (on the panel and on the trim itself) with bitoplast or anti-squeak.
The panel/dashboard creaks. Solution: The solution to the problem of panel rattling must be comprehensive.
- It is recommended to weight the dashboard using vibration materials (for example, 1 sheet of STP Gold 250 RUB/sheet is enough). Heat the pieces with a hairdryer and glue the panel with a “vibra” using a hard roller. A heavier Granta panel will produce less extraneous sounds.
- Wrap the torpedo wires with anti-squeak.
- Treat all removable elements with anti-squeak (panel trim, airbag cover, glove compartment, etc.)
- Tighten all possible panel mounting nuts.
Soundproofing the dashboard is a modification that should be done at the factory, but AvtoVAZ provides car owners with the opportunity to do this with their own hands.
Remember that the best sound insulation is when a set of works has been completed not only to isolate from external noise (noise from wheels, engine, wind, etc.), but also to eliminate creaks and crickets inside the car.
Alternative torpedo
The alternative dashboard is softer than the standard “tens” dashboard, but the main advantage is the absence of unpleasant grinding and squeaking. Motorists decide to get rid of the standard one precisely because of the squeaking. For the VAZ 2110 car there are several types of panels that differ in design.
The panel is sold as a set:
- The panel itself, which is an alternative to standard plastic.
- Buttons, brackets and inserts for blowers and instrument panels.
- A set of wires and a block for a double switch.
- Buttons for low beam, heating, dimensions and fog lights.
- Plugs for buttons are installed in places where keys are not needed.
How to remove the dashboard of a Lada Granta
We remove the instrument panel when it is necessary to change the wiring or when repairing the interior heater; we also remove the panel during body work.
We prepare the vehicle for work. Disconnect the negative terminal of the battery.
Drain the coolant from the engine cooling system.
We remove the filter of the heating and ventilation system.
Using a Phillips screwdriver, unscrew the four self-tapping screws that secure the heating system filter casing to the instrument panel.
Loosen the clamps securing the heater hoses and remove the hoses from pipes 2 of the heater radiator. Using a 10mm socket, unscrew nut 1 of the stud securing the flange of the heater radiator pipes to the front panel.
Removing the cover of the mounting block
Removing the instrument cluster
Removing the floor tunnel lining (article - How to remove the floor tunnel lining of a Lada Granta)
We disconnect the steering column from the instrument panel frame and lower it to the floor of the body or remove it completely
Remove the central trim of the instrument panel (beard), (see How to remove the central trim of the instrument panel Lada Granta)
We take out the seals of the front door openings
Unfastening it from the clips, remove the left side trim of the instrument panel. We also remove the right side trim of the instrument panel.
Parsing the Granta panel
To completely disassemble the tidy, you need to follow a sequence of actions.
Diary of Lada Granta Automatic. Entry 4. Dismantle the center console (beard).
- Disconnect power from the battery.
- Remove the glove compartment cover and fuse box.
- Next, you need to unscrew the fastening screws of the instrument panel trim and in the glove box.
- Now you should proceed to removing the steering wheel and column cover.
- The MUS, the transmission tunnel, is also removed.
- After this, the center console trim is pryed off and removed from the car.
- Now you need to remove the instrument panel and the heating and ventilation system controls.
- After this, you should unscrew the screws securing the torpedo and lift it from its seat.
- Next, all wire chips and contact groups are disconnected.
- Now you can completely remove the dashboard from the car.
Having understood the nuances of removing the dashboard on a Granta, the driver can perform the procedure with his own hands, without the involvement of third-party specialists.
Specialization: Graduated from the State Automobile University, worked for 20 years at GAZ-56, now I drive for VAZ.
How to remove the front console of a Lada Granta
Many Lada Granta owners sometimes need to remove the central trim on the dashboard. The reasons for this may be different, such as eliminating unnecessary squeaks or installing a radio. Today I will tell you how to dismantle it.
how to remove the radio panel on a grant
The space for installing the radio in the dashboard console of the Lada Granta car is designed for 1 DIN radio. Now you need to remove the metal frame from the radio and install it in the place where the plastic pocket was. 231 videos found. Kalina2 How to disassemble and remove the radio panel (MMC). Uploaded October 5, 2013. Uploaded August 16, 2015. Details can be found here. Granta. Removing the horseshoe. Uploaded May 18, 2015. Remove the center trim of the instrument panel console. Next, remove the glove box cover.
How to remove the air duct damper control unit of a Lada Granta. How to remove the instrument panel of a VAZ 2106. However, it will not be possible to remove the radio panel if you do not first dismantle the climate control panel. Below it are metric screws (A, B) that secure the media center shield from below. How to properly remove a radio without special keys. Many motorists face the problem of removing the radio in their car. The first step is to remove the front panel of the radio.
To remove the car radio, use the same algorithm. After you have removed the cover covering the radio, you will see two connectors.
How to flash the firmware
- Buy an SD card, format it in FAT, exFAT format;
- We download the firmware for free on the manufacturer’s official website;
- We save the data in the root directory of the SD card;
- We insert the SD card into the slot on the radio, start it, wait for the update to finish;
- Turn on and off the module;
- We customize the new interface for ourselves.
If the firmware is installed incorrectly, additional screen calibration using the CAN bus will be required. It is impossible to do this yourself, only in a service station. After successful flashing, the following is available:
- graphic equalizer;
- viewing photos, pictures, videos;
- improved sound quality;
- possibility of installing a navigation system.
Disadvantages of a standard radio
- Outdated firmware from the “box”;
- Not all options are initially available;
- The need for periodic software updates;
- Push-button interface.
How to remove the dashboard of a Lada Granta
We remove the instrument panel when it is necessary to change the wiring or when repairing the interior heater; we also remove the panel during body work.
We prepare the vehicle for work. Disconnect the negative terminal of the battery.
Drain the coolant from the engine cooling system.
We remove the filter of the heating and ventilation system.
Using a Phillips screwdriver, unscrew the four self-tapping screws that secure the heating system filter casing to the instrument panel.
Loosen the clamps securing the heater hoses and remove the hoses from pipes 2 of the heater radiator. Using a 10mm socket, unscrew nut 1 of the stud securing the flange of the heater radiator pipes to the front panel.
Removing the cover of the mounting block
Removing the instrument cluster
Removing the floor tunnel lining (article - How to remove the floor tunnel lining of a Lada Granta)
We disconnect the steering column from the instrument panel frame and lower it to the floor of the body or remove it completely
Remove the central trim of the instrument panel (beard), (see How to remove the central trim of the instrument panel Lada Granta)
We take out the seals of the front door openings
Unfastening it from the clips, remove the left side trim of the instrument panel. We also remove the right side trim of the instrument panel.
Torpedo Granta dorestayl
The panel from Kalina began to be installed on the pre-restyling Granta immediately before the release of the updated Lada Granta FL family.
If the dashboard of your car is like in the left photo, then you will need to replace a number of parts of the instrument panel (dashboard) with parts from the Lada Kalina dashboard:
- 21925-5325011-00 Instrument panel VAZ-21925 Lux with air duct SB AvtoVAZ OJSC
- 21920-7905020-00 USB cable 2192
- 21925-5326014-00 Overlay for the instrument panel console LUX
- 21920-5326014-00 Instrument panel console trim NORMAL - lower, depending on the climate unit
- 21920-5303014-00 Glove box body 2192
- 21920-3710010-00 Hazard switch
- 21920-5303016-00 Cover of the glove box of the instrument panel
- 21920-5325322-00 Fuse box cover
This is a global alteration of the car interior, which cannot be called rational.
After this, you can begin installing the center console according to the instructions below.
How to remove the center console of a Lada Granta
Greetings my subscribers and guests of my logbook
This morning I woke up, and my hands were itching since yesterday, I endured it until the morning. I again took some Madeleine and scissors and went to the car. I removed the center console and began to inspect the whole thing, where the joints of all the parts that are installed on it are. I carefully took everything apart, taped the material, assembled it and moved everything normally. So we move on. Some parts, such as air ducts, had to be removed and installed several times to achieve a result that suited me.
After gluing everything became much tighter, I pulled the console with both hands and everything was quiet EXCELLENT what I wanted). I didn’t stop there and glued the remaining material onto the fuse cover, the side panel plugs, the frame on the instrument panel, and glued a small square to the place where the alarm key fob knocks on the steering column casing. I also glued it to the inner velvets, they were still removed when I rolled the glass with film. The glass sits much tighter and doesn’t rattle on bumps, that’s all.
We look, we rate, we comment
Removing the center console of Lada Granta
Many Lada Granta owners sometimes need to remove the central trim on the dashboard. The reasons for this may be different, such as eliminating unnecessary squeaks or installing a radio. Today I will tell you how to dismantle it.
How to remove the dashboard of a Lada Granta
We remove the instrument panel when it is necessary to change the wiring or when repairing the interior heater; we also remove the panel during body work.
We prepare the vehicle for work. Disconnect the negative terminal of the battery.
Drain the coolant from the engine cooling system.
We remove the filter of the heating and ventilation system.
Using a Phillips screwdriver, unscrew the four self-tapping screws that secure the heating system filter casing to the instrument panel.
Loosen the clamps securing the heater hoses and remove the hoses from pipes 2 of the heater radiator. Using a 10mm socket, unscrew nut 1 of the stud securing the flange of the heater radiator pipes to the front panel.
Removing the cover of the mounting block
Removing the instrument cluster
Removing the floor tunnel lining (article - How to remove the floor tunnel lining of a Lada Granta)
We disconnect the steering column from the instrument panel frame and lower it to the floor of the body or remove it completely
Remove the central trim of the instrument panel (beard), (see How to remove the central trim of the instrument panel Lada Granta)
Unfastening it from the clips, remove the left side trim of the instrument panel. We also remove the right side trim of the instrument panel.
Soundproofing panel/dashboard Grants
| Probably all owners of LADA Granta have noticed that the interior of the car begins to fill with crickets over time, and the dashboard is no exception. The reason is poor build quality and materials (cheap plastic). To get rid of crickets for a long time, it is recommended to soundproof the Granta panel, and the advantage of this method is that it does not need to be removed for this. |
Pull up the handbrake
But if you really know how to tighten the handbrake on a Lada Granta standard, this procedure will not take you much time and effort. The only thing that is required for its implementation is a jack or an inspection hole, because access to adjustable components and assemblies occurs from below and you will have to work under the car. To tighten (adjust) the handbrake you will need 3 tools:
- two open-end wrenches for 13, one of them is preferably a socket one;
- one key head for 8;
- a faithful assistant (although in desperate situations you can get by alone).
The process of directly adjusting the manual braking system of a Lada Granta car is carried out in nine main stages:
- We lower the handbrake lever inside the car.
- We climb under the car, unscrew the rubber cushions (brackets) from the resonator, and remove the muffler from its attachment to the body.
- We remove the protective screen of the parking brake adjustment mechanism. To do this, use a socket wrench to unscrew the 4 nuts from the fastening bolts.
- We remove the protective screen or move it to the side behind the muffler - in this case, the necessary space for work is also quite enough. In this case, the muffler can be pulled back with something, for example, by pushing a block of wood under it.
- We take two 13mm wrenches - the first one is to slightly loosen the locknut, holding the adjusting nut. Then vice versa - hold it, and secondly turn (also loosening) the adjusting nut.
- Actually, we adjust the hand brake as follows: tighten the handbrake cable, for which we tighten the adjusting nut (move the key clockwise).
- Next, you should check the travel of the handbrake lever - this is why you need a partner, or you will have to do it yourself. The lock nut can be tightened when the handbrake stroke is 2-4 clicks (see above).
- Then we test the operation of the parking brake mechanism as a whole. To do this, lift the rear wheels and check how freely they rotate when the handbrake is lowered and how completely they lock when fully raised (in this case they should not rotate at all!).
- If the handbrake is working properly, tighten the locknut and replace the protective screen and muffler. The handbrake adjustment is complete!
As the mileage and life of the vehicle increases, the handbrake becomes less and less adjustable. It happens that even after adjustment, the manual braking system does not work properly and does not “hold” the car. This indicates that the wear on the brake pads is too high or the cable stretch is irreversible.
Tools:
- Ratchet wrench
- Extension
- 10 mm head
- 13 mm high head
- Open-end wrench 13 mm
Parts and consumables:
Aerosol lubricant type WD-40
Notes:
The parking brake should hold the vehicle on a 23% grade. The full travel of the parking brake lever should be from 2 to 4 teeth (clicks) of the lever ratchet device.
1. To adjust the parking brake, place the vehicle on an inspection ditch or overpass and lower the parking brake lever.
2. Using a 10 mm socket, unscrew the four nuts securing the rear heat shield of the additional muffler, having previously treated them with WD-40 lubricant.
3. Remove the rubber cushion from the front suspension bracket of the additional muffler.
4. Slide the heat shield forward to expose the parking brake adjustment assembly.
5. Holding the adjusting nut of the cable end with a 13 mm wrench, use a socket of the same size to unscrew the lock nut.
6. Turn the adjusting nut clockwise to tighten the cables.
Note:
It is convenient to adjust the tension of the cables with a high head with a ratchet and an extension. In this case, do not unscrew the lock nut completely, but, aligning its edges with the edges of the adjusting nut, put on a 13 mm high socket and rotate both nuts at once.
7. Use the locknut to secure the adjusting nut. When the lever is lowered, the suspended rear wheels should rotate freely.
The article is missing:
Photos of parts and consumables
Adjusting the handbrake lever on the Lada Grant is necessary if its stroke is more than 6 clicks. The optimal stroke is 2-4 clicks, but during operation it is allowed to increase its stroke to 8 clicks.
An increase in the travel of the parking brake lever occurs for several reasons, the main ones being stretching of the handbrake cable and wear of the brake pads.
How to remove the dashboard for sizing
Recently a guy asked how to remove the dashboard for sizing. I want to share my impressions about this process. Suddenly someone wants to do this too. So here it is. I removed the panel last summer. Also for sizing. I did everything alone. I’ll say this: you can remove/install it alone, but it’s very messy. It's easier with two people, but I don't think it's much easier. Don't believe the repair book, it's much more complicated than it says. Too much will have to be removed in addition to the panel itself: the central trim, air duct tubes, gearbox housing, handbrake housing, floor tunnel, passenger airbag (if equipped), A-pillar trims, tidy. There are a lot of different screws and self-tapping screws, during assembly it is easy to get confused as to which ones were screwed in where. If I'm not mistaken, there are 26 screws alone for securing the panel itself! There are two treacherous screws on the left and right right under the windshield, which you can’t unscrew with a regular screwdriver, you can’t get under them. While the panel is being removed, you are left without glass blowing, and in current weather conditions this is fraught with consequences, including an accident due to fogged windows. If you just park the car. In terms of time: removal took 3 hours, installation took 4 kopecks. The steering wheel gets in the way. The left air duct pipe did not want to fall into place, it rested either on the body or on the windshield, it took me a whole hour just to do this. According to the results: the panel became a little more assembled, but after a WEEK it began to crunch again. In addition to this, the airflow on the windshield has become uneven - it blows weaker in the middle than at the edges. I’m generally silent about the numerous scratches on the dashboard and front door trims. You can remove them with an autogen lighter, but still the appearance is no longer marketable. Summarizing all of the above, from the bottom of my heart I HIGHLY DO NOT RECOMMEND doing this. You'll only make it worse. But this is purely my opinion, and then see for yourself. Maybe if you have experience in this matter, it will be easier for you. But I wouldn’t do this again now for any money, there are too many body movements and nuances
Cold welding – hot idea
So, let's begin. The work is very delicate and painstaking, one might even say a piece of jewelry, so we must be patient. The most ideal option for making such an invention as a frame for a 2 din Grant radio, in my opinion, is to mold an adapter frame from cold welding, and besides, I was not the only one who came up with this idea. The transition frame needs to be “sculpted” on the center console with the radio. To do this, you should go to a hardware store and buy there:
1. Cold welding 2. Masking tape 3. Nylon thread
You're probably wondering, why use masking tape? And this is in order to paste over the radio according to the form of welding, so as not to glue it to the panel forever. Be sure that everything will work out, and soon you will have a frame for Grant’s 2 din radio.
In order for the mold to be easily removed later, we apply cling film on top of the tape, again following the shape of the weld. Also, to give our frame greater strength, it is recommended to run thin copper wire around its perimeter.
To make it easier to remove the frame, you should put a thread under it. In my case, it turned out according to the well-known saying “The first pancake is lumpy”, I stuck a cold weld right on top of the masking tape and did not put a thread under it (although this would hardly have changed anything), the result is a broken newly made 2 din grant frame. Learn from other people's mistakes.
Don’t be surprised if it takes some effort to remove the cling film from welding; act carefully and you won’t break anything.
After we have removed the “freshly molded” frame, we should immediately take care of the fastenings, because somehow it must hold on.
To do this, we make two thin fasteners, similar to those that are placed on the caps, having previously measured the diameter between the tunnel for the radio and the upper edge of the panel. If you blinded too much, don’t worry, we have sandpaper and desire.
So, the transition frame for the Lada Grant is ready. Now we get to work on grinding off all the excess and giving our frame for the 2 din radio a smooth and attractive look. To do this, we use sandpaper No. 40, and if you have gone through with force and ground off the excess, we use the same cold welding to build up. I would like to immediately warn you that the work of adjusting the frame requires the greatest endurance.
After eliminating all the irregularities, we begin the process of preparing the frame for applying putty and primer. If you have taken on this painstaking work, then you are probably patient and a person striving for ideals, and you probably love your Lada Granta very much. After all, many simply would not take up this matter. In the meantime, let’s continue the so-called journey towards the ideal in the “2 din Grant Frame” case.
Training procedure
From the moment the engineer made the key for the Lada Priora, the demand for ECU reprogramming has increased significantly. You need to prepare for reprogramming the ECU and not do it chaotically: the sequence of steps must be completed without long breaks.
You can train keys by following the following procedure:
Close all doors. Make sure that the sensors on the control panel do not accidentally light up and interfere with the process: add several liters of fuel to the tank, remove faults, etc. Sound signals can confuse you. The vehicle's ignition must initially be turned off. For convenience, place the training copy in your right hand, and the first worker, who will be assigned a code in the ECU, in your left hand. Turn on the ignition with the training key (it is smaller and marked with a red plastic insert), wait at least 6 seconds.
Turn off the ignition by turning the key towards you. After this, the yellow car icon will flash (very quickly) on the dashboard. This means that the ECU has authorized and started the key learning mode; it should flash until all actions are completed as a sign that everything is being done correctly. Remove the training tool from the ignition lock cylinder, quickly insert the first working key within the next 6 seconds and just turn on the ignition. A triple beep will sound (not a horn). After a few seconds, two more beeps will sound - this means the code has been successfully written: you can turn off the ignition! If there were no two beeps, it means something went wrong and you need to repeat it all over again. The last steps are to confirm the recording of the code for the new control panel. After the double signal, you can remove the working key, but then you quickly need to insert a small, training key. Turn on the ignition, then again wait for three or two beeps. Turn off the ignition, but do not remove the key! After a single beep, the yellow vehicle icon on the dashboard will flash even faster. Turn the ignition on then turn off after three seconds. Three more beeps will sound. Do not turn on the ignition for another 10-20 seconds. It's not always possible to get everything done the first time. For some Lada Priora cars, the sound signal may disappear - it is worth trying to continue the algorithm if the yellow car icon is still blinking. Training of the second instrument is carried out in the same sequence.
How to remove the dashboard of a Lada Granta
Lada 2109 aquarium Logbook Grant trunk lock and sensory trunk We remove the instrument panel when we need to change the wiring or when repairing the interior heater, we also remove the panel during body work.
We prepare the vehicle for work. Disconnect the negative terminal of the battery.
Drain the coolant from the engine cooling system.
We remove the filter of the heating and ventilation system.
| Using a Phillips screwdriver, unscrew the four self-tapping screws that secure the heating system filter casing to the instrument panel. | Removing the casing |
| Loosen the clamps securing the heater hoses and remove the hoses from pipes 2 of the heater radiator. Using a 10mm socket, unscrew nut 1 of the stud securing the flange of the heater radiator pipes to the front panel. | Removing the cover of the mounting block |
| Removing the instrument cluster | Removing the floor tunnel lining (article - How to remove the floor tunnel lining of a Lada Granta) |
| We disconnect the steering column from the instrument panel frame and lower it to the floor of the body or remove it completely | Remove the central trim of the instrument panel (beard), (see How to remove the central trim of the instrument panel Lada Granta) |
| We take out the seals of the front door openings | Unfastening it from the clips, remove the left side trim of the instrument panel. We also remove the right side trim of the instrument panel. |
Kia Rio
But with this model you will have to seriously tinker. Since the deflector is attached to screws that are hidden by the visor. It must first be removed.
The tools you will need are Phillips and slotted screwdrivers, a flashlight and a construction spatula.
The process involves some combination of activities. Watch in detail how this work is done in the video.
Video: removing the instrument panel visor on a Kia Rio
Only then can you remove the central deflector. It is attached to pistons and screws. Two screws at the top, two pistons at the top and one at the bottom. After the deflector is removed, you need to disconnect the plug.
Before dismantling the left deflector, remove the left panel and the panel under which the fuse box is located. The deflector is attached to the side with two self-tapping screws. Before dismantling the right panel, open the glove compartment and remove the right panel, unscrew the screws. Now, by prying with a screwdriver, you can remove the deflector.
Video: dismantling the central and side heating deflectors
This is how the air duct deflector is removed on different cars. Of course, within one article it is impossible to give complete instructions for all car models. From all of the above, we can conclude that the amount of work that needs to be done to remove the air duct deflector is not the same. In some cars, the deflector is removed simply by pulling it out (Renault Logan), in others you have to remove the dashboard or other large elements (Lada Vesta, Kia Rio).
Wind deflectors on the Grant Liftback are not included as standard. The owner installs the accessory himself, having previously purchased it at a car dealership.
The gluing process is not complicated and intuitive. Every driver can cope with the task. Contacting the service center is not necessary at all. If you have accessories and rags, the work will take no more than ten minutes.
Soundproofing panel/dashboard Grants
| Probably all owners of LADA Granta have noticed that the interior of the car begins to fill with crickets over time, and the dashboard is no exception. The reason is poor build quality and materials (cheap plastic). To get rid of crickets for a long time, it is recommended to soundproof the Granta panel, and the advantage of this method is that it does not need to be removed for this. |
There can be many sources of rattling and squeaking in dashboards, let's look at the most common ones:
The radio/radio plug is rattling. Solution: use anti-creak or sealant.
The air duct rattles at the point of contact of the windshield blower nozzle. Solution: use silicone sealant or anti-squeak.
The airbag plug creaks. Solution: when installing the plug, coat it with sealant, or use bitoplast (5mm or 10mm).
The panel trim creaks. Solution: Remove the dashboard trim and glue the places where it touches (on the panel and on the trim itself) with bitoplast or anti-squeak.
The panel/dashboard creaks. Solution: The solution to the problem of panel rattling must be comprehensive.
- It is recommended to weight the dashboard using vibration materials (for example, 1 sheet of STP Gold 250 RUB/sheet is enough). Heat the pieces with a hairdryer and glue the panel with a “vibra” using a hard roller. A heavier Granta panel will produce less extraneous sounds.
- Wrap the torpedo wires with anti-squeak.
- Treat all removable elements with anti-squeak (panel trim, airbag cover, glove compartment, etc.)
- Tighten all possible panel mounting nuts.
Soundproofing the dashboard is a modification that should be done at the factory, but AvtoVAZ provides car owners with the opportunity to do this with their own hands.
Remember that the best sound insulation is when a set of works has been carried out aimed not only at insulating from external noise (noise from wheels, engine, wind, etc.), but also eliminating creaks and crickets inside the car.
How to eliminate the howling of a VAZ box
The first thing you can do is contact the service center and request that the noise be eliminated as part of the warranty repair. This process is long, painstaking, requires patience and does not always end in victory. In most cases, the manufacturer claims that the sound during transmission operation is normal and the vehicle is not subject to warranty repair. But if the sound is very loud or the buyer is very persistent, the manufacturer suggests replacing the box. But, judging by the reviews of drivers who managed to replace the manual transmission under warranty, this does not always solve the problem. The fact is that a howling box is a manufacturing feature, not a defect, so whether it’s worth replacing it with exactly the same one is up to you to decide.
Modification of the clutch cable
Sometimes the noise is due to vibration transfer between the fork and the clutch cable. This problem can be solved with a simple modification that does not require financial investment. You need to remove the clutch cable from the fork, replace the standard rubber insert with a washer made of softer rubber, which dampens vibration well. The element is glued to a plastic part, which serves as a stop for the cable.
This method does not help everyone and will not allow you to achieve ideal silence, but it makes the unpleasant sound much quieter. In any case, it won't hurt to try to implement this simple modification.
Interior noise insulation
Another option is good sound insulation of the cabin. Of course, the howl of the box in this case will not go away, but it will be less audible. This event is expensive, but it will make the car more comfortable. If the performance of the transmission is not in doubt, and only noise is annoying, you can use this option.
Do I need to add oil?
It is difficult to check the oil level in a cable-driven box; this model does not have a dipstick. The only way to do this is to unscrew the oil filler plug. If at the same time the oil begins to flow out slowly, then the level is normal; if not, it is better to top it up. In this case, it is imperative to use exactly the same technical fluid as already poured in the box.
To add oil to the maximum level, you need to jack up the car from the side where the oil filler neck is located and add oil until it begins to flow out. For convenience, it is better to use a syringe. As soon as the liquid flows out, the plug must be quickly tightened. If you do not raise the correct side of the car, the transmission fluid level will be low.
In some cases, this procedure helps get rid of the howling or makes the box a little quieter. Some motorists noted that they had to add about 0.5 liters of oil to the manual transmission. But in most cases, the procedure does not eliminate the howling problem.
Does oil quality affect transmission noise?
At the factory, manual transmission 2181 is filled with budget oil of dubious quality. Many people prefer to replace it immediately. This not only makes the transmission quieter, but also extends its life. Does changing the oil eliminate the noise? In some cases, this procedure can improve the situation somewhat, but it is not a panacea. In most cases the box continues to howl.
Choosing the right radio size
We carry out installation either independently or by contacting specialists at the service center. In the second case, the service is paid.
By default, all VAZ and Lada models are equipped with a 1-DIN radio. The opening dimensions correspond to: 180 x 50 mm. This is an old standardization that has been in force since the times of the USSR. Modern audio modules can be purchased complete with a pre-installed LCD display. The size of the opening must comply with the standard: 180 x 100 mm, that is, doubled in height. Size marking: 2-DIN.
To install the radio in the Granta liftback, cut out the top pocket, remove the plastic, and install the assembled module. For a beginner, the process will seem somewhat complicated, so strictly follow the instructions.
Granta FL
The modern version of Fl 2022 differs little structurally from its prototype. The car tidy is removed in the same way. Similar fasteners and identical clamps are used here.
How to remove a panel on a Grant to install a radio
In most configurations it comes with a plastic plug instead of a tape recorder.
Next, you will need to reach into the resulting groove and find a standard terminal there for connecting a sound reproduction device. It needs to be taken out. After this, a short shaft is placed on the panel, intended for mounting a modern radio. At the end, the device is connected to the on-board network and inserted into the prepared shaft.
Installing the Euro trim without removing the dashboard
In this option, you need to have a drill and screws on hand.
Rely on the lining mounting diagram and start in order:
- Remove the dashboard.
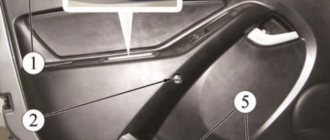
- Open the glove compartment and unscrew the three screws from the inside (positions 1,2,3 in the diagram). Trying to unscrew the screw (pos. 9) from the inside near the windshield is difficult, but doable.
- Remove the 4 keys (next to the control module) and unscrew the screws from the inside (pos. 4.5)
- Unscrew or loosen the fastening by adjusting the backlight (pos.
- Open the fuse module and unscrew 2 screws from the inside (pos. 6 and 7)
- Now the panel overlay is held in place only by screws, positions 10 and 11. They cannot be unscrewed, so we break them out or lift the overlay by the right edge and cut them off with a file. (Note: the Euro trim will cover the entire top of the panel up to the windshield, so you don’t have to worry about the appearance when you cut or break the screws)
- Remove the old dashboard trim.
Removal and installation of panel (dashboard) Grants
Removing the panel (dashboard) of Lada Granta
Required tools: flat and Phillips screwdrivers, 13" and 24" socket heads, marker.
Disconnect the negative cable from the battery. Remove the cigarette lighter (squeeze the lock and remove the cigarette lighter socket, disconnect the connector with wires). Remove the head unit of the audio system (radio tape recorder) and disconnect the block with wires from it.
Remove the central panel trim (dashboard). Remove the glove compartment cover and remove the screws securing the inner panel.
Remove the pillar trim. Then remove the central tunnel. Then remove the steering wheel. Remove the steering column cover and steering column switches. Remove the exterior lighting control unit (first remove the fuse box cover, then unscrew one screw and disconnect the connector.)
Remove the headlight hydraulic corrector regulator (remove the handle, unscrew the fastening nut, remove the hydraulic corrector regulator).
Remove the instrument cluster. Then... Remove the 4 screws securing the air duct damper control unit to the instrument panel. Remove the 18 screws securing the decorative panel to the frame (Figure 11.13). Move the decorative panel away from the frame as far as the air ducts attached to its inside allow.
| If you have decided to make soundproofing of the engine shield, or tuning the dashboard (upholstery or paint), then carefully study the instructions on how to remove and install the Lada Granta panel with your own hands. |
| Place your hand under the panel and use a long Phillips screwdriver to remove two screws No. 1 (Figure 11.14) (one on each side) securing the front side glass air ducts to the decorative panel. Remove the ends of the air ducts from the nozzle pipes No. 2, and then remove the inner ends of the air ducts from the pipes of the heater body. |
Pull the panel towards you, and bending air duct No. 4 of the windshield, transfer it through box No. 2 (Fig. 12.1) for supplying air to the central deflectors on the heater body. Remove the decorative instrument panel.
| To make it easier to reinstall the panel in the future, remove two screws No. 3 (Figure 11.14). |
- Remove air duct No. 4 (Fig. 11.14) of the windshield.
- Remove the two bracket nuts from the panel brackets.
- And move them to the air duct brackets - this will allow you to install the decorative panel in place without the air duct, and secure the air duct to the panel after its installation by screwing in the screws from the interior side.
Figure 11.13. Location of Lada Granta panel screws.
Figure 11.14. Decorative instrument panel (view from the inside):
Installation of panel (dashboard) Lada Granta
Installation of the dashboard is carried out in the reverse order, but a number of points should be taken into account: Before installing the panel, place the windshield air duct on the window of the heater housing.
After installing the panel, put the air duct brackets in place (for clarity, shown on the removed panel). Screw in the fastening screws from the passenger compartment side.
By the way, do you know how to paint a panel?
vazikov.ru
Removing the Lada Granta generator
Tools:
- Open-end wrench 10 mm
- Open-end wrench 13 mm
- Open-end wrench 19 mm
- 8mm straight box spanner
- Ratchet wrench
- 13 mm head
- Knife (for generator without tensioner)
- Large flat-head screwdriver (for alternator without tensioner)
- Medium flat screwdriver
- Torque wrench
Note:
Remove the generator for diagnostics, repair or replacement when it fails, as well as when dismantling the engine.
1. Disconnect the wire terminal from the negative terminal of the battery.
2. Remove the generator drive belt: with a tension roller - as described here, without a tension roller - as described here.
3. Disconnect the tips of the high-voltage wires from the spark plugs of the first and second cylinders and remove the engine oil level indicator.
4. Remove the rubber protective cap from the “B+” terminal of the generator and unscrew the nut securing the corresponding wire with a 13 mm wrench.
5. Remove the wire ends from the “B+” terminal of the generator.
6. Pressing the block lock, disconnect the wiring harness block from the generator connector “L”.
7. Using a 13 mm socket, unscrew the bolt of the lower mounting of the generator (for clarity, shown with the engine removed), remove the bolt and nut from the generator bracket.
8. Using a 13 mm socket, unscrew the nut of the generator upper mounting bolt.
Note:
In the modification of the generator without a tension roller, at this stage the upper bolt will already be unscrewed and the generator will only have to be removed from the engine compartment.
9. Remove the upper generator mounting bolt and remove the generator from the engine compartment.
Note:
If you carry out the work on an inspection ditch or overpass, it is more convenient to unscrew the bolt of the lower mounting of the generator from the bottom of the car. In this case, first remove the upper mounting bolt of the generator, then remove the lower mounting bolt and remove the generator.
Note:
If these operations are carried out on a car with air conditioning, then before removing the generator, you should additionally disconnect the compressor (2) from its mounting bracket (3) by unscrewing the three bolts of its mounting (1). There is no need to disconnect the air conditioning system pipes, just move the compressor down and towards the right side member of the body. Otherwise, the process of removing the generator is similar to that described above.
10. Install the generator in reverse order.
