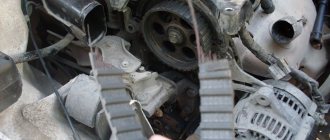
Today our old client came to us in his white Lada Granta to replace the timing belt, roller and pump in the place with antifreeze. From the factory, this engine is equipped with a Gates timing belt with a declared service life of 75 thousand kilometers, but we change it to 60 just in case.
Important! When the timing belt breaks on this engine, all the valves bend. This is true for all engines produced until 2022.
I recently read that starting from 2022, this engine will be equipped with plug-in pistons; when the new Granta arrives, we’ll be sure to see if this is true with an endoscope.
Preparatory operations, all engines
First, remember a simple rule: the 11183 engine cannot bend its valves, so you can rotate the crankshaft and camshaft pulley separately. For motors 11186 and 21116 this would be unacceptable! Read more about engine 21116 in this material.
Before carrying out any work, disconnect the battery terminal (key 10), as well as the DPKV sensor. But first you need to remove the protective cover.
Unscrew the 4 bolts and remove the protection
To remove protection you need:
- 11186/21116 - using a “5-point hexagon”, unscrew the 4 bolts on the upper part, which is then removed. And the lower part is also dismantled;
- 11183 – use a 10mm wrench to unscrew the 3 fastening bolts.
It will not be difficult to cope with what is said above.
Disconnect the connector, unscrew one screw
The crankshaft position sensor (CPS) is disconnected from the connector (see photo). Then the fastening screw is unscrewed with a “10” wrench. The sensor itself must be removed.
Installation of all shafts according to marks
First check that the gear is in neutral. There is a rubber cover on the crankcase body closer to the clutch assembly. It needs to be removed.
Inspection window and rubber plug
The point is to achieve alignment of the marks on the flywheel and in the scale slot. When this is done, fix the flywheel with a screwdriver.
Flywheel fixed
Of course, it is easier to perform such an operation with two people. Know that the desired position of the shaft corresponds to the alignment of marks AB and CD (see figure).
Timing drive in 8-valve engines
The crankshaft itself must be rotated to the right using a 17 or 19 key (motor 11183). The meaning of this is illustrated in the photo.
You need to turn the generator drive pulley
The alternator belt needs to be removed
The alternator belt blocks access to the timing drive parts. You will have to loosen the fastening and remove this belt.
More about this:
- We change the alternator belt on a Lada Granta with air conditioning;
- We change the alternator belt without tensioner on the Lada Granta.
Generator mounting, 13 bolts
Use a 13mm wrench to loosen the lower mounting bolt. Then unscrew the upper fastening nut and remove the bolt. The generator casing is pressed against the engine and the structure is secured with wire. The belt can now be removed.
Installation of the alternator belt is carried out in the following sequence:
- Secure the generator;
- Throw the belt over the pulleys, as shown in the photo;
Installation of the alternator belt, first step
- Having engaged 5th gear, roll the car back.
Please be aware that reusing the alternator belt is a last resort. It would be better to buy a new part.
Features of disassembling a 16-valve engine
As for the 16-valve engine, the sequential disassembly is completely identical to that described, with the exception of one point - installing the marks. Since this engine uses two camshafts, the marks must be aligned on both, and do not forget about the marks on the flywheel.
Also, during disassembly, in addition to the tension roller, you will also have to dismantle the bypass roller, since it also needs to be replaced.
After removing the belt, you should also check the play of the bearings on the pump. If it is significant, then it is better to replace it immediately. Otherwise, it may quickly fail after replacing the belt and the need to re-disassemble the drive, since the pump is replaced only after dismantling the drive.
Note that after removing the belt, it is important to ensure that you do not accidentally turn one of the shafts while installing a new one.
Replacing the timing belt
Make sure the engine flywheel has been correctly installed and secured (see above). Then, using a “17” or “19” wrench (ICE 11183), unscrew the screw holding the generator drive pulley. The pulley itself and the protective washer are then removed.
The pulley should not interfere
Now you need to weaken the clamping force in the tension roller:
- 11186/21116 – using a “15” round wrench, unscrew the fastening bolt 2-3 turns. The roller will “release” the belt automatically;
Automation will work to weaken
- 11183 – use a 17 key to loosen the fastening nut. Then the roller itself is rotated clockwise.
All that remains is to replace it: a new part is installed in place of the old timing belt, and that’s it. Installation of the remaining parts is carried out in the reverse order.
Basic replacement operation
To increase downforce, the outer roller assembly is rotated counterclockwise. For engines 11186/21116, an additional requirement must be met: the two rectangular marks must coincide.
Mandatory requirement for motors 11186/21116
Upon completion of installation, the marks AB and CD should also match. The drawing for them is given above.
Tightening torques
To perform installation correctly, you need a wrench with a force regulator. The value on it is set depending on the type of part:
- Tension roller mounting screw (11186/21116) – 17-27 N*m;
- Roller fastening nut (11183) – 30–36 N*m;
- Generator pulley fastening – 105–110 N*m.
First, the tension is adjusted on the roller, and then the fastening nut or bolt is tightened.
Snapshot
The surface of the toothed part of the belt should not have folds, cracks, undercuts of teeth and separation of fabric from rubber. The reverse side of the belt should not have wear, exposing the cord threads, or signs of burning. There should be no delamination or fraying on the end surfaces of the belt. If defects are found on the belt or there is a significant discrepancy between the belt tension control elements (see photo above), the belt must be replaced. You should also replace the belt with a new one if traces of engine oil are found on it (before installing a new belt, the cause of oil getting on the belt must be eliminated) or when replacing the coolant pump.
Attention! Failure of the timing belt (breakage and cutting of teeth) can lead to valves sticking into the pistons due to mismatch of the rotation angles of the crankshaft and camshaft and, as a result, to expensive engine repairs.
We replace the timing belt in accordance with the maintenance regulations every 75 thousand km or if defects are detected on the belt.
To avoid damaging the crankshaft position sensor, it must be removed.
According to the regulations, the timing belt needs to be replaced every 75,000 km. The advice applies to VAZ-11183, 11186 and 21116 engines. All of them are 8-valve and are installed in Grant cars. Let's consider replacement steps.
Parts from the VAZ catalog
Let’s immediately look at the list of VAZ components and special tools:
- Tensioner roller for internal combustion engine 11183 – 2108-1006120, nut for it – 00001-0021647-21;
- Timing belt (11183) – 2108-1006040-10;
- Automatic tension roller – 21116-1006226;
- Timing belt (11186/21116) – 21116-1006040;
- Key for automatic roller – 67.7812.9573-01;
- Key for roller VAZ-11183 – 67.7834.9525.
The tension roller of the "2108" family has two slots on one side. These slots should look “up”, that is, away from the engine.
Tensioner roller for motor 11183
The slots were made for special tools. It is designated by the numbers “67.7834.9525” (see list). And for automatic rollers, the key is designated differently - “67.7812.9573”. What it looks like is shown below.
The automatic roller can also be adjusted
It remains to list how the mounting bolts, washers, etc. are designated:
- Three bolts for the VAZ-11183 cover – 00001-0009024-11, washers – 00001-0026406-01;
- Timing drive cover (11183) – 21080-1006146-10;
- Bolts for VAZ-21116 covers – 2108-1003286-00, spring washers – 00001-0011977-73;
- Top cover – 21116-1006226-00, bottom cover – 21116-1006218-00.
We hope no questions arise here.
Imported analogues
Various components are suitable for replacing belts “2108-1006040-10”:
- GATES – 5521 or 5521XS;
- BOSCH – 1 987 949 095;
- DAYCO – 94089;
- CONTITECH – CT527;
- Finwhale - 2108-1006040.
The timing belt “21116-1006040” can be replaced with another part:
- GATES – 5670XS;
- CONTITECH – CT1164;
- QUARTZ (Germany) – QZ-5670XS.
Usually the choice is made in favor of GATES products. The letters "XS" in its catalog mean "reinforced". Grantovods have already told us in detail about the timing of replacing the timing belt, its choice, and signs of wear in the material: when to change the timing belt on Grant: recommendations from the plant and grantovods.
Original timing belt and fake
Attention! Components from GATES (England) are most often counterfeited! From the photo you can understand what the main difference is. Beware of fakes.
How to determine that a break may soon occur
Urgent replacement of the timing belt for a Granta car of 8 and 16 cl. may be necessary if the following phenomena occur:
- Decrease in vehicle power. A poorly tensioned or worn drive can make the engine difficult to start and reduce power output.
- Incomprehensible noises from the timing belt on the Grant, emanating from the engine compartment. Clunking, ticking or strange rustling noises often indicate that the Granta timing belt is damaged and rubbing against the casing or other parts under the hood
- Visible damage. The part may have abrasions, cracks and “shaggy” areas that are visible to the naked eye.
If, upon careful inspection, it is discovered that the teeth on the Grant timing belt have been cut off or at least one of the other listed problems, it is necessary to urgently replace the part with a new one, which is quite possible to do yourself.