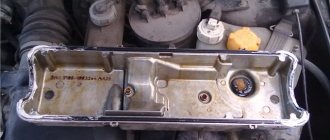
Preparing the machine and tools
Before you start work, you need to prepare everything you need in advance. This means stocking up on tools that may be needed, a new replacement kit, and also carrying out all the preparatory work.
First of all, prepare the place of work and the car itself:
- the working area must be level and normally lit;
- put the car on the parking brake;
- under the wheels - always stops;
- the engine must be completely cool;
- The car is de-energized and the battery terminals are removed.
Before starting to work on the engine itself, the car needs to be jacked up and everything that might interfere with getting to the timing belt must be removed.
List of necessary tools:
- standard set of open-end wrenches;
- a set of socket heads with a “ratchet”;
- fork key;
- a pair of screwdrivers (flat and Phillips);
- jack;
- sealant.
And finally, you need a new set of timing belt with rollers (its configuration depends on the car model), as well as clamps for the shafts (which ones depend on the engine itself, and this can be found in the service book), a flashlight, overalls, gloves and rags . And, of course, a phone with a camera, which will have to record the position of all the elements before they are dismantled. Believe me, this is important!
A few words about the importance of correct tension
Many motorists know that improper functioning of the timing belt can cause very serious engine damage. This is due to the principles of operation of the mechanism, which boil down to the timely and high-quality opening/closing of the engine valves. This approach not only allows you to adjust the valve timing of the internal combustion engine, but also differentiates between sensitive valves and constantly knocking pistons.
If the timing belt begins to work incorrectly, the gas distribution order is disrupted, as a result of which engine elements begin to wear out at an accelerated rate. Similar disturbances in the functioning of the engine can also occur due to improper belt tension.
Note! A break in the belt drive while driving not only negatively affects the condition of the engine, but can actually severely bend the valves. Repairing a car with such a breakdown often costs motorists five-digit sums of money.
In addition, drive tension that does not meet the standards accelerates wear of the main timing elements, the list of which includes:
- directly the belt drive itself;
- rollers;
- torque clutches;
- guides;
- tensioner
Repair of each of the marked timing parts takes much longer than normal belt tensioning. Well, there is nothing to say about the cost, if you can tighten the drive yourself and completely free of charge, then you will have to pay for replacing the components of the mechanism.
Step-by-step, do-it-yourself timing belt replacement
The replacement process is individual for each car model, but there is a certain algorithm of work that is typical for all cars. Clearly shown in the figure below.
Step-by-step timing belt replacement
So, everything is ready, we can start. An example is shown on 16-valve models VAZ 2110, 2111, 2112.
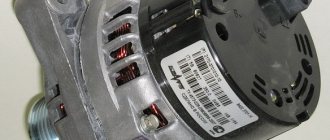
- First you will have to remove the alternator belt, which interferes with access to the timing belt.
Loosen the generator and remove the belt - Additional units that interfere with further work must be dismantled or moved, after loosening the fastenings. This applies, for example, to the adsorber, which may prevent the belt from being removed.
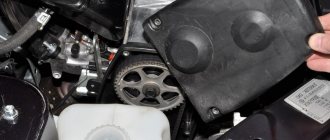
Remove the adsorber - Next, dismantle the protective covers and casings covering the timing mechanism. Their number depends on the car model: in some places everything will be limited to one casing, in others you will have to remove a dozen separate elements to get to the belt itself. The more complex the design, the more pictures you will have to take so that there are no unnecessary details left later. In this case, everything is extremely simple.
Unscrew the casing bolts - Next, you need to align the marks on the camshafts and the casing. This can be done by turning the jacked wheel, after putting it in 5th gear.
Place marks on camshafts - Also check the mark on the crankshaft.
Check the mark on the crankshaft gear - Secure the crankshaft and camshafts. To do this, you may need slats or brackets prepared in advance.
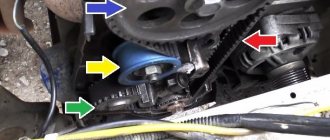
- Loosen the tension roller. To do this, you will need a hex or socket wrench, which moves the roller to the side, allowing you to remove the belt.
Loosen the tension roller - Remove the timing belt. After removal, you need to inspect it for oil or antifreeze stains. If there are stains, you need to find the leak and fix it.
Remove timing belt - Unscrew the mounting bolts of the tension and idler rollers and remove them. Inspect the seats for oil contamination and clean if necessary. Install new videos.
- Replace the remaining elements that are included in the timing belt kit: vibration damper, brackets for mounting the rollers, mounting bolts. If the pump is in poor condition, it will also have to be replaced (a worn-out pump begins to vibrate, which damages the timing belt. And to replace all these “dances” you will have to start all over again, so it’s better to do everything at once). Check the labels again for consistency.
- Install a new set, first bending the tension roller. Depending on the car model, the tension roller will need to be moved to the side or loosened. Please note that a new timing belt should not be contaminated with oil if it gets on your gloves. You will need a clean rag or napkin to dry your hands with. Next, we check the marks again.
Install a new timing belt and check the marks again - Check belt tension. After this, tighten the tension roller.
- Install the remaining parts in reverse order.
If all this seems complicated, then the video below clearly shows the whole process.
Hydraulic timing chain tensioner: chain tension is always normal
Most modern timing chain drive engines use hydraulic chain tensioners. Read everything about hydraulic tensioners, their existing designs and operating features, as well as the correct selection and replacement of these devices in the article offered on the website.
What is a hydraulic timing chain tensioner?
Hydraulic timing chain tensioner (hydraulic chain tensioner) is an auxiliary unit for the timing chain drive; a hydraulic cylinder of a special design that provides the required magnitude and constant over time (independent of current temperature conditions, loads and wear of parts) chain tension.
The camshaft chain drive is still widely used due to its reliability and resistance to high loads. However, the chain is subject to thermal expansion (since it is made of metal), and over time it wears out and stretches - all this leads to a change in the chain tension, which is manifested by an increase in vibrations and noise, and ultimately can result in sprocket teeth slipping, phase changes and even the destruction of individual parts. All these problems are solved by using a special device - a hydraulic chain tensioner.
Design of a hydraulic chain tensioner Design of a hydraulic chain tensioner without a reserve cavity
The hydraulic tensioner performs two key functions:
- Automatic maintenance of chain tension when it is worn out and pulled out;
- Damping of chain branch vibrations during engine operation.
The use of this device makes manual adjustment of the degree of chain tension unnecessary, and eliminates the negative consequences of gradual wear of drive parts. Also, due to its design, the hydraulic tensioner dampens vibrations and oscillations of the chain, reducing the load on parts and the overall noise level of the mechanism. A faulty hydraulic tensioner can cause problems and should be replaced as soon as possible. But before you buy or order a new hydraulic chain tensioner, you should understand the design and operation of these devices.
Types, design and principle of operation of hydraulic chain tensioners
Diagram of operation of the spring-hydraulic chain tensioner for VAZ engines
Fundamentally, all modern hydraulic tensioners have the same design and operating principle, differing only in details and additional functionality. The unit consists of a metal cylindrical body, in the front part of which there is a plunger, and in the rear part there is a valve assembly. A closed working cavity is formed between the plunger and the valve assembly.
How often should it be changed?
As you can see, the replacement procedure is still a “holiday”. It’s clear that you want to do this less often, but bringing your car to an accident is also not the best option.
What is the optimal replacement frequency?
The answer can be found in the service book, it clearly states: a condition check is done at every service, routine replacement is done every 80 (100, 120, 180 , etc.) thousand km. But there are two small “buts”.
- Firstly, the manufacturer indicated the procedure for replacing the original belt. Yes, if a car is purchased with zero mileage, it will pass its regulatory period without any problems, even the longest one. But the quality of non-original belts from different manufacturers may vary. So even products from the best brands require supervision and often early replacement.
- Secondly, the service life is shortened by the following factors:
- variable climate, in which elastic materials wear out faster;
- engine malfunctions that may cause damage;
- when contaminated with oil or antifreeze (yes, this is why it is recommended to install a new kit with clean hands);
- long-term downtime of a car, during which it also ages, but not from mileage, but from time;
- incorrect installation.
So you can’t always count on the belt to last until the scheduled time. Often 50 thousand km is the maximum limit for it, after which experts recommend replacement.
Automatic tensioners
The design of these mechanisms contains elements that provide automatic tension adjustment. No matter how worn the belt is or how quickly it stretches, the tension will remain at the same level. With the help of such mechanisms, it is possible to reduce the level of vibration of the belt drive and absorb various shocks and shocks. There are two types of automatic tensioning mechanisms:
- Hydraulic - work thanks to oil pressure.
- Mechanical - adjustment is made using springs.
The latter can use torsion or compression springs.
Signs that replacement is needed
The main signs of abnormal timing belt operation can be identified either purely visually or by listening to the engine. You need to pay attention to the following points:
- The engine starts to run unstably and the power drops. One of the reasons may be the belt stretching or slipping by one tooth;
- engine vibration appeared;
- extraneous noises are heard from the running engine;
- the color of the exhaust has changed, becoming darker, black;
- During inspection, wear of the rollers was revealed;
- the belt has external signs of wear: protruding threads, frayed edges, cracks on the outside, “licking” of the teeth;
- there are traces of technical fluids on it.
If it was installed incorrectly (tensioned too tightly or too loosely, touching other elements with the side edge, etc.), it will wear out long before the end of its designed service life. That is why even if it is “freshly installed”, it needs to be checked after 8-10 thousand km.
Mechanical devices
The timing belt tensioner roller can be adjusted using a spring. If a compression spring is used, the roller is pressed against the belt under the action of elastic force. If a coiled spring is used, then its lower edge engages with the base. And the upper one acts on the roller. The force with which the spring acts on the roller is set by the device manufacturer. One thing is required from the driver or mechanic at the service station - to install the mechanism correctly. It does not need adjustment; the roller device will take the most suitable position.
How to choose the right timing belt, which brand is better, what are the prices on the market?
On the one hand, the timing belt is a simple thing, so it won’t create any special problems when choosing. On the other hand, each engine model has its own, correct one, with special technical characteristics.
Therefore there are three options:
- Select by VIN code or technical data of the car. This is the most accurate method that all specialists use. It is especially relevant if you need not only a belt, but also the entire replacement kit.
- Select according to certain characteristics. That is, knowing the width and number of teeth, choose exactly the same one.
- Knowing the individual number (the one indicated by the manufacturer), choose the same one or an analogue (catalogues of analogues are available in any online store).
All three methods have the right to exist, but specialists mainly use the first and third, and ask for technical specifications only for verification.
In terms of brands, there are three categories of recommended brands:
- OEM, that is, belts with the brand of the automaker. This is an ideal, albeit the most expensive option, since their quality is almost the same as that of the factory ones. It runs quite well throughout the entire regulatory period and presents almost no unpleasant surprises (almost - because a defect can slip through even two or three stages of quality control, nothing can be done about it). OEM prices go up to $200 (per belt, not per set), but this is perhaps an extreme option. On Lada, for example, branded ones cost from 25 to 100 dollars.
- Premium brands are manufacturers who make spare parts to order from automobile concerns (that is, they produce OEM products) and release them under their own brand. The quality is high, reliability too, prices are lower than the original, but not by much. These are, for example, Contitech, Lemforder, Gates. Prices start from 10 and go up to the same 200 dollars.
- Mass market brands are those manufacturers that are in greatest demand. Prices are usually average, but the quality is quite decent. For example, the most popular brands among buyers are Bosch, Dayco, SKF and Blue Print, prices for which start from 5 and end at 100 dollars.
Do the rollers need to be changed at the same time as the belt? After all, the difference in price between a separate timing belt and a complete set is very, very noticeable, so is it worth the expense?
The answer to this question is very simple - the more fuss with replacement, the more arguments there are for replacing the entire set, including the water pump. The rollers wear out and begin to vibrate, this vibration shortens the service life of the belt itself. Even if you don’t change it yourself, but go to a service station, it’s still better to pay once for the work than twice with a short interval.
However, if the belt is replaced for any reason long before the end of its standard service life (for example, it was incorrectly installed and frayed, or was initially of very poor quality and quickly cracked), then it may be enough to replace only it, and not the whole set.
Hydraulic devices
They are more expensive and more complex, but their efficiency is higher than that of spring ones. With their help, it is possible to achieve the required belt tension in automatic mode. They also allow you to change the tension force over a wide range. At the base there is a cylinder, which is mounted as follows:
- Together with the roller on the bracket. The rod, which is located on the cylinder, rests against the bracket or engine block.
- Directly on the internal combustion engine block - on the cylinder - the rod rests against a roller, which moves together with the bracket.
No matter which cylinder design is used, they all have the same operating principle. They have two cavities connected to each other. They are separated using a plunger device. Oil flows between the two cavities through channels. Belt tension is controlled by oil pressure and a spring.
Adjustment
The roller that provides tension to the timing belt is located at the end of the engine. It is equipped with a spring-plunger mechanism, which makes the adjustment procedure much easier, as well as making it faster and easier even for a person who does not have special knowledge and skills.
In the meantime, the adjustment procedure must be carried out regularly. This ensures that the unpleasant effect that was described in the previous section of the article will not occur, and you will not have to spend money on expensive and time-consuming engine repairs.
What do I need to do? In order for the adjustment to take place properly, it is highly advisable to arm yourself with a dynamometer. It will allow you to understand exactly how much adjustment to make in one direction or another, in order to avoid chafing of the thin rubber layer when operating the car.
Of course, you can do without a special tool. However, it is worth remembering that this is just a temporary measure. What can this be useful for? For example, the motor may fail along the way. Or the engine can be repaired independently, in a garage, and after that you need to drive to the service center on your own, so that the tuning can be done there with the help of special equipment more efficiently and accurately.
Installation of a new video
You need to install a new part on VAZ cars in the reverse order to its original place. In addition, installation must be carried out in such a way that the two existing holes are directed outward and not inward.
At all stages of installation, you need to monitor the marks and prevent them from moving. All that remains is to check the tightness of the roller fastening and adjust the tension of the belt drive.
To test the correctness of the actions, you should start the car and evaluate the quality of work. If a large branch wobbles even at low speeds, it is necessary to increase the tension. Any noise and hum should be excluded. If they are present, the tension must be loosened.
