The VAZ-2170 or Lada Priora first appeared on the market in 2007. Since then, it has enjoyed deserved popularity among many car enthusiasts. And there are reasons for this: Priora combines the low cost of a domestic car and good build quality, comparable to some foreign cars. At the same time, the car has a fairly economical engine, and its repair and maintenance will not break the bank. And some simple jobs, such as removing the rear or front door trim, can be done with your own hands.
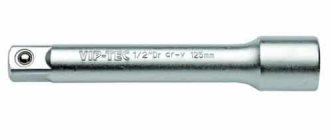
Door Removal Tools
Before starting the manipulations, you need to prepare the tools. To work you will need:
- heads for 10 and 13;
- key - “ratchet”;
- head extension;
- Torx T20 bit;
- adapter for nozzle;
- Phillips screwdriver.
In some places of the casing there are plastic holders, so-called clips. You can remove them without damage using plastic spatulas designed for removing plastic clips.
Trim Removal Tools
This is a highly specialized tool, not every car owner has it. In this case, you may have to purchase new upholstery fasteners, since the old ones may break if they are exposed to inappropriate tools. You can try replacing the blades with a shoe knife or similar tool, but a good result is not guaranteed, since you can, again, break the fasteners or scratch the upholstery.
Why may it be necessary to dismantle the covering?
There are various situations in which it is necessary to remove door trim. For example, without this it is impossible to install noise insulation or insulate a door. In addition, if the window regulators or door handles need repair, you also cannot do without removing the trim.
Well, in the end, there may always be a desire to replace the casing with a newer one, with an original color scheme or unique materials.
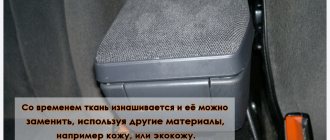
Replacing door trim can significantly change the appearance of the interior
How to remove the front door trim on a Priora
Dismantling operations will involve disconnecting the electrical components of the door. Before starting work, remove the negative terminal on the battery. This is done using the key at “10”. Release the tightening and carefully remove the contact. It needs to be moved away from the terminal to avoid accidental contact.
After the power to the car is turned off, you can begin to remove the trim. The process is carried out in stages:
- Open the door. Below, under the upholstery, there are three cross-shaped screws. They should be unscrewed.
- There is also a screw for a screwdriver in the body of the handle for opening; we also unscrew it.
- Remove the two T20 Torx bolts from inside the door handle.
- The pocket is secured with latches. Carefully pry it up and release it. The entire handle, along with the power window module and side mirror adjustments, should come out. Disconnect the block with wires and put it aside.
- Now you should unscrew the locking cap by hand.
- We move to the side of the door from the salon. We carefully pry up the bottom corner and try to free the upholstery from the fastenings. If you have shoulder blades, we do it with them. Otherwise, you can use a wide flat screwdriver. The latches may burst, it's not a big deal.
Important!
Try to keep the screwdriver as close to the latch as possible. Otherwise, the upholstery itself may be damaged. If you use special blades, place their edges under the latch.
- We continue to release the casing, moving up and in a circle.
- When the entire element remains in your hands, we disengage the opening mechanism.
- We remove the upholstery to the side.
- The insides of the door opened before us. Unscrew the two screws securing the handle module and window regulator. Let's take it off.
- There is a nuance to this point. When the upholstery has already been removed before, there may be no sound insulation. But if there is one, remove the large piece first, and then the small one.
At this point, the work with the casing can be considered completed.
You can watch more information about removing the trim from the front door of the Lada Priora in the following video:
Do-it-yourself repair of glass control buttons in cars
First you need to remove the button block from the doors, it’s not difficult.
Renault car power window control button block
To do this, you need to pry and pull the block up, but always from the side as in the photo, where the arrow indicates.
Next, we free the buttons from the wires and remove them from the case. To disconnect the chips with wires, you need to press the locking tab on these chips in the direction indicated by the arrow. See photo. And then, swinging, we pull together the chips.
We remove the chip with wiresNext, we release the latches holding the button in the unit body - you will see them and now the front window lifter buttons are already on the desktop.
Removed block of buttons on the desktop
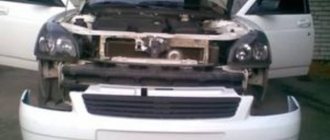
How to remove the front door on a Priora
We proceed according to the following scheme:
- We disconnect the block of wires going to the window regulator.
- Disconnect the connection to the locking mechanism.
- There is a rubber corrugation at the front of the door. We pry it up with a flat screwdriver and pull it out of the grooves.
- Now you can remove the wiring harness from the doors. We take them aside.
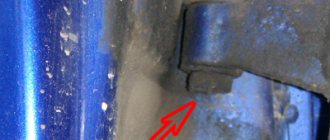
- Let's move on to the stroke opening limiter mechanism. Depending on the year of manufacture of the car, it can be secured with 8 or 10 mm bolts. We select a suitable head and use a ratchet wrench to unscrew them from the car pillar.
- There are loops left. To do this, use a 13 mm socket to unscrew the bolts. The fastening is tightened tightly, so you will need a powerful wrench or a regular wrench.
Advice!
It is advisable to carry out this procedure with an assistant who will hold the door as the fastenings are loosened.
- By freeing the hinges, the door can be removed from the body.
After this, you can begin to disassemble the internals: the lock, handles, window drive, etc. if necessary.
Advantages and disadvantages
There is a lot of debate as to whether soundproofing car doors is really necessary, and whether soundproofing materials provide any real benefit. Each modification to a car after it leaves the factory can have strengths and weaknesses. This also applies to soundproofing doors. If we talk about the advantages, here are the following points:
- the overall level of comfort of the car increases;
- high-quality insulation increases the value of the car in the eyes of buyers;
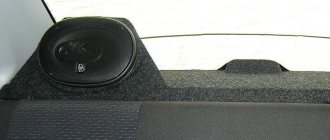
- doors can be used to install more powerful acoustics than a standard audio system;
- closing is carried out softer, more accurately, without unnecessary sounds.
As for the shortcomings, here, basically, it all comes down to the fact of increasing the weight of the door. Because of this, they gradually begin to sag, the hinges wear out, and repairs are required. The advice is simple. Don't forget to lubricate the doors, don't overuse the amount of insulating materials, and also try not to keep the doors wide open. Another conditional disadvantage manifests itself in the form of poor audibility of what is happening outside. Some people actually consider this a disadvantage, since the driver hears the signals of other cars worse. But here he has rear-view mirrors at his disposal, which he needs to look at periodically.
Making high-quality sound insulation for doors is really not that difficult. Dismantling takes little time, and there are no complex parts that must be removed before applying a layer of vibration and sound insulation. Therefore, many people prefer to do this work themselves. Based on the recommendations given, following the sequence of actions and choosing high-quality materials, you will certainly be able to achieve an excellent result.
How to remove the rear trim on a Priora
If the car has a full power package (front and rear electric windows), the procedure is practically no different from dismantling the front panels. If manual window drives are installed on the rear door trims, proceed according to the following scheme:
- Prepare a thin flat-head screwdriver. Use it to pry the handle lock and press it away from the round socket (it is located right next to the casing).
Important!
Gently apply force with a screwdriver to the plastic elements. They “don’t like” strong pressure.
- Move the latch so that it comes out of the socket. Take it off.
- Pull the window handle and the base itself out of the mechanism shaft.
- Unscrew the screw securing the door opening housing with a Phillips screwdriver.
- Slowly pry up and remove the panel.
- Using a Torx T20 bit, unscrew the inner panel handle. We remove it from the latches.
- We unscrew the cap of the locking mechanism by hand.
The casing is freed from attachments, you can begin to dismantle it from the plastic clips. The procedure is the same as for the front door, except there are no screws at the bottom of the trim.
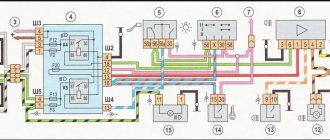
Components of the window lift system
What should I do if the right one does not work or both electronic devices fail? The window regulators may break, leaving them unable to lower or raise the windows. It is possible that the electronic device is jamming or sticking, but before you repair and disassemble the system yourself, you need to understand its structure. The unit itself works by controlling electric motors installed in the vehicle doors and designed to raise and lower the windows.
The system itself includes the following components:
- electric motors;
- switches located in the doors;
- wiring;
- glass
General structure of the ED system
How to remove the rear door on a Priora
The sequence for dismantling the rear door is the same as in the case of the front door. Notes:
- if the car does not have rear power windows, the step of disconnecting the wiring can be skipped;
- The presence of a central lock requires the supply of electricity to the electric lock mechanism. After removing the upholstery, the block with connections should be disconnected and pulled out from the door through the hole.
After this, unscrewing the fasteners and removing the door itself can continue.
The tools are similar: for the travel stop - a 10 mm head (in some, 8 mm), for hinges - 13 mm.
Central locking device
The central locking system is designed to ensure reliable operation under all conditions. It combines several basic elements, without which full use of the system is impossible. New cars have a complex central locking control scheme. Other components of the vehicle’s on-board system are involved.
The device of the central car lock:
1. Control unit.
The electronic control unit is used to transmit signals with commands to the mechanism switches and the central unit. The central unit, after decoding the command, opens or closes the doors, windows, trunk and hatch.
2.Input sensors.
Input sensors are also called microswitches. Work together with door lock limit switches. Microswitches determine and fix the position of the locks after a command from the central control unit.
3.Executive devices.
Actuators are represented by door and trunk locks. They open and close based on microswitch commands. The last link in the chain.
The central locking system operates independently of engine operation. The electronic control unit on the key fob is powered autonomously. A coin-cell battery is used.
Some useful tips
The first dismantling can cause a number of difficulties and wrong decisions. To avoid damaging the door and its upholstery, follow these rules:
- Do not attempt to remove a Torx bolt with a regular screwdriver. It is shaped like a star and cannot be grasped tightly with the normal end. At best, nothing will come of it. In the worst case, the edges will collapse and it will become difficult to twist even with the original nozzle. The bits are inexpensive, and will save a lot of time and nerves.
- It is necessary to de-energize the vehicle when performing any wiring work. A sloppy contact can easily short out to ground or to another wire. The consequences are a blown fuse, a short circuit, failure of sensitive units. A few minutes spent disconnecting the battery is not that much time.
- Each connection block has its own sets of grooves. Don’t be afraid to connect the contact “in the wrong place” - you won’t be able to insert it anywhere else.
- Do not leave damaged wire sections inside the door. They can cause poor contact or shortness.
- It’s better to get a new Phillips screwdriver with “fresh” edges. Unscrewing licked screws takes a lot of time and patience.
- When working with upholstery, try to keep the tool clean. Getting the covering material dirty is a matter of seconds.
Removing doors does not require much qualification. The tips given will help even an inexperienced motorist dismantle the assembly.
Happy renovation!
4.7/5 — (3 votes)
Cost of services
Simple card (direct) from 4 hours 2000–5000 rub. Complex map 3–7 days 6,000–15,000 rub.
Basically, the cost is calculated individually, based on the dimensions (number) of speakers and the desired configuration of the card (location, type of materials used, etc.). Contact us, we will make a good offer.
Manufacturing of other parts for car audio
Selection of audio system components 5 min – 1 hour free Adjustment of acoustics (during installation) free Audio preparation from an hour from 1000 rubles. Installation (installation) of coaxial acoustics 2–4 hours from 1400 rub. Installation (installation) of broadband acoustics 2–4 hours from 1600 rub. Installation (installation) of component acoustics 2–6 hours from RUB 3,500. Installation (installation) of subwoofers 1–4 hours from 500 rub. Installation (installation) of radio tape recorders from 15 minutes from 500 rubles. Organization of linear RCA outputs from an hour from 1000 rubles. Installation of a sound amplifier from an hour from 1000 rubles. Installation (installation) of the processor with configuration 4–6 hours 1500–4000 rub. Organization of control of the radio on the steering wheel from an hour from 2500 rubles. Disassembly and assembly of interior elements from 30 minutes from 300 rubles. Installation of a capacitor (storage) 1 hour 600–1500 rub. Crossover installation 1 hour 800–1200 rub.