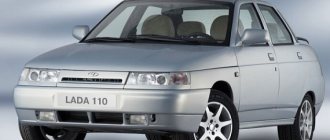
The armrest on the Priora is a thing - I’ll say even more, now I can’t drive cars that don’t have it. But it is covered with fabric, which quickly gets rubbed off with oily dirt, and at the car wash they charge a separate fee for cleaning off this dirt. Sometimes you want to remove the armrest and cover it with leather. On a Priora you can disassemble it in a couple of movements. Read the article to the end and you will find out how to do this. By the way, below there is a video about how to disassemble the armrest in a Priora car. Okay, these are the lyrics, let's move on. The exterior of the Lada Priora, especially the 2nd version of the car, has at least some style and ergonomics, it has an armrest - hurray. All buttons in the car interior that perform primary tasks are located as close as possible to the driver. Everything, from buttons to seats, should be done so that a person is comfortable, and fatigue while driving is very far away - Lada is moving towards this.
By the way, an armrest for the Priora can be purchased additionally - even if you bought the car on the secondary market, it can be made as comfortable as it should be. The armrest will fit like a native one on Priora 1, 2, it doesn’t matter - there is already space between the seats. The price of the part, especially the factory one, for the pre-restyling version of the car and for Priora 2 starts from 1000 rubles.
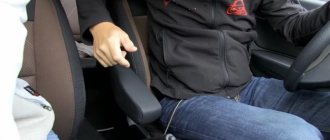
The driver's position is such that while driving, especially while stuck in traffic, it is easy to get tired of the monotony. After a few hours, the search begins for places where you can put your hands, because they get a little numb. The armrests of the Lada Priora are positioned so that you can rest your elbow on it without pulling your shoulders up or down.
Instructions: how to remove the armrest on a Priora - replacement, reupholstery, price
The armrest on the Priora is a thing - I’ll say even more, now I can’t drive cars that don’t have it. But it is covered with fabric, which quickly gets rubbed off with oily dirt, and at the car wash they charge a separate fee for cleaning off this dirt. Sometimes you want to remove the armrest and cover it with leather. On a Priora you can disassemble it in a couple of movements. Read the article to the end and you will find out how to do this. By the way, below there is a video about how to disassemble the armrest in a Priora car. Okay, these are the lyrics, let's move on. The exterior of the Lada Priora, especially the 2nd version of the car, has at least some style and ergonomics, it has an armrest - hurray. All buttons in the car interior that perform primary tasks are located as close as possible to the driver. Everything, from buttons to seats, should be done so that a person is comfortable, and fatigue while driving is very far away - Lada is moving towards this.
By the way, an armrest for the Priora can be purchased additionally - even if you bought the car on the secondary market, it can be made as comfortable as it should be. The armrest will fit like a native one on Priora 1, 2, it doesn’t matter - there is already space between the seats. The price of the part, especially the factory one, for the pre-restyling version of the car and for Priora 2 starts from 1000 rubles.
The driver's position is such that while driving, especially while stuck in traffic, it is easy to get tired of the monotony. After a few hours, the search begins for places where you can put your hands, because they get a little numb. The armrests of the Lada Priora are positioned so that you can rest your elbow on it without pulling your shoulders up or down.
- Standard armrest - article number and price
- Priora 1
- Priora 2
- Basic faults
- Installing the armrest of a Lada Priora car
- Manufacturers (analogues of armrests) and prices
- Do-it-yourself armrest reupholstery for a Priora car
Where to buy armrests for Lada Priora?
You can buy high-quality armrests for the Lada Priora car in our company! Here you will find any armrests for this car model at the best prices! We cooperate directly with armrest manufacturers, so we can vouch for the quality of the products we sell. In addition, we deliver goods to all regions of the Russian Federation. In addition, if you suddenly have any problems choosing an armrest, call us! We will be happy to help you choose the right and suitable armrest, as well as answer any questions you have about installing it.
Standard armrest - article number and price
Lada Priora was equipped with this small box with a pillow (and the catalog records this detail as a “floor tunnel lining box”) only for versions “Norma” and higher. Such a small addition can be purchased without any problems to ensure comfortable travel for yourself and your passengers. This will make you feel comfortable and relax a little on the road.
Armrest repair kit for Priora car - consists of the following parts:
- cover (21700-5109504-10);
- buffer(2183-5303044-00);
- drawer body (2170-5109514);
- cover button (2170-5109542);
- button spring (21700-5109544-00);
- front drawer lock (21700-5109548-00);
- rear clamp (21700-5109536-00);
- cover axis (21700-5109534-00);
- drawer holder (21700-5109530-00);
- drawer hinge (21700-519522-00);
- hinge axis springs (21700-5109528-00 and 21700-5109529-00).
Priora 1
The pre-restyling VAZ-2170 was equipped with an armrest with a cushion, which was covered with gray textile fabric. Catalog number – 21700-5109502-10. Price – from 1,000 to 1,500 rubles. You can purchase a lid or a box separately; smaller parts are less common - springs, axles, buttons.
Priora 2
The restyled VAZ-2170 received a more complex box design. This change comes as the 2013 facelift brought significant improvements to the interior with modern details. The catalog number of the armrest for 2 Priora is 21720-5109504-00. The price is also from 1,000 to 1,500 rubles.
For the restyled VAZ-2170, a part from Lada Vesta is suitable. The original received catalog number 8450-0312-30. Its price is about 10,000 rubles. Everyone is here. Its design is more complex, but the pad is quite soft. It is easier to change it because the cover closes with a zipper.
Removing the floor tunnel lining
We carry out the work by removing the cigarette lighter, parking brake lever and trunk lock control button. We tilt both front seats back (see “Removing the front seat”). For clarity, the work is shown with the driver's seat removed.
Using a 10mm socket, unscrew the nut securing the air duct to the legs of the passengers in the rear seat...
...and remove it. Similarly, remove the air duct on the right side.
Raising the armrest, we pry up the decorative trim of the armrest hinge...
...and remove it. We pry up, overcoming the resistance of the latches, a container for storing small items...
...and take it out of the tunnel lining.
Using a 10mm socket, unscrew the two bolts securing the armrest hinge and remove the armrest.
Using a Phillips screwdriver, unscrew the four screws securing the floor tunnel lining.
Through the opening in the lining, pressing the lock with your hand, remove the wiring block from the trunk lock control button.
Using a high 10mm head, unscrew the two nuts securing the tunnel lining. We install both front seats in their places and move them as far forward as possible along the slide.
Using a Phillips screwdriver, unscrew the self-tapping screw securing the tunnel lining to the base on the left and similarly on the right.
Use a slotted screwdriver to remove the plastic plug at the bottom of the cup holder.
Using a Phillips screwdriver, unscrew the screw fastening the tunnel lining.
Using a Phillips screwdriver, unscrew the two self-tapping screws securing the floor tunnel lining on the left and similarly on the right.
Use a slotted screwdriver to pry up and remove the plug in the niche of the parking brake drive lever.
Use a Phillips screwdriver to unscrew the screw fastening the side panel of the tunnel lining...
...and remove it. We remove the right shield in the same way.
Using a Phillips screwdriver, unscrew the self-tapping screw securing the front part of the tunnel lining. Similarly, unscrew the self-tapping screw on the right side.
Overcoming the resistance of the clamps, we remove the frame for fastening the gear lever cover... ...and leave the frame with the cover on the lever.
Using a Phillips screwdriver, unscrew the two screws securing the tunnel lining to the instrument panel console.
We lift up the tunnel lining...
...and by pressing the latch, disconnect the wiring block from the cigarette lighter. Remove the floor tunnel lining. We install the tunnel lining in the reverse order.
Basic faults
The armrest of the Lada Priora has a fairly simple structure, but nevertheless, with use it wears out and has to be replaced or repaired. The main malfunctions of this part are the following:
- It gets very dirty from the elbows of the driver and passenger. The fabric absorbs absolutely everything - sweat, water, and other drinks. It’s even worse when it’s washed – it looks very untidy. Corrected by re-upholstering the fabric. It is not at all necessary to change the box or install a new one in its place - if the other parts are in good order, this is not advisable;
- The lid lock is faulty. This manifests itself in the fact that when you open the box, the lid immediately falls on your hand, thereby preventing you from calmly moving any things. The latch can be changed if the situation is “not critical” - when other elements are not damaged.
- The lid button spring is faulty. She might just fly off. To lift the soft element under your elbow, you will have to pry it off.
Newbie mistakes
The most common mistake is incorrect calculation of the required amount of material. When purchasing it, you need to consider hems, seams and hems. It is better to buy fabric with a reserve, and if there is excess left, then sew decorative pillows. In the worst case scenario, the store may run out of this material, or the new batch will have a different shade. Experienced professionals give the following advice:
- Before starting work, make sure you have all the necessary tools.
- When reupholstering, it is recommended to use padding polyester, which is laid on foam rubber. Thanks to it, the fabric will stretch better, and during operation it will not come into contact with the foam rubber, which increases the service life of the sofa.
- It is recommended to film or photograph each action during the disassembly process. This will help during assembly.
If you haven’t had to pull up sofas before, it is recommended to first practice on a stool.
It is not difficult to reupholster a sofa at home. You just need to choose the right material and prepare all the necessary tools. The result is an updated piece of furniture that will serve for many years to come.
Installing the armrest of a Lada Priora car
In order to disassemble this part of the car seat, repair it a little, and redo the upholstery, you will need to get a repair kit for a soft pad under the elbow. It costs only 100 rubles, and the kit itself includes the following elements:
- Holder. Catalog number 2170-5109552.
- Retainer (finger). Catalog number 2170-5109548.
- Holder spring. Catalog number 2170-5109554.
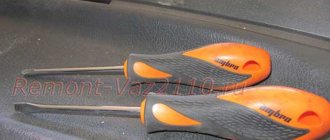
To work you will need a “10” head and a knob. Next, in order to remove the part on the car, follow these steps:
- Fold back the lid together with the box.
- The plug on the bottom needs to be pryed off. Here, unscrew the two mounting bolts with a ratchet.
- Remove the box with the lid.
- Place the new element in reverse order.
Removing the floor tunnel lining
We carry out the work by removing the cigarette lighter, parking brake lever and trunk lock control button. We tilt both front seats back (see “Removing the front seat”). For clarity, the work is shown with the driver's seat removed. Using a 10mm socket, unscrew the nut securing the air duct to the legs of the passengers in the rear seat...
...and remove it. Similarly, remove the air duct on the right side.
Raising the armrest, we pry up the decorative trim of the armrest hinge...
...and remove it. We pry up, overcoming the resistance of the latches, a container for storing small items...
...and take it out of the tunnel lining.
Using a 10mm socket, unscrew the two bolts securing the armrest hinge and remove the armrest.
Using a Phillips screwdriver, unscrew the four screws securing the floor tunnel lining.
Through the opening in the lining, pressing the lock with your hand, remove the wiring block from the trunk lock control button.
Using a high 10mm head, unscrew the two nuts securing the tunnel lining. We install both front seats in their places and move them as far forward as possible along the slide.
Using a Phillips screwdriver, unscrew the self-tapping screw securing the tunnel lining to the base on the left and similarly on the right.
Use a slotted screwdriver to remove the plastic plug at the bottom of the cup holder.
Using a Phillips screwdriver, unscrew the screw fastening the tunnel lining.
Using a Phillips screwdriver, unscrew the two self-tapping screws securing the floor tunnel lining on the left and similarly on the right.
Use a slotted screwdriver to pry up and remove the plug in the niche of the parking brake drive lever.
Use a Phillips screwdriver to unscrew the screw fastening the side panel of the tunnel lining...
...and remove it. We remove the right shield in the same way.
Using a Phillips screwdriver, unscrew the self-tapping screw securing the front part of the tunnel lining. Similarly, unscrew the self-tapping screw on the right side.
Overcoming the resistance of the clamps, we remove the frame for fastening the gear lever cover... ...and leave the frame with the cover on the lever.
Using a Phillips screwdriver, unscrew the two screws securing the tunnel lining to the instrument panel console.
We lift up the tunnel lining...
...and by pressing the latch, disconnect the wiring block from the cigarette lighter. Remove the floor tunnel lining. We install the tunnel lining in the reverse order.
Manufacturers (analogues of armrests) and prices
There are some good suggestions that can be used to replace these stock seat parts. There are copies with any coating - even eco-leather and any design. Among them:
- Varta – 1500 rubles. The base is wood, the covering is eco-leather. With a gray stripe in the middle, which is emphasized by black stripes on the sides.
- Azard bar10013 – 1500 – 1,700 rubles. The covering is strictly black, made of eco-leather.
- Autochecly models RR-01 - RR-05, RR-20, RR-26. Made of eco-leather, the central insert of the backing can be made in several colors. Cost – 2,200 – 2,400 rubles.
Do-it-yourself armrest reupholstery for a Priora car
There is no need to throw away the old box - re-upholstering the soft backing under the elbow is easier than re-upholstering the steering wheel. Fabrics wear out over time and need to be replaced on time. The new covering of the elbow box on a car can be completely different - eco-leather, fabric, genuine leather. Before covering the substrate, prepare:
- textile;
- glue “Moment” (it works great);
- hair dryer;
- clips, clothespins;
- knife.
First you need to remove the box assembly. The new reupholstery can be made on top of the standard fabric or under it. Do the work like this:
- Measure the required length for the covering, leaving a gap of two centimeters.
- Fill the working surface with glue - this is necessary so that the new fabric does not crawl over the lid, and also wrinkles do not collect on it.
- Push the ends of the fabric under the plastic frame and secure them with clothespins. You can put old plastic cards under the clothespins so that the iron parts of the clips do not leave their mark on the sheathing. You can also use other methods of fixing the tissue.
- Wait 15 minutes. Warm the surface with a hairdryer and work for 4-5 minutes.
- Set the finished covered box aside for 10-15 minutes.
- Remove the clamps. Check your work. Install in place of the old backing, a part with a new covering for the lid.
How to make a metal armrest:
- Choosing a mounting location.
In this case, these are the seat belt buckle bolts. The lower bolt secures the seat belt buckle itself, the upper one secures the tip of the support. - To create the armrest frame we need a sheet of iron 3 mm thick. We cut a strip of sheet metal approximately 30 mm wide.
- We bend this metal strip along the edges, as shown in the photo. There is no need for exact dimensions. Approximately what is the width of the sheet, we measure and bend it from the edges.
- Next, we drill holes on the resulting foot and on the strip itself.
We weld the hinge and stiffener. - We also make the base for the armrest from a sheet 3 mm thick.
- We weld the profile for reinforcement.
- It turns out to be such a moving part.
- We choose corduroy fabric for covering and upholstering the armrest.
- Let's make a cover. For example this option.
- We make the lining to size. For example, several layers of padding polyester.
- We apply it to the armrest frame, tighten the base and sew it together.
- Sew on corduroy fabric to cover the bottom of the base.
- We put on the cover and tighten it with a cord.
- The end result is a car armrest that looks like this.
Instructions: how to remove the armrest on a Priora - replacement, reupholstery, price
The armrest on the Priora is a thing - I’ll say even more, now I can’t drive cars that don’t have it. But it is covered with fabric, which quickly gets rubbed off with oily dirt, and at the car wash they charge a separate fee for cleaning off this dirt. Sometimes you want to remove the armrest and cover it with leather. On a Priora you can disassemble it in a couple of movements. Read the article to the end and you will find out how to do this. By the way, below there is a video about how to disassemble the armrest in a Priora car. Okay, these are the lyrics, let's move on. The exterior of the Lada Priora, especially the 2nd version of the car, has at least some style and ergonomics, it has an armrest - hurray. All buttons in the car interior that perform primary tasks are located as close as possible to the driver. Everything, from buttons to seats, should be done so that a person is comfortable, and fatigue while driving is very far away - Lada is moving towards this.
By the way, an armrest for the Priora can be purchased additionally - even if you bought the car on the secondary market, it can be made as comfortable as it should be. The armrest will fit like a native one on Priora 1, 2, it doesn’t matter - there is already space between the seats. The price of the part, especially the factory one, for the pre-restyling version of the car and for Priora 2 starts from 1000 rubles.
The driver's position is such that while driving, especially while stuck in traffic, it is easy to get tired of the monotony. After a few hours, the search begins for places where you can put your hands, because they get a little numb. The armrests of the Lada Priora are positioned so that you can rest your elbow on it without pulling your shoulders up or down.
The final stage
At this stage, it is necessary to install the prepared product directly into the machine itself. To do this, it is best to use a polypropylene pipe with a steel rod and an M8 pin, designed for fastening plastic elements in the machine.
After this you need:
- Insert the pins into the holes.
- Install a metal plate on the reverse side and secure with a wrench.
- Cut a rectangle out of plywood, cover it with leatherette and make a couple of holes in it.
- Install the part and put on the tubes.
- Mark holes on the armrest and make them.
- Install the finished product between the seats and secure it with nuts.
Fastenings can be designed at your discretion. Some car owners simply fix the armrest between the seats. If it holds tightly, then additional manipulation may not be required. However, it is worth pressing the product several times to make sure that it does not fall out.
If the car owner experiences discomfort when using the made armrest, then it is better to remove it or remake it.
Necessary tool for replacing seat upholstery on Lada Priora
To reupholster the rear and front seats on a Priora, you will need the following tool:
- Pliers or side cutters (or a pair of pliers).
- Crosshead screwdriver.
- Awl.
- Nylon ties 2.5×150, or 3.6×150.
The new upholstery was from, a more classic pattern, the fabric itself is pleasant to the touch, and the seams are even and do not tear. If your style is business, then you can choose “Skif”, although it will be more expensive.
Naturally, you need to change the upholstery on all seats, but if you are going to reupholster it for the first time, we recommend starting with the back row, it will be easier with it than with the front ones.
Required Tools
In addition to the material itself, some tools will be needed.
There aren't that many of them. In order to do everything, you will need:
- Hair dryer (preferably a construction hair dryer);
- Scissors or knife;
- High quality glue;
- Screwdriver;
- A set of keys.
This is quite enough to cope with the armrest. A sewing machine is welcome, but not required. You will need it if you are going to sew a “cover” for the armrest from several parts or decorate it with decorative seams.
Basic faults
The armrest of the Lada Priora has a fairly simple structure, but nevertheless, with use it wears out and has to be replaced or repaired. The main malfunctions of this part are the following:
- It gets very dirty from the elbows of the driver and passenger. The fabric absorbs absolutely everything - sweat, water, and other drinks. It’s even worse when it’s washed – it looks very untidy. Corrected by re-upholstering the fabric. It is not at all necessary to change the box or install a new one in its place - if the other parts are in good order, this is not advisable;
- The lid lock is faulty. This manifests itself in the fact that when you open the box, the lid immediately falls on your hand, thereby preventing you from calmly moving any things. The latch can be changed if the situation is “not critical” - when other elements are not damaged.
- The lid button spring is faulty. She might just fly off. To lift the soft element under your elbow, you will have to pry it off.
Manufacturing process
Making an armrest with your own hands is quite simple if you have at least some experience with a jigsaw. If you have correctly measured all the distances and made the correct drawing, then all you need to do is follow the diagram and our instructions exactly.
- Cut out the pieces from graph paper. After use, do not put them away far, because they will still be useful when covering the body with material.
- Attach them to the plywood and transfer the contours.
- Using an electric jigsaw, cut out the necessary parts.
- To create curves, for example on an armrest cover, soften the plywood over steam or hot water.
- Fasten all the parts using self-tapping screws, according to the project. If necessary, you can use glue, but it alone will not be able to firmly hold the structural elements.
- If desired, you can install partitions inside the armrest: you will have compartments of different sizes for storing useful little things.
- Glue foam rubber onto the armrest cover, otherwise your hand will feel the hardness of the wood even through the upholstery material.
Making an armrest
cut out the parts from plywood, according to the diagram, think over the principles of connecting the parts and fastening the lid. After all the parts are connected, all you have to do is glue the foam rubber on top and cover the body with leather
Your armrest is almost ready: now its body needs to be sheathed with material, and then installed between the seats in your preferred way.
Selection of material for reupholstery
Before you start reupholstering, you should decide on the material in which you will “dress” your armrest.
There are not many options on the market today. The best, of course, is leather. The armrest will look good in appearance. And in terms of wear resistance, it is much superior to other types of material. However, to cover the armrest with leather, you will have to tinker more. Moreover, it is not cheap.
You can also take a good leather substitute. Outwardly, it will not be much different from leather, but it has several disadvantages, including a tendency to damage and wear, and an unpleasant odor. In addition, leatherette is more elastic. This makes the re-upholstery process somewhat easier, but during operation this factor has a negative effect.
There is also Alcantara - a fiber material that is quite thin. It is durable, soft and silky. Has dirt-repellent properties.
When choosing a material, before purchasing it is worth checking its uniformity and at least looking at its quality externally. Also pay attention to the fact that it is in harmony with the interior color.
conclusions
Reupholstering the Priora armrest is a somewhat labor-intensive and painstaking process. However, almost anyone can do this on their own with minimal investment of time and money. And you will get much more pleasure from tuning yourself than by doing reupholstery “with someone else’s hands.”
Hi all . How to remove the trim from the armrest cover.
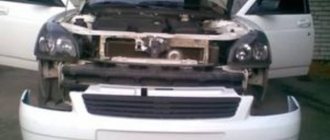
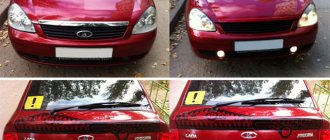
Taped the hood with 25 cm of transparent film
by Adminrive · Published 02/17/2013
How do you like it?
by Adminrive · Published 10/01/2016
Armrests for cars - we make them ourselves + » AvtoNovator
Such a disadvantage as the lack of an armrest can be easily eliminated. You can, of course, buy it, but if you make it yourself, the car will have an armrest that fully matches the interior layout and the car owner’s needs.
- 2 Where to start making a universal armrest?
- 3 Design and manufacture of universal armrest elements
- 4 Selecting materials and making your own armrest
What is the right armrest?
The idea of creating your own element for the location of one of the driver’s hands is not without meaning. Buying such a factory-produced design is not the easiest undertaking. It is expensive, it is difficult to find a structure with suitable dimensions, appropriate design and the internal functionality that you require. There is only one way out - to delve into the manufacture of armrests for cars and try your hand at this exciting business.
We need the “correct” armrest, the design of which will take into account all the nuances, its ergonomics will be brought to the maximum, and the appearance will fully correspond to the interior of the car. To do this, you will need to pay attention to the following points:
- the presence of a separate compartment for storing important little things that can be easily and quickly found;
- the ability to put a bottle of water or a glass of tea/coffee;
- the presence of a sliding and tilting mechanism to give the structure mobility and provide access to the hand brake and seat belt latch;
- the use of soft but durable materials that will ensure a comfortable and comfortable hand position.
Removing the interior trim of the Priora
Any parts of the car interior, in particular the ceiling, can be modified, for example, installing sound insulation.
The ceiling can also be improved and re-stretched. Of course, the first step in any type of tuning is dismantling the product. How to remove the trim from the roof of a Lada Priora car yourself? To carry out the operation of removing the car upholstery, you need a Phillips and flat-head screwdriver, as well as gloves, which must be clean, since the upholstery of the VAZ 2107 (Lada Priora) is very soiled and easy to get dirty. By the way, if you have your upholstery changed at a service station, but you need a car urgently, we recommend using the Kyiv car rental SVcar service. We assure you that you will be satisfied!
The procedure for removing the headliner:
- You need to open the glasses case and unscrew two bolts.
- The lampshade snaps off and is removed.
- It is necessary to disconnect all wiring harnesses from the lampshade.
- The plastic cover located near the interior mirror is removed, and the latches are snapped off with a flat screwdriver.
- Two bolts are unscrewed, the mirror and plastic box are removed.
- The side trims of the windshield pillars located on the driver's side are removed. To do this, you need to pry them off and snap off three clips.
- The pillar trim on the passenger side is removed in the same way.
- The pillar trim in the center (near the seat belts) on both the driver and passenger sides is removable.
- The plugs are removed and the bolts holding the upper handles are unscrewed.
- The three plugs near the rear window also need to be removed.
- The rear strut covers do not need to be removed; instead, it is recommended to snap off their upper part.
- If there is a central lamp used for interior lighting, it must also be removed.
How to remove the headliner of a Lada Priora?
After carrying out all the above work, only the seals hold the casing in place. Using a flat-head screwdriver, the headliner is removed from under the seals. As soon as the front part of the ceiling is on the seats, the trim needs to be moved forward, then the rear part of the trim is brought out from under the rear pillars.
In order to remove the trim from a VAZ 2170 (sedan), you need to lower its left edge between the door and the seats, and then pull it out through the rear door. This must be done very carefully so as not to break the upholstery.
If the car is a VAZ 2171 (station wagon) or VAZ 2172 (hatchback), then in this case the headliner can be pulled out through the trunk. The roof sheathing is installed in the reverse order of the above.
Found a mistake? Select the text with the mouse and press Ctrl+EnterVIP is a type of tuning that over time has become a car culture. The emergence of the VIP style is closely related to the emergence of the JDM scene.
During the operation of any car, the lamps in the headlights must be replaced, because they cannot work forever. Reupholstering the car ceiling with your own hands This article will help you learn more about how you can reupholster the car ceiling yourself at home. Attaching the inner door panel: Fig.
1Service life of the main muffler, which is used in the exhaust system of the Lada Priora (hereinafter referred to as pShow more
Original armrest repair kit (3 parts) for Lada Priora
Equipment:
- Holder 2170-5109552 — 1 pc.;
- Holder spring 2170-5109554 — 1 pc.;
- Retainer (finger) 2170-5109548 — 1 pc.
Applicability:
- Lada Priora sedan (VAZ 2170)
- Lada Priora station wagon (VAZ 2171)
- Lada Priora coupe (VAZ 21728)
‘>
Original armrest repair kit (3 parts) for Lada Priora
Original (factory) armrest repair kit. Designed to replace a standard one that has become unusable.
Equipment:
- Holder 2170-5109552 — 1 pc.;
- Holder spring 2170-5109554 — 1 pc.;
- Retainer (finger) 2170-5109548 — 1 pc.
Applicability:
- Lada Priora sedan (VAZ 2170)
- Lada Priora station wagon (VAZ 2171)
- Lada Priora coupe (VAZ 21728)
Payment to Sberbank VISA card
The most convenient and profitable payment method for you. Payment can be made through the Sberbank Online system, through a payment terminal (Sberbank ATM), provided that you have a card from this bank. If you are not a client of this bank and you do not have a card, then you can top up your balance at any bank branch through an operator; they will accept cash payment and top up your balance. Commission from 0 to 1%
Payment to Alfa-Bank card
Payment via Tinkoff card
Payment to VTB card
Cash on delivery (payment upon receipt)
Payment for the order will be made at the post office upon receipt of the goods. For cash on delivery services, Russian Post takes an additional commission - approximately 4% of the cost of the order (parcel) upon receipt.
The postal commission based on the amount of “Cash on Delivery” for your parcel is described below, i.e. In addition to the delivery cost, the post office will also charge you a commission for .
Postal commission for cash on delivery service:
· up to 1,000 rub. inclusive - 80 rub. + 5% of the amount
· over 1,000 to 5,000 rubles. inclusive - 90 rub. + 4%
· over 5,000 rub. up to 20,000 rub. inclusive -190 rub. + 2%
· over 20,000 rub. up to 500,000 rub. inclusive - 290 rub. + 1.5%
Attention! Advance payment for delivery 100% (via Sberbank payment). This is included in our Cash on Delivery terms.
Check with the manager for additional information.
Yandex money.
This payment method involves issuing an invoice in the Yandex.Money system.
You will be able to pay from your Yandex.Money wallet. ATTENTION
! There are restrictions on the payment amount: anonymous wallet 15,000 rubles, registered wallet 60,000 rubles, identified wallet 250,000 rubles. After payment you will receive an electronic cash receipt.
Transfer via Western Union
QIWI Wallet.
This payment method involves issuing an invoice in the QIWI system.
You will be able to pay from your QIWI wallet. ATTENTION
! There are restrictions on the payment amount: RUB 250,000. After payment you will receive an electronic cash receipt.
Payment to a bank account for legal entities and individual entrepreneurs (excluding VAT).
This payment method is intended only for legal entities and individual entrepreneurs. After placing your order, send your organization details to [email protected] In the subject line of the email, please include your order number.
After this, the manager will send an invoice via email in the prescribed form. We work without VAT. Payment method commission - 6%
.
Attention! Regardless of which delivery method you choose, check the integrity of the goods and packaging upon receipt of the cargo (parcel).
After submitting your order to the terminal of the transport company/Russian post office, a track number will be sent to the phone number and email specified in the order, if available, to track the parcel.
Delivery by transport company
Delivery by one of the transport companies with a representative office in your city. Delivery time: 2-10 days depending on the distance of your locality from Togliatti. The most convenient and fastest way to deliver orders of different sizes. Delivery cost from 250 rub. depending on weight and delivery distance.
Orders are sent by transport companies based on 100% payment for the order. Dispatch by transport companies PEK, KIT, Baikal-Service is carried out on Wednesday, Thursday and Friday.
Product delivery options
Note! Below are the shipping methods available specifically for this product. Payment options may vary depending on the delivery method.
Detailed information can be found on the “Delivery and Payment” page.
Parcel by Russian Post
Available payment methods:
- Cash on delivery (payment upon receipt)
- Using cards Sberbank, VTB, Post Bank, Tinkoff
- Yandex money
- QIWI
- ROBOKASSA
Shipping throughout Russia. Delivery time is from 5 to 12 days.
Parcel by Russian Post 1st class
Available payment methods:
- Cash on delivery (payment upon receipt)
- Using cards Sberbank, VTB, Post Bank, Tinkoff
- Yandex money
- QIWI
- ROBOKASSA
Shipping throughout Russia. Delivery time is from 2 to 5 days. More expensive than regular delivery by Russian Post, approximately 50%. Parcel weight up to 2.5 kg
Express Parcel EMS
Available payment methods:
- Cash on delivery (payment upon receipt)
- Using cards Sberbank, VTB, Post Bank, Tinkoff
- Yandex money
- QIWI
- ROBOKASSA
Shipping throughout Russia. Delivery time is from 3 to 7 days. More expensive than regular delivery by Russian Post, approximately 100%.
Transport companies
Available payment methods:
- Using cards Sberbank, VTB, Post Bank, Tinkoff
- Yandex money
- QIWI
- ROBOKASSA
Delivery is possible to any locality where there is a representative office of the transport company. Delivery time is from 2 to 10 days. Sending large parcels is approximately 50% more profitable than by Russian Post.
Courier delivery in Togliatti
Available payment methods:
- Cash upon receipt
- Using cards Sberbank, VTB, Post Bank, Tinkoff
- Yandex money
- QIWI
- ROBOKASSA
Source
We cooperate with:
Delivery is carried out throughout Russia and the CIS.
Deadline for order delivery to T.K. from 1 to 4 business days from the date of receipt of funds. (orders are not processed on Saturday and Sunday).
Lead time for orders that include painting services: 5-10 business days.
The lead time for placing orders and “made to order” items is from 14 days; you can check with the manager for more detailed information.
Orders for pickup are placed on the website, the formation time is on average 1-4 business days, after the items arrive at the pickup point, the manager will notify you when you can receive your order.
ATTENTION! All fragile goods (headlights, plastic products, glass, etc.), by default, are sent in additional paid packaging from TK. If you take responsibility for the integrity, we can ship without it. To do this, you need to make a note in the comments when placing your order. For additional information, please contact the managers.
How to reupholster the rear, front seats and armrest on a Priora with your own hands
The upholstery in your car will tighten over time, even if you use cleaning products. The door panels, headliner and seat upholstery are combed out, become tarnished, greasy and simply have holes in them or are simply burned with a cigarette. Therefore, often dry cleaning is also powerless.
And here we are faced with a choice. Either install covers or replace the upholstery. Each of these options has its pros and cons.
In this case, such a problem concerns the Lada Priora car. If you like to take care of your car, then this instruction will be useful for car owners. Since it will be clearly shown how to reupholster the old rear seat with new upholstery. The instructions will have the most detailed explanation of how to disassemble and reassemble, as well as what you need to pay attention to and where to start when replacing the seat upholstery with your own hands.
The easiest way to update a seat is to cover it with new covers. But this will not solve the issue of cleanliness, because all the dirt that the upholstery has absorbed remains there, so the dust and unpleasant smell will not go away. The main advantage is how well they fit and perfectly follow all the curves of the foam casting. Covers will hide dirty upholstery, but with new upholstery you'll feel like you're in a new car.
Pay attention to what kind of seats you have. The fact is that at first they installed foam molding of the tenth family on the Priora, and accordingly the upholstery was different. Check this question with the seller before buying a new one!
To reupholster the rear and front seats on a Priora, you will need the following tool:
- Pliers or side cutters (or a pair of pliers).
- Crosshead screwdriver.
- Awl.
- Nylon ties 2.5×150, or 3.6×150.
The new upholstery was from, a more classic pattern, the fabric itself is pleasant to the touch, and the seams are even and do not tear. If your style is business, then you can choose “Skif”, although it will be more expensive.
Naturally, you need to change the upholstery on all seats, but if you are going to reupholster it for the first time, we recommend starting with the back row, it will be easier with it than with the front ones.
How to reupholster the rear and front seats of Priora
The first thing you need to do is disassemble the back row, then put it in a place convenient for you, maybe right in the middle of the room. The whole procedure consists of straightening the metal rings, rearranging the knitting needles and stretching the new upholstery using not rings, but ties.
- The old upholstery is attached to the body using steel rings; we unbend them. If you try to snack on them, it will be a rather labor-intensive task. Therefore, simply use side cutters to twist the ring clockwise, and it will come off. If that doesn't work, use pliers.
- To give the upholstery a shape, it is attached using a knitting needle with rings to a knitting needle in foam casting, and we also unbend them.
- We remove the old upholstery, take out the knitting needles and insert them into the new one.
- Using a screwdriver or an awl, we make holes in the upholstery along the spokes and connect the holes made with a tie to the spokes in the foam casting. Instead of steel rings, it is better to use ties; the work then becomes much easier. And in terms of strength it is no worse than rings.
- We tighten the ties evenly, bite the edges and remove the locks inside so that they do not stick out from the upholstery. When tightening the clamps, watch the tension; when tightening, folds will appear that cannot be removed.
- We also make holes along the contour of the upholstery and connect it to the body with clamps.
With the backs everything is absolutely the same. The only thing I would like to talk about is the removal of the headrest clamps. There is no information on how to remove them on the Internet at all. To remove them you need to press on one of the tabs with a screwdriver and pull it up. Quite difficult to remove.
Priora armrest and headrest reupholstery
Armrest . There shouldn’t be any special problems here, the upholstery is simply attached with Velcro. Don't forget to make holes for further fastening.
Headrests . We unscrew the protective cover, pry up the upholstery and remove it from the hooks. We insert the knitting needles from the old upholstery into the new one, stretch it and hook it onto the hooks. Screw the cover back on.
The spokes in the headrest are of different lengths, do not mix them up.
Detailed video on reupholstering seats, headrests and armrests on a Priora with your own hands
Additional work after reupholstering the seat upholstery
After assembly, there may be folds, since the upholstery was originally folded. A steamer will help you here. if it is not there, then do it the old fashioned way, with an iron and a damp cloth. But be very careful! Once you put everything in place, believe me.
Overall, you will probably be very pleased with the result. The interior will be like new. And in the next article you will learn in more detail how to disassemble and reupholster the front seats, as well as how to install and connect seat heating.
to our channel in Yandex.Zen
Even more useful tips in a convenient format
Stories from our readers
“Fucking basin. "
Hi all! My name is Mikhail, now I’ll tell you a story about how I managed to exchange my two-wheeler for a 2010 Camry. It all started with the fact that I began to be wildly irritated by the breakdowns of the two-wheeler, it seemed like nothing serious was broken, but damn it, there were so many little things that really started to irritate me. This is where the idea arose that it was time to change the car to a foreign car. The choice fell on the melting Camry of the tenth years.
Yes, I had matured morally, but financially I just couldn’t handle it. I’ll say right away that I am against loans and taking a car, especially not a new one, on credit is unreasonable. My salary is 24k a month, so collecting 600-700 thousand is almost impossible for me. I started looking for different ways to make money on the Internet. You can’t imagine how many scams there are, what I haven’t tried: sports betting, network marketing, and even the volcano casino, where I successfully lost about 10 thousand ((The only direction in which it seemed to me that I could make money was currency trading on the stock exchange, they call it Forex. But when I started delving into it, I realized that it was very difficult for me. I continued to dig further and came across binary options. The essence is the same as in Forex, but it’s much easier to understand. I started reading forums, studying trading strategies. I tried it on a demo account, then opened a real account. To be honest, I didn’t manage to start earning money right away, until I understood all the mechanics of options, I lost about 3,000 rubles, but as it turned out, it was a precious experience. Now I earn 5-7 thousand rubles a day. I managed to get the car buy after half a year, but in my opinion this is a good result, and it’s not about the car, my life has changed, I naturally quit my job, I have more free time for myself and my family. You’ll laugh, but I work directly on the phone)) If If you want to change your life like me, then here’s what I advise you to do right now: 1. Register on the site 2. Practice on a Demo account (it’s free). 3. As soon as you get something on the Demo account, top up your REAL ACCOUNT and go to REAL MONEY! I also advise you to download the application to your phone, it’s much more convenient to work from your phone. Download here.