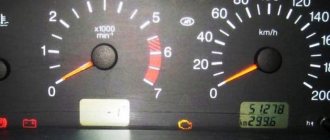
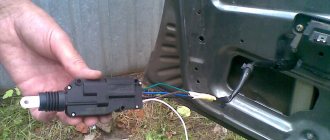
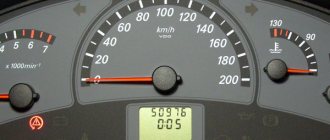
Let's consider such a problem in a Lada Priora car as a non-functioning instrument panel (dashboard). I’ll tell you a case from the practice of a car service. One Priora owner's instrument panel suddenly stopped working, the lights came on, and all the arrows were dead. He did not find out why this suddenly happened, but simply bought another one at a disassembly site and put it in place of the broken one. After some time, it also stopped working, and in the end he had to go to a car service for diagnostics.
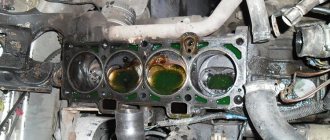
The cause of this malfunction was found out; the individual coil was broken to ground, i.e. 25,000 volts hit the ground, and accordingly all the electronics went crazy. A similar problem occurred on the Opel Vectra A, where in addition to the instrument panel, it was still impossible to connect the diagnostic tool. The problem was not with the coils, but with the fact that the high-voltage wires have a very high resistance, their general condition was very deplorable, this led to the fact that the slider in the distributor heated up and began to “break through” to ground.
Here is a broken coil on a Priora:
How was the fault determined? We immediately heard misfires from the exhaust, and only then began to remove the connectors from the coils and, using a rebuild method, found the problem cylinder that had misfires.
Fuses and relays in Lada Priora, electrical diagrams
Lada Priora is another car in the line of new VAZ cars, which is gaining popularity among segments of the population. External similarities with the 10th model attract the attention of young people; the relatively low price is also a reason for purchase for most car enthusiasts. Along with the growth in popularity, the owners of this model are gaining experience in repair and maintenance, which is becoming more and more every year.
If your Priora has electrical problems, do not rush to get upset; first, check the fuses and relays in your Lada Priora. These are the ones that will be discussed in this article.
Fuse box in the passenger compartment of VAZ-2170, -2171, -2172
The fuse box in Priora is located at the bottom of the dashboard, on the left side of the steering wheel. To get to it, you need to open the cover, which is held on by three latches. Rotate each locking knob 90 degrees and pull the lid down and it will snap open.
Fuses in the interior mounting block
F1 (25 A) - radiator cooling fan. If your fan does not work, check its motor by applying 12 V directly to it from the battery. If the engine is working properly, then most likely the problem is in the wiring or connectors. Check the serviceability of relay K1.
The fan in the Priora usually turns on at a temperature of 105-110 degrees. Do not allow the engine to overheat, watch the arrow of the temperature sensor.
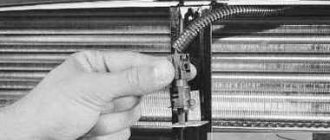
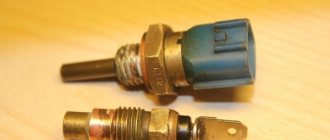
If the fan runs constantly and does not turn off, check the coolant temperature sensor located on the thermostat. If you remove the connector from the working sensor, the fan should turn on. Check the wiring to this temperature sensor, as well as the contacts of relay K1, move this relay, clean the contacts. If this is the case, replace it with a new relay.
F2 (25 A) - heated rear window. Check together with fuse F11 and relay K2. If the rear window does not fog up, the heating element threads may have broken. Inspect all the threads and if you find a break, seal it with special glue or varnish, which can be bought at car dealerships for 200-300 rubles. Check the connection contacts at the terminals to the heating elements at the edges of the glass, as well as the switch on the dashboard and the wiring from it to the rear window.
F3 (10 A) - high beam, right headlight. F4 (10 A) - high beam, left headlight. If the headlights do not shine on high beam, check the K7 relay and the headlight bulbs. The steering column switch, wiring or connectors may also be faulty.
F5 (10 A) - sound signal.
If the signal does not work when you press the steering wheel button, check relay K8. The signal itself is located under the radiator grille; you can get to it by removing the plastic casing from above. Check it by connecting the voltage to 12 V. If it doesn’t work, try turning the adjusting screw, or replace it with a new one.
F6 (7.5 A) - low beam, left headlight. F7 (7.5 A) - low beam, right headlight. When replacing lamps, be careful; there are separate lamps for the low and high beams, so they can be easily confused. It is better not to install lamps in high-power headlights; the reflectors may melt and the desired effect will not be achieved. Most low beam headlight problems that cannot be corrected by conventional means can be related to the light control module (LCM). The low beam relay is only available in cars equipped with a light sensor, it is located in the place of relay K1; on most cars this relay is not in the mounting block; the low beam circuit goes through the MUS block. It happens that the tracks in the block burn out; if there are problems, it is better to replace it with a new one. If the windshield wipers turn on spontaneously when the low beam is not working correctly, the problem is most likely in the windshield wiper control unit, located in the center of the dashboard, the topmost block, next to the radio, is best reached from the glove compartment, or by hand through the removed console covers at the feet.
F8 (10 A) - alarm signal. If the alarm does not work, also check relay K9.
F9 (25 A) - stove fan.
If your stove does not work in any mode, the problem may be with the stove speed controller or with the engine. Check the stove motor by applying 12 V voltage directly to it. If it does not work, remove it, open the cover and check the condition of the brushes. If the stove does not work only in the first modes, but works in the last mode, most likely you need to replace the heater resistance, located under the hood on the fan scroll.
The price of these resistors is about 200 rubles. Also check that the filter and all pipes are clean and that air flows normally into the stove. If the stove fan squeaks or turns with difficulty, try lubricating it. If the stove turns on and off, check the connectors and contacts in them, they could have melted or oxidized, in this case, replace the connector.
If the car has an air conditioner, the thermal fuse may burn out; it is located near the additional resistance; the fan fuse in the configuration with the air conditioner is located under the hood in the power fuse box.
F10 (7.5 A) - instrument panel, interior lights, brake lights.
If your instrument needles and gauges on the panel stop working, most likely the problem is in the connector that fits it. Check to see if it has fallen out and inspect its contacts. It may also be due to burnout of the tracks on the panel board. In this case, you need to disassemble the panel and inspect it. It can be easily disassembled by unscrewing the screws on top under the trim, on the bottom near the fuse cover and on the side.
If your brake lights do not work, none of them including the additional interior light, most likely the problem is in the switch, which is located at the base of the brake pedal, check and replace it. If some of the brake lights work and some don't, the bulbs are most likely burnt out. To replace the lamp you need to remove the headlight. To prevent the lamps from burning out, replace them with better ones.
F11 (20 A) - heated rear window, windshield wipers. If the heating does not work, see information about F2. If the front wipers do not work, check the tightness of the nuts on the shafts and the operation of the gear motor by removing it and applying 12 V voltage to it. If the motor is faulty, replace it with a new one. Removing the motor is problematic due to the design, so it is better to contact a car service.
The price of a new engine is about 1,800 rubles (if the car is not under warranty). Also check the steering column switch, it may be faulty or its contacts have oxidized.
F12 (10 A) - pin 15 from the devices.
F13 (15 A) - cigarette lighter. If your cigarette lighter does not work, check its contacts and wiring. Typically, problems with the cigarette lighter occur due to a short circuit after using non-standard or low-quality connectors. To replace the cigarette lighter, you need to remove the center console.
F14 (5 A) - left-hand side lamps. F15 (5 A) - right-side lamps. If your headlights stop working and the dashboard backlight does not light up, most likely the problem is in the light control module (LCM), check all the connectors and contacts in them; if the module is faulty, replace it with a new one. If the dashboard lights work, but the dimensions do not, most likely the problem is in the wiring or contacts. Don't forget to check the lamps themselves.
F16 (10 A) - Pin 15 from ABS.
F17 (10 A) - left fog lamp. F18 (10 A) - right fog lamp. If the PTF stops working, the lamps may have burned out, check if there is voltage in their connectors. If there is no voltage there, then in addition to the fuses, there is either wiring, or connectors, or a relay. Also check the power button in the cabin. The lamps in the “foglights” can be replaced by unscrewing the bumper or one side of it, or by unscrewing the fender liners and turning the wheels towards the headlight being replaced, or you need to unscrew the protection from below. You cannot install xenon in the PTF, because there is no tilt angle corrector and there is a high probability of blinding oncoming drivers.
F19 (15 A) - heated seats. If the heated front seats stop working, check the connector under the seat, wiring and the power button.
F20 (5 A) - immobilizer.
The immobilizer blocks the ignition circuit and the operation of the fuel pump. If the immobilizer does not see or loses the key, and also does not work correctly, try replacing the battery in the key. The electrical package control unit, which is located in the center of the dashboard, in the area of the radio, the second unit from the top with a black housing, could have failed. If you have lost your key and want to use a new one, you will need to register it in the immobilizer firmware.
If you disable the immobilizer, a light with a key symbol will light up on the panel, this means that it is looking for a key.
F21 (7.5 A) - rear fog lamp.
F22-30 - backup fuses.
F31 (30 A) - electrical package control unit.
Relay in the interior mounting block
K1 – radiator cooling fan relay. See information about F1.
K2 – relay for turning on the heated rear window. See information about F2.
K3 – starter activation relay. If the starter does not turn when you turn the key, first check the battery voltage and the contacts of its terminals, if necessary, clean them from oxidation and tighten them firmly. Charge the dead battery or replace it with a new one. The common ground contact in the engine compartment or the contact on the solenoid relay may also disappear; check whether the nuts are securely fastened and whether they hold the wire terminals well.
You can check the starter by closing its contacts directly with a screwdriver when the gearbox is in neutral gear or by applying a plus from the battery to one of the retractor contacts. If it turns, it means the problem is in the wiring or the ignition switch. If not, most likely the starter itself or the retractor is faulty.
Another reason may be the lack of contacts in the ignition switch. Also check the contact group, wires and connectors.
K4 – additional relay (ignition relay).
K5 – backup relay.
K6 – front wiper and washer relay. See information about F11. If the washer does not work, in the cold season, check the washer system pipes for frozen liquid and blockages, and also inspect the nozzles. Check the pump and its contacts by applying 12 V voltage to it; the pump is attached to the reservoir with windshield washer fluid. If the pump fails, replace it with a new one.
K7 – headlight high beam relay. See information about F3, F4.
K8 – horn relay. See information about F5.
K9 – alarm relay. Check together with fuse F8.
K10, K11, K12 – backup relays.
How the cooling system works on Priora
The system we are considering in the popular Lada Priora works by circulating fluid, as expected, through the radiator. The temperature decreases solely due to airflow. What types of blowing are there:
- The look is natural. As the name implies, in this case the natural air flow cools the radiator while driving.
- Kind of forced. When excessive heating occurs, the built-in fan is activated.
How does a fan work in the cooling system of a modern car:
- Through the positive contact, current flows to the so-called winding of the installed fan.
- The contact marked “-” is directed to the relay, which in turn is controlled by the ECU.
- The ECU, based on a signal from the coolant temperature sensor, turns on a device such as a relay to ground.
Attention! The domestically produced car Lada Priora does not have 1 coolant temperature sensor, there are 2 of them. And these are completely different devices. The 1st sensor sends a signal to the main computer, the 2nd sensor is responsible for the movement of the arrow on the dashboard.
Cars with ECU: features
In ordinary modern carburetor cars, the operating temperature is lower than in “injection” cars. For the latter it is 102-105 degrees. It is known that with such heating, the most ordinary water will naturally begin to boil. Therefore, you only need to use antifreeze or, as an option, antifreeze, the boiling point of which is at around 115 degrees.
Additional block
Additional relays are mounted on a bar and located under the dashboard, near the front passenger's feet. To get to them, you need to remove the right tunnel lining. Next to the additional relays is the electronic engine control unit (ECU).
If its connector interferes with access to the relay, disconnect it by first removing the negative terminal from the battery.
Circuit breakers
F1 (15 A) – main relay circuit, starter blocking.
F2 (7.5 A) – power circuit of the electronic control unit (ECU).
F3 (15 A) – electric fuel pump. If the fuel pump has stopped pumping (this can be determined by the absence of a sound when the ignition is turned on), check together with relay K2. There may also be problems with the immobilizer, it blocks the pump, see information about F20. If the wiring, this fuse and the relay are good, most likely the fuel pump itself has failed. To remove it, you need to disconnect the battery, remove the rear seat cushion, unscrew the cover, ring and fuel hoses, then carefully remove the entire fuel pump.
K1 – main relay.
K2 – electric fuel pump relay. See above about F3.
Where is the temperature gauge sensor on the needle located on the Priora and the symptoms of its malfunction
To check the temperature gauge sensor on a Priora or replace it, you must dismantle it. To do this, you should first understand the location of the device. The temperature indicator sensor is located on the needle on the Priora next to the DTOZH. If the DTOZH is built into the thermostat housing, then the DTOZH is installed directly in the cooling system on the engine block (under it on the left, as shown in the photo below).
To get to this sensor, you need to remove the air filter housing.
Signs of malfunction of the product in question appear as follows:
- The pointer arrow freezes in its initial position.
- The arrow shows incorrect values, for example, when the engine is warm, it shows 50-70 degrees, although it should be around 100 degrees.
- There is an abrupt change in readings, for example, the needle jumps from 90 degrees to 70 or 50, and returns back.
- Set at a maximum of 130 degrees.
Having an idea of the location of the element, you can resort to replacing it, and this process is described in detail in the next section.
Block in the engine compartment
The power fuse box is located in the engine compartment under the hood, near the left strut support. To get to it, you need to open the lid by prying the latch.
1 (30 A) - engine control system circuit. If there are problems with the electronic control unit, short circuits or other malfunctions, this fuse may blow out.
2 (30 A) - vehicle on-board circuit. 3 (40 A) - vehicle on-board circuit.
4 (60 A) - generator circuit.
5 (50 A) - electric power steering circuit.
6 (60 A) - generator circuit.
In case of any problems, it is important not to panic, to think soberly and logically. The most important thing is to diagnose and establish the cause of the breakdown. If you don’t have enough experience or nerves, it’s easier to sign up at the nearest car service center if it has a competent electrician.
I hope this article will help you deal with electrical problems and quickly fix any Priora malfunctions. If you have any experience or information, please leave a comment below, useful information will be added to the article.
Everyone values the time of day! TROUBLE! The instrument lights do not light up. First things first. Probably half a year ago my speedometer light stopped working. Today I decided to take care of it and changed two light bulbs. I put it in place, turn on the dimensions, and then “Hello.” Only the tachometer light is on and that’s it. The rest of the instruments are not illuminated, and the arrows do not light up either. The BC monitor is on and working, the arrows are also functioning, the indicator lights are all on. Only the devices do not light up. Changed the rest of the light bulbs. the same. Zero result.
Maybe someone had something similar? What could it be? Is it really necessary to change the device?
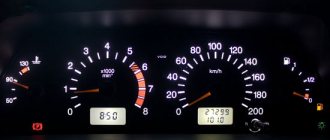
An instrument panel and several switches for various additional devices are installed on the front panel of the Lada Priora. If you look at the instrument panel from left to right, then it contains: tachometer, speedometer, coolant temperature indicator, fuel level indicator in the gas tank. There is a liquid crystal display under the speedometer, and below it, along the entire length of the dashboard, there are 16 warning lights. Two more turn signal indicator lamps are located at the top left and right of the speedometer. All instruments and warning lamps operate from appropriate sensors, and an electronic control unit takes part in data transmission.
Malfunctions that cause malfunctions in the operation of the instrument panel are purely electrical and are difficult to find without the appropriate knowledge. The following case can be cited as an example. The driver wiped dust from the front panel and instrument panel glass with a microfiber cloth. After these actions, when the ignition was turned on, the instrument panel refused to work at all. All instrument needles were at zero. He searched for the cause of this phenomenon and the elimination of this malfunction for quite a long time, but still found it. Apparently, a microfiber cloth, when moving over a plastic surface, creates a magnetic field, which leads to failure of the instrument panel. And fixing this malfunction is quite simple; you just need to remove the negative terminal from the battery for 10 seconds. But how much time was wasted in order for this rag, which is the cause of this malfunction, to be thrown into the trash.
A complete failure of the instrument panel can also result from the failure of the 7.5 amp fuse F10; in this case, the interior lamp and brake lights will also not light up. So it’s quite easy to check it without even opening the mounting block.
If only one device does not work, then you need to start looking for the cause of this malfunction by searching and checking the functionality of the sensor that powers this device. But again, all signals from the sensors to the dashboard instruments go through the electronic control unit. And if replacing the sensor does not give positive results, then you will have to check the electronic unit and the instrument panel itself, and here you cannot do without specialists.
The only thing the driver can do on the instrument panel is to check and, if necessary, replace a burnt-out warning light bulb. Sometimes the cause of the malfunction is simply poor contact in the connecting blocks of the wires. The driver can also check their condition himself.
The more complex the filling becomes on modern cars, the more difficult it is for the driver to find the cause and eliminate any malfunctions that arise. In these cases, knowledge and fairly easy access to information about the causes of these malfunctions are needed.
Dear experts, I think someone has encountered this. Priora 13 year luxury, tidy with navigation itelma. The display sometimes works, sometimes it doesn't.
Maybe someone knows where to buy a display, if you find a link on Alika. Very necessary
Malfunctions
If the speedometer on a Priora stops working, then you need to check each of its components step by step. It's better to start with the device itself.
Drive unit
The drive is checked by simply disconnecting the negative terminal of the battery. After reconnecting the terminal, the on-board computer reboots the system. Next, you need to reset the odometer, hold down the reset button and turn on the ignition. The tachometer and speedometer needles should deflect to the maximum. If this does not happen, then electrical voltage is not passing through these devices.
You can conduct an additional test of the speedometer's performance. On a Priora, the speedometer may not work due to a failure of the signal receiver drive. To check you need:
- From the “+” terminal of the battery, run a wire to terminal “26” of the red connector.
- With short touches you need to simulate the arrival of signals from the EMF.
- The arrow should deflect each time terminal “26” is touched.
If there is no response to the incoming voltage, you will have to dismantle the panel and remove the instrument printed circuit board. It needs to be inspected for breaks or oxidation of soldering and tracks. The oxidation needs to be cleaned, and the broken tracks need to be soldered with jumpers. Next, perform the following test:
- Set the tester to resistance measurement mode.
- Connect the red measuring probe to terminal “26”.
- Apply the black test lead to ground.
- The pulse input should show an operating resistance of up to 3 ohms.
FakeHeader
Comments 17
My throttle went off. View the board on the non-propelled
Do you mean the throttle?) I’ll take it to another place one of these days to check
How to understand whether something works or doesn’t? With brightness everything is fine, but the LCD backlight periodically turns off and does it plow?
I turn on the ignition, and sometimes the screen lights up, sometimes it doesn’t light up. But when the screen turns black, I don’t see anything, but from the passenger side I can see what’s happening on the display
I don’t really understand this, but as I understand it, the master said the screen consists of layers and supposedly, at his own risk, he disassembled the display itself and changed the backlight, but it didn’t help.
Its version processor or cable
Well then it's definitely a train.
Is the repair suitable? Or is it all the star to him?
I read it and he took it from my hands. There's no longer there
Maybe it's enough to just solder the contacts? Carefully examine the tracks and pins that are soldered into the board, as well as the connectors for connecting to the instrument panel. 85 percent of the faults are located there.
Another plus is that the cable may fall off from the LCD contacts
By the way. Thanks for the addition. I forgot this moment.
AvtoAmper161
Maybe it's enough to just solder the contacts? Carefully examine the tracks and pins that are soldered into the board, as well as the connectors for connecting to the instrument panel. 85 percent of the faults are located there.
I gave it to the technician, he first of all soldered the contacts, changed the backlight and did something to the processor
Then either to another master. Or to the landfill. To another master, not because this handyman. There are just moments when I can’t find the reason, I myself send the client to another master.
I agree, you need to find a friend. Landfill is not an option. The cost of such a device is very expensive
Latest Visitors
- I was told 6 times
- I said 25 times
| I came across panel 2170-3801010-60 (with a can-bus) with a complaint about the lack of indication. I don’t know how this happened for the owners, it felt like they had turned down the brightness of the display to zero. I contacted Itelm specialists and they told me the display unit was faulty (I didn’t understand) and recommended that I contact them in Moscow and give the panel for repair. They didn’t give me a diagram, the same recommendations for repairs, corporate rules (to develop crap and then make a secret out of the documentation). According to the subject, I thought it was a software glitch, but after the firmware the same canoe was still left, and once it turned on a dozen times it showed brighter, it’s a pity there was no way to attach another display. |
A comment
Rating
- I've been told 145 times
- I said 55 times
A comment
- I was told 20 times
- I said 6 times
| I uploaded working dumps, but there was no result. On one of the resources I came across information that when rebooting the device after updating, you need to pull out the flash drive from it. If this is not done, we get a dark screen and then can only be restored through a Windows XP PC. Are there any working dumps? |
A comment
- I've been told 30 times
- I said 2 times
A comment
- I was told 20 times
- I said 6 times
| How to update these panels via PC? |
Age: 2022 years old
- I was told 17 times
- I said 7 times
A comment
Age: 2022 years old
- I was told 17 times
- I said 7 times
| On the “Oktya” forum, section “odometers”, Granta, Priora2, Kalina2 Itelma instrument panels |
- I've been told 30 times
- I said 2 times
A comment
- I was told 0 times
- I said 6 times
| Maybe off topic, watch the video, what could it be? video Electrical package without errors, I threw off the PP, the test passes all the rules. Everything works, but these oil lamps and emergency lights are constantly on. |
How to eliminate error 4 on BC Lada Kalina: check light is on, photo
According to the service manual, error number 4 in the control unit indicates a malfunction of the coolant temperature sensor. According to reports from members of our community and according to motorists, this error is quite common and appears often on the Lada Kalina. It’s worth figuring out why errors pop up and how to fix the problem.
Causes of 4 errors
There are several reasons why error 4 appears in the ECU. Let's consider all possible options:
- The coolant temperature sensor has failed.
In the process of replacing and repairing the coolant sensor on Kalina
Open circuit with sensor.
Checking the wiring and voltage supply to the sensor
- Random error in the control unit system due to impact or other factors.
- Loss of contact on the sensor due to plaque buildup.
All of these reasons are fairly easy to fix and are not a cause for serious concern.
How to view errors on the on-board computer?
The video shows the “self-diagnosis mode” of the Lada Kalina car, in which you can find out if there are any errors:
Elimination methods
In order to eliminate the cause of error 4 in the Kalina ECU, you should perform the following operations:
- Check the sensor for functionality. If it “died”, then it should be replaced.
- Check if there is contact and if there is any plaque. Clean the seat and replace the sensor.
- Check the on-board circuit and make sure there is contact in it.
- But a random error will have to be treated only by flashing the ECU and resetting all errors. To do this, it is recommended to contact a car service.
Thus, you can solve the problem yourself, but as practice shows, this does not always work out. Error 4 occurs quite often in the cold season, when the car is parked in the fresh air for a long time, and not in the garage.
conclusions
Finding and eliminating the cause of error 4 on the Lada Kalina turned out to be quite easy. Although deciphering error codes requires special knowledge, the necessary information can be found in this article.
Attention /1
Below are the main reasons why reverse lights may malfunction and not light up when driving in reverse gear.
- Lamp burnouts
- Fuse
- Reverse sensor
- Open circuit
- Oxidation of contacts
Lamp burnout
This is the simplest option, but it still cannot be ruled out. It is unlikely that both bulbs could fail at once, but it is possible that you may not have noticed that one of the reverse lights is not on. Therefore, first of all, it is worth checking the lamps. To do this, you need to dismantle the lamp; it is removed from the luggage compartment and is held on by three wings.
Fuse
Both reversing lamps are powered by the same circuit, protected by the same fuse. Therefore, when the fuse-link melts, the power supply circuit for the lights disappears and both lamps stop turning on. This can easily be checked by looking at the dashboard, since on the Priora the fuse responsible for powering the rear running lights is also responsible for the dashboard lighting. If the car's lights and instrument panel lights stop lighting at the same time, the fuse link has most likely failed.
This fuse is numbered F12 with a rated current of 20A or 10A, depending on the vehicle configuration. In the “luxury” configuration 20A, “standard” 10A.
You can only replace a fuse with the same rating as it was previously installed in order to avoid a fire in the vehicle's electrical wiring.
Designations for other fuses can be found here.
Reverse sensor
To turn on the reversing lamps on the Prior, a special sensor is used, which is installed in the gearbox housing (gearbox). It is he who is able to disable the lights. This sensor is reliable, but it also sometimes fails.
It is not possible to repair this electrical appliance, so it is recommended to replace it entirely.
You can get to the sensor from the inspection hole, but to do this you will have to remove the crankcase protection (if equipped). We find the sensor, circled in red in the picture.
Next, remove the chip from the sensor and close it with a jumper made of thin wire, then turn on the ignition and see if the lights come on. If the lamps come on, then you need to start replacing the sensor.
Open circuit
Checking the circuit for open circuit is done using a multimeter. It is necessary to turn on the ignition on the car and set the gearbox to reverse gear. On the device, set the switch to measure DC voltage, as in the picture below.
We check whether the plus is coming to the lamp; to do this, remove the lamp and connect the device between the two contacts; if the device shows readings from 11V to 13V, then everything is normal and the circuit is working.
If there are no readings, then we connect one of the multimeter probes to the car body and take a measurement. The readings that appear on the multimeter will mean that the “-” mass is not reaching the flashlight. You need to look for a break.
If there are no readings, then the power supply circuit “+” and “-“ is open. It is best to contact an auto electrician to fix the problem.
Oxidation of contacts
Contacts can oxidize due to a poor connection between the lamp and the contact, as well as the sensor and the chip. Most often, oxidation occurs at the contact between the chip and the sensor. We check the contacts, tighten them if necessary and clean them.
After carrying out all the manipulations described above, the rear running lights of your car will shine like new.
Layout and operating principle
The Lada Priora model is equipped with a fully electronic speed calculation system. It consists of the following elements:
- Speed sensor (EMF). Its function is to create electrical impulses.
- Electrical wiring. Powers the speedometer system with electric current.
- Fuse. Protects the system from voltage surges.
- On-board computer. Monitors work and analyzes incoming data.
- The speedometer itself. Necessary for visual speed control.
There are not many components in the system. The system works as follows:
- The speed sensor produces electrical impulses. It is installed on the gearbox housing. On power units with 16 valves, the EMF is located on the side of the expansion tank. The EMF is installed opposite the flywheel. This gear has teeth along its entire diameter. There is only one tooth missing in one place. It is to this place that the magnetic speedometer sensor reacts. During the passage of an empty space, the EMF opens, thereby creating an electrical impulse.
- The pulses generated by the opening are sent through wires to the ECU. The computer calculates the speed at which the signals arrive and converts them into an electrical voltage of a certain strength.
- Voltage is supplied to the instrument panel, activating the speedometer drive motor.
- The electric motor deflects the speedometer needle by a certain degree.
In addition to needle deflection, electrical impulses from the speed sensor are necessary to calculate the fuel supply to the engine. Based on the data received, the on-board computer determines the required amount of combustible mixture and its filling with air. In this way, the required, stable engine speed is maintained for the current speed limit.
The speedometer on the Priora does not work for several reasons. But this is always preceded by the appearance of a number of symptoms of a malfunction. They will be described below.
How to change instrument lighting on a Priora
Replacing the backlight of the Lada Priora instrument panel
Where is the starter relay on the VAZ-2114: photo and video location
Task: replace the dashboard backlight in Lada Priora
We remove the dashboard of the Lada Priora. Let's disassemble it, everything is simple (4 screws and everything else is secured with latches). Another important thing is to carefully remove the hands and not damage them. Peel off the lining (overlay with numbers) and on the back side of this lining we begin to erase the green coating. I washed with ear sticks and rubbing alcohol (solvent is not recommended).
Next, carefully remove the LCD screen. We take out the green filter, erase the green coating of the filter and put everything back
Next, we change 5 light bulbs to white LEDs (you can also install red or blue LEDs, whichever backlight you prefer). I bought white LEDs together with a base at a radio store.
Let's put everything back together in reverse order.
The photo shows that it shines brightly, but in real life it is much worse. After driving around, some diodes began to blink, apparently there was a bad contact, and I decided to change the backlight a little.
I bought 1 meter of LED strip and a soldering iron with a thin tip.
1 Replacing Priora lamps in 5 minutes
2 Illumination of the instrument cluster Lada Priora 2.1 Soundproofing Priora
Replacing backlight bulbs
instrument panel
Lada Priora VAZ 2170.
Illumination of the instrument cluster Lada Priora
Backlight tuning
instrument combinations
Priora frets from Pavel Medved.
Let's begin. We take the tape and cut strips, 3 diodes in each, and solder the wiring to them. I took solid copper wire.
Next, glue these strips in the same way as shown in the photo. In some places it is necessary to drill holes for the wires.
Let's check this whole thing. To test the LEDs, I bought a 9 volt Krona battery. All diodes light up
We take the board and connect it to the car, turn on the dimensions and use the control light to find the plus and minus of the backlight. And solder the wiring to them.
Then we assemble everything and twist and insulate all the wires.
I wanted blue arrows. I bought blue fluorescent paint at an art salon. I wiped off the red coating on the hands and painted it.
It shines very brightly. You set the backlight control to minimum and everything is fine, it doesn’t dazzle. But still I decided to tint it with 20Koy.
Here is the final version of the work done. I spent 2 evenings on this matter and was pleased with the result. Now it shines evenly and brightly.
Result: work on replacing the dashboard backlight of the Lada Priora has been completed
Noise insulation priors
To soundproof the Lada Priora with your own hands - for starters, I bought five or two rolls of Splen, STP sheets, corrugations for
Instructions for replacing the device yourself
Replacing the drive on Kalina is simple, you need to perform the following steps:
- Using a wrench, unscrew the screw securing the device to the gearbox.
- Next, use a screwdriver to carefully pry the hole and remove the speedometer.
- At the next stage, the removed drive should be inspected for defects and contamination. It is also necessary to check the seat and clean it of dirt.
- When inspecting, pay attention to the gearbox. If oil stains are found, the O-ring must be replaced.
- We install the repaired or new speedometer in its original place.
- We assemble the drive in the reverse order of removal.
After final assembly, the operation of the drive should be checked.
Standard instrument panel - article number and price
The original car tidy exists in three types.
- the first is an option for a pre-restyling car;
- the second panel is for a restyled car;
- and the third is the “Lux” option for the restyled one, which has become faintly similar to all previous torpedoes.
Each of them contains standard elements such as a tachometer, so their functionality does not decrease. . Who wants to do tuning of the instrument panel, this option is for them.
Priora first generation
The instrument cluster for the first generation Lada Priora received catalog number 2170-3801010. Cost – about 6,000 rubles. Everything is standard with it - from left to right there are four arc scales with red arrows: odometer, speedometer, coolant temperature, fuel level. Below the speedometer there is a small on-board computer display, and above the arches are all the indicators, including the direction indicators.
Priora 2
For the Priora “Lux” variation there are two more “subtypes” - with or without a CAN bus. Different subtypes were made so that the panel could be connected to any car. Catalog number – 2170-3801010-50 without tire, 2170-3801010-60 with tire. It is distinctive in that it contains an elongated display with a screen that can highlight the navigator.
The catalog number of the combination for the “Norma” assembly is 21720-03801010-20. Cost – 6,500 rubles. Like the “Lux” version, it received a brighter speedometer and odometer, and the coolant temperature along with the fuel level indicator is hidden at the bottom of the speedometer and odometer. The base will not create a route on the display, but will show all the information in color.
Priora temperature gauge sensor or why the engine temperature arrow does not work
On the instrument panel of Priora cars there is a arrow indicator that displays the engine heating temperature at a specific point in time. This is one of the most important devices through which the engine temperature is monitored, which eliminates the possibility of overheating and, as a consequence, failure. Very often, owners of Priora or VAZ-2170 cars are faced with a situation where the engine temperature gauge needle does not work or shows incorrect values (and sometimes even takes on a life of its own). The main cause of such breakdowns is the temperature indicator sensor on the needle. It is important not to confuse this device with the sensor responsible for turning on the fans and transmitting information about the engine temperature to the ECU. It's called DTOZH, and you can read more about it here.
Lada Priora Hatchback Belaya Laiba › Logbook › Self-repair of the instrument panel
So, the first entry and the recent breakdown. In general, the speedometer got stuck at 120 km/h and wouldn’t let go. My father-in-law at the speedometer was 0, it was 120, if you go 50, then the speedometer shows 170 km/h))) it’s a very inconvenient thing that turned out like this. The tachometer was also downward by 500 rpm. I read here on the website who treated it. Reset the terminal from the battery, run a tidy test, etc. nothing helped. It was decided to remove the tidy and set the arrows by hand. I put it out, I think everything will be fine. I connect the device, run tests, what is the result? The tachometer needle still doesn’t show correctly (goes down), and the speedometer is fine at first, but then there are some crackles and it again starts to show incorrectly, going far beyond 200 and resting on the bottom of the dashboard... Taking a friend to help, we decided to open it completely and see how everything works there and what interferes with the shooters. After much thought and fiddling with a thin screwdriver, we uncovered the “motor” that turns the speedometer needle. The whole problem was that the gear on which the arrow was mounted was not entirely intact, or rather, 4 teeth on it were broken. Again we thought about how to solve the problem. Don’t buy a new device for 3400 just because of one gear... The solution was simple. I opened the temperature gauge motor and swapped the speedometer and temperature gears. Having empirically determined that broken teeth will not harm the temperature gauge. We collected everything except the temperature needles and speedometer. We connected it to the car and did a test so that the motors would drop to zero. Then I set the arrows evenly, ran the test, and lo and behold, everything works! Saved RUB 3,400.
