In this manual, we will examine in detail the procedure for removing and installing decorative front door trim on VAZ 2110-2112 vehicles. I would like to say right away that performing this procedure will not take you more than 10 minutes of time and you will need a minimum number of tools, namely:
- Flat blade screwdriver.
- Phillips or figured screwdriver.
A small digression before carrying out repairs. I recommend buying a set of plastic products in the store, which includes all the chips and clips for fastening the trim, carpet and other decorative parts of the interior. It is inexpensive, about 100 rubles, and will never be superfluous. And even more so when removing the casing, since there is a high probability of damaging them.
Where are the mounting points for the sheathing?
Almost any kind of skin is attached to one-time-use pistons, but in some places it is also held on by screws; the mounting locations vary depending on the skin, that is, the rear skin is attached in slightly different places, unlike the front; for clarity, we have given two photographs below, on the left they showed the trim of the front door and the arrows indicate the places where the pistons hold it, respectively, in the right photo everything is the same, but only the trim is no longer on the left, but on the right, by the way, the blue arrows show the places where the screws secure them, you remember all these places, because the casing needs to be bent and it needs to be bent exactly in those places where the pistons are located.
When should you replace your door trim?
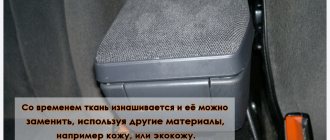
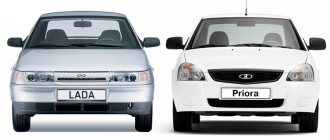
Over time, the casing gets scratched and deteriorates, due to this, the appearance of the car from the inside becomes not very beautiful and the casing is changed, but the casing does not always need to be changed, in most cases it is simply removed and therefore this article can still be used in it both the removal and installation of the trim are described, and in some cases (Very rarely) people who love their cars and simply those who want to give a new look to the car, this trim is removed and a new one is installed, of a completely different type or even from Priora (It fits the top ten, but you’ll just have to tinker with the electronics because in the Priora the electronics in the front door are located in the driver’s room, and in dozens it’s located in the floor tunnels in the middle and besides that you’ll have to redo the ventilation a little, namely through the trunk, otherwise the windows will most likely sweat ).
Replacement options
Drivers have several options for replacing door trim, each of which has its own advantages and is chosen based on taste:
- Eurocard;
- European cladding;
- panels from the manufacturer;
- independent re-upholstery.
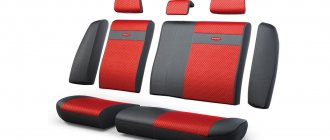
Factory trims from AvtoVAZ are replacement kits for the original trim. They are made of plastic and additionally covered with decorative inserts. The advantages are the exact overall dimensions, ease of installation of clips, and compliance with the door dimensions. Frequently used sheathing kits Lux 1 or Lux 2.
With European cladding, the door lining is made of high-strength polymers and comes in a variety of colors. Manufacturers are small companies specializing in car tuning.
Self-upholstery does not require large investments and is within the capabilities of every driver. The material you can use is textiles, natural, artificial leather, velor, etc.
Tools and materials
To reupholster yourself you will need to prepare:
- Sheathing material.
Experienced drivers recommend using vinyl, but keep in mind that the material shrinks significantly. Before purchasing, you must take measurements and leave at least 10 cm for allowances and internal bends. If genuine leather or suede is used, allow up to 5 cm for allowances.
- Scissors with a long blade.
- Glue. For repairs they use Moment, Master, Titan.
- A construction knife with a small blade and a sharp end.
- Construction or household hair dryer. It is not recommended to use a heating lamp as it may deform the material.
- Glue brushes: thin, wide.
- Set of clips.
For the VAZ 2110 they produce special sets of fasteners, the cost of a set of 10 clips is 30 rubles. Each door will require 8 clips. It is recommended to buy latches with a reserve. During installation, several clips often break, since the fasteners are consumer goods and the quality of the fasteners is not regulated.
- Self-tapping screws. If you use independent re-upholstery of the cladding on the old casing, then use standard short self-tapping screws; when installing factory casing or Eurocard, purchase a set of long self-tapping screws.
- Crosshead screwdriver.
- A thin screwdriver with a wide blade.
Lux 2 panels and Euro casings have standard places for speakers with a diameter of 17 cm. If the standard Lada audio system has smaller speakers, then you will need to select it to fit the size of the hole or add a rubber or plastic insert to the part to fit the speaker tightly to the mesh.
Reupholstering doors and panels with glue
Reupholstering complex surfaces raises the most questions, even among experienced craftsmen.
But it’s a good idea to familiarize yourself with the main nuances:
- First prepare the surface. Washing, sanding and degreasing are mandatory steps. Then the adhesion of materials increases, they adhere to each other faster and better. Special substances will help cope with degreasing.
- Next, glue is applied to the working surfaces and the material used. Applying with a brush helps with areas that have a lot of unevenness.
- Heating with a hair dryer promotes faster and better adhesion. Materials become more elastic.
Dismantling
At a service station, a mechanic spends no more than 15 minutes to disassemble door panels. Self-replacement will go quickly if you adhere to the order of work and do not change the sequence.
Front doors
The work algorithm for the front and rear doors of the VAZ 2110 is slightly different. Before work, you must disconnect the negative terminal from the battery. If the standard trim is reinstalled on the Euro trim, then it is necessary to remove the window lifter lever.
How to remove the front door trim of a VAZ 2110 step by step:
- Wrap the screwdriver in a rag or cover the tip with electrical tape.
- Using a screwdriver, press the trim of the window handle away from its socket.
- Guide the screwdriver so that the panel comes out of the grooves.
- Dismantle the cladding and remove the socket.
- Using a screwdriver, press out the lock of the driver's door armrest plug.
- Remove the clamp.
- Unscrew the two screws that hold the handle.
- Press the inner handle of the armrest, turn it up, and remove the part.
- Unscrew the screw that holds the mirror mechanism and remove it from the lever.
- Remove the two fastening clips from their seat and remove the triangular trim.
- Carefully slide the screwdriver under the panel and unfasten the 6 clips.
If the driver's or front passenger's door is equipped with a power window, then after removing the handle lock, you need to disconnect the plug.
Rear doors
The differences in work when removing the door trim are based on the fact that power windows are rarely installed for rear row passengers.
Removal of the rear door trim is carried out in the following steps:
- Use a thin screwdriver to pry the trim on the door handle and remove the part from the grooves.
- Unscrew the two bolts located under the trim.
- Carefully move the handle to the side, remove it from its seat, and pull it out.
- Unscrew the three screws securing the lower rear door trim panel.
- Remove the bottom panel.
- Unscrew the latch blocking the door from the inside.
- Pry off the cladding panel with a screwdriver; you can use a wooden wedge, bend it back and snap off the fastener clips.
The plastic clips must be reinstalled with new ones when assembling the updated door card.
Photo report on the dismantling and installation of the casing
Now you can proceed directly to the work itself. So, open the car door on which all this needs to be done and unscrew the three screws securing the lower door pocket. Look clearly at the photo below:
Then you need to do the following:
- push the bottom part back slightly
- carefully move the pocket down, thereby removing it from the grooves in the casing itself
If you have front speakers installed in the doors on a VAZ 2110-2112, then you need to unscrew the 4 bolts securing them along the entire diameter:
Then we perform the following procedure:
- carefully push the speaker back to pull it out of its seat
- disconnect the power wires from the contacts on the inside
Now you can proceed further
We take a thin screwdriver or knife and carefully pry up the trim on the door closing handle, after which we simply remove it by hand
As you can see, under it there are two more bolts that also need to be unscrewed:
Then you can remove the handle, since nothing else holds it:
- turn it up slightly
- and disengage with the door opening handle
Almost everything is done. There are several points left, one of which is unscrewing the latch locking the front door of the VAZ 2110.
Now, carefully, starting from the bottom corner, we pry up the casing and also carefully try to tear it off the latches (plastic clips) that secure it to the metal part of the frame:
And then we move in small sections in a circle, but we must act carefully so as not to damage or break the upholstery itself. At the last step, we lift it slightly up to free it from the door lock control rod (on which the latch, which we have already unscrewed, is screwed on):
This repair procedure can be considered complete. Then we carry out those actions for the sake of which all this was started; for everyone here there will be their own goals. After completing the repair, install in the reverse order.
Self-upholstery
Before directly reupholstering, it is recommended to check the condition of the inner door panel, remove pockets of corrosion, check or replace sound insulation, replace rubber seals, so the doors will open better. For VAZ 2110, the service life of door seals is up to 3 years.
The process of re-covering a door part yourself step by step:
- Clean the outside of the card. You can sand it with fine-grain emery for better adhesion of glue and leather.
- Attach the door card to the material, cut around the perimeter, leaving at least 7 cm around the edges.
- Treat the outer surface with glue and the inside of the future cladding with glue. Apply glue according to the manufacturer's recommendations. If an adhesive composition is used, then after coating you need to wait up to 10 minutes.
- Place the vinyl on the door card, constantly heating the material with a hairdryer, and level the surface so that the leatherette fills all the curves of the part: the space for the speaker, for the central panel, the recesses for the handles.
- Cut out all the holes that are covered with vinyl in the door card from the center and not reaching the perimeter, carefully wrap it on the wrong side, making sure that the edges of the fold do not exceed 2-3 cm. Trim off the remaining vinyl.
- After gluing the card, trim off the remaining vinyl, leaving at least 3-5 cm on the inside of the card perimeter.
After the glue has completely dried, install the door card on the car in the reverse order, having first changed all the clips.
Tuning
After finishing removal, clean the cards from dust using a vacuum cleaner, and begin tuning yourself.
First of all, measure and cut the necessary “patterns” for all door cards, taking into account an allowance of 5 or even 7 centimeters for each side.
This is so that during the process of gluing the sheathing material you do not have to install patches or redo everything all over again.
The glue must be applied to the cards with brushes one at a time so that it has time to dry a little, but not dry out. Having coated the doors with glue, we proceed to the cut piece of vinyl or fabric, which we also coat with glue on the back side, and set aside for 10-15 minutes.
After this time, we proceed directly to gluing the upholstery to the door cards. Vinyl stretches well, filling door “cavities”, but for this it needs to be heated with a hair dryer and smoothed over each cavity and bulge with your hands, preferably with gloves. The edges need to be carefully folded inside out and trimmed.
We subject the remaining doors to the same procedure. In addition, it is advisable to paste the same material over other parts of the interior so that it is in the same style.
These include door handle inlays, the glove compartment lid (if you want to highlight it), triangles at the mirrors, and the top cover of the steering casing. In places of various fastenings, you need to cut small holes using a stationery knife.
When reinstalling, do not forget to replace damaged pistons.
Installation of a ready-made kit
Re-upholstering the cladding yourself does not always help save time or money. If you don’t have time to do this yourself, then you can use ready-made cladding.
The set of door elements Lux 2 from AvtoVAZ has additional sound insulation, a set of standard fasteners, mesh for speakers and screws. Installing a finished panel takes up to 20 minutes for an inexperienced driver. When choosing a casing, choose original replicas; if the set contains only four panels, then the speaker grids, caps and screws must be purchased separately.
The lower part of the door trim needs to be screwed in only with long screws; if the standard kit offers short ones, then you need to change the screws yourself.
Installation of Lux 2 cladding in steps:
- Remove the old card.
- Attach a new panel, check the gaps and the alignment of the fastener locations.
- If the car is equipped with a mechanical window lift, then the panel needs to be modified. Lux 2 does not have a hole for the handle of a mechanical lift.
- Secure the trim to the clips.
- Tighten all the bolts and secure the outer trim panels.
The process of dismantling the front door trim from a Chevrolet Niva
There are various reasons why there is a need to carry out such work. For example, when repairing a door mechanism or installing additional speakers. The work is easy to do yourself, you just need to spend some time studying the nuances.
The procedure is not at all complicated.
- The inner handle has two plugs; under them there are mounting screws for this design. To remove the plugs, just poke at the structure with a sharp object.
- Use a screwdriver to unscrew the screws from the armrest, and the latter is removed.
- Three screws hold a special pocket on the plastic, with which you can store various items inside. The screws themselves are located at the bottom.
- The plastic cover of the handle for opening the door is dismantled next. The handle is unscrewed, then the screw inside is removed. Remove the decorative trim by pulling part of the part towards you. The main thing is that the trunk is not damaged.
Cost and types of finished skins
At a specialized service station, the cost of reupholstering a door trim starts from 3,000 rubles. excluding the cost of the door card.
Depending on the model, in 2022 the following prices for ready-made kits for the VAZ 2110 will remain:
- factory replicas from AvtoVAZ and KAMAZ - from 2300 rubles;
- Luxury cladding panels – from RUB 3,200;
- door cards Lux 2 for 16.8 cm speaker – 3500 RUR;
- plastic trim linings - from 300 rubles. thing.
Clips and nets for speakers must be purchased separately.
How to make door cards with your own hands
Everyone wants high-quality and unique door cards for their dozen, but you can’t buy these in a store, because the class of the car doesn’t allow it. Therefore, you can make door cards with your own hands.
Fastening
The cost of one door trim piston is from 3 rubles. AvtoVAZ produces plastic fasteners in its workshops. Product code 2108-6302015, 21080630201500, width, clip length 1.5 cm.
The mount has a simple shape and holds the door panel trim using a plastic skirt. The manufacturer claims high quality parts, but in practice, when disassembling the door card, two of the six required clips break. When installing Euro sheathing, on average one clip breaks, this is worth taking into account.
Car rear door reupholstery
| After you have tightened the interior plastic, I advise you to move on to a more complex stage - covering the rear door trims (the shape of the rear door trim is lighter than the front). |
Replacing the threshold of a VAZ 2110 with your own hands video
Door trims "Lux VAZ 2110-12" + mounts for 16 speakers
In previous entries I talked about the multiple preparation of doors and door cards (technical hole plugs, backlight lamps, ESP control unit). Today we will talk directly about installing the skins. I’ll be honest, the process of installing “Lux” cards was simply painful! The skins themselves are super, but the fastenings... I heard about the problems, prepared, tried them on, but so be it.
During hasty fittings I did not notice any serious problems. The discrepancies were not great, the largest “run-up” of the fastenings was about 4mm.
If we consider individual fixation points, these are all little things. But when you need to latch at once (all six pistons), then millimeter distortions result in very big problems. By the way, from the factory there are 8 clips per door, here on all cards there are fewer!
About the process
1) Selection of pistons, clips.
Euro, VAZ 2110 and Kalino piston (1), Lada Largus clip, prepared linings from modelin (2).
There are a huge number of them, but due to the peculiarities of the fastenings, only “herringbone” ones are normally suitable (1). Feature: inserted into the hole.
I liked the white ones from Priora and the yellow ones from Largus (2). At first I tried to remake the fastenings for them (grooves instead of holes).
I attached the clips, but later during the installation process they did not fit. It turned out that in addition to the shift to the right/left and up/down, there is a jamb with long fastenings (plastic platforms). Most of them are not pressed against the metal and remain at a distance, leaving no opportunity for the clip (Largus or Priors) to snap into place.
Further, the so-called “Euro pistons”
Stopped on them. Reviews about Euro pistons are good and the price is not high.
Made from normal materials, moderately soft and not hard. Compared to other options, they are dismantled with less effort, for example, from the same viburnum they simply cling tightly (there is a high risk of breaking off the soldered holders from the casing).
2) Accessories for assembly.
New (standard) internal velvets and a replacement for the original “fungi” - lock release button 21700-6105125-00 (Sold as a set, bushings 21700-6105129-00 are not needed). Taped corners of the rear doors.
Front door trims without holes and inserts into handrails. Old scratched handles had to be replaced on all doors.
3) About the nuances of assembly.
Everything is clear with the fastenings, there was a complete collapse. In addition, it was necessary to return the ten-point locking rods to their place; the priors have a different bend and length. The locks were installed from 2170 along with the rods!
From the priors above.
In general, the velvets snap in place normally, they rise a little at the edge due to the fact that they fit on the ring around the button (can be trimmed).
The handles are very tight in several places; I had to trim the hole to press it tightly to the card. The moving plastic parts were lubricated with Permatex white lithium grease, now when opening the doors there are no extraneous creaking sounds (door opening handles, pulls).
Everything else is good. The triangles fell into place.
Right and left sides.
In addition to the clip mounts, there are 12 places for self-tapping screws; I didn’t give them up. Extra fixation won't hurt! Bought from a hardware store, painted black. The original screws turned out to be short.
It looks great on the door and is not conspicuous.
4) The result of the work done.
Front pair of trims
Rear pair of trims
I'm happy with the result, it looks nice in black! I like it, but the process completely blew my mind due to problems with fastenings, I’m afraid that the next removal will not be the last for them...
5) Making spacers for 16th speakers. (No metal cutting)
Din Alpine SPG-17C2. I never purchased the component system, so I installed these. I have no experience and at first there were a lot of questions: “What’s better?”
Mounting options considered:
1) Screw it to the card. 2) Grid to the card, speaker to the metal to the door. 3) Grid to the card, speaker to the ring and to the door. 4) Podium to the door, then the door card and on top of the speaker + mesh.
After consulting, I chose the required installation method and made option No. 4.
Process
Initially I wanted to use the third example (grid to the card, speaker to the ring and to the door). Why the blanks were made:
Flat spacer ring.
It later became clear that this option has several shortcomings. It is better when there is no void between the speaker and the card, but with such rings you cannot achieve such a result. I'll explain why this happens. Firstly:
The “deluxe door card” cutout is not aligned with the standard hole in the metal. The speaker will be off to the side.
Secondly:
The plane of the map and the door are not parallel. The map is at an angle relative to the standard landing. Having assessed the current situation, we remake the spacers taking into account all the above nuances. Places for attaching the podium to the doors.
Threaded rivets
Alteration of “pieces of wood” to suit new conditions. I cut off all the protrusions on the round part.
I added a second detail - the base. The entire structure will be screwed through it and the misalignment will be compensated.
Trying it on, noted the position of the ring.
Grinding the ring (inclination of the card plane)
Assembly of podiums.
After multiple fittings, we twist both parts with glue and seal the remaining cavities. I had to drill out places in the wood for the bolts fastening to the door (the ring partially falls on them). My mistake... Well, the painting.
Finished rings!
To the car.
There is seam sealant between the metal and the spacer (visible in the photo), the bolts are tightened with a thread locker.
We screw Alpine SPG-17C2 on top of the entire “vegetable garden”.
All pressing parts are glued with bitoplast from STP (mesh-speaker, speaker-card, card-podium).
Bottom line: The speaker is firmly mounted to the door card via a wooden ring screwed directly to the door. Thus, the acoustics play into the closed volume of the door, and not under the trim, which has a positive effect on the sound quality of even such a budget set.
There are absolutely no parasitic vibrations from the door or trim! When the volume increases above average, extraneous sounds appear from the windows, side mirrors and tenth external metal handles (not euro). Everything is on the street side.
Previously carried out work: Gluing, sound insulation of door cards. Gluing the front doors stp aero + fiberglass plugs for technical holes in the doors.
Removal
Dismantling work is the beginning of your journey to replacing the door panel trim. It's nice to know that this task is quite simple. This is especially true for the front doors.
We will tell you separately about the nuances of dismantling the front and rear door trims of your VAZ 2110.
Disassembled cards
Front
Let's say right away that the likelihood of damaging the standard clips is very high. But this is not scary, since new products are cheap, and their installation is much simpler than repairing old caps.
If you are installing Euro panels, you will have to remove the lever from the window regulator.
The process is performed according to a certain algorithm:
- Using a thin screwdriver, pry the window handle trim away from the socket. Direct it in such a way that it disengages. Now remove the lining. This item is not relevant for those whose car is equipped with electric windows;
- Remove the socket now;
- Using a screwdriver, press out the latch on the plug for the inner handle of your armrest, and then remove it;
- Remove the handle mounting screws;
- Press the inner handle of the lock and turn the armrest handle up. This way you can remove the element;
- Next, unscrew the button that blocks the door lock;
- Remove the screw that secures the exterior mirror control mechanism. It must be removed from the lever;
- Remove the triangular trim. To do this, the fastening pins are removed from two holes in the door.
Upholstery in all its glory
Rear
The rear trim is removed slightly differently. But this does not make the procedure significantly more complicated.
- Remove the three mounting screws;
- Remove the trim;
- Using a screwdriver, press out the upholstery. This will allow the pistons to pop out;
- Try to keep the screwdriver as close to the piston as possible to avoid breaking the holders;
- Don't forget to also remove the spacer sleeve from the window lift shaft.
Self-upholstery
Now we can begin to create a new look for your interior by independently reupholstering the dismantled door panels.
Preparations are in full swing
Before starting work, be sure to clean the cards, go over them with a vacuum cleaner, and replace the door seals if necessary. This will allow them to close better, without unnecessary noise.
The job of re-upholstering yourself is not difficult. Especially if you already have experience working with fabric or leatherette in or outside the car.
- Measure and cut the pieces from your chosen fabric or vinyl to size.
- An allowance of 5-7 centimeters must be provided for each side. This is necessary in order to avoid the use of patches when covering.
- Gradually apply adhesive to the cards, letting it dry a little. Just be sure to make sure that the glue does not dry completely.
- When you have coated the doors, use the same glue to treat the surfaces of fabric or leatherette, depending on what you choose. Let these elements sit for about 10 minutes so that the glue dries a little, but does not dry out.
- After the specified time has passed, begin gluing elements of the material onto the door cards. Vinyl is good because it stretches well and fills all the differences and depressions in the card structure.
- To ensure that the vinyl stretches and fills all the gaps, preheat the material using a hair dryer.
- Smooth the material by hand, but it is better to wear gloves for this.
- The edges with the allowance are carefully folded to the wrong side, after which they can be trimmed.
- Do the same with all the doors of your VAZ 2110. As you can see, there is nothing complicated here.
- Experienced car owners and fans of comprehensive tuning of domestic cars note that some other interior elements should be covered with the same material in order to achieve an ideal picture of the car’s interior. This could be the glove compartment lid, a triangle near the mirrors, a steering casing, etc.
- When reassembling cards with new skins, use pistons. To install them, you will need to make appropriate holes in the casing. This is where a sharp utility knife comes in handy.
How is installation done?
Reupholstery begins with replacing the plastic latches from the previous set. In most cases, this procedure is carried out simply if a high-quality upholstery set is purchased. Even if the seller assures the buyer of the high quality of his products, it is best to disassemble the door first and go shopping for new upholstery with one of the stock clips. This will help you select the most similar fastening elements.
When disassembling, you must remember that the self-tapping screws on the VAZ 2110 trims are different. The mounting screws for the bottom of the trim are usually longer, so it is advisable to place them separately from other hardware. European panels can be secured with the same screws if they do not spoil the appearance of the updated upholstery.
The stock audio preparation of the VAZ 2110 provides openings for speakers with a diameter of 13 cm. This is a good reason to replace the speakers with new ones, since the old ones will spoil the overall appearance. Of course, they can be covered with black protective mesh caps if it is not possible to replace them with new ones.
When purchasing an upholstery kit, you need to consider the type of window regulators on your vehicle. The panels are different for power and manual windows. If your car has a manual type of lifts, and you were unable to find upholstery for such doors, reupholstering can still be done. To do this, you will need to slightly alter the trim panels by cutting out a small opening for the window lift handle.
This process is simple because the upholstery has a soft backing that can be cut through with a small knife. Don't forget to mark with a pencil. Remember that the hole must be smaller than the diameter of the handle. Otherwise, it will fall inside the casing.
Upholstery
Trunk lining
Before you begin dismantling the trunk door trim, it should be noted that the VAZ 2110 is manufactured in three versions - sedan, hatchback and station wagon. To make it easier for you to remove the trim on the tailgate, you need to perform separate steps for each version of the car. Removing the trim from the tailgate of the hatchback begins:
- Using a Phillips screwdriver, you need to unscrew several screws that secure the trim to the door (one of them is located at the top, the rest are at the bottom of the car door).
- Using a special tool or a simple slotted screwdriver, remove the button of the four holders of the upper upholstery fastening. Each holder has its own button. After dismantling it, the holder itself is removed.
- A slotted screwdriver is inserted under the fabric and, with a careful, leisurely movement, pries out the lower part of the door trim. The upholstery is removed.
To carry out work on installing the upholstery, you need to start doing the steps from the last paragraph of the instructions. The option of removing the trim on the trunk door of a station wagon requires consideration. Work must begin after the car is installed on a flat road surface, it is secured on all sides, and the hand brake is applied. Before doing this work, the car must be washed. How to properly wash a car should be found in the vehicle’s operating manual. Detailed information is available on the Internet:
- There are two screws on the top of the tailgate trim that need to be removed.
- On the surface of the door you should find four fasteners that need to be removed. Removing them with a screwdriver will help remove the door trim fasteners.
- A Phillips screwdriver is used to remove the screws on the right side of the door. After removing them from the car, you need to remove the upholstery fasteners.
- By analogy with the right side of the door, the trim fastening on the left side of the car's trunk door is removed.
- Using a special tool (puller) or a simple screwdriver, four buttons are removed, which are holders of the lower trim of the tailgate.
- There are also two screws that secure the upholstery. They need to be unscrewed.
- The door has seven holders that secure the upholstery. They need to be removed. A sharp object is used for this. After disconnecting them, the lower door trim is removed.
Installation occurs in the same sequence as during the disassembly process, only you need to start from the last point. It is recommended to use video and photo components in the process. It is necessary to determine for yourself, after reading this instruction, whether the driver can cope with this work. When all these movements seem difficult to perform or there is no time to carry out this repair, it is better to entrust the car to specialists. The service station will carry out repairs many times faster than if you work independently according to the instructions. The cost will increase significantly, but if some parts are damaged, you will have to pay more. New upholstery can be purchased at specialized stores. At the moment, the upholstery market for VAZ 2110 cars has a wide range of options. You can choose not only the color, but also the material. The price will vary depending on the material and its manufacture. To install new upholstery with your own hands, you just need a little attention and the desire to do this work. You can also learn about replacing the ceiling trim on our resource.
Advantages and disadvantages of updating
The main advantage of replacing door trim is a significant change in the interior, since European trim makes the interior more attractive. At the same time, owners of an expensive audio system will have the opportunity to install larger speakers in the opening for audio preparation. In addition, the fabric covering is reupholstered separately; the owner does not have to completely disassemble the door.
The main disadvantage of installing modern trim on a VAZ 2110 is the need to modernize the car's interior, since the new panels do not provide openings in the doors for ventilation. High-quality European cladding is not cheap, and more affordable panels are made too sloppily in the edge parts, where there are almost always noticeable flaws made during production.
If you want to replace worn upholstery with a new one, you must remember that although this process is simple, it takes a lot of time. The work is small and voluminous, since you will have to upholster each of the doors separately. You should decide to install Euro upholstery only if you are not bothered by the cost of the kit and the amount of time that needs to be spent on its installation.
Preparing a new canvas
Usually the skin is removed if the panel is deformed or if there is a desire to replace the panel. If the car has been in an accident, the panel part can be replaced with a piece of plywood. The main thing is to take accurate measurements and cut to the exact shape. The same goes for the material. It is purchased in advance, marked and cut out. Its total size is equal to the diameter of the panel, only 2-3 cm is left at the edges for hemming. In addition to the basic set of tools you will need:
- To install new sheathing, you will need an adhesive so that the material fits tightly onto the main part.
- For internal fastening, you need a construction stapler with staples or hardware. In the latter case, you still need a drill to drill holes.
- Additional clips are purchased in advance. When disassembling the door, these fasteners periodically break.
Drivers are offered a variety of materials: leather, substitute, leatherette, auto fabric, Alcantra, carpet. Any of them is suitable for covering. After the old cladding has been separated from the panel and a new piece of fabric has been prepared, all that remains is to secure the material. Stages:
- The plywood is coated with glue.
- The fabric is stretched.
- The folds are straightened out.
- Holes are created for self-tapping screws or the canvas is fixed around the perimeter with a stapler.
- A hole is cut for the speaker.