Especially for our customers and members of the vk.com/club81452708 group, we have made step-by-step instructions with photos on how to replace factory seat covers using the example of Lada Priora seats, similar ones are found on the VAZ 2110-12. This is the first part and it will clearly show how to replace the front seat covers.
1.11) The first thing you need to do is take the seats out of the car; those who don’t know how to do this are written in detail here: www.vazclub.com/lada/prio…na-perednego-sidenya.html
1.12) We begin to disassemble our seat, to do this we need to unscrew the 4 bolts on the sides with a “10” key
1.13) Fold the backrest and remove it using a flat-head screwdriver.
1.14) Pull out the headrest, use a screwdriver to pry up the plastic plugs, and remove them.
1.15) On the underside of the back, bend 8 fasteners with a flat screwdriver.
December 18, 2016
This review with video instructions will tell you how to put seat covers on correctly and quickly.
In the video, an Avtoprofi expert will show and teach how to correctly and quickly put on seat covers with a separate fitting pattern on car seats.
For those in a hurry, here are brief step-by-step instructions for installing covers on the rear and front rows. But we recommend watching the video anyway – it’s interesting.
Installing covers on the front seats
It is better to remove the seats - this way the tension will be as tight as possible and without wrinkles.
If the covers have a separate putting on pattern, then first put the cover on the chair cushion.
- Put on the cover;
- Tuck the tongue between the pillow and the backrest;
- Spread the material around the entire perimeter.
- We first fix it with long thin elastic bands - we put them under the seat, stretch them and tie them together.
- We finally fix the lower part of the cover using installation rubber bands with hooks at the bottom of the seat.
car owners were advised to purchase a strong nylon cord from a fishing store and sew it to the covers instead of ribbons. With the Avtoprofi models, such efforts are not required: all models are pre-installed with wide stitched elastic bands with stainless steel hooks.
- The tongue of the upper half of the cover also fits between the pillow and the back.
- Then the fabric of the cover should be pulled down with a slight movement and smoothed so as to pull the material down as much as possible, towards the tongue.
- The cover is pulled over a tongue on the back of the chair, like leather on a drum.
- With maximum tightening, the front part of the cover is literally imprinted into the shape of the chair.
- The tongue is inserted under the back of the cover and secured with Velcro.
A little trick: holes for the headrest rods in the cover can be made using a screwdriver or... A regular cigarette!
Reupholstery of seats and interior of VAZ 2110, 2111, 2112
Replacement of seat upholstery in VAZ 2110
Despite the fact that the standard upholstery was in excellent condition (especially for an 8-year-old car), there was a great desire to update the interior. I decided to start with the upholstery of the interior seats. There are two ways to do this: 1 - take the car/chairs to a workshop for reupholstery and 2 - do everything yourself.
Standard upholstery. Front seats.
Standard upholstery. Backseat.
According to the 1st method: You give the car to the masters, choose the style, material and color, pay the payment/advance payment and wait for a call to invite you to accept the salon. The cost of reupholstering all the salon seats, depending on the city/skill/greed/material/moon phase, is too different and even for an average city for jacquard-type material will be in the range of 5,000-10,000 rubles. (including material ~3000-5000 rubles and labor ~2000-5000 rubles), and should take about a week.
Method number 2: Firstly, you must be sure that you need to do it yourself, or simply do not have the money for method 1. Enlist self-support, then then choose the upholstery (you can order it in some online store or directly in a car shop from method 1) according to your interior (for 2110: 2 seat backs and an armrest, and for 2111 and 2112: one seat back with a 40/60 split), get it and change it.
Rear seat of VAZ 2110
Rear seat of VAZ 2111, 2112.
Professionals in this field will tell you more about the 1st method, I will tell you about the 2nd. As before, everything is simple. It's simple. Yes, it’s long, but it’s simple. It is not at all necessary to have hands sharpened at the desired angle, you just need to have them. I will rather reduce the entire review to a simple collection of tips on how and what to do better, and how and what it is better not to do. Let me make a reservation in advance, it took time: half a day on each of the 2 weekends (started on Sat), and 3 hours in the evening of the next 5 days. The salon was ready for the weekend.
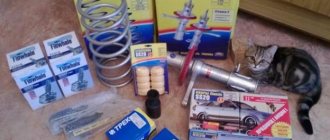
For the operation you needed: - a set of tools (keys and screwdrivers), - wire cutters and pliers, - silicone grease, WD-shka, grease (CIATIM, Litol, etc.), - sandpaper, - paint (if you are going to paint the visible part of the front frames seats), - scissors or a sharp knife, - nylon cable ties (2.5x100 ~200 pcs are enough), - rags and napkins, - possibly double-sided thin tape (for installing or reinstalling heated seats).
I ordered jacquard upholstery in a dark shade from an online store, although I had previously planned a light one (I refused light colors, and also didn’t find a set I liked in terms of style), paid for it, and received it. I previously parked the car right in front of my entrance (I had to come back from work at lunchtime especially for this, then in the evening there would be a free space at least 150 meters away). And he started.
Received a set of new covers.
Jacquard material.
Relatively little space is required to reupholster one chair or seat: half a room or a garage. There is no need to dismantle the entire interior at once. You remove one seat, bring it home, retighten it, put it back in place, then the next one. Before you take them home and remove them, first clean them - their frames and backs will be covered in dust, dirt, and sometimes rusty.
I won’t tell you in detail how to remove and disassemble the chairs and upholstery. And in general, when replacing, the order of assembly is equal to the reverse order of disassembly.
So, you removed the front seat, brushed it off, and brought it home. Disassemble into 3 parts: seat, back and headrest. In order to simply familiarize yourself with the essence of a new operation for you and the properties of the upholstery material, start with something simple - with the headrests. We disassembled it, pulled off the old one, and put on new upholstery. Next is the back and seat.
Headrests.
All front seat upholstery is attached to the same places (special hooks on the seat frames) from where it was removed. In places where the upholstery material was attached to the frame with metal rings, we use nylon ties. Metal knitting needles are used as rigid elements of the covers (to give shape) - if the seller did not include them in the set of new covers, then take them from the old one.
Back side of the backrest. At the bottom you can see hooks - the upholstery is placed on them.
Seat back. Front side. The backs of the old style were made of straw. Later, they, like the seats, began to be made from foam casting.
Seat back. Backside.
Front seat seat. This was the state of standard heating. OK.
One moment. If your seats (like the car) are already several years old (more than 5-6), you can (better) order an additional “seat” (foam molding) in advance instead of the old driver’s seat. It is not expensive (300-500 rubles). Almost certainly, she is already in poor condition. I didn’t think about this in advance, so I had to repair the old one: I glued in a piece of thick foam rubber, trimmed it with scissors, and trimmed it. Or, as a last resort, swap the seats of the driver and passenger seats - they are identical.
Driver's seat. The left side edge was torn. Most often it is this part that suffers. This is a characteristic feature of landing in a VAZ. The reason: the lack of more or less serious lateral support for the seat, and the second is that we often sit on the edge with our feet facing the street.
If necessary, remove rust from the seat frame along with the slide elements, prime and paint. Tighten the rod (between the slide clamps) - most likely it is stretched, so it dangles and rattles - either bend the ears of the rod, or adjust the rod with the letter Z (I hope I explained it clearly), or it’s also good to put a heat-shrinkable tube on the ears and heat it up - the rattling will stop altogether. It is also necessary to clean the springs of the slide clamps from dust, then lubricate them with silicone grease, and wipe the residue dry. If in your Premiere the front seats are pushed all the way back (which is most likely, but unlikely for 2110/11/12), then you should not have problems with torsion bars (or you do not feel them). If the seats are pushed forward, then the torsion bars will probably rattle here too. The advice is the same - heat shrink tube. Slides: clean off rust, blow with WD-40, wipe dry, lubricate the inside of the gutter (where the roller runs along the slide) with grease.
Rear seats. The principle of attaching the seat and back upholstery is slightly different here, without hooks. Each cover has a hollow edging at the edges (like panties with an elastic band) around the entire perimeter, into which a rigid plastic cord is inserted. Again, if the seller did not include it in the upholstery kit, we remove it from the old one. The cover is tensioned using fastenings with metal rings that attract the cord (in the edging of the cover) to the seat/back frame. When reassembling, we replace the rings with nylon ties.
Rear seat sofa. Reverse side. The ends of the black plastic cord running inside the edging of the cover are visible, as well as the method of attaching it to the frame of the sofa.
Additional food for thought:
The new cases are thinner than the standard ones, and have the same thickness everywhere (i.e., without adding additional tabs). for example, the thickness of the “seat” part of the standard cover (both front and rear seats) is much greater than the new one, because has additional layers of ~8mm foam rubber and a thin fabric backing. I wish I could feel the heated seat through this whole sandwich. Of course. The new case has only one 2mm layer of jacquard. This is also why the seats in the new upholstery look thinner and slimmer, so to speak.
Standard thick seat upholstery with foam padding.
Despite the fact that the upholstery looked and felt (or rather seemed) absolutely clean. I was soon dissuaded of this. Because after half an hour of actively working with it, while I was taking it off, my hands became greasy and sticky, in general, not very pleasant. So, the upholstery can only be clean on the top. All the dirt, everything that once fell on it or was spilled - it’s all there, under the top pile. Still, it was not in vain that I wanted to take the car to the dry cleaner.
The reverse side of the seat. Dirt, it doesn't go anywhere. It is absorbed by the upholstery, and there is nowhere else to go - there is dense foam molding
Also, this is the most convenient moment for related work: - general cleaning of the interior, - replacement (front)/installation (rear)/repair of heated seats, - installation of lumbar support, - painting of rusted lower frames of the front seats, - replacement of broken elements (most often these are the guides of the headrests and the handles for the drive mechanism for reclining the front seats) - replacing/repairing sagging seats, - raising the front edge of the driver's seat (for those who get numbness on the right side of their butt on long trips - theoretically this should allow you to relieve the load from the muscles that hold your right leg in suspended on the pedal).
New upholstery. Accurate color reproduction.
New salon. The photo turned out to be highlighted.
New salon. The photo turned out to be highlighted.
Compare.
Installed the upholstery at the end of January. More than 6 months have passed since then and during this time I have driven almost 10 thousand km. Periodically, when I clean the interior, I inspect the upholstery: the seams are holding, there are no abrasions, it is not shiny, no pills are formed. In general, so far everything is great (pah-pah, so as not to jinx it). That’s what I answer to everyone.
But still, in order not to be unfounded, I am attaching a photo report. If someone thinks there are stains on the upholstery, it’s a dusty camera lens.
The most used seat is the driver's seat, so I only review it in detail.
There are folds visible on the left side of the seat - a consequence of the missing part of the foam seat, which I repaired - photo 12 of the article on replacing the upholstery. I'll replace the seat foam in the fall.
A slight swelling of the material is noticeable just to the right of the middle of the seat. So the heating fabric got a little lost - apparently it needed to be glued better. Again, I’ll fix it in the fall.
The folds and swelling of the material were eliminated by themselves when the seat foam was replaced.
Replacing the seat (foam molding) of the driver's seat of a VAZ 2110
This is what my seat looked like: folds and swelling of the upholstery material. This look does not suit the new salon. We should fix it.
The crease at the edge is the result of the destruction of the sidewall of the foam casting. Swelling in the middle - the poorly secured fabric of the seat heating element has slipped and become tangled.
The view is not as good as it should be.
And today I changed the seat in two hours. As before, I drove the car to the entrance, removed the seat and replaced it at home.
At that time, it turns out that I attached the heating sheet to just two strips of double-sided tape. And he couldn’t stand my fidgeting.
The heating sheet ran away.
It will be better this way.
Having previously smoothed the fabric with an iron, we put it in place.
Young woman and old woman.
Much better now.
Was - Has become
The new seat is a little harder and denser, because it has not been dented by time - I now sit 1-2 cm higher.
Interior reupholstery in Alcantara VAZ 2111
Well, finally finished with the bumper, now I can do less dusty work) I did it as always for the first time and only with my own efforts)
The entire salon did not require: - 3 full days. - 3 liters of glue. -4 meters of Alcantara. -brushes, scissors and a stationery knife.
Go. First, we dismantle the ceiling and all the plastic, bring it into the room and begin to remove the old upholstery.
Now we cut the fabric to the size of the upholstery, leaving a margin of 10-15 cm at the edges. I had a choice between gray with long pile, and brown checkered with smaller piles. I chose the checkered material.
Now we are starting to glue the whole thing, I did it in pieces, applied 40 centimeters of glue, glued it and then smeared it on.
We tuck the edges and glue them well so that in a month we don’t have to remove the ceiling and glue them again. Actually, that’s all, the ceiling is ready.
Then the bumper lit up, it was purely by accident that it got into the frame))
Now we begin to glue the plastic, there is nothing complicated, I won’t explain.
We install it on the car and HERE.
Disassembling standard seats
We need: 1. Ratchet 2. Driver 3. Sockets for: 8, 10, 13 4. Flat screwdriver 5. Some free time 1. Move the front seat as far forward as possible and remove the seat torsion bars (these are metal cables that are located under the seat and help us move them forward more smoothly and easily) Although the book says that the seat needs to be moved back as far as possible and removed with a screwdriver. What nonsense? Why remove stretched torsion bars, and even apply force, when you can calmly and effortlessly remove them with your hands. 2. Torsion bars have been removed. Now move the seat as far back as possible and use a 13mm head to unscrew the 4 nuts securing the brackets. 3. The brackets have been removed. Now we raise the seat and use a 8mm head to unscrew the 2 front bolts securing the slide. 4. Move the seat forward as much as possible and unscrew the 2 rear bolts securing the slide.
5. That's it. Now the seat can be easily removed. We carefully pull it out, trying not to scratch the door trim or panel with the sled, and take it home. The seat has been removed, dragged home or to the garage... let's start disassembling it: 1. Using a 10mm socket, unscrew the 2 bolts on the left side and remove the plastic cover. 2. Next, we also unscrew 2 bolts on the right side. Now we need to remove the “twist” of the seat back. With a little effort, pull it towards you. It has strong latches, so don't be afraid to break it. Underneath we also see a 10mm bolt. Unscrew it and remove all the remaining parts.
If you look closely, at first glance it will seem that the seat and back are welded and riveted to each other.
I thought so too at first. But everything turns out to be much simpler. Thanks for the advice nairik. The seats are attached with these hooks. In order to separate the back of the seat from the seat, do the following: 1. Place the seat in approximately this position
2. We stand above him and grab the right hook with our right hand, and the left one with our left hand. 3. At the same time, pull the hooks away from you and press on the seat with your knee. That's it, the seat came off the hooks. 4. Take a large and long screwdriver and insert it as shown in the figure (on the right and left sides) and bend it towards you with a little effort.
That's it, we separated the back from the “seat”
IMPORTANT: If you are not going to remove the upholstery from the seat for further washing and hemming, or you do not need to properly stretch the additional cover, then you do not need to disassemble the seat in half...
https://www.drive2.ru/l/2734975/, https://www.drive2.ru/l/1084060/, https://www.drive2.ru/l/2730681/, https://www .drive2.ru/l/1735494/, https://www.2114.ru/forum/showthread.php?t=14364
next article:
Interior ventilation of VAZ 2110, 2111, 2112
Contents of the article: VAZ 2110 interior air recirculation system Improving VAZ 2110 interior ventilation flows Installation
Rating 0.00 [0 Vote(s)]
Installing car covers on the rear row
Now you need to install the covers on the back row of the car. We remove the pillows and the backrest. Leave the back in place.
The donning pattern here is exactly the same as with the first row:
- On the back of the rear seat, you need to remove the seat belts, if present, and then fold the backrest.
- The cover consists of two halves and is positioned so that its zippers coincide with the fault lines of the back.
- Once put on, the zippers are closed and the two separate halves of the cover become one.
The rear covers are secured to the backs of the chair using elastic bands and hooks (everything is included in the kit).
On headrests, the covers are placed on top and secured with elastic bands.
Selecting material for covers
It is necessary to choose the material for sewing covers especially carefully and responsibly. For this you can use very different materials, from cheap to very expensive. All of them are subject to the general requirements that we mentioned above. So, when choosing material for sewing covers, pay attention to the following options:
This option is considered the most luxurious, as it qualitatively improves the interior design of your car. It also increases the cost of the car when selling. The leather resists staining and does not require special care. Sewing leather covers requires special skills and some experience.
Neoprene
This synthetic material has excellent stretch, wear resistance, protects from dust, moisture, friction, does not burn or fade. It comes in different patterns and colors, which makes it possible to implement any design ideas. You can make products that are combined in texture and color.
Polycotton
This material perfectly combines the softness of cotton and the protective properties of polyester materials. It washes well, has water-repellent properties, is very soft and pleasant to the touch. Has a wide range of colors.
Velours
This material has an attractive appearance. At the same time, it is very durable and velvety to the touch. Fluffy and soft, it does not fade, washes well, is easy to cut and can be sewn on any sewing machine.
This fabric is remarkable in many ways. Easy to cut, affordable, sews well on any machine. Flock is easy to work with and does not require any special sewing skills from you. If desired, you can easily add decorative trim in the form of stitching or piping. It has a knitted base, excellent stretch, fits well on the seats, machine washable, wear-resistant and water-repellent.
Faux suede or leather
Faux suede with leather
Leather can be of different colors and textures:
Faux leather is quite rough and difficult to work with, so not every sewing machine sews several layers of material. The material is mainly used to create the lower and side parts of car seats.
As for faux suede, it is more pleasant to the touch and easier to process. The material does not harden in the cold and does not get very hot in the sun in summer.
Artificial fur
Good for finishing or creating decorative details to complement the base material. A wide range of textures, colors, strength and thickness allow the material to be used for combinations and design ideas.
Additional tips:
- The tighter the material adheres to the case, the longer they will last. Therefore, it is better to take the time to remove the seats before installation.
- If the seats have built-in side airbags, then choose the appropriate cover models.
- The unraveling seam must be placed on the side where the Airbag pillow is located.
- Remove the seats. At least the front row. The quality of planting will be higher, and it will take less time. Removing the seats is quite simple: turn off the electrics and unscrew the mounting bolts of the slide.
- Be sure to turn off the ignition before removing the seats and rear sofa!
- There is no need to remove the plastic on the sides of the seats. In principle, it is not suitable for removal and returning it to its place can be problematic. To better push the cover fabric between the seat and the plastic, it is good to use a smooth metal plate (about the same as what doctors use to examine the throat).
- Squeeze the seat upholstery while pulling the cover. This will make it easier to install the covers without damaging the fabric around the seams.
- It’s unlikely that anyone is going to install seat covers in the cold, but just in case, it’s worth pointing out that it’s best to install protective coverings at above-zero temperatures. Especially if the covers are made of natural or artificial leather (eco leather). These materials “tan” and lose elasticity at low temperatures, so if you don’t have a warm garage, then summer is the best season to install covers.
How to make patterns for car seat covers: tips and instructions
Over time, the upholstery of seats in a car interior loses its attractive appearance, gets dirty and wears out. Car covers will help extend the life of the upholstery and even add style to the interior. Stores offer a wide selection of different materials.
Well-chosen car covers add style to the car interior (photo: restavraciya-peretyazhka-mebeli.ru)
The best option is covers made individually to the shape and size of the seats of a particular car. You can make them yourself by choosing the right fabric and patterns for sewing car covers.
Car compatibility
Approximate list of compatibility of covers size S*
| Audi | A1, A2 |
| BMW | Episode 1 (04 - 07) |
| Chery | |
| Chevrolet | Lanos, Lacetti, Aveo, Spark |
| Citroen | C2, C3 |
| Daewoo | Tico, Matiz |
| Fiat | Panda, Punto, Albea, 500 |
| Ford | Ka, Fiesta, Fusion |
| Honda | Jazz, Civic |
| Hyundai | i20, i30, Atos, Getz, Accent |
| Kia | Rio, Picanto |
| Mazda | 2, 3 |
| Mitsubishi | Colt |
| Nissan | Note, Micra |
| Opel | Tigra, Corsa, Astra |
| Peugeot | 1007, 107, 206, 207, 306, 307, 308 |
| Renault | Logan, Symbol, Twingo, Clio |
| Seat | Ibiza, Leon |
| Skoda | Fabia, Roomster |
| Suzuki | Swift, Ignis, SX4, Jimny |
| Toyota | Aygo, Yaris, Vitz, Corolla, Echo |
| Volvo | C30 |
| VolksWagen | Lupo, Polo, Golf |
| VAZ | 1111, 2104-2109, 21099, 2110-2121, Granta, Kalina, Largus, Priora |
| UAZ | 3151 Hunter |
*The list is provided for informational purposes only and is not complete.
Sample list of vehicles with M-size seats*
| Audi | 80, 90, 100, 200, A2, A3, A4, A6, TT |
| BMW | Series 1 (since 2010), Series 3, Series 5, Series 7, X5, Mini One, Mini Cooper, X3, X6, M6 |
| Chery | Amulet, Tiggo |
| Chevrolet | Astro, Blazer, Captiva, Tracker, Aveo, Lacetti, Lanos, Niva, Cruze, Cobalt, Epica |
| Chrysler | Town&County, Voyager |
| Citroen | AX, BX, ZX, Berlingo, Jumper, Saxo Visa LN, Xantia, C2, C3, C4, C5, C8, XM |
| Daewoo | Espero, Laganza, Magnus, Nubira, Gentra |
| Daihatsu | Charmant, Sirion, Move, Rocky, Feroza |
| Dodge | Caravan, Caliber |
| Fiat | Brava, Bravo, Idea, Marea, Weekend, Panda, Punto, Stilo, Doblo |
| Ford | Escort, Ka, Maverick, Ranger, Focus, Focus II, Focus C-Max, Fusion, Escape, Galaxy |
| Great Wall | Safe, Deer |
| Honda | Concerto, CR-V, HR-V, FR-V, Logo, Accord, Civic, Jazz |
| Hyundai | Lantra, Matrix, Sonata, Santa Fe, Tuscon, Tiburon, Grandeur, Elantra, Solaris |
| Kia | Ceed, Cerato, Clarus, Magentic, Shuma, Rio, Spectra, Sorento, Sportage |
| Mazda | 626, 121, 2, 3, 6, 323 S, RX-7, RX-8, MX-5, CX-5, CX-7, CX-9, Familia, MPV |
| Mercedes | 100, 190, A-Class, C-Class, E-Class, S-Class, R-Class, CLK, SLK, GL, ML |
| Mitsubishi | Galant, Carisma, Colt, Lancer, Outlander, Delica, Diamante, Dingo, Dion, Eclipse, Pajero, Mirage |
| Nissan | Maxima, Primera, Avenir, Murano, Note, Cedric, Liberty, Cefiro, Pathfinder, Skyline, X-Trail, Terrano, Patrol |
| Opel | Calibra, Kadett, Manta, Tigra, Agila, Astra, Combo, Meriva, Signum, Vectra, Zafira |
| Peugeot | 106, 204, 205, 306, 307, 309, Partner, 406, 407 |
| Renault | Clio, Laguna, Megane, Scenicll, Twingo, Scenic, Modus, Safrane, Sandero, Logan, Duster |
| Rover | 200, 214, 400, Mini, 45, 75, ZT, ZS |
| Seat | Alhambra, Altea, Arosa, Cordoba, Ibiza, Leon, Toledo |
| Skoda | Favorit, Felicia, Forman, Fabia, Oktavia, Superb |
| SsangYong | Musso |
| Subaru | Impreza, Legacy, Leone, Forester, Outback, Tribeca |
| Suzuki | SJ 410, SJ 412, Alto, Baleno, Swift, Grand Vitara, Ignis, Wagon R, Jimny |
| Toyota | Camry, Carina, Lavd Cruiser, Lite Ace, RAV 4, 4 Runner, Starlet, Tercel, Avensis, Corolla, Prius |
| Volvo | C30, S40, S60, S70, S80, V40, V40-Cross Country, V50, V60, V70, XC60, XC70, XC90 |
| VW | Golf, Golf II, Jetta, Scirocco, Bora, Polo, Passat |
| TaGAZ | Tingo ('12- ) |
| GAS | 3102, 3110, Siber |
| UAZ | 3160, 3162, 3163, Patriot, Pickup |
Method of cutting car covers
Car seats are very different. Therefore, ready-made patterns simply do not exist. Each specific case requires its own unique cutting. There are two elementary ways to create patterns that do not require dismantling the seats or taking complex measurements.
- You can use thick film, newspapers or plastic bags. Use pins to pin the transparent film onto the seat and trace all the details with a felt-tip pen with maximum precision. Be sure to number and sign all details. Cut out the pattern along the marked lines. You need to cut, leaving 2-3 cm seam allowances on all sides.
- You can also carefully remove old seat covers. Using a knife and scissors, they need to be ripped apart or cut along the seams and darts. Next, lay it out and pin tracing paper or polyethylene on top. We make patterns using the old seams. You can cut covers from new fabric.
Front seats
Consistency, accuracy and attentiveness are all you need to successfully install covers on the front seats.
- It is not necessary to remove the front seats to install the covers. All work can be done directly in the salon.
- Remove the head restraints from the seats.
- Pull the cover over the top of the back of your chair.
- Usually there are three elastic bands on the central seams of the covers. They must be passed between the back and the seat so that each element of the product is exactly in its place.
- Now we fix the position of the covers using hooks that are placed under the chair itself.
- Carry out a similar operation with the lower part of the chair.
- The locking hooks are also inserted from the bottom so as not to interfere with the driver and passenger.
- All that remains is to pull the material onto the headrest. How to install a turbine on a VAZ 2110
Panel modernization
The appearance of the dashboard on the very first Twelves was very far from ideal. In 2006, AvtoVAZ engineers tried to correct this situation and began installing “European”-style panels on these cars. And today, owners of old cars are modernizing their cars by installing Europanels on them.
Europanels began to be installed on the VAZ 2112 only in 2006
Sequence of work
To remove the panel you only need a couple of tools: a knife and a Phillips screwdriver.
- The instrument unit is removed along with the decorative visor as described above.
- The car glove compartment opens.
There are 3 self-tapping screws inside; they are unscrewed with a Phillips screwdriver. To remove the VAZ 2112 panel, you only need a knife and a screwdriver - There are 4 plugs located near the central control unit. They are pryed with a knife and removed. The screws located under them are unscrewed.
- The safety block opens. Inside there are 2 self-tapping screws. They also get out.
- The old dashboard trim has been removed from its fasteners. All that remains is to remove it by pulling it towards you and up.
- The removed trim is replaced with a new europanel, the fastening screws are returned to their places (all the mounting holes for the old and new trims match, so there will be no problems).
Back row
Depending on the tailoring and manufacturer, these products may differ from each other. But mostly the installation principle is the same everywhere.
Replacing the braid on the steering wheel
The standard braid on the VAZ 2112 is made of leatherette, the surface of which seems too smooth to many. The steering wheel simply slips out of your hands, which is very dangerous when driving. Therefore, almost all owners of “dvenashki” change the standard braids for something more suitable. There is now a huge selection of braids in spare parts stores. The steering wheel of the VAZ 2112 requires a braid of size “M”. It is put on the steering wheel and sewn along the edges with ordinary nylon thread.
Clamp needles and nylon threads are used to sew the braid together.
Eco-leather
Eco-leather is an excellent modern material from which excellent cases
using the latest technologies. The material is breathable and does not contain polyvinyl chloride components, which ensures comfort for the driver and passengers and does not contribute to fogging of the back and legs when in contact with eco-leather. Covers for VAZ 2110-2112 (if they are put on correctly) look like the original Lada upholstery. How to sew covers and reupholster the seats of vases with your own hands. Due to special micropores, the products allow steam and moisture to pass through, but at the same time reliably retain water. How to open the door of a Lada car. How to change the radiator, removal and installation on a VAZ 2114. Air permeability indicators significantly exceed even the highest quality genuine leather. How to properly put seat covers on a VAZ - features. The only drawback is the rather high price.
Eco leather
Problems and their solutions
As the car is used, owners of the VAZ-2110 encounter various problems:
- Dirt – Over time, factory seat upholstery becomes dirty as a result of transporting a dog or children. The fabric becomes stained from spilled tea, juice or coffee, dust that has penetrated inside is eaten away, and so on.
- Passengers – with the regular transportation of people and various things, pollution also remains.
- Comfort and appearance - over time, any seat upholstery wears out, and this affects both ride comfort and the appearance of the seats.
For those who want to prevent damage to the standard upholstery, keep the interior clean and make the ride more comfortable, eco-leather covers will help. They do not absorb moisture, are durable and are easy to clean from dirt (to do this, you just need to wipe the surface of the covers with a damp cloth and they will sparkle clean again).
Covers or new interior?
Many VAZ 2110 owners are seriously thinking about upgrading their car. The original seats aren't great, but they certainly aren't terrible either.
Whatever one may say, a person always strives for maximum comfort. Therefore, thoughts about completely or partially replacing the interior are more than justified.
Finding completely new seats that would fit the “ten” is not difficult now. Some even manage to find leather goods. Whether to take such a step or not is a purely personal decision.
Cases are a much more budget-friendly and versatile solution. How to change the injector on a VAZ 2110 VAZ 2110 replacement. How to check the lambda, but the oxygen sensor can simply give a Lada VAZ 2110 - 2112. Even if you install a new interior
, you will feel sorry for spoiling it with regular use. Because? That's right, you decide to put covers on it.
Purchase and install a new salon
It makes sense only if the original VAZ seats give you discomfort, you are uncomfortable sitting in these chairs and traveling long distances on the road. If the question is purely about appearance, beautiful original covers can change the perception of the VAZ 2110 interior in the most amazing way, so it’s not worth spending money on a set of seats.
How to sew car covers?
Sewing custom car seat covers is a modern and original way to transform or restore the interior of any car. The fact is that the cover is a mandatory element of updated seats. As a rule, these products are created from high-strength and wear-resistant fabrics, including the following:
Sewing custom-made covers is a fairly expensive service, and choosing the ideal model covers for your car can sometimes be very difficult. At the same time, it is important to take into account your design ideas, the moisture resistance and practicality of Czechs, their resistance to chemicals and cleaning agents, and resistance to temperature changes. With all this, the covers must match the contours and shapes of the car seats as accurately as possible.
Cases with a pattern
If you wish, you can make car covers yourself. For this you will only need patterns and suitable material. In addition to the kit, you can make a cover for a child seat, pillows for the rear parcel shelf, or add several decorative elements for the interior:
Sewing covers
After cutting the covers, be sure to leave seam allowances. You can duplicate the seams themselves, line them with durable leatherette, which will not only make the product stronger, but also act as a kind of finishing. It is better to use reinforced threads to give an additional decorative effect and increase strength. Be sure to do a fitting to ensure the product fits perfectly on the seats. Be sure to think about the method of fastening - it could be a cord, a drawstring under the seat, elastic bands, hooks, Velcro, etc.