Repair / From Alexander Smirnov
- Symptoms of a problem
- Diagnostics
Checking the electrical circuit
- Pressure check
- Video: how to distinguish an original from a fake
Fuel pump malfunction in VAZ 2114 and VAZ 2115 cars is a fairly common phenomenon. You can solve this problem yourself, without resorting to the services of a car service. The pump replacement procedure is quite simple. It will require only a few hours of free time and a standard set of tools.
What fuel pumps are installed on the VAZ 2114/2115
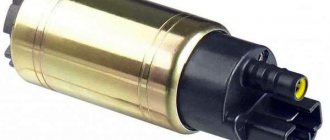
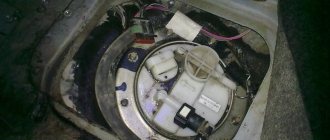
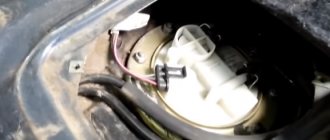
The gas pump (or fuel pump) pumps fuel from the gas tank to the engine. On models 14 and 15 of the VAZ family, the fuel pump is located in the fuel tank. The gas tank is located on the bottom of the car, in the rear. Therefore, in order to get to the fuel pump if necessary, you will need to remove the cushion from the rear seat in the cabin and find a small hatch hidden underneath.
The device is “hidden” under the rear seats, under an inconspicuous hatch in the car body
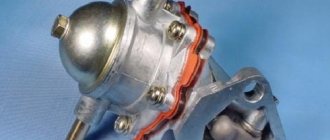
On cars of the Samara VAZ family (that is, on “fourteeners” and “tags”), “native” factory fuel pumps of the “Saratov” brand are installed. Their performance is average, but in terms of tightness they can let the driver down at any time. However, their main advantage is their low cost.
Each owner of a VAZ-2114/2115 can easily replace an unwanted fuel pump with a better one. For example, the domestic “DAAZ” or the time-tested “Pekar”.
The production of gasoline pumps is located in Dmitrovgrad
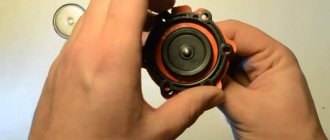
Foreign analogues: QH (England) and OTA (Italy) also fit perfectly into the fuel system of domestic cars, however, their cost is almost three times higher than the price for a Saratov fuel pump. However, unlike domestically produced pumps, QH and OTA products are equipped with only one membrane, but a very thick one. Therefore, when using foreign expensive gasoline pumps, the possibility of fuel getting into the oil is practically excluded.
Pekarov production was opened in St. Petersburg
Table: comparative characteristics of fuel pumps for VAZ 2114/2115
| Fuel pump test results | |||||
| Characteristic | "Baker" | DAAZ | Saratovsky | QH | OTA |
| Zero supply pressure (at a crankshaft speed of 2000 rpm), kgf/cm2 | 0,26 | 0,28 | 0,26 | 0,3 | 0,36 |
| Capacity for free drainage (at a crankshaft speed of 2000 rpm), l/h | 80 | 76 | 73 | 92 | 74 |
| Suction period at crankshaft speed 200 rpm, s | 4 | 13 | 12 | 9 | 6 |
| Valve tightness at a pressure of 0.3 kgf/cm2 (fuel leakage within 10 minutes), cm3 | 8 | 12 | 20 | 8 | 8 |
| Place | 3 | 4 | 5 | 1–2 | 1–2 |
The fuel pump does not pump: causes and diagnostics
Let's start with the fact that if the gas tank is full, the battery is charged, the spark plugs are dry and there is a spark, the starter turns the engine normally, but the engine does not seize, then you should pay attention to the gas pump. A common problem is that there is no power to the fuel pump after the ignition is turned on. In a similar way, the malfunction manifests itself in motion, when the power to the fuel pump is lost and the engine suddenly stalls.
An equally important point is how much the fuel pump pumps. In other words, the pump may hum and buzz (power is being supplied), but not create the required pressure in the fuel line. The pressure in the fuel system with a working fuel pump must be more than 3 bar (which depends on the specific car model). The indicated pressure is accumulated in the fuel rail and has an indicator of 300 kPa and above.
To check, you need to measure the pressure in the fuel rail with a pressure gauge, taking into account the indicators that are the norm for a specific car model. Using the example of injection VAZs, the pressure when the ignition is turned on is 3 atmospheres, at idle the figure is 2.5 atmospheres, when you press the gas 2.5-3 atmospheres. This method will help you accurately determine:
- malfunction of the fuel pressure regulator in the rail;
- breakdown of the fuel pump or a noticeable decrease in its performance due to wear;
- severe contamination of filters (fuel filter and/or fuel pump mesh);
In the second case, when you press the gas, the pressure does not increase; in the latter case, the pressure gauge needle rises, but very slowly or jerkily.
A decrease in pressure below the norm will lead to the fact that the engine may not start or start with difficulty, stall, jerk, operate unstably and with failures. If this happens due to the fault of the pump and not the fuel filter, then there is a high probability that the coarse filter screen of the fuel pump is clogged. In this case, there is no need to change the fuel pump itself, since it will be enough to replace or even clean the mesh.
If you suspect that there is no voltage to the fuel pump, there is a quick way to check. It is enough to turn the ignition key and listen, as when you turn the key you should hear a slight hum from the fuel pump. If such a buzzing noise is not heard, it means there is no power to the fuel pump, there are problems with the wiring, etc.
Also in the general list of possible reasons why the fuel pump does not pump, the following are noted:
- failure of the fuel pump fuse;
- fuel pump relay failure;
- problems with the ground of the fuel pump;
- malfunction of the electric motor of the fuel pump;
- oxidation or damage to fuel pump contacts and terminals;
- the fuel pump itself is faulty;
Wiring to the fuel pump
On most cars, the wiring to the fuel pump consists of three wires: “plus”, “minus”, and also a wire for indicating the amount of fuel in the gas tank. If the fuel pump does not pump, then the cause may be a lack of power.
To check the power to the fuel pump, just take a 12-volt light bulb and supply it with power from the external connector of the fuel pump. After turning the ignition, the control lamp should light up. If this does not happen, then the problem is in the external circuits. If the lamp comes on, it will indicate the need to check the internal contacts of the fuel pump.
To check the external wiring, you should alternately connect the positive and negative contacts, which are removed from the fuel pump power connector, to the ground of the pump. The contacts must also be connected to the fuel pump relay. If you place the negative contact on ground, after which the ignition is turned on and the light comes on, then this means that this contact is faulty. If the light bulb does not light up, then problems with the “plus” are obvious. If you place a contact on the relay and the light comes on, there is probably damage to the wire on the section that connects the relay and the fuel pump itself.
How to check the performance of the fuel pump
Often, for those problems for which the car owner blames the fuel pump, other elements of the fuel system are to blame. To establish whether a fuel pump has failed, you will need to know the reasons why it might break.
Causes of fuel pump malfunctions
Most often, the device may fail while the vehicle is moving. The gas pump may simply refuse to pump fuel from the tank to the engine, or a leak may form, causing the device to malfunction. If the power supply is interrupted, the pump stops working completely.
The main causes of fuel pump malfunctions include the following:
- lack of tightness in the pump itself (leakage);
- damage to membrane surfaces;
- the resource of the pump motor has been used up;
- contacts have oxidized;
- wiring or relay problems;
- dirt and debris in the fuel tank, which, along with gasoline, enter the pump.
As you can see, there can be many reasons for a fuel pump to fail.
Dirt deposits on the filter mesh are a common cause of fuel pump malfunctions.
Symptoms of a problem
There are only four main signs by which you can diagnose malfunctions in the fuel pump without special tools:
- The car simply won't start. Of course, the engine may not function for a number of other reasons, however, first of all, you will need to check the functionality of the fuel pump itself.
- After the car starts, the characteristic buzzing of the fuel pump is inaudible. The whirring noise should be clearly audible in the rear of the cabin, as the fuel pump is located under the rear seats.
- Recently, interruptions in the operation of the power unit have begun to be observed: the engine does not start the first time, while driving you can hear the engine straining.
- The car starts to jerk when driving at low speed.
Signs of breakdown
There are several situations in which the pump or its components can be at fault. This will definitely have to be checked. Otherwise, you can spend a lot of money buying and installing a new fuel pump, but in the end it turns out that the problem is completely different.
- The engine will not start. This is not a clear sign of problems with the pump, but still. Therefore, first check the condition of the spark plugs, the presence of a spark, and the absence of traces of oil on them. Also check the electronic control unit.
- Pressure inside the fuel system. If the pump is operating normally, it will create a pressure of 3.2 bar. Depending on the type of engine in your VAZ 2114, the characteristics may differ slightly: For a 1.5-liter engine, the optimal values are 285-325 kPa;
- For a 1.6-liter engine, these characteristics in optimal operating mode will range from 375 to 390 kPa.
New and old coarse filter
Many people purchase the entire fuel module assembly at once, which includes a filter, sensor, float, intake chamber and the pump itself. Such a purchase will cost approximately 3,000 rubles. It is much more profitable and practical to buy a separate pump, which costs up to 1000 rubles. This is due to the fact that when the pump fails, the remaining elements almost always remain intact and are fully suitable for further use.
Repair of fuel pump VAZ 2114/2115
When repairing the fuel pump, we will proceed from the fact that we have already removed the fuel pump from the tank. How to properly dismantle the device will be written below, but we will dwell in more detail on the description of the progress of the repair work:
- You will need to remove the protective cup from the module - to do this, you will have to pry the cup latches with a screwdriver, and the fuel pump will come out freely.
- We unscrew the two screws from the fuel pump housing that secure the fuel level sensor, then disconnect the cable of wires coming from the sensor and put it aside.
- Next, you will need to disconnect the filter mesh from the pump using a flat-head screwdriver.
- To complete the disassembly, you need to remove the housing itself from the device - there is a cotter pin on the surface that needs to be pulled out.
- You will need to carefully examine all parts of the device for cracks, tears and deformations. As a rule, most often some specific parts of the fuel pump fail, which are much easier and cheaper to replace than to buy a new device. Replacing membranes, rubber bushings or filters is not particularly difficult: use a screwdriver to pry off the old product and pull the new one in its place. The fuel pump mesh, float or fuel level sensor can also be easily mounted with a regular screwdriver.
- The unit is reassembled in the reverse order.
The structure of the VAZ 2114 fuel system
The fuel system of the VAZ 2114 car consists of:
- fuel module;
- fuel lines;
- injector ramps;
- fuel injectors;
- fuel filter;
- fuel control systems.
The fuel module consists of the following elements:
- fuel pump;
- fuel level sensor;
- float;
- primary fuel filter meshes.
The filter mesh located on the suction pipe of the fuel pump has a fine-mesh structure, which allows it to trap contaminant particles that can damage the structural elements of the part. A fine fuel filter housing is additionally built into the gas pipeline system.
As a rule, the design of a fine fuel filter uses a material capable of retaining on its surface the smallest particles suspended in the fuel. The injector of a modern VAZ car is a fairly reliable device that provides control over the systems responsible for ensuring the smooth operation of the car engine.
The injector of a VAZ 2114 car, in addition to elements of the fuel supply system, includes an electronic control unit, as well as a large number of sensors that transmit information about the state of the car to the control unit and allow you to control the operation of the power plant.
What to do if the fuel pump does not work
Before deciding anything regarding the repair or replacement of this device, it is worth remembering that the function of the gas pump is to create a certain pressure in the fuel system of the car. Accordingly, the first step is to measure the fuel pressure, quite possibly in order to accurately diagnose the failure of the fuel pump.
Measuring pressure in the fuel system
Normal atmospheric parameters in the VAZ-2114/2115 fuel system are as follows:
- at idle - 2.5;
- after turning on the ignition - from 3;
- without pressure regulator tube - 3.3;
- with pinched drain - 7;
- after pressing the gas pedal - from 3 to 4.5.
You will need to measure the pressure in five operating states of the fuel system at once in order to obtain accurate data. There is a pressure fitting under the hood of the car; you will need to unscrew the cap from it and attach a pressure gauge with a hose. By turning on the ignition, holding the drain, pressing the gas, it is necessary to take all five pressure measurements.
Using a pressure gauge, you can measure the fuel pressure and, based on this indicator, look for a malfunction
Wiring check
If the pressure readings are almost identical to normal, you will need to check the wiring for a short circuit. It is quite possible that the fuel pump itself is in working order, only the contacts that go to it have been damaged.
It is necessary to check the fuel pump wiring for short circuits.
You need to know that the wiring system, which goes directly to the fuel pump itself, has three wires: positive, negative and an indicator of the fuel level in the tank. You will need to take a regular light bulb with a power of no more than 12 V and attach its wires to the “+” and “-” contacts on the external connector of the pump. After starting the engine, if the lamp blinks, then there is contact.
If there is a flaw in the wire circuit, the light bulb will not light up. The internal contacts of the fuel pump are checked as follows:
- one by one, the light bulb wiring is connected to the “+” and “-” connectors of the fuel pump, then to its ground and relay;
- if the lamp blinks when connected to the negative contact, then the fuel pump contact is considered not working, and if it does not blink, then the “+” contact is not working.
After this, you will need to first check the relay and fuse: if they are normal, then the wiring is damaged somewhere between the pump and the relay.
Wiring
If the fuel pump fails, first of all, you need to make sure that the circuit was installed correctly. Three wires lead to its electric drive:
- one - to the fuel sensor;
- two - to the contacts of the motor itself.
A regular 12 volt light bulb will help you figure this out. It is connected to the power wires. When you turn on the ignition, it will light up - this means that the electrics are supplied correctly.
The lamp also checks the performance of the motor itself. In this case, it is connected to the protruding terminals of the drive, and its short-term flashing will indicate in this case a malfunction of this element.
Replacing the fuel pump on a VAZ 2114/2115
Before you begin work, you should relieve the fuel pressure in the system. Even when the pump is not working, the pressure can remain very high, which will lead to the pressure of a stream of gasoline during dismantling work.
To reduce the pressure in the fuel system of a car, it is enough to let it stand on level ground for three hours. The fuel pressure in the hoses and pipes will noticeably decrease, and replacing the device will take place without any difficulties.
Not in all cases it is necessary to replace the fuel pump with a new one; sometimes it is enough to simply repair it
Preparing tools
To make all stages of the work easier, you will need to prepare several tools. As a rule, most car owners have all of them:
- crosshead screwdriver;
- flat screwdriver;
- open-end wrench 17;
- head at 7;
- extension for key.
How to remove a faulty fuel pump in a VAZ 2114/2115
The procedure for dismantling the fuel pump determines the following stages of work:
- Open the hood and disconnect the negative terminal from the battery.
- Raise the rear seat cushion inside the vehicle.
- There is a small hatch under the seat - it is under it that the fuel pump is located.
- Using a 17mm wrench you will need to unscrew all the nuts securing the hatch to the floor.
- Putting the hatch cover aside, you will need to disconnect the two wire blocks. To do this, you will first need to bend the fixing element on the plug.
- Next, using a 17mm wrench, you will need to unscrew the nuts on the fuel line and disconnect the fuel pipes.
- After this, the fuel pump itself will become accessible. Using an extension cord and a wrench, you will need to unscrew all the fasteners that connect the pump to the metal surface of the car.
- The best way to remove the fuel pump is to use a screwdriver to hook it onto the rubber ring.
How to install the fuel pump back
The procedure for installing the fuel pump in the VAZ 2114/2115 is completely reverse: that is, you will first need to insert the device into the cavity under the seat, and then connect all the disconnected wires and tubes. The final stage is closing the hatch and returning the rear seat cushion to its original place.
The ability to independently diagnose a fuel pump failure, as well as quickly replace or repair the device, will be especially useful for those drivers who are accustomed to servicing their car themselves. In addition, the procedure for checking the fuel pump and its repair cannot be considered particularly complex work, so even an inexperienced owner will be able to get the fuel pump into working condition without contacting a service station.
Yuri Petrovich 12/10/2009 - 15:45
QUOTE
(Cat 302 @ December 10, 2009, 1:42 pm)
The crankshaft position sensor has died, and if there is no signal from this sensor, the controller blocks the fuel pump circuit!
Anton, read carefully -
QUOTE
(Cat 302 @ December 10, 2009, 4:13 pm)
It happens Yuri Petrovich. So, on the highway to NG, I’m going out of town to celebrate, I stop for a little emergency, smoke the car in the wilderness, don’t start, I listened to the pump, it’s not making noise, and purely by chance a friend was driving by and it saved me, they brought services, no tools, no tools in the cottage, we went for the DPKV, it didn’t help, we hooked it up directly with wires it works, on holidays we took it to a local service center, where the controller immediately gave an error: a short circuit in the fuel pump network, they replaced the relay, everything rang smoothly, the error remained, the technician came to the conclusion that the controller had burned out and, purely for the sake of experiment, they tried to fix it and lo and behold, the pump started working.
a friend on a new fourteenth car died after six months on the highway, it was cured by replacing the relay, first the relay should be changed Post edited by Rino: 12/10/2009 - 19:33
Diagnostics of the fuel pump and injectors VAZ - 2115
The April issue of the magazine “Behind the Wheel” showed ways to check the electrical circuit of the fuel pump on a VAZ-2110...2115. Let's assume that it is working properly: the pump hums as usual. But does this mean that gasoline is supplied to the injectors normally? No! This is where problems may arise.
Let's start with the simplest. Remove the protective cap of the fitting (photo 1),
put a rag underneath so as not to spray the engine compartment with gasoline, and use the tip of a thin slotted screwdriver to press the spool of the fitting. A thin, weak stream of gasoline indicates low pressure in the fuel rail - you will have to look for the reason. If gasoline sprays with good pressure, there is hope that the pressure is close to normal (2.8–3.2 bar), all that remains is to measure it with a pressure gauge.
Service specialists do this using fuel pressure gauges with adapters. We will use a simple one, from a tire pump. It is only important that the measurement limit is at least four bar. You will also need a piece of gas-resistant hose 150 mm long with an internal diameter of 10–12 mm, and two clamps for it. Using the wheel valve cap, unscrew the spool valve from the fuel rail fitting (the pressure has already been released) (photo 2).
We put the pressure gauge hose on the fitting and tighten it with a clamp. We turn on the ignition without starting the engine: after two seconds, the fuel pressure in the rail should rise to 2.8–3.2 bar and stabilize at this level (photo 3).
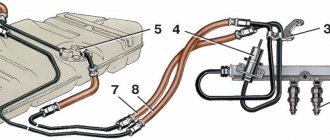
If it is significantly lower (about 1 bar) and remains this way for a long time, you need to check the supply line 4 (see figure) - most likely, it is clogged. There are two problem areas here: fuel filter 5 and fuel pump mesh 2.
Let's check the filter first. It is located under the underbody near the gas tank (photo 4).
If it's ok, let's look at the pump grid. We remove the fuel pump from the tank, remove the screen and wash it. Before installing the fuel pump, it is very useful to check the tightness and reliability of the connection of its tube (arrow in photo 5)
to the fuel line. You will, of course, ask what to do if the supply line is clear, the pump is humming, and the pressure is low. Change the pump! It's worn out. And it also happens that the pump is working, but there is no pressure in the ramp at all! This happens in winter if there is a lot of water at the bottom of the gas tank. If it freezes on the pump grid, it will interrupt the flow of gasoline into it. What to do? Under no circumstances should you light a fire under the gas tank or heat it with a blowtorch or other source of fire. It would be better to remove the fuel pump and clear it of ice. Another option is for those in no hurry: roll the car into a warm room and wait... By the way, in this case it makes sense to drain the water from the gas tank at the same time. It's a troublesome task, but rewarding.
But now we are convinced that the pressure in the ramp is normal. Does gasoline enter the engine cylinders? This is not a fact! The injectors may become clogged, and the fuel supply may be reduced or even stopped completely. But sometimes the injectors do not receive a control signal, although they themselves are working.
We begin the control by inspecting the spark plugs. Wet means fuel is supplied. Dry? Then we’ll check the signal at the injector harness connector with a probe (photo 6).
Yes, are the spark plugs dry? You will have to unscrew the screws securing the ramp and lift it under the intake manifold so that the injector nozzles become visible. Turn on the ignition and turn the engine crankshaft with the starter. Can't see the streams of gasoline? This means that the injectors will have to be removed and, most likely, replaced with new ones. True, almost every serious service will offer you to wash them. Take an interest in prices: if a new set of injectors is slightly more expensive than flushing, replacement should be preferred. After all, old injectors also have age-related diseases.
Diagnostics
A malfunction of the VAZ 2114/2115 fuel pump can be caused by:
- malfunctions in the device’s power supply circuit;
- failure of starting and protection elements (relay and fuse);
- wear of electric motor parts.
Checking the electrical circuit
At the beginning of the diagnosis, you should check the electrical circuit of the fuel pump. To do this you will need:
- car tester (multimeter);
- crosshead screwdriver;
- two pieces of wire about 2 m long.
Checking the electrical circuit is carried out in the following order:
- Turn on the ignition without starting the engine. When the key is in the first position, a click should be heard, characteristic of turning on the relay, followed by a slight whirring of the pump electric motor. If there is no click, the relay is faulty or is not receiving power. If there is a click, but no buzzing, the wiring coming from the relay or the pump motor itself is faulty.
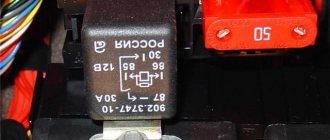
- Under the glove compartment, find an additional mounting block consisting of three relays and three fuses. The pump relay is located in the middle, and the fuse is located to the left of it. Remove the fuse from its socket, test it with a multimeter, and if the result is negative, replace it. When replacing the fuse, please note that it is rated for a maximum of 15 A.
The relay and fuse for the fuel pump on the VAZ 2114/2115 are located in the mounting block under the glove compartment.
Set your multimeter to voltmeter mode. Connect one probe of the device to the relay terminal to which the pink wire fits, and the second to the car body. Turn on the ignition. The device should show the on-board network voltage in the range of 11.7–12.4 V. If there is no voltage, the problem may be a broken wiring or a malfunction of the ignition contact group. In this case, it is better to contact an auto electrician. If power is supplied, check that the relay is working. With the ignition on, use a screwdriver or a piece of wire to close the contacts to which the pink and gray wires go. This closes the circuit bypassing the relay. If the fuel pump works, replace the relay.
Pressure check
If the pump is working properly, but the engine begins to operate intermittently, you should check the fuel pressure in the system. For this you will need:
- pressure gauge (can be a tire gauge with a measurement limit of 5–7 kPa);
- petrol-resistant hose with a diameter of 10–12 mm and a length of 50–80 cm;
- two clamps for a hose of the appropriate diameter;
- Phillips screwdriver;
- nipple cap;
- dry rag.
In addition, the presence of an assistant is desirable.
The verification procedure is as follows:
- In the engine compartment on the engine fuel rail, locate the pressure measuring fitting (on the right side).
- Remove the plastic cap (plug) from the fitting.
Description of the VAZ-2115 fuel pump injector
Modern cars mainly use an injection power plant.
The carburetor engine has less efficiency, so it is practically no longer produced. The fuel pump is installed on a VAZ-2115 car directly in the fuel tank. With its help, it is possible to create a pressure within the fuel system within eight atmospheres. The fuel pump is capable of pumping 80 liters of gasoline per hour. The disadvantage of this element, which powers an 8-valve engine, is considered to be poor resistance to impurities contained in fuel. Also, you cannot turn it on if there is no fuel in the tank.
When this module becomes unusable, the car engine will not start.
Wiring contacts
The wiring system goes to the fuel pump in the number of three wires: positive, negative and gasoline level indicator. The cause of a fuel pump failure may be a simple power failure in the wiring. If everything is normal with the pressure, then we check the contacts.
We take a simple 12 V light bulb and attach its wires to the positive and negative contacts on the external connector of the fuel pump, respectively. We turn the ignition: the light blinks, there is contact. Then you need to dig deeper - look at internal contacts.
Device
In the VAZ-2115, the fuel supply system contains the following components:
- ramp;
- fuel line;
- filter;
- Control block;
- fuel injectors.
The fuel module itself includes:
- gasoline level sensor;
- gasoline pump;
- float;
- primary filter.
The latter's mesh is located directly at the suction port of the pump. It quite well rids the fuel of contaminants, the presence of which significantly reduces the service life of the entire system as a whole.
In addition, the gas line also has a filter that provides fine cleaning of the fuel.
As practice has shown, the VAZ engine injector itself is quite reliable and very rarely fails. In addition to individual elements of the fuel system, its operation also involves:
- ECU;
- sensors that monitor various parameters.
Fuel pump weight
The contact system is normal, but the gasoline level sensor is acting up. Let's see what happens to the mass of the fuel pump. It may be poorly secured. In this case, the fuel pump will not be able to pump anything.
The mass of the fuel pump itself is attached to it in the area of the handbrake, under the dashboard. When you pull the handbrake, you can touch the ground contacts of the fuel pump, and the connection may be lost.
It is not difficult to tighten the mass of the fuel pump, it is difficult to reach it. Namely: get the grounding contact of the ground conducting the lost connection. We remove the plastic under the handbrake and the floor covering of the car, respectively; We clean the contact and firmly attach the mass to the fuel pump.
In the same place as the fixed mass of the fuel pump, under the dashboard, its relay is located.
Ideally, when ignited, the relay creates the required pressure in the system in a couple of moments and turns off. If this does not happen, the pressure is normal, but the process does not proceed, we completely lift the front facing panel that covers the contacts of the music and air conditioner and look from the passenger side: there are three switches, the lowest one is from the fuel pump. When you turn the key, the relay makes a characteristic click and works. If there is no click, the relay or its contacts are closed.
As they say, there is no need to waste time on trifles, if the motor terminals can be reanimated, then it is better to replace the relay and its contacts. The pleasure is inexpensive, the location for replacing spare parts is very convenient.
Scheme of work
Essentially, a fuel pump is an electric motor that pumps fuel and creates the pressure necessary for the operation of the entire system. It, as noted above, is one of the components of the fuel module. The latter is a block, inside of which there are also:
- intake chamber;
- fuel level sensor;
- float;
- filter mesh.
The fuel pump is powered from the car's network. The engine is installed so that it is freely washed by gasoline. This ensures its cooling. In this case, the fuel also lubricates the working surfaces of the pump.
What is a fuel pump and why is it needed?
Fuel pump diagram
The gasoline pump serves to ensure continuous and uninterrupted fuel supply to the engine during operation. In most modern car models, it is located inside the gas tank, so access to it is not so obvious and can be difficult.
In VAZ cars, under the rear seat you can find a rectangular hatch, under which you can access the fuel pump. The fuel module kit also includes: a fuel level sensor with a float and a coarse filter - mesh. Two fuel lines are connected to the fuel pump:
feeder, from which the fuel rail with injectors is fed through a fine filter;
reverse, returning fuel through a pressure regulator, ensuring its constancy in the engine power system.
Malfunctions
The main signs that the fuel pump is not pumping are as follows:
- the power plant does not work;
- when the ignition is turned on, the noise of the pump is not heard;
- if the engine is running, then interruptions occur periodically;
- the car moves jerkily.
Thus, checking whether it works is quite simple: turn on the ignition and listen. A characteristic sound will indicate that it is working properly. You need to listen in the rear seat area, because that is where the gas tank is located.
The most common breakdowns:
- fuse blown;
- relay failure;
- incorrect or unreliable ground connection;
- contamination of terminals;
- failure of the electric drive.
It should be admitted, however, that the latter happens very rarely. Due to the fact that this unit is well cooled, it is not afraid of overheating.
Most often, the centrifugal vane hydraulic supercharger, located in the pump itself, fails. The reason for this is usually the low quality of the fuel and its high contamination with foreign substances. In this case, they act as an abrasive and wear away the working surfaces, as a result of which the tightness of the seal is disrupted and, accordingly, the efficiency decreases.
The more worn the pump is, the louder it runs and the worse it pumps. If necessary, the problem can be eliminated by replacing the entire assembly, which includes both the electric motor and the pump itself.
If the fuse is blown, replace it with a new one.
The relay fails for the following reasons:
- fatigue of materials;
- incorrect installation;
- poor workmanship.
Unreliable fastening of the mass leads to regular loss of contact. An incorrect connection will prevent the pump from starting at all.
Causes of malfunction
- Fuses under the dashboard on the ECU. The top one is 15 A (pump) and the bottom one is 7.5 A (goes to the ECU, to the ignition module).
- Faulty fuel pump relay. It is located there under the torpedo - the very top (below the top fuse).
- Poor fuel module mass. It is mounted under the dashboard, where the handbrake is. The mass needs to be cleaned and re-secured. If it disappears, the fuel level indicator will also not work.
- Lack of positive contact. Removing the back seat. We check the presence of contacts in the wire block. If there is no positive, then the reason is either the relay or the fuse.
- Fuel pump motor not working.
How to remove the fuel pump
Before this, you need to twist the negative terminal from the battery.
Also, the gas tank must be completely empty. To replace the pump, you will need to completely remove the fuel module. This, among other things, will allow you to clean the bottom of the tank from accumulated dirt. Before removing the module, it is necessary to reduce the pressure in the system. There is a fitting on the ramp for this.
Next you need to do the following:
- remove the protective cover to gain access to the module;
- disconnect the pump power terminal;
- unscrew the fuel hoses;
- loosen the lock of the module itself;
- remove it from the gas tank.
We should not forget that before performing the last action, you need to release the float. Replacing the entire unit is the simplest solution, since repairing its individual elements will require knowledge and extensive experience. If there is neither one nor the other, then it is better to contact a car service.
Relay
Relay
In the same place as the fixed mass of the fuel pump, under the dashboard, its relay is located.
Ideally, when ignited, the relay creates the required pressure in the system in a couple of moments and turns off. If this does not happen, the pressure is normal, but the process does not proceed, we completely lift the front facing panel that covers the contacts of the music and air conditioner and look from the passenger side: there are three switches, the lowest one is from the fuel pump. When you turn the key, the relay makes a characteristic click and works. If there is no click, the relay or its contacts are closed.
As they say, there is no need to waste time on trifles, if the motor terminals can be reanimated, then it is better to replace the relay and its contacts. The pleasure is inexpensive, the location for replacing spare parts is very convenient.
Replacing the fuel pump on a VAZ 2113, VAZ 2114, VAZ 2115
Welcome! Fuel pump - people usually call it by different names, some say a fuel pump, while others simply call it a fuel pump. If you read these two names more carefully, you will already get a picture of why this thing is needed at all; for greater clarity, we will answer you that it is needed only to pump the fuel that is in the gas tank into the car engine. Therefore, if the fuel pump fails, the first thing that happens to the car is that it stops working, because the fuel pump does not pump fuel into the car's engine, and therefore the car will simply stall.
Note! To replace this pump you will need to stock up on: A small wrench and a screwdriver!
Where is the fuel pump located? In all cars of the Samara family, this unit is located in the inside of the gas tank, and the gas tank in this turn is installed on the car in the lower part of the car, popularly called the bottom, and this same gas tank is located in the rear of the car, that is, approximately somewhere under the rear cushion seats and therefore, after reclining this pillow, it will be very easy to see the location of the fuel pump, in this case it is indicated by an arrow in the photo:
When should you change the fuel pump? It is replaced if it fails, or if its mesh is clogged, which in turn can be simply removed and replaced with a new one, or simply removed and washed, and as a result it will be clean and will allow fuel to flow into the car engine much better . (For information on how to remove the mesh, see the article entitled: “Replacing the fuel pump mesh on a VAZ”)
Fuse
Fuse 15 A
One of the final stages of checking a malfunctioning fuel pump is its fuse. Like the relay, the fuse can be seen from the inside. Or you can climb in from the outside, through the hood. Under the hood, closer to the windshield, there will be a dark box, right on the electronic control unit. You need to open it and find the topmost fuse with a current of 15 A and the English inscription fuel pump. We take it out and look at the insides: the contact is not damaged - the fuse is alive. The contact is damaged (blown) - you need to install a new fuse. As with the price of the relay issue, buying and replacing a fuse will not be a big waste of money and time.
Not every master's hands grow from the right place. For this reason. The reason that the fuel pump does not pump can be simple stupid shortcomings of simple tuning.
For example, the alarm was installed in such a way that all the contacts were mixed up, and power simply does not go to the fuel pump. Not because the alarm should not be on the car, or the wiring system is acting up, it’s just that the person who installed it didn’t have enough brains and practice. Check all connections carefully if you decide to add some style to your little one.
Or anti-theft. The button is placed in such a way that it interrupts the integrity of the fuel pump ground contact system, and almost always fails. By the way, if you have such a lotion, I don’t think it will be very effective in the absence of a signal. And if there is a signaling system, then anti-theft is not needed at all.
In any case, remember: in any situation where a VAZ breaks down, the point is not that it is a VAZ, and it was made poorly. It’s just that the Russian auto industry is a little more delicate than the foreign one, it requires a little more attention and your ingenuity.
How to replace the fuel pump, also known as the fuel pump, on a VAZ 2113-VAZ 2115?
Note! Before you start work, be sure to remember that if you are going to work with the fuel supply system to a car engine, then you always need to bleed off the pressure that is in the system, because if the pressure is not bleed, then when you disconnect the fuel lines from the fuel pump, the jet that is in them under pressure will splash on you, or either on the seats and thereby stain them, so the pressure in the system must be reduced, but how to do this, you ask?
There are two ways to reduce pressure in the system, the first method and most likely not even a method but simply a passage of time, that is, if the car sits in one place without starting for about 2-3 hours or more, then the pressure in the fuel system will decrease and therefore When the fuel lines are disconnected, a strong stream of fuel from them will no longer splash you.
The second method is also very simple, to implement this method, first find a diagnostic block in your car, which contains only three fuses, one of which is the fuel pump fuse (It is listed under f3), so remove this fuse and then start the car and let it run. let it work for a while until it stalls, and after it stalls, install this fuse in its place and proceed to removing the fuel pump!
There is one more final way by which you can also relieve pressure from the system, see how to do this in the article: “Reducing pressure in the power system”!
Removal: 1) At the very beginning of the operation, disconnect the “-” terminal from the battery terminal. (For information on how to disconnect the terminal, read the article: “Replacing the battery on a VAZ”, point 1)
2) Then lift the bottom cushion of the rear seat, looking for the tongue thanks to which you can lift it.
3) After your seat is reclined, look under it for the fuel pump hatch, which you will need to remove by unscrewing the two nuts that secure it.
Note! The hatch is located almost in the very center, if you don’t find it, then perhaps it is hidden under soundproofing material, in which case try to find a cut, perhaps somewhere it has already been made in advance for easy access to the fuel pump, and if a cut is found If not, then carefully use a knife to cut off part of the soundproofing material in the exact place where the fuel pump is located to gain access to it!
4) Next, take the wire block with one hand and the connector with the other and, as a result, separate them from each other by bending the side clamp that secures them. (The fastening lock is indicated by an arrow)
5) Next, unscrew the two nuts that secure the fuel line or fuel tubes (whichever is more convenient) to the pump, and after unscrewing, carefully disconnect these tubes from it.
6) Now that the fuel pipes are disconnected, then take a wrench or an extension with a head in your hands, and use it to unscrew all the nuts that secure the fuel pump to the car body.
7) When the nuts are unscrewed, carefully pry up the pressure ring with a screwdriver and then remove it and set it aside.
 Then remove the fuel pump from the car tank with both hands.
Note! Remove the pump very carefully and always remember that the float, which is also attached to this pump, is located in the inside of the gas tank and therefore, after removing the fuel pump, turn it slightly on its side so that this float passes through!
9) Finally, after removing the fuel pump, remove the rubber o-ring from all the studs.
Note! Pay attention when the pump is removed so that nothing remains in the inside of the tank, if there is a storage cup left inside the tank, then remove it from there and install it either on the old one or (if it is in good condition) on the new one pump, or throw it away altogether!
Installation: Installation of a new pump occurs in the reverse order of removal.
The fuel pump does not work, the relay turns on.
Checking relay power.
In the case when the fuel pump relay turns on when the ignition is turned on, but the pump itself does not work, you need to check the power at terminal 87 of the fuel pump relay. To do this, touch terminal 87 of the relay socket with the output of the control lamp connected to the vehicle ground, and the lamp should light up. If the lamp does not light, it means the fuse has blown or there is a break in the wire.
If there is power at terminal 87, you should remove the relay from the socket, and instead place a jumper between pins 87 and 30. In this case, if the pump and connecting wires are working properly, the pump should start working and if this happens, the relay should be changed. If the pump does not start working, then, without removing the jumper, you need to touch the power wire on the fuel pump with a test lamp connected to the vehicle ground.
Checking the fuel pump power circuit.
If a submersible pump is installed on the car as part of the fuel module, you need to remove the connecting connector and touch one of the thick wires. When you touch one of them, the indicator lamp should light up. If the lamp does not light up on any of the wires, then it is necessary to eliminate the break in the wire from the fuel pump relay to the module connector or the pump itself, if the pump is of a remote type. One of the reasons for the break may be the anti-theft blocking of an installed non-standard alarm system.
In the case when the test lamp lights up on one of the thick wires of the connector or one of the terminals of the remote pump, you need to connect these terminals with a test lamp to each other. In this case, the control lamp should light up. If the lamp does not light, it is necessary to eliminate a break or poor contact in the wire connecting the pump to the vehicle ground.
If, when checking the wires and relay for turning on the fuel pump, no malfunction is detected, the electric motor of the fuel pump or its connection to the module connector is faulty. It is not difficult to find the cause by removing the fuel pump module from the tank. If there is poor contact with the connector, melting of the plugs will be visible. If melting is not noticed, then to check the pump itself, you can connect it to the battery. It should be taken into account that operating a submersible pump without liquid will damage the pump. A faulty pump should be replaced.
Buying a fourteenth fret is a young thing that does not require a large budget, both for the car itself and for spare parts. If you compare the VAZ 2114 with any foreign car of the same class, you will get a decent price difference in favor of the Lada. And even if a foreign car costs more, and servicing it is not more expensive than a Lada, then spare parts from the Russian automobile industry will be much easier to find in any of the most remote areas of our country.
Whatever you say, any car wears out and requires attention and care. So let's talk about a common problem with the fourteenth - the fuel pump does not pump.
Gasoline pump VAZ 2114
You're driving, and suddenly you stall. You start it, the engine growls, the starter turns, it starts moving and again there is a stupor. Or the ignition does not respond at all, you have to push it to start. This also includes the case when the engine responds every once in a while if you slow down for a couple of minutes and go to nitral. The battery is ok. We're sinning at the fuel pump.
Replacing the fuel pump VAZ 2115
The frequency of replacing the fuel pump on Samara 2 (VAZ 2113,14,15) cars is not regulated. Change it only if necessary.
It is quite easy to understand that the fuel pump is faulty. If the car does not start, or starts and immediately stalls, in this case, the first thing you can do is listen and understand whether the pump is pumping or not. Usually the sound of a running fuel pump is heard in a car.
If there is no sound, then you must first check the fuse and relay, and then only climb into the tank. It's another matter when the pump is still running, but pumping little fuel. In this case, you will not be able to check the pump yourself without special tools.
When the car begins to pick up speed poorly, drops in speed when you sharply press the gas pedal, or simply has unstable engine operation, you need to check the pressure in the fuel rail. If the pressure is less than 2 bar, the pump must be replaced.
The normal pressure of this fuel pump is 2.5 - 3.5 bar.
Popular breakdowns
Problems with the fuel pump can occur for several reasons. Therefore, your first priority is to determine the source of the problem. These may be:
- Fuel pump fuse;
- Fuel pump relay;
- Pump weight;
- Motor;
- Contacts;
- The pump itself.
If one of these elements fails, it can stop the normal functionality of the entire module.
Let us consider the situations with each of the specified elements of the fuel module in more detail.
Pressure
What exactly is a fuel pump? This is an element of the fuel system that allows fuel to pass through due to pressure. Therefore, if you take pressure measurements, you can get answers to many questions.
Let's give an example of normal pressure readings when checking in certain modes.
Check mode
Normal indicator
At idle
Without pressure regulator tube
When the drain is pinched
When you press the gas pedal
We recommend measuring with a small range of atmospheres on a pressure gauge (up to 7 atm). This will reduce errors to a minimum. Having a pressure gauge at hand will allow you to significantly save on professional diagnostics.
Contacts
The fuel pump includes three wiring:
- Plus (positive);
- Minus (negative);
- Fuel level indicator.
So, failure of the pump may occur due to a simple violation of the integrity of the wires. So if the pressure check shows normal, then we definitely examine the condition of the wiring.
To check, you will need a 12V lamp, which is attached to the external connectors of the pump with positive and negative contacts. Turn the ignition key. If the lamp blinks, contact is present. In this case, you will have to check the condition of the internal contacts.
Checking contacts
Motor
If the pressure and wiring are normal, let's try to check the serviceability of the motor. It is this element that is responsible for moving fuel through the system.
- To check it, you will need the same 12V lamp;
- Attach it to any motor terminal;
- Turn the ignition key;
- If the lamp blinks, you will have to get rid of the motor and buy a new one.
Motor
Don't make hasty conclusions. Before checking, look at the condition of the terminals and motor wiring.
Fuel pump weight
The contacts are fine, but the fuel level sensor may provide incorrect information. In this case, you definitely need to check the weight of the pump responsible for dispersing the fuel.
It often turns out that after prolonged use or driving on difficult road sections, the mass simply loses its fastening strength. Accordingly, if the mass falls off, the pump will not be able to work.
The mass is attached to the pump under the dashboard in the area of the hand brake. Therefore, when the driver turns on the handbrake, there is a possibility of hitting the ground contact, which is why it will fall off.
Putting the mass back in place is not that difficult. The problem is caused by the path to it. You'll have to:
- Get to the bottom through the interior;
- Remove the plastic under the handbrake;
- Remove the floor covering;
- Remove the grounding contacts;
- Clean;
- Secure it to the fuel pump as firmly as possible.
The fuel pump relay is located exactly where the ground is. Therefore, there should be no problems with the search.
With an ideally working fuel supply system, when the ignition is turned on, the relay instantly creates pressure inside the system, and then turns off.
If this process is disrupted, you will have to:
- Lift the front facing panel, which covers the contacts of the audio system and air conditioning;
- Take a look from the front passenger side;
- Find three relays;
- The lowest one is our desired pump relay;
- Turn the ignition key;
- If you hear a characteristic click from the relay, it is working properly;
- If there is no click, check the contacts. The reason is either them or a failed relay.
Fuse
All that remains is to check the condition of the fuse. This stage will make sure who the real culprit of the problems is - the pump itself or its fuse.
Fuse location
- Getting to the fuse is as easy as getting to the relay - through the hood or from the inside. The first option is preferable.
- Raise the hood and look in the area near the windshield.
- There is a dark-colored box located directly on the electronic engine control unit.
- Open the box and look inside for the topmost fuse.
- It has a current strength of 15A, as well as an inscription in English - Fuel Pump, that is, a fuel pump.
- Examine its external condition by removing it from the box.
- If the contacts are intact, then everything with the fuse is normal.
- If burnt contacts are clearly visible, consider purchasing a new device. Its price is affordable, so finding and replacing should not be a problem.
Which fuel pump to install on a VAZ 2115
On the VAZ 2114 and others of this family, they are installed from Bosch or Denso, since the original fuel pump only comes complete with a module (article 21102-1139009-02). Other manufacturers may be preferred only for reasons of economy.
| Manufacturer | vendor code | Average price, rub. |
| SAT 3.7 | STFP06 | 799 |
| MEAT DORIA 4.0 | 76416 | 1056 |
| DENSO 4.6 | DFP0105 | 2504 |
| BOSCH 4.0 | 580453453 | 2899 |
Tool required for work
- 10mm wrench;
- Screwdrivers “+” and “-“;
- Construction hair dryer;
- Pliers;
- Fuel container.
Operating principle and symptoms of malfunction
The fuel pump is a small electric motor that pumps fuel and creates operating pressure in the fuel rail. It is a component of the fuel module. The fuel module of the VAZ 2114 car is a single unit, which, in addition to the pump, includes:
- fuel sensor that controls the fuel level, assembled with a float;
- intake chamber;
- filter element.
The pump is driven by an electric motor powered from the on-board network. Structurally, the pump and the electric motor that drives it are one unit. The electrical component of the assembly is washed with gasoline. This is required in order to provide cooling to the electric drive of the pump, since it heats up quite quickly during operation.
Fuel pump operation diagram
In addition, gasoline passing through the electric motor provides lubrication of the surfaces in contact with each other. There are a large number of signs of malfunction that may indicate interruptions or failure of this fuel system component. Among them, the main signs that any person can detect are the following:
- the car engine does not start;
- when you try to start the engine after turning on the ignition, you cannot hear the sound of the pump electric motor;
- the occurrence of interruptions in the operation of the vehicle’s power unit;
- the appearance of jerks in movement at low speed.
Return to contents
