The VAZ 2106 engine is the most powerful of the engines installed on the classic models of the Volzhsky Automobile Plant. The piston diameter of the VAZ 2106 ranges from 78.94 to 79.79 mm. This variation in part size is due to the fact that the plant produces power units of five classes: A, B, C, D, E. The engine class depends on the exact size of the cylinder. For each class of cylinder block, corresponding connecting rod and piston groups are produced.
In addition, there are 2 main repair sizes of cylinders; corresponding connecting rod and piston groups are also produced for them. As a result, when you go to an auto parts store, you can find 15 identical-looking pistons, having different diameters and intended for the same power unit. It is quite difficult to understand this variety, but if you have knowledge and special tools, it is impossible to make a mistake in choosing.
VAZ 2106 engine piston diameter
The VAZ 2106 engine is the most powerful of the engines installed on the classic models of the Volzhsky Automobile Plant. The piston diameter of the VAZ 2106 ranges from 78.94 to 79.79 mm. This variation in part size is due to the fact that the plant produces power units of five classes: A, B, C, D, E. The engine class depends on the exact size of the cylinder. For each class of cylinder block, corresponding connecting rod and piston groups are produced.
In addition, there are 2 main repair sizes of cylinders; corresponding connecting rod and piston groups are also produced for them. As a result, when you go to an auto parts store, you can find 15 identical-looking pistons, having different diameters and intended for the same power unit. It is quite difficult to understand this variety, but if you have knowledge and special tools, it is impossible to make a mistake in choosing.
VAZ 2101 piston pin size
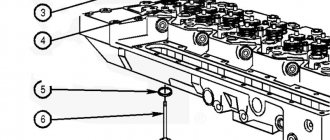
The piston pin is capable of providing a hinged connection between the upper head of the connecting rod and the piston itself. When the engine is running, significant variable forces act on the piston pin. Consequently, the product itself and the hole for it are mated with a minimum gap, which ensures lubrication. In VAZ engines, 2 types of articulated joints are implemented according to the “piston-pin-connecting rod” scheme. So in models 2101, 21011, 2105, 2108, 21083, the pin is installed in the upper head of the connecting rod with a fairly tight fit that will prevent any rotation. If the hole is made with clearance in mind, free rotation of the product will be ensured.
Selection of spare parts
Before going to the store, you need to roll the car out to a bright place or use a flashlight for work. You need to open the engine compartment cover (hood), approach the car from the left front fender and carefully inspect the left vertical wall of the cylinder block. It is there, in the very center, that the capital Latin letter should be located, indicating the class of the motor.
If the letter is not visible, it means the engine is dirty. You need to clean the surface of the power unit from dirt using a sandblaster and look again. If after this the letter does not appear, it means that it was “eaten” by corrosion. In this case, before going to the auto store, you need to purchase a bore gauge and use this tool to measure the actual dimensions of each cylinder. It happens that some craftsmen do not bore all the cylinders during a major overhaul.
Class A engines that have not been overhauled or bored have cylinders with a diameter of 79 to 79.01 mm, class B - from 79.01 to 79.02, class C - from 79.02 to 79.03, class D - from 79 .03 to 79.04, class E - from 79.04 to 79.05 mm. The original pistons for these blocks have diameters of 78.93, 78.94, 78.95, 78.96 and 78.97 mm, respectively. These are approximate figures, since in reality there is a tolerance of 9 thousandths of a millimeter.
Table of dimensions and tolerances of VAZ classic engine parts
Spare parts stores supply cast pistons of classes A, C and D, intended for unbored engines. Forged pistons for the VAZ 2106 are made to order and come in any size. The main repair dimensions of the VAZ 2106 engine cylinders are 79.4 (first bore) and 79.8 mm (second bore). Piston diameters for the first boring depending on the class (in millimeters):
Piston diameters for the second boring:
It should be noted that pistons are also divided into 3 categories based on the diameter of the piston pin hole, so new pistons must be purchased complete with pins. It is very difficult for a non-professional to distinguish a bored block from an unbored one, so if you are doing major engine repairs yourself, you must definitely purchase a bore gauge, and if this is not possible, then at least take old parts with you and compare them with store-bought parts.
Six engine tuning methods
Forged pistons
The factory usually installs cast pistons. In order to reduce the load, you can use forged ones instead. They have less weight. Moreover, at high speed, casting begins to work less efficiently than forged metal.
You can also replace the connecting rods with H-shaped forged ones, which have a slightly longer length than the original ones. This will improve the compression of the flammable substance. It must be remembered that when increasing the length of the connecting rod, it is necessary to install pistons whose compression height is less than the original one.
As a result, we get a more powerful engine.
Boring process
This method can significantly increase engine power. The classic version has 8 valves. Each of the engine cylinders has 400 cm. For boring, a small layer of steel is removed from the wall of each cylinder. This work is performed on special machines. In principle, you can remove as many layers as the cylinders themselves allow. But you need to remember that this reduces the mileage of the cylinders by thousands of kilometers.
After boring, it becomes possible to install a piston with a larger diameter. As a result, we get an increase in engine power by as much as several tens of horsepower.
Torque.
By installing a more advanced camshaft, engine torque can be significantly increased. For example, you can add up to two thousand revolutions to the engine. As a result, the car will accelerate much better already at first speed than with a standard engine.
Introduction of 16-valve cylinder block
This is a rather complicated procedure that requires deep knowledge of the structure of the six motor. The old block is completely removed, and a new block is placed in its place in a disassembled state. There is no head, gears, belts, etc. installed in it yet. Before completing the assembly, the new sixteen-valve valve must be connected to the gearbox. And only after this the assembly is completed.
Naturally, after this procedure it will not be possible to use the classic Zhiguli gas pump. Some people put a Volga pump in its place.
Also, for a 16V engine you will have to install a more powerful generator. For example, the generator located in the Niva is perfect.
Other parts will also require replacement: camshaft belts and chains, flywheel, crankshaft, release cylinders, ECU, injectors, combustion chambers.
Yes, there is a lot of work. But without all these modifications, you won't be able to experience the full power of the 16-valve engine.
Replacing damaged parts without boring
Situations often occur when, due to knocking of connecting rods or stuck rings, people completely disassemble the engine and bore it, spending a lot of effort and money on this. However, if the cylinder has the correct round shape, has no scratches, burrs, cracks, and its actual wear does not exceed 0.15 mm, then boring and honing is not necessary.
In other cases, it is enough to simply replace worn parts. To do this, you don’t even need to remove the power unit from the car, just remove the cylinder head (cylinder head) and the oil sump. Typically, this method is used when replacing the piston rings of a VAZ 2106 is required. Work order:
Assembly is carried out in reverse order. In this case, each piston should be inserted using a special mandrel. The “P” mark must face forward in the direction of travel. You can look up the sequence of tightening the cylinder head bolts and bearing housing nuts on the Internet. The pre-tightening torque of 10 cylinder head bolts is 3.4-4.2 kgf.m, the final tightening torque is 9.8-12 kgf.m. The 11th bolt is tightened to a torque of 3.5 kgf.m.
Source
VAZ 2103 engine malfunctions
The most common defects found on the engine:
All these malfunctions are associated with various reasons, which will be discussed below.
The engine gets very hot
Experts call the main reason for overheating of the engine unit a lack of refrigerant in the system. According to the rules, before leaving the garage, the driver is required to check the level of all technical fluids each time. But not everyone does this, and then they are surprised to find themselves with a “boiling” internal combustion engine on the side of the road.
Antifreeze may leak from the system. In this case, there is a malfunction - a violation of the integrity of the cooling system. Antifreeze stains on the floor of the garage in which the car was parked directly indicate to the owner that there is a leak. It is important to eliminate it in a timely manner, otherwise there will not be a drop of liquid left in the tank and system.
Another reason for engine overheating is a non-working radiator fan. On a VAZ 2103, the quality of cooling by the engine blades is extremely important. The slightest sagging of the drive belt has a negative effect on it. But this is not the only reason for the element to be released.
Finally, overheating of the internal combustion engine can occur due to damage to the thermostat.
Engine knock
On a VAZ 2103, engine knock is detected without special equipment, by ear. A 1-meter wooden pole is taken and one end is applied to the motor in the part being tested. The other side of the pole should be clenched in your fist and brought to your ear. It turns out something like a stethoscope.
VAZ 2103 engine smokes
As a rule, at the same time as the smoke, the engine eats up oil. It may be gray in color and increase with increasing idle speed. The reason is related to the oil scraper rings that require replacement. It is also possible that one of the candles is not working.
In some cases, this happens due to a ruptured gasket or insufficient tightening of the head bolts. On older engines, there may be a crack in the block head.
Troubles the engine
The phrase “troubling engine” means that one or more cylinders are not working. The power plant is not capable of developing full power and does not have the required traction force - accordingly, fuel consumption increases.
The main causes of tripping are: faulty spark plugs, incorrectly set ignition timing, loss of tightness in the intake manifold area, etc.
Piston sizes VAZ 2106
The VAZ 2106 car engine is equipped with a piston stroke of 80 (mm) and a compression ratio of 8.5 units.
The main dimensions of the pistons on the VAZ 2106:
An engine piston is a cylindrical part that serves to ensure the tightness of the combustion chamber and convert fuel energy into mechanical work of the engine.
The material for the manufacture of pistons on the VAZ 2106 is an alloy of aluminum and tin.
Piston parameters for VAZ 2106 1.6 MT:
Important: some modifications of this model, for example, the VAZ 21063 1.3 MT, have a 66 (mm) stroke piston installed.
Other names:
The 4-door sedan VAZ 2106 was also produced under the names VAZ 1600 and Lada 1600.
Years of production: 1976-2006.
Piston rings. Which ones are better?
The connecting rod and piston group on the VAZ 2106 consists of a piston, connecting rod, piston rings and piston pin. Piston rings differ in purpose: compression and oil scraper. The former prevent gases from penetrating the combustion chamber into the crankcase. Oil scrapers, removing residual oil from the cylinders, prevent its penetration from the crankcase into the combustion chamber. When free, the rings have a larger diameter than the inner diameter of the cylinder. Therefore, the ring has a cutout called a lock.
High quality cylinders use narrow rings to reduce friction and prevent vibration at high engine speeds. But due to the heavy load, they quickly wear out themselves and accelerate the wear of the cylinders. Therefore, wide rings are more popular, as they are more reliable. A special feature of piston rings is that after millions of cycles they must remain elastic and provide a seal. Therefore, for their manufacture, a material with low friction and wear coefficients should be used.
The first products began to be made from malleable cast iron, which has good performance characteristics due to its porous structure. The next material used was ductile cast iron, which elastically deforms, making it easier to fit products onto the piston.
Another material from which rings are made is cast iron coated with hard chrome. These products must be carefully selected when replacing, as they have low ductility. But at the same time they have high wear resistance even under conditions of high pressure and high temperatures. They are used on forced engines. There are also stainless steel rings, which have similar characteristics to chrome parts, but have a longer service life.
In addition to the material, the efficiency of the ring is affected by its location and design. If the product is slightly twisted, then it grinds faster with the cylinder walls. Compression rings with an L-shaped section contribute to the development of additional force applied to the cylinder walls at high pressure.
Thus, when deciding which piston rings to install on the VAZ 2106, you need to take into account the following factors:
Problems associated with faulty rings
First of all, you need to understand that the rings have become inoperative. Many people believe that this can only be understood by disassembling the engine, but there is another way. Watch how your “iron horse” behaves. If it is characterized by a sharp drop in power, then this is a clear sign that the rings have worn out.
As a result, fuel consumption increases, because the bulk of gasoline is simply released into the atmosphere. Along with fuel, oil consumption begins to increase. The rings stop coping with their tasks, and the oil simply remains on the cylinder walls, and then into the combustion chamber. In addition, the oil does not burn, but is deposited on the parts. The oil layer is quite thick, so the heat transfer between parts is sharply reduced, which has a detrimental effect on the mechanism as a whole.
If oil has leaked into the combustion chamber, it will be visually visible. The fact is that when exhausted, the gases will have a characteristic blue tint. Of course, there are cases when the gases are completely blue, but this already indicates severe wear and tear on the entire piston system.
In order to replace the rings you will need not only a large number of tools, but also dexterity. Naturally, it will not be difficult for professionals to make a replacement even if they have only two screwdrivers in their arsenal, but not alone. It is almost impossible to replace the rings alone. You will also need a table on which the cylinder block will be located, since the block will need to be turned over several times.
Other parameters of VAZ 2106:
| General parameters of VAZ 2106 pistons | ||
| Drawing General General view of the pistons | Models Total number of models presented | |
| Modifications The total number of all modifications of all VAZ models presented in our database | ||
| (drawing) | 5 units | 10 units |
| VAZ 2106 pistons parameters | |
| Parameter Piston parameter | |
Data is presented in millimeters (mm)
Caution: the above data are the official figures of the manufacturer, however, please note that the information is for reference only and does not guarantee absolute accuracy.
Video “Assembling a piston group for a VAZ 2106”
This video shows the intricacies of assembling the crankshaft and piston group of the VAZ 2106.
Every car owner has encountered repairs to their purchase. Naturally, any car sooner or later develops a malfunction of one or more parts. The problem is whether to repair it yourself or take it to a workshop, where you will also have to shell out a certain amount of money. In any case, every motorist should know how to repair his car. If your car is a VAZ 2107, then take a couple of minutes and read the article. The story will be about how to replace piston rings.
Variety of STK products
In fact, everything is not limited to Prioras, Kalinas and GAZs. The STK company has manufactured many groups of pistons for a wide variety of machines.
Today Samara Trading offers pistons for:
- VAZ pistons;
- OKA pistons;
- GAS pistons;
- Pistons ZIL, URAL;
- Lada pistons, including Lada Largus;
- Pistons Snowmobile Buran;
- Volkswagen pistons;
- Opel pistons;
- Ford pistons;
- Special sports piston kits.
If we approach the issue more practically and classify pistons not by models and brands, but by their sizes (diameters and strokes), then STK is ready to offer pistons for virtually all cars.
STK pistons for VAZ cars are suitable for such cars as:
- VAZ-2101, 2103
- VAZ-21011, 2106
- VAZ-2105
- VAZ-2108, 21081 (vol. 1100 kb. cm.)
- VAZ-21083
- VAZ-21213
- VAZ-2110 and its modifications. 21083 (when replacing the connecting rod with a connecting rod from a VAZ-2110)
- VAZ-2112
- VAZ-21124
- VAZ-21126 “Priora-EXPORT”
- VAZ-11194 "Kalina-EXPORT"
- VAZ-21116 "Granta-EXPORT"
- VAZ-21179 "EXPORT"
- VAZ-21126 "Priora"
- VAZ-11194 "Kalina"
- VAZ-21116 "Grant"
- Lada Largus
STK pistons for OKA, GAZ, Buran, PAZ and UAZ cars:
- OKA-1111
- GAZ-406
- GAZ-405 Euro 2
- GAZ-405
- GAZ-405 Euro 3
- GAZ-409 Euro 2
- GAZ-409 Euro 3
- PAZ-523
- GAZ-402
- GAZ-410
- UAZ-274
- Piston Snowmobile Buran, diameter D=76.0 mm.
STK pistons for ZIL and URAL cars:
- ZIL-130 and its modifications (product diameter: 100 mm.)
- ZIL-375, "URAL" (product diameter: 108 mm.)
STK pistons for Volkswagen cars:
- Volkswagen 1.8 S and its modifications (diameters: 81.0; 81.5; 82.0 mm.)
- Volkswagen 1.8 N and its modifications (diameters 81.0; 81.5; 82.0 mm.)
- Volkswagen 1.6l and its modifications (diameters 81.0; 81.5; 82.0 mm.)
Lada 2106 VAZeratti › Logbook › Piston markings.
Friends, hello everyone. And so, that's the crux of the matter. I changed a lot in the engine. And the oil pump and the piglet. New pig bushings with reamer. Timing belt from a shnivy with a drive gear for an oil pump of reduced diameter. New camshaft with pastel, different options for oil filters (from LadaDetal to Champion). Thicker oil, thinner oil. And still, when standing in a traffic jam for a long time, the oil pressure light sometimes blinks. There are no extraneous sounds in the engine. It turned out surprisingly quiet. I understand that blinking the light bulb is allowed. But it doesn't make me happy. The engine does not consume oil and does not throw oil into the ventilation. There may be several reasons: Wear and tear of everything. There is such a possibility, but the mileage is only 58,000 km
And then, at a club meeting, one good person (Pash, about you) said that maybe I have connecting rods from the factory with holes for pouring oil onto the piston bottom.
And all the pressure sprays out. Six months ago I bought a set of “Ks” piston group.
Includes: 4 pistons 4 pins Rings are installed on the pistons.
And then a friend gave me a zero crankshaft 2103. From long-term storage (I hope that we will get off with polishing, or grind it to 0.25 with subsequent balancing).
There is a piston, there is a knee. All that's left are the connecting rods. And here's the question. Connecting rods are selected according to the piston pin class. Everything is clear with the classification of domestic pistons and connecting rods.
From the markings I understood that: 78.96 is the diameter of the piston itself Sp 0.04 is the thermal gap R1c-? 91317-? The markings on all pistons are the same. Tell me, who knows what class of piston pin?
Lightening the VAZ crankshaft
We have already written about how to lighten a flywheel, but a flywheel alone is of little use. In this article we will look at lightening the crankshaft and other parts of the crankshaft.
Lightening the VAZ crankshaft:
For a standard crankshaft, you can also make it lighter; it has a large margin of safety. But this must be done after weighing all the pros and cons.
So the advantages of crankshaft lightening:
- Inertial masses, which negatively affect the crankshaft journals, are reduced, increasing their wear
- The motor is lighter and revs faster
Disadvantages of relief:
- If the crankshaft is lightened incorrectly or excessively, idle performance may deteriorate, and under high loads the crankshaft may simply burst.
- Additional costs for tuning (well, how could we do without it?)
Lightening the crankshaft consists mainly of machining the cheeks and counterweights. There is no single scheme for lightening the crankshaft. Someone mills the sides of the cheeks, someone sharpens the counterweights, sometimes even very sharply, someone simply brings the cast surface to good cleanliness, removing casting defects, grinding and polishing the surface of the knee.
But it's not that simple. After any intervention in the design of the crankshaft, preferably even after grinding the journals, it is necessary to balance it.
Static balancing is not suitable here as for a flywheel; dynamic balancing is needed here, using special equipment.
True, there are masters who can balance you on their homemade stands, but mostly it’s all of poor quality.
The crankshaft is lightened together with the flywheel. Such balancing will give tangible results. First, one crankshaft, and then assembled with a flywheel. It is possible to balance the crankshaft with the clutch basket and pulley, but in practice it is not profitable. Because the clutch changes quite often, especially on tuning cars, so we won’t remove the crankshaft from the engine every time and balance it every time. The cost of balancing in each region is different, ranging from 1,500 to 3,500 rubles, maybe cheaper. If anyone knows what it costs and where, please leave a comment. Maybe it will be useful to someone.
It is not worthwhile to greatly lighten the crankshaft counterweights, since they are strongly interconnected with the weight of the journal and connecting rod, so that the counterweight will not be much lighter than the journal. Lightening the crankshaft by more than 1 kg is dangerous.
I remind you once again that after lightening the crankshaft, dynamic balancing is mandatory.
See how the crankshaft is lightened. The picture shows the Nadezhda crankshaft; for other VAZ models everything is similar.
I wish you success!
Replacing pistons
Before carrying out repair work on the VAZ 2106, you must first thoroughly wash the engine to prevent small particles and dirt from getting inside. It is better to place the dismantled motor on a reliable shelf located at a convenient height. The replacement tools you need to prepare are:
When disassembling, you should carefully remember the location of all parts of the VAZ 2106, make notes, and better yet, take photographs.
Stages of work
When replacing the piston group on a VAZ 2106 yourself, you should carefully monitor the installation sequence.
Crankshaft pulley
The generator and water pump on the VAZ 2106 are driven by a belt from the crankshaft pulley
When carrying out repair work on the engine, attention should also be paid to the condition of the pulley: is there any visible damage (cracks, scuffs, dents). If defects are found, the part should be replaced
During the installation process, the pulley should sit smoothly on the crankshaft, without distortion. Despite the fact that the pulley fits quite tightly on the shaft, a key is used to prevent rotation, which can also be damaged. A defective part must be replaced.
Crankshaft marks
In order for the engine to work flawlessly, after installing the crankshaft, the correct ignition setting is necessary. There is a special casting on the crankshaft pulley, and on the cylinder block there are three marks (two short and one long) corresponding to the ignition timing. The first two indicate an angle of 5˚ and 10˚, and the long one - 0˚ (TDC).
The mark on the crankshaft pulley is located opposite the length of the marks on the cylinder block. There is also a mark on the camshaft sprocket that must be aligned with the casting on the bearing housing. To rotate the crankshaft, use a special wrench of the appropriate size. According to the marked marks, the piston of the first cylinder is at top dead center, while the slider on the ignition distributor must be installed opposite the contact of the first cylinder.
Despite the fact that the crankshaft is a critical component of any engine, even a novice auto mechanic can repair the mechanism, with the exception of the grinding stage. The main thing is to select the elements according to the dimensions of the shaft, and then follow the step-by-step instructions for assembling it.
source
The principle of installing piston rings on a VAZ 2107 car
When all the steps are completed and the connecting rod along with the piston are removed, it is necessary to clean them of carbon deposits and dirt. After a preliminary inspection, you need to remove the piston rings. It should be noted here that the rings will have to be replaced, so you should not be afraid of breaking the parts that came off. Now installing new rings, you need to start with the oil scraper ring.
First of all, install the expansion ring, which is made in the form of a flexible spring with a rod or an octagon-shaped plate. When a new ring is installed on the piston, you should gradually push it through and periodically measure the gap, because it must be a certain distance.
If at the extreme point the gap is more than 0.4 mm, then the ring must be changed, and if it is less than 0.25 mm, then the whole problem is in the lock and it should be sharpened. If the gap size is normal, then install the ring. Moreover, it should be taken into account that the locks should not coincide, but rather have a difference of 90 degrees between themselves. This procedure should be performed with all rings on all pistons.
When the replacement is complete, before installing everything back, pay attention to the gaskets and also clean the engine. These operations will improve the performance of the engine.
If compression is insufficient, the VAZ 2106 engine loses power and begins to consume excessively not only gasoline, but also oil. In the best case, you can get by with a simple replacement of the piston rings, in the worst case, a complete overhaul of the engine, starting from turning the cylinders, replacing the piston group and ending with repairing the car’s crankshaft.
If you decide to change the rings yourself, there should not be any special problems when performing this repair. Of course, you will need a considerable list of tools to do this as quickly and conveniently as possible. And also, it is necessary to perform a number of preparatory work to get to the pistons:
Personally, I carried out this procedure with the engine removed, since the car was almost completely disassembled. But everything can be done even with the engine installed, but then it is most convenient to carry out repairs on a pit or a lift.
So, after the pan cover is removed, you can take a 14mm socket with a wrench and unscrew the two nuts securing the connecting rod cover. This is shown more clearly below:
When both nuts are unscrewed, you can remove the cover by hand; it can usually be easily removed without any problems:
Then, with a certain force, you need to press the connecting rod bolt with your hand or even with the handle of a hammer:
Until the piston comes out from the back of the cylinder. It will roughly look like this:
This should be done quite carefully so as not to damage either the piston itself or the cylinder walls:
Next, you can begin to remove and replace the piston rings if the cylinders are not yet worn out. To do this, carefully pry the edge of the ring with your fingernail or finger and remove it from the piston groove:
And carefully turn the ring until it is completely free from the groove:
After all the rings, both compression and oil control, have been removed, you can measure the clearance by inserting them into the cylinder and inserting a feeler gauge into the hole between the two edges:
If the values exceed the nominal values, we replace the rings with new ones. After which you can install all the parts in the reverse order of removal. It is worth paying special attention that when installing the rings, their locks should be directed in different directions for greater tightness of the cylinder.
Piston repair: what you should pay attention to
Modern materials and technologies for manufacturing parts make it possible to operate the engine under very intense conditions. The maximum crankshaft rotation speed reaches one hundred revolutions per second. In this case, the piston and connecting rod reach a translational speed of up to 30 m/sec twice for each revolution (two hundred times per second). and the same number of times they come to a complete stop, causing huge cyclic inertial loads (the weight with such acceleration increases by more than a thousand times). Therefore, technologists try to make the piston as light as possible, making it from an aluminum alloy with a cast steel plate that compensates for thermal deformations. The piston has stiffening ribs and hard anodizing, up to the fire zone, which protects the bottom and the groove of the upper compression ring from burning out. Friction is reduced by the most advanced brands of oils with additives. But it is impossible to avoid wear, so periodically, after a certain mileage, the piston VAZ 2106 is replaced. It is better to do this when the first symptoms appear:
Operating a car with wear and tear can lead to damage that will require major repairs, which will increase the price many times over.
How to dismantle the piston yourself
First of all, it is necessary to thoroughly wash the engine, since after disassembly it will be difficult to prevent grains of sand and dirt from getting inside. The engine must be placed on a sturdy rack at a height convenient for work. Prepare rags, a set of tools and accessories:
- socket, ring wrenches and heads 10 mm., 12 mm., 13 mm., 14 mm., 17 mm., 19 mm., 22 mm., and wrench 36 mm.;
- a set of thin flat probes;
- bore gauge;
- micrometer;
- calipers;
- torque wrench;
- device for compressing rings on the piston;
- bushing for installing piston pins;
- gas-burner;
- hammer;
- core;
- portable lamp;
- large flathead screwdriver.
Tip: Before disassembling with your own hands, all parts are marked with a core, and a photo of the initial location is taken with the numbers and marks of the removable parts so that they can be installed in their place if they are suitable.
Disassembly sequence
- The engine with the head, pan and side covers removed is laid on its side to allow access to the pistons and connecting rods. Wrench 36 mm. the crankshaft is rotated to the position of maximum extension of the nuts of a pair of connecting rods.
- Using a head and a long wrench, you need to unscrew two nuts each, securing the connecting rod cap of the first and fourth cylinders, you can use any one, but it is more correct to follow the chosen sequence. By lightly tapping with a hammer, the cover moves out of place, allowing you to easily remove it from the studs. It is advisable to first familiarize yourself with the stages of work via video.
Tip: The caps and connecting rods form a pair; during their manufacture, the final boring of the mounting hole is done in assembled form, so they are marked with the cylinder number and cannot be replaced. You need to make sure that the numbers match when assembling and are directed in the same direction.
- Using the wooden handle of a hammer, resting against the pin, the connecting rod with the piston is pushed out through the upper plane of the cylinder block. The crankshaft is rotated to the maximum extension position of the nuts of the other two connecting rods. All four pistons are disassembled in the same way. The main bearings are unscrewed and the crankshaft is removed for visual inspection.
Attention: The main bearing caps are marked with marks; it is very important to place them only in their place, since they are not interchangeable; this is required by the boring technology and assembly instructions.
- The liners are removed from the connecting rods and covers. When repairing a VAZ 2106, the piston rings are replaced, starting with the upper compression ring, all the rings are sequentially removed from the pistons, and the piston pins are knocked out with a bushing. If possible, it is better to use a press. The parts and the block are washed with kerosene, blown with compressed air, the cooling and lubrication channels are purged.
- Sanded surfaces are wiped and checked for damage. For inspection, a portable lamp is used, changing the angle of illumination to conveniently examine small scratches. Cracks are not allowed; if they are detected, defective parts will have to be replaced, including the block.
- Wear is measured using a bore gauge in four planes located from the top plane at a distance of 5mm, 15mm, 50mm. and 90 mm. In each plane, two measurements are taken in perpendicular directions.
Diagram of cylinder diameter measurement planes
- In the area of the first plane, the cylinder practically does not wear out, so the difference in size will indicate the degree of wear. If wear exceeds 0.15 mm, or there are wear or scratches on the cylinder walls, the block must be bored until they are completely removed and brought to the required size and cleanliness class by honing.
When it is necessary to replace pistons on a VAZ 2106, the cylinders are bored to one of five standardized sizes that determine the accuracy class, designated in Latin letters:
After boring the cylinders, the size of suitable repair parts is determined.
Replacing piston rings on a VAZ 2107 car
A rag will be useful for repairs, because there are still oil residues in the system (even if you drain everything first). It’s also worth adding a few liters of kerosene to your arsenal (to clean parts from coking oil deposits) and a few metal brushes.
First of all, you need to remove the engine from the car, this will take around several hours. Then he removes the remaining parts one by one. It should be noted that except for the ignition distributor, the parts will not need to be unscrewed, which greatly facilitates the work. Having gotten rid of unnecessary spare parts, all that remains in front of you is the engine.
We unscrew the nuts along the entire perimeter of the engine in order to remove the upper valve cover. Here, be sure to remember that the cover washers have a specific shape, so it’s absolutely not worth losing them! Because they can only be replaced with similar ones, which you will have to buy at a car store.
The valve cover and cylinder head can now be removed. It should be remembered that the bolt that secures the head is hidden under the shaft housing, so it is necessary to loosen the chain and gears in advance. Once the camshaft is loosened, the cylinder head can be unscrewed and removed. Since it is constructed of aluminum, you must remove it very carefully to avoid scratching or damaging it.
After all the operations performed, the cylinder block will be open and the bottom of the pistons will be visible. Thus, it will be possible to immediately visually assess the condition of the entire mechanism. Now let's move on to the bottom part, because there is no need to remove anything from the top. Here you have to unscrew 19 bolts that secure the engine to the sump. In addition, do not forget about the original washers, which again must be preserved. You should be especially careful when removing the pan, because there is an oil pump intake nearby, which can be very easily damaged, and this is exactly what you do not want.
Source
Camshaft and its drive
The camshaft of the 21213 engine differs from the 2121 in a different angular arrangement of the cams, since the 21213 engine has different valve timing.
The camshaft drive has special features in repairing the chain tensioner. Its plunger is kept from falling out of the body not by a locking ring (as on 2121 engines), but by punching the body at three points. To disassemble the tensioner, file the edges of the body at the core points. After installing the plunger tensioner into the housing, it is necessary to open the housing at three points. In this case, the protrusions from the core should not touch the surface when the plunger moves.
VAZ-2106 engine weight
On a VAZ-2106 car, the weight of the engine without gearbox is 121 kilograms. Therefore, it is strictly not recommended to try to remove or move this unit alone - this is a direct path to serious injury. It is best to hire an assistant who can help you during the process of dismantling or installing the motor.
With all the necessary equipment, including both the cylinder head and the ignition system, the engine weight will be even greater - 140 kilograms.
Finally, when assembled with the gearbox and the devices attached to it, this value will increase by another 26 kilograms.
As you can see, weight can be considered a significant disadvantage of the car compared to imported analogues. To reduce it, increase power, and also improve dynamic characteristics, many drivers today install parts made of light metal alloys.
In 1984, a diesel version of the “six” was released at a Bulgarian automobile company. Replacing a gasoline engine with a diesel engine didn't have much of an impact on the car's performance. Firstly, the Bulgarians failed to increase the power of the power unit. Secondly, its weight increased by about 10 kilograms, which can also be called a disadvantage of the alteration.
Are there any benefits from engine modifications?
There are undoubtedly benefits. Even such old models of power units as the VAZ 2106 engine lend themselves well to modification. Depending on the specific manipulations, several goals can be achieved:
- Increased engine power, which is expressed in acceleration dynamics and speed characteristics;
- Reducing fuel consumption or maintaining it while increasing dynamic performance;
- Increased maneuverability in difficult conditions;
- Increasing the service life of the unit by 70-80 percent.
Of course, you have to choose why the work is being done: to reduce fuel consumption or to improve the driving performance of the car. It will not be possible to achieve both at the same time. But due to the fact that during tuning, engine parts are cleaned and replaced with newer and more advanced ones, the service life inevitably increases.
You also need to evaluate how profitable the planned work is for you. After all, refining the power unit may require considerable material investments. Isn't it better in some cases to just buy yourself a newer and more advanced car? You also need to think about this before starting work.
Which pistons are better to put on a VAZ 2106
Correctly placed 2106 piston vases
VAZ 2106 engine piston diameter
This SECRET hides from us what remains for our client AUTO BARS! Let's take a look.
Today there are already 4 main sizes of repair cylinders; the correct connecting rods and piston groups are also located underneath. For this reason, when you go to an auto parts store, you may find 15 pistons that are similar in appearance, different diameters, and made for the same block. It is difficult to understand the large number, however, given the knowledge and special tools, it is impossible to make mistakes.
Selection of parts
Before heading to the store, it is necessary to turn the car around in a bright place, as it is also intended to use a flashlight at work. You need to open the hood (hood), approach the unfamiliar car to the left front fender and carefully look at the left vertical wall of the cylinder block
. In particular, in the center there is a capital Latin letter indicating the engine class.
If the letters are invisible, the engine is dirty. It is necessary to clean the surface of the unit from contamination with a sandblasting machine and look again. If the letter still does not appear, then corrosion has eaten it. Then, before heading to the auto shop, you need to purchase a caliper and use this tool to measure the actual dimensions of each cylinder. It happens that some craftsmen did not perform all cylinders during a major overhaul.
Class A engines, which have not been overhauled or even bored, have cylinders with a diameter of 79 to 79.01 mm, Class B. from 79.01 to 79.02, Class C. from 79.02 to 79.03, Class D from 79.03 to 79.04, class E from 79.04 to 79.05 mm. The unique pistons for these blocks have diameters of 78.93, 78.94, 78.95, 78.96 and 78.97 mm respectively. These are approximate figures because in reality the permissible deviation is 9000 millimeters.
Table of dimensions and tolerances for classic VAZ engine parts
Parts stores stock grade A, C, and D cast pistons designed for finished engines. Forged pistons for the VAZ 2106 are made to order and are available in all sizes. Main repair cylinders for VAZ engine 2106
79.4 (1st drilling) and 79.8 mm (2nd drilling). Piston diameter for the first hole, depending on the class (in millimeters):
Cross section of pistons for 2 borings:
It should be emphasized that pistons are also divided into 3 categories based on the diameter of the piston pin hole, so new pistons must be assembled with fingers. It is very difficult to distinguish a drill unit from a junk one from an unprofessional one, if a complete engine repair is carried out without outside help, it is absolutely necessary to buy calipers, if this is not possible, then at least take the old parts yourself and check them in stores.
Replacing damaged parts without boring
READ How to Remove Air from the VAZ 2115 Heater
In other cases, it is quite easy to replace worn parts. You don't even need to remove the unit from the car, just remove the cylinder (cylinder head) and oil pan. Typically, this method is used when changes are needed. piston rings
VAZ 2106. Work order:
Reverse assembly. However, whoever it is, the piston must be inserted using a special mandrel. The P mark must face forward in the direction of travel. The sequence of tightening the cylinder head bolts and bearing housing nuts can be viewed online. Tightening torque for 10 cylinder head bolts. 3.4-4.4.5 kgcm, final tightening. 9.8-12 kgcm The 11th bolt is tightened with a torque of 3.5 kg/m.
How to install pistons?
Installing a piston into an engine requires some technical knowledge. Incorrect installation will destroy the motor. The text of the article is devoted to how to install pistons on the engine of a VAZ car, since their design is very common, and anyone can service them without the help of others.
Piston assembly
Selection of pistons for VAZ classic Lada. Which pistons are the best and why.
Checking the pistons of engine parts for engine overhaul 2106
READ Which Rxx is better for VAZ 2114
Installation of piston rings
Installing the piston into the cylinder block
More than just entertainment
The working gas pressure after ignition of the fuel consistency exceeds 60 kg. / cm2, which makes the axial load more than 3000 kg. and side load up to 250 kg. The highest temperature helps speed up the destruction process when the VAZ 2106 piston needs to be replaced.
+ Change
Personally, I performed this function with the engine removed because the car was completely disassembled. However, what remains to be done by our client is done even with the engine installed, but then it is most convenient to carry out repairs in a pit or elevator.
What you need to do when you remove the sump cover is to remove the 14 heads using a handle and unscrew the two connecting rod nuts. This is shown more clearly below:
Once both nuts are unscrewed, the cover can be removed by hand; Usually removed without problems:
Then, after some effort, you should press the connecting rod bolt, in other words, even with a hammer handle:
If the torque is set correctly, the piston will not come out of the rear of the cylinder. It will look something like this:
Do this carefully enough so as not to damage either the piston itself or the cylinder wall:
READ Replacement Oxygen Sensor Ford Focus 2
We then proceed to remove and replace the piston rings if the cylinders are still not firing. To do this, carefully twist the edge of the ring with your finger or finger and remove it from the piston groove:
And carefully rotate the ring until it is 100% free from the groove:
If our customer is left with the rings removed using clamps and oil scrapers, you can measure the gap by inserting them into the cylinder and inserting a pin into the hole between the two lips:
Nominal ring clearance. value range from 0.25 to 0.45 mm. Very good ground clearance when you need to change rings. 1.0 mm.
If the values exceed the nominal values, we replace the rings with new ones. After installation, our customer leaves the parts in reverse order. Particular attention should be paid to the fact that when installing the rings, their locks are oriented in different directions for greater density of the cylinders.
Changing the oil in the rear axle on the link.
Installation
Before installing new piston rings, check the clearance in their connections.
It is assumed that the gap between the ring and the groove has already been checked and meets the standards.
Position the piston joints using connecting rods and new piston rings so that the set of rings matches the cylinder where the clearance will be measured.
Insert the top ring into the 1st cylinder and slide the bottom of the piston inward so that the ring inside the cylinder is perpendicular to its axis. The ring should be at the bottom of the cylinder, in a position corresponding to one of the dead points.
The gap at the piston ring junction is measured with a pin. Compare the amount with the set value.
If the gap is lighter or smaller than specified, repeat the measurement to ensure the ring can be installed.
If the gap is too small, it must be increased, otherwise the ends of the ring will close when the engine is running, causing serious damage. Of course, the gap at the piston ring joint must be carefully increased by sawing the ends with a narrow file. Take a soft sponge to the file and carefully move the ring over it, removing any excess material.
The gap may exceed the established one; unfortunately, it is less than 1 mm.
Repeat the measurement to make sure the ring fits.
Repeat the measurement for each ring installed in the 1st cylinder, and, as a rule, for each of the rings installed in the other cylinders.
After measuring the gaps at the junction of the rings and adjusting them, the rings are installed on the pistons.
First. This is the oil scraper ring (the lowest one on the pistons).
This ring consists of 3 parts.
Install the splitter/extender into the groove.
Install the lower scraper oil guide. It is impossible to use the retaining ring device while installing the guides, as it may break. Insert one end of the guide into the groove of the piston between the spacer and the horizontal platform of the groove, hold it firmly and insert the other end of the ring with your finger into the groove. Install the second guide in the same way.
After installing all the parts, the scraper oil scraper ring
Make sure the top and bottom guides rotate freely in the groove. Position the oil scraper rings as shown in the figure.
Subsequently, the middle ring (number 2.4) is installed. In fact, the R mark is engraved on a ring that can be rotated towards the piston head.
How to choose
You take the ring, insert it into the cylinder and see how much thermal clearance you leave. 0.2-0.3 mm is the norm.
The gap in the piston grooves for the upper ones is 0.04-0.07, for the lower ones 0.03-0.06; if the clearance between the cylinder and the piston exceeds 0.15, then a different group of pistons should be selected.
Table of contents
A bore gauge is a measuring tool that is designed to obtain data on the distance between two surfaces, as well as determine the internal diameter of various parts. On average, the measurement accuracy of this device is 0.01 mm. A bore gauge for measuring cylinder diameter consists of replaceable gauge rods, which are extensions, and a head. The head itself consists of the following parts:
- Replaceable tip;
- Locking device;
- Stem;
- Cap;
- Drum;
- Micrometer screw
Thanks to the presence of replaceable tips, you can increase the measuring range. For those devices with a measurement accuracy of 0.01 mm, the current GOST is 868-82, and for devices with a division value of 0.001 or 0.002 mm - 9244-75.
The advantages of bore gauges are their fairly high measurement accuracy, both for private and industrial applications. The cost of the device is also not high. The main thing is that the advantages of all mechanical devices are preserved here, which includes durability. At the same time, they require special care and special storage conditions. When a device breaks down, repairs are often very complicated and it is easier to replace the device with a new one than to repair it. During some measurements, deformations may remain on soft parts if there is strong pressure. When it comes to measuring cylinders, difficulties arise in places where there are windows.
What types of bore gauges can be used to measure the diameter of a cylinder?
Bore gauges are often used to measure the diameter of a cylinder. Micrometers are not suitable for this operation, so specialists use these types of devices. The measurement of cylinders with a bore gauge is carried out in two perpendicular planes and four zones. The most popular types of bore gauges are suitable for this.
The indicator type of device is more suitable for those cylinders whose diameter is relatively small. They can work with sizes from 6 mm and larger. It is easy to use, but uses a relative measurement method, so the device has two scales. Although it can work with small values, its error is higher than that of other types of these devices.
photo: indicator bore gauge for measuring cylinder diameter
A micrometric bore gauge uses an absolute measurement method, which, at the same division price as the indicator type, gives a significantly smaller error. The measurement limit here ranges from 50 to 4000 mm, which depends on the specific model. People often use two instruments to get more accurate data.
Selecting a bore gauge for measuring cylinder diameter
To measure a cylinder with a bore gauge, you need to select the device itself correctly. The accuracy of the result, as well as ease of use, will directly depend on this. First of all, you should decide on the appropriate dimensions, since the micrometric and indicator types have too much variation in the minimum limit. If you need to work with parts with a diameter of up to 5 cm, then an indicator bore gauge is suitable, if larger, a micrometric one.
Next, you need to decide which replacement caliber rods should be included in the kit. They expand and contract the operating range of the instrument, so that to obtain correct data you need to have a wide supply of replacement parts. The higher the accuracy class, the smaller the error, so modern high-precision devices allow you to obtain the most accurate data for further work.
Naturally, the device must pass verification, be free of damage and comply with accepted GOST standards. If possible, specialists carry out measurements using several devices simultaneously.
Other characteristics of the VAZ-2106 engine
The weight of the motor is, although important, but far from its main characteristic. That is why we decided to talk about other features of the power unit installed on various modifications of the “six”. For example, engine power on carburetor models was 77 horsepower. After switching to an injector, it dropped to 75 hp. With. However, this parameter can always be increased by carrying out a number of upgrades.
The cylinder diameter of the VAZ-2106 power unit is 79 millimeters, the torque can reach 3000 rpm, and the working volume is 1568 cubic centimeters. Finally, the compression ratio of the engine is 8.5 atmospheres, and the piston stroke is 80 millimeters.
