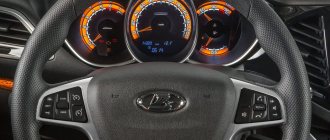
Regarding the new Lada Vesta sedan, the manufacturer is positioning it as a modern, comfortable and safe car, adapted to the realities of Russian roads. But it is still far from the top European models in terms of driver comfort. A simple thing that increases the comfort of a Lada Vesta car is an armrest. It is installed on luxury vehicles. Even in luxury, it brings less benefit than inconvenience.
The standard AvtoVAZ armrest does not have a box for storing driver's small items, has a C grade view, and is difficult to adjust to the needs of the driver and passenger. Owners of the Lada Vesta, whose models are equipped with it, note that using the handbrake is inconvenient. You have become the owner of a Lada Vesta without elbow rests, its convenience and practicality are not enough for you - fix it. Read the article, dive into the topic and choose a good armrest.
- Universal armrests made in Russia
- ArBox on Lada Vesta
- Armster on Lada Vesta
- Alamar on Vesta
- Varta boxes on Vesta
- Universal armrest made in China
- Armrest from a foreign car
- Standard armrest for Lada Vesta
- 4 advantages of the Lada Vesta Cross armrest
- How to remove the standard armrest on a Lada Vesta - you need to know
- Rear armrest Lada Vesta
How to remove the armrest of Lada Vesta
Sometimes, even owners of a Lada Vesta with the maximum configuration (which has a standard armrest installed) prefer to exchange it for an improved one. But to install a new one, you need to dismantle the old one. How to do this correctly? You need to adhere to a certain technology:
- Unfasten the cover of the standard armrest;
- Unscrew the bolt that secures the armrest;
- Move it to a vertical position, and swing it in different directions, remove it from the mount.
During the work, you will definitely need a Tor X 40 star key. Installing the armrest on the Lada Vesta occurs in the reverse order.
Should I put covers on the seats or not?
This is the personal choice of the car owner. But generally, cases have more pros than cons. Of course, if you put cheap covers from the market on beautiful seats, the interior of the car will lose a lot in terms of appearance. But more often it’s the other way around - the standard seat upholstery looks so-so, but good covers give it a more expensive, beautiful look. Often already worn out seats are covered with covers.
Another undeniable advantage of covers is in terms of practicality. They can be removed and washed, wiped, vacuumed. And the standard upholstery underneath is like new. Before selling the car, you can remove the covers if they are frayed and sell the car with apparently new seats. The covers can be changed just like that if you get tired of them. Buy and supply a different color, a different material...
New Lada: Removing the Lada Largus gearbox / Lada Largus
Factory version of the armrest
Note that although the armrest we are considering for the Lada Vesta interior is an attribute of comfort, its function is not considered a vital necessity. In view of this, AvtoVAZ installs these products only in luxury configurations
Experience has shown that many drivers are dissatisfied with the standard armrest option. In their opinion, the armrest is installed “for show” and is characterized by the following disadvantages:
- narrow width, which allows only the driver to rest comfortably;
- insufficiently impressive exterior;
- lack of niches;
- difficulties during adjustment.
These points confirm the desire of the owners to replace standard products with more practical analogues with their own hands. An identical desire is demonstrated by drivers whose cars are initially deprived of this convenient accessory.
Universal options
This category is the most numerous and is capable of presenting a variety of products of various shapes and dimensions. The lion's share of products is of Chinese origin. Fastening methods are also very diverse. The versatility of the accessories makes itself felt, since many armrests require modification to fit during installation. These accessories often suffer from the presence of defects, which can be:
- missing stitch;
- poor fit of product components;
- low quality plastic, etc.
We do not recommend purchasing such an armrest if you have access to options adapted for LADA Largus. Choose the right one and install the armrest yourself!
Some pro tips
You can sew zippers on the armrest areas, making it easier to remove and put on the covers. There are brands of cars where the backrests tilt back in individual elements. Normal types of cases will not fit under them.
Some cars have airbags in the end parts of the backrests. If you put covers on top, they will not be able to open. For this reason, the upholstery on such seats will simply have to be cleaned.
If you still decide to make covers, then leave slits at the points where the pillows fly out. They can be stitched with cotton thread, which will tear easily. The work is simple and can be done independently.
AvtoVAZ has equipped some Vesta configurations with an armrest, which is attached to the driver’s seat and has an angle adjustment. According to statistics, about 80% of owners are dissatisfied with this accessory and prefer the classic design (attached to a tunnel). Let's look at how to make an armrest for Vesta yourself.
Required:
- remove the standard armrest
- plywood 8 mm and 18 mm thick
- jigsaw
- furniture corners
- door hinge 125 mm - 2 pcs (for opening the armrest)
- guides 250mm long (so that the armrest can extend)
- material for upholstery
- glue or furniture stapler
The armrest is made of 8mm plywood, only the back wall is made of 18mm (for installing the hinge of the upper box).
Pieces of cardboard and a felt-tip pen were used to obtain dimensions. If you want to repeat the design, you can use the suggested dimensions of the armrest.
The door hinge was applied from the outside at the end. To prevent anything from sticking out, a rectangular recess was made. Similarly, install the second loop (for the folding part).
Instead of the removable part of the guides, a piece of board was installed. The guides are attached to M6 screws 20mm long, which pass through holes No. 2. The central hinge fastening screw (No. 1) is the guide travel limiter.
The insides of both boxes were covered with carpet. The armrest itself is covered with leatherette.
As a result, a homemade armrest has a number of advantages over a standard one:
- there are two boxes for storing things
- can be adjusted forward and backward
- designed for driver and passenger
Using similar materials, you can make an armrest similar to the one used in the extended Vesta (Signature), which we looked at in the review. Let us remind you that the standard Vesta armrest can be modified or an Alamar armrest can be installed.
Cases made of soft materials
To prevent them from looking baggy, patterns should be made from two types of material - the main one and the mattress one. They are connected together with the wrong sides facing each other.
But just remember that it is necessary to provide an unsewn hole. Foam rubber material cut in advance is inserted through it. The headrest and armrest areas are made without such inserts. All that remains is to stretch them and sew them up. When the seats located at the bottom have plastic linings, they must first be removed. Now you can press the edges of the cover with them, which will make it possible to securely fix it.
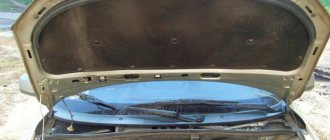
In the niche behind the glove box
After removing the box, access to the EMM unit fixed on the engine panel will open.
Also visible is the VCM unit, which is located higher, in front of the passenger airbag.
The block is fixed with a mount and a bolt with a nut of 8 on the reverse side.
The VSM unit must be removed, and then the black block S1 must be disconnected, as indicated in the information letter.
From the removed block you need to remove contact No. 37, which is marked in pink and green.
The wire must be carefully insulated, and then put the block in place.
Then the EMM block is taken, from which the gray block S2 is removed.
In the block it is necessary to swap the third and fourth contacts, which are indicated in the photo in black-blue and yellow, respectively.
As for removing the wires, everything is quite simple.
Each block is equipped with a white plate and white latches on the sides. First, use a thin knife to pry off the plate, and then the clamps.
Next, you need to arm yourself with some thin object (for this Vladislav used a spring) and insert it into a small hole, which is slightly above the contact. They need to bend the contact retainer and remove the wire.
In the end, everything is assembled in reverse order.
On the steering column
After completing the work in the Vesta glove compartment area, you need to proceed to the steering column area. First of all, the casing is disassembled, for which 2 T20 bolts at the bottom are unscrewed, and then the plastic is snapped off.
You need to lift the top cover and move it towards the dashboard. We are interested in the low/high beam switch, to which the gray block fits.
First, the block itself is removed by pressing on the plastic tab.
In the block you need to swap two wires - the 6th and 7th, marked in white-blue and yellow-red.
But in this case, the layout of the block is slightly different, and therefore you will have to remove the white latch from it, for which you need to pull it towards you.
Afterwards, an awl is inserted into the back of the block and pulled out of the block along with the wire. All that remains is to swap the indicated wires and then reassemble everything in the reverse order.
As a result of the described actions, the Lada Vesta battery should stop discharging.
Which armrest to choose for Lada Vesta
On the shelves of auto stores you can see a variety of shapes and designs. Among car enthusiasts, the most popular are boxes with compartments for small items.
Chinese armrests
China's products are characterized by cheapness and poor workmanship. The most popular are modifications of boxes from brands such as REX and TORINO.
Impact-resistant plastic is used as manufacturing material. Installation takes place using plastic clips; you can also use self-tapping screws.
As a rule, armrests are produced in several types at once, so that you can choose them for the desired car model.
Alamar
A domestic product developed based on a Chinese design. It is manufactured in two versions: regular and with boxes.
The first is an analogue of the standard armrest, with the exception of the increased width of the base to 140 mm. It has a convertible top, upholstery made of substitute, leather or fabric. The cost of the armrest is from 800 rubles. Installation is carried out using plastic clips.
The model with a box is made of wood and has leather upholstery. Cost – from 1400 rubles.
Armster
This is also a domestic “product”, but it is distinguished by high quality workmanship. The design includes a hinged lid made of soft plastic, two compartments for things, and an armrest bar for placing cups or bottles of liquid.
How to fasten the structure: when installing in a Lada Vesta SW, file the lower mount for a tight fit on the screw. The cost of the accessory is from 3700 – 4000 rubles.
Arsolid
Wood was used as the base material. The design is covered in leatherette or genuine leather, depending on the characteristics. Fixation is carried out on the rod that mounts the handbrake base.
The structure is held on a metal base - a plate. There is a cutout in the center for the parking brake lever. Price per product – from 1200 rubles.
How to disassemble the box: just unscrew the two screws at the base.
Varta
The design is in many ways similar to Arsolid: it also provides compartments for small items, a hinged lid, and a cutout in the center of the base for the parking brake lever.
The frame is made of wood, lined with eco-leather around the perimeter. Installation is carried out with two self-tapping screws. Price from 2000 rubles.
Armrest produced under the Armster brand
The most expensive option. It has high quality workmanship and is quite practical. The version with the “Classic” box is equipped with a soft lid that can be folded back. There are no modifications applicable to Vesta yet, so the owner of a Lada Vesta SW will have to slightly modify the product after purchase. The price starts from 4 thousand rubles.
On a note! The sales network includes Chinese analogues of these branded armrests. Their exterior is similar to the original, but they cannot boast of reliability and premium materials. Their cost is several times less. Products for the Vesta "Azard" car
They are universal accessories with a niche for luggage. The manufacturer's range includes options with a cup holder and a locking roof. Price – 680 rub. and higher.
How to remove the standard armrest on a Lada Vesta - you need to know
Vesta owners have to remove the old one before installing a new box. There is no need to contact the service - it’s done like this.
Steps to remove the factory armrest:
- Unfasten the cover of the part and unscrew the side screws hidden under it. Then pull the armrest towards you.
- Unscrew the bracket. It is held on by a mounting bolt located next to the handbrake.
- We lift the part up and carefully remove it, being careful not to damage the seat trim.
Then we begin installing the new accessory. Installation may vary. It depends on the box that is installed to replace the original one. Chinese analogues are mainly installed in a regular place and according to the same principle. For some reason, Russian manufacturers do not design the same fasteners. Some of them just need to be placed between the seats, others are equipped with a large number of bolts.
Installation Rules
The original ArBox armrest, specially created for LADA XRAY, is made of plastic and is fixed under the seat runners on metal brackets. Its installation takes a few minutes. To do this, you need to move the front seats forward until they stop and unscrew the fastening of the slides with a TorX T-40 screwdriver. The standard armrest fixation bracket must be placed under the slides so that the holes on them coincide with the holes in the bracket. Then tighten the seat mounting bolts.
The Almar model is easy to use and very popular among car enthusiasts; even an inexperienced driver can install it. To do this, unscrew the bolts securing the driver's seat from the floor and remove it. Then remove the plastic cover on the right side of the chair, insert the armrest mounting pin into the technological hole and tighten the nut on the pin. Now you need to put the seat in place and secure it.
Armrests in a car are not decoration, but a necessary detail that allows you to create comfortable conditions for the driver while driving. The market for spare parts and accessories offers a wide range of designs that differ in shape, size, and materials used. Along with the advantages, all the proposed armrests have the same disadvantages: it is inconvenient to use the handbrake, fasten and release seat belts.
Standard armrest on Lada Vesta
Is the standard part of the Lada Vesta really so bad that it has to be remade? Minuses:
The factory part is approximately 2 times narrower than its analogues. Even the driver’s hand can hardly fit on it, and there is no talk at all about the comfort of the front passenger.
The appearance of the accessory looks cheap and is difficult to combine with other parts of the interior.
The part will not allow you to store things, there is no socket, ashtray, or cup holder - this is provided for in foreign cars. The mission of the factory version is a stand.
Adjusting the accessory to the needs of a specific driver is problematic; the design is fragile and unstable.
https://www.youtube.com/watch?v=zflOfca5aZo
With so many disadvantages, it becomes difficult to highlight the advantages.
Armrest from a foreign car
Particularly picky car owners make armrests for their Lada Vesta using an accessory from some foreign car. This option allows you to create something individual, comfortable for a specific driver and car. All that remains is to choose which brand and model of part to use. Manufacturers of Toyota, Volkswagen, Mercedes, and BMW equip their models with extremely comfortable and ergonomic accessories. Therefore, they are more often chosen. The final decision lies in several criteria:
- Armrest size. It should fit freely into the niche between the front seats and not interfere with the people sitting next to them;
- The location of the accessory relative to the handbrake. Access to the handbrake must be free;
- Functional characteristics. In addition to a box for storing things, it would be good if the accessory comes with an ashtray, a cigarette lighter, and a cup holder.
Most likely, when choosing an armrest similar to the original one, you will have to file it, solder it yourself, and possibly cover it with leather or fabric. The result should be a convenient accessory that separates the front seats.
There is a high probability that detailed photo or video instructions on how to remake the armrest of a specific foreign car to suit Vesta’s needs will not be found. The choice of these nodes is too large. Therefore, the tuning option should be chosen by car enthusiasts who are able to perform the necessary manipulations without outside help and carefully think through them.
Main seat faults on Lada Vesta
They become unusable for several reasons:
- The sled creaks, stopping the movement. This can be corrected by adding lubricant to the mechanism.
- Faulty backrest and height adjustment. Mechanical adjustment can always be repaired.
- Violation of the integrity of the upholstery of the chair, you will feel it, because the fasteners of the frame will rest against the back. Replacing the chair will correct the situation. If you order a replacement from a dealer under warranty, you need to check that the new seat matches the old one in terms of parameters: the same texture, there is (or is not) a heating element, etc.
At the back of the armrest we bend the factory upholstery a little and there is a zipper there, unfasten it and remove it a little
IMPORTANT - the armrest must be in the down position. now we take Torx T40, there will be one bolt - unscrew it, don’t be afraid
As soon as we have removed the bolt, we raise the armrest to the highest possible position “all the way” and begin to remove it, pulling it from side to side.
Start. Removing the front seat
Seat bolts and wires
That’s it, now you can safely remove the seat (I vacuumed it in one go, since that’s the case here :D). I vacuumed with a Soviet car vacuum cleaner, which I got from my grandfather (I will attach a photo later). The front passenger seat is removed in the same way and is no different. It’s more convenient to start putting on the covers from the bottom of the seat, just take them and pull them on.
Plastic inserts 2
Where there are plastic inserts, we simply insert the covers into them carefully (I did not remove these inserts). We pull the hooks from below and hook them under the seat from below.
Attaching covers to the seat
The lower part of the seat is ready. There is nothing complicated at the top either. We take the cover, pull it on top, push it between the seats and also pull them, where there are ropes we pull and tie.
Headrest 1
Headrest 2
The driver's seat is ready! There is no point in describing the process for the passenger one; it is similar and not fundamentally different. Let’s move on to the rear seats, where a number of nuances also await us. We remove the head restraints by pressing a special “button” located next to each of them and remove them one by one.
Removing the rear sofa
We begin removal from the bottom cushion; there is a fastener on each side (visible in the photo above).
Fastening on which the lower cushion is held in front
You need to carefully grab and pull straight vertically upward, they should snap off.
Mount 1
Mount 2
Mount 3
Rear seat bottom cushion
This is the largest element, everything is tightened very simply and simply, you just need to pull it tightly and tie it tightly with ropes.
Rear seat belt attachment
With the upper seats, it was decided not to remove them; fortunately, it’s already possible to put them on normally. The only thing that gets in the way is the central seat belt, where you need to unscrew one bolt (Photo above).
Rear sofa
The front seats are installed in the same way as they were disassembled: do not forget to snap all the fasteners, connect the wires in their places and screw the seats with 4 bolts. Those who have the equipment with an armrest: you need to install it on the seat in a vertical position, lower it to the lowest possible position and screw on one single bolt, tie it tightly with ropes so that the cover fits tightly.
General view of the rear seats
The final result can be seen in the photo above. I’m very pleased with the result, it’s a very pleasant feeling when you sit on the seat and the appearance has now definitely changed for the better! Of course, it will be more difficult for one person to pull on the covers, but it’s easier and more efficient for two people.
But having seen so many things, there is no trust in them, yet you yourself will definitely do better and conscientiously, and you will also save money! Good luck to everyone!
Price tag: 0 ₽ Mileage 2427 km
| This is what a Lada Vesta seat looks like in an eco-leather cover |
Possibility of purchasing Vesta with an armrest from the factory.
Many will probably be surprised, but the plant offers customers a very small selection of armrests when purchasing a Lada Vesta car. The Lada Vesta has a standard armrest only in the maximum configuration, but its price does not suit all buyers. Therefore, many people prefer to purchase it separately from the car, and the choice is noticeably greater.
The armrest of the Lada Vesta, which is offered as a factory option, does not suit many people. The first thing that buyers are not happy with is that the factory version is designed only for the driver. It is attached only to the driver's seat, and is only wide enough for one hand. The passenger in such a situation feels disadvantaged, and it has long been a common opinion among car enthusiasts that it would be nice to also equip the passenger seat with such an accessory.
The second is its functionality. Many are not satisfied with the work of the armrest; they consider it “loose” and unreliable. But, for the sake of fairness, it is worth noting that many owners simply configured it incorrectly. If you approach the process of setting up the armrest correctly, its operation will be more correct.
Independent modification of the Lada Vesta armrest
The topic of the standard Lada Vesta armrest is on the lips of buyers of this model, which is not surprising, considering what kind of element is installed on the car.
Problem
It is unknown what the managers and designers of AvtoVAZ were guided by when they decided to equip their sedan with such a device. Of course, it has certain advantages, primarily in terms of adjustment, but they are offset by many disadvantages. In particular, this is the absence of an armrest for the passenger, the need for disassembly and assembly when installing covers, as well as the absence of a box for small items.
Because of all this, car owners often change the element by installing an alternative device.
Finalization
However, there is one very interesting option for independently modifying the standard armrest of the Lada Vesta. At the same time, the algorithm for its functioning remains the same, but the element becomes noticeably wider and more convenient. This method was demonstrated by Vladimir Deulin, known on Drive as kobs57.
Factory armrest Lada Vesta
Materials and tools
It is worth noting right away that the method is quite labor-intensive and requires appropriate equipment, and therefore is not suitable for everyone.
Materials:
- Sheet steel;
- Bushing (larger and stronger than standard);
- Bolt for fixation.
Tools:
- Welding machine;
- Drill;
- Drills for 8 and 10;
- Material for upholstery (eco leather, leatherette, etc.).
Work progress
Independent modification of the standard Lada Vesta armrest begins with dismantling the factory element. It's easy to remove. This requires a ratchet and a TorX 40 sprocket.
First you need to unfasten the armrest cover, and then unscrew the mounting bolt.
At the end, you need to lift the armrest to a vertical position, and then carefully remove it, rocking it in both directions.
The entire algorithm of actions is shown in the plot.
First, you need to remove the upholstery from the factory armrest, and then build a model of the future modified element.
Disassembled armrest Lada Vesta
When the template is ready, you need to cut out pieces of sheet steel of suitable size and weld them to the steel frame of the standard armrest.
However, it is impossible to install the element in this form, since its weight and amplitude will increase significantly, and the backlash will increase noticeably. To avoid breakdowns, you need to take 2 measures:
- Strengthen the fastening to the seat - this is done by using a longer bolt and a more powerful bushing. The sleeve is inserted from the inside.
- Reduce weight - due to the additional metal, the modified standard armrest of the Lada Vesta turns out to be too heavy. To solve the problem, you need to drill as many holes in it as possible with 8 and 10 drills. This will significantly reduce the weight.
When the frame is completely ready, it is covered with a layer of splenite, after which it is sheathed with eco-leather or other material.
After such independent modification of the Lada Vesta armrest, the component continues to function as before. However, ride comfort is noticeably improved due to the fact that it has become wider and longer. Now not only the driver, but also the front passenger can use it.
Is it possible to buy a Lada Vesta Cross armrest?
Owners of Lada Vesta sedans are increasingly asking this question, since such modifications to the car are very successful and necessary for them. I won’t argue with this, because I probably agree with it.
You can buy a Lada Vesta Cross armrest. And you can do this in several ways.
1. Place an order for the required part from an authorized dealer. For an additional cost, the dealer will even reinstall the armrest. 2. Order everything yourself on the Internet using article numbers or catalog numbers. This won't be difficult if you know the part numbers. You can also order parts from Lada Vesta Cross spare parts manufacturers in Tolyatti. 3. Buy an assembled armrest in an offline store and install it yourself. At the moment, only residents of large cities have been able to do this, since all the spare parts have not yet reached the regions.
To purchase online you will need the following items:
8450031230 — Central armrest assembly 21720510952700 — Left box lid hinge axis 21720510952600 — Right box lid hinge axis 8450031380 — Armrest cover lock axis 8450031229 — Rear floor tunnel lining insert 845 0031234 — Rear lining insert for rear floor tunnel 8450031235 — Container for small items 8450031236 — Lower bracket for fastening the rear floor tunnel lining assembly 8450031237 — Upper mounting bracket for the rear floor tunnel lining 8450031327 — Left floor tunnel lining panel 8450031326 — Right floor tunnel lining panel 8450031228 — Rear floor tunnel lining 8450031290 — Lever seal hand brake 8450031291 — Pressure strip for hand brake lever seal brakes 8450031484 — Storage container mat 8450031428 — USB and seat heating switch plug 8450031050 — Left rear seat heating switch 8450031051 — Right rear seat heating switch 8450031052 — USB connector
The list of parts may change as it all depends on the configuration. Therefore, look at everything according to the situation. In any case, the above list of parts and their article numbers will help you buy a Lada Vesta Cross armrest on the Internet.
By the way, the price of the finished product will cost you about 10 thousand. rubles
Regarding the new Lada Vesta sedan, the manufacturer is positioning it as a modern, comfortable and safe car, adapted to the realities of Russian roads. But it is still far from the top European models in terms of driver comfort. A simple thing that increases the comfort of a Lada Vesta car is an armrest. It is installed on luxury vehicles. Even in luxury, it brings less benefit than inconvenience.
The standard AvtoVAZ armrest does not have a box for storing driver's small items, has a C grade view, and is difficult to adjust to the needs of the driver and passenger. Owners of the Lada Vesta, whose models are equipped with it, note that using the handbrake is inconvenient. You have become the owner of a Lada Vesta without elbow rests, its convenience and practicality are not enough for you - fix it. Read the article, dive into the topic and choose a good armrest.
Armrest Lada Vesta Cross - a necessity or an unjustified expense?
As a conclusion to the article, I still want to understand whether the Lada Vesta Cross armrest is really needed or not? Undoubtedly, this part of the cabin has its advantages - aesthetic appearance, additional storage space, convenience.
But there are also disadvantages: a price of around 10 thousand rubles may be unaffordable for most people, but is the insignificant comfort worth that kind of money?
In addition to the price, there is a second point - a large number of parts required to install the armrest. All these parts will need to be ordered, assembled and installed.
It is important not to forget something and not to order too much
Difficult to install. Not everyone will be able to install an armrest, since something will have to be adjusted and completed.
In the end, we found that the pros and cons of the Lada Vesta SV Cross armrest are the same. Whether to install it on a Vesta sedan is up to you to decide. I would recommend that you wait a little until armrests from third-party companies go on sale. They will obviously be inferior in quality, but will cost several times less. That's all
Thank you for your attention and see you again
Regarding the new Lada Vesta sedan, the manufacturer is positioning it as a modern, comfortable and safe car, adapted to the realities of Russian roads. But it is still far from the top European models in terms of driver comfort. A simple thing that increases the comfort of a Lada Vesta car is an armrest. It is installed on luxury vehicles. Even in luxury, it brings less benefit than inconvenience.
The standard AvtoVAZ armrest does not have a box for storing driver's small items, has a C grade view, and is difficult to adjust to the needs of the driver and passenger. Owners of the Lada Vesta, whose models are equipped with it, note that using the handbrake is inconvenient. You have become the owner of a Lada Vesta without elbow rests, its convenience and practicality are not enough for you - fix it. Read the article, dive into the topic and choose a good armrest.
Advantages of the new armrest
What should Vesta owners do who couldn’t or didn’t want to buy the top-end equipment of the car, but want to have such a useful and functional thing in their cabin? Previously, when there were no armrests on the accessory market created specifically for the West, car enthusiasts had to be content with universal models, which, in principle, could be adapted to any passenger car. But these armrests had a lot of shortcomings and inconsistencies.
The original Lada Vesta armrest was offered by one, previously little-known company. She developed a special armrest that fully satisfies the needs of the vast majority of Vesta owners.
The new armrest of the Lada Vesta is made of environmentally friendly material - wood; the manufacturer decided to abandon plastic (over time it begins to make squeaks). The wood was covered with perforated leather, this gave the armrest a presentable look. In addition, it is pleasant to the touch and does not crack in the cold (if the car often spends the night outside).
Compared to the armrests that had to be installed on Vesta previously, the products that were offered now differ in a positive direction in many respects:
- Easy to install. In order to install such an armrest on Vesta, you do not need to have any special skills; any driver can handle the job, and this is not a bad saving on the service station;
- Organic. Since the manufacturer approached the development of the armrest for Vesta with full responsibility, it looks great in her cabin. The design is designed in such a way that it appears as if it was built in at the factory;
- Convenience. After several days of using a new armrest, many people have a question: “How could you ever get by without it?” The armrest is comfortable for the hand, and as an organizer the armrest is excellent, and the interior design, after its installation, “sparkled with new emotions”;
- Capacity. Phone, documents, wallet, bottle of water, etc., all this and much more will “quietly” fit into its interior space.
- Ergonomics. The Lada Vesta armrest does not have sharp corners and does not interfere with the operation of the handbrake or other controls and buttons of the car.
What types of covers are there for Vesta?
Cases are different. There are “shirts” that usually cover only the front seats. There are covers that completely cover all seats.
Car covers come in different materials. And at different prices. From two or three thousand in the nearest market to several tens of thousands. There is also a complete refurbishment of the interior, but that’s a slightly different conversation.
Covers are made from leather, faux leather, synthetic fabric, velor, vinyl, Alcantara and even sheepskin.
Synthetic fabric covers are very comfortable and inexpensive. Easy to remove, wash and put back in place. But there are some disadvantages: they look simple, they slip in the heat, and they don’t absorb moisture well.
Velor covers are pleasant to the touch, beautiful, and do not heat up or cool down very much. It’s quite comfortable with them, but...there are also disadvantages. They wear out, velor is short-lived. Such covers often have to be replaced.
Vinyl covers are cheap, bright, but very uncomfortable. They overheat greatly and become tanned in the cold. No comfort.
Alcantara is artificial suede. Usually quite good quality. Doesn't overheat too much in the sun, holds heat well, and is ideal in winter. Pleasant to the touch. The downside is the high price. Appearance is not for everyone.
One of the newest types is eco-leather covers. Good eco-leather has better properties than leather. The price varies greatly, depending on the quality, density and thickness of the material. In essence, eco-leather is the same leatherette, but new production technologies put it on the same level as the most expensive materials.
Eco-leather allows air and steam to pass through, but does not allow water to pass through. The breathability of eco-leather is tens of times higher than that of genuine leather. The material “breathes”. These properties make it unique for the production of cases. Eco-leather is polyurethane on a cotton base. Do not confuse it with the old leatherette - PVC on fabric. Advantages of eco-leather: fairly affordable prices, does not cause allergies, pleasant to the touch, constant elasticity at plus and minus temperatures, a huge selection of colors, odorless, quite resistant to aggressive influences (cigarette ashes, liquids). Eco-leather is easy to care for - just wipe with a damp cloth.
There are also disadvantages. Eco-leather is easy to cut and scratch. In extreme heat, eco-leather covers can get very hot, just like leather ones. In winter, eco-leather is cooler than other covers, for example, velor or suede. Heated seats take longer to heat up.
Eco leather can be regular or perforated. With perforation they are usually used for the central inserts of covers for better ventilation.
Also, different types of materials are often used in the production of covers, for example, eco-leather is used on the sides and back of the seats, and a velor insert is used in the center.
Material requirements
The fabric for making covers must be of different density and quality. Recommended use:
- eco leather. Eco-leather car seat covers are an excellent option, specially designed for interior finishing work. The material does not lose color and is resistant to bending;
- flock - often used for furniture repair;
- velor - fabric with pile. The advantage is that the material does not fade and retains its shape after washing. The material is inexpensive, but is famous for its durability.
How to install boxes on Lada Vesta
For a Lada Vesta car, you can install armrests in two ways:
- on the standard mounting of the driver's seat;
- for fastening at the base of the accessory.
Installing the armrest in the standard mount
Service station workers recommend installation in certified workshops, but if desired, you can do it yourself.
Preparatory stage:
- key to "13";
- rags;
- lubricant for chair rails.
How to remove the factory armrest. Regulations:
- Open the driver's door wide.
- Move the chair as far back as possible.
- Disconnect the block with the seat heating wires.
- We remove (unfasten) the trim and cover.
- We find a hole for fastening on the right side.
- Screw on the accessory and tighten the nut.
- We put on the trim and cover again.
- Lubricate the guides at the base of the chair for ease of movement.
Installation of a universal armrest in the form of a box
The only tool you need is a Phillips head screwdriver.
Sequencing:
- Open the driver and front passenger doors wide.
- We push the front passenger seat as far forward as possible, and the driver’s seat as far back as possible.
- We remove the plastic thumb from the chair, which is responsible for adjusting the angle of inclination.
- We unscrew the screw that secures the decorative trim and guides at the base of the chair.
- Installing the accessory.
- We assemble the structure in reverse order.
How to remove the standard armrest on a Lada Vesta - you need to know
Vesta owners have to remove the old one before installing a new box. There is no need to contact the service - it’s done like this.
Steps to remove the factory armrest:
- Unfasten the cover of the part and unscrew the side screws hidden under it. Then pull the armrest towards you.
- Unscrew the bracket. It is held on by a mounting bolt located next to the handbrake.
- We lift the part up and carefully remove it, being careful not to damage the seat trim.
Then we begin installing the new accessory. Installation may vary. It depends on the box that is installed to replace the original one. Chinese analogues are mainly installed in a regular place and according to the same principle. For some reason, Russian manufacturers do not design the same fasteners. Some of them just need to be placed between the seats, others are equipped with a large number of bolts.
Universal armrest made in China
Armrests for Lada Vesta made in China are widely represented on the automotive spare parts market. They are made by many manufacturers and have a number of features that equate to advantages:
All Chinese analogs for Lada Vesta are made in the form of a storage box with an additional cup holder.
The cost of the accessory is approximately 2-2.5 times lower than that of Russian suppliers. You can buy a good option in China for about 600 rubles.
You can buy a Chinese equivalent at any car enthusiast store; Chinese armrests are easy to buy.
Let's talk about problem areas of accessories. Often, the fastenings of Chinese elbow boxes do not match the design features of the car and require additional modification. Comfortable use of the handbrake and seat belt is not guaranteed. Having decided to install a Chinese analogue into the car interior, carefully study the method of fixing it, avoiding additional problems with installation and use.